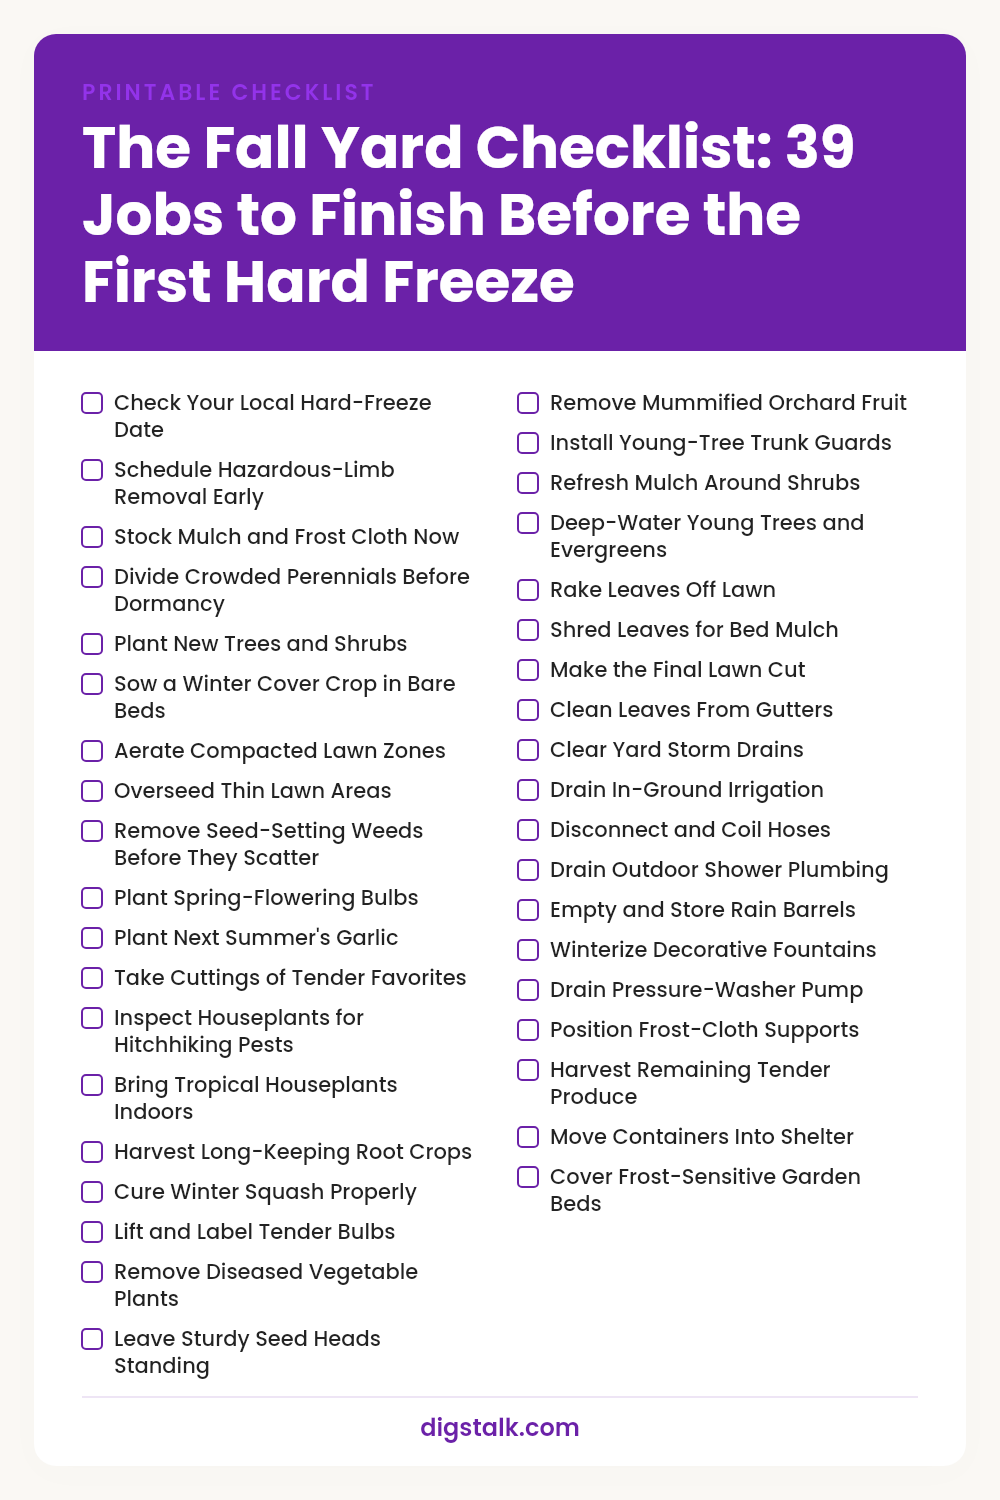
The first hard frost doesn’t send a warning text. One October night it just shows up, and everything you meant to get to is suddenly dead, split, or buried under a tarp you can’t find. Fall yard work has an order to it, and that order is the whole game. Do it in sequence and spring arrives easy; do it backwards and you spend April undoing October. Work through the checks below in order.
Please note that some of the images in this article were created with the assistance of AI.
38. Check Your Local Hard-Freeze Date
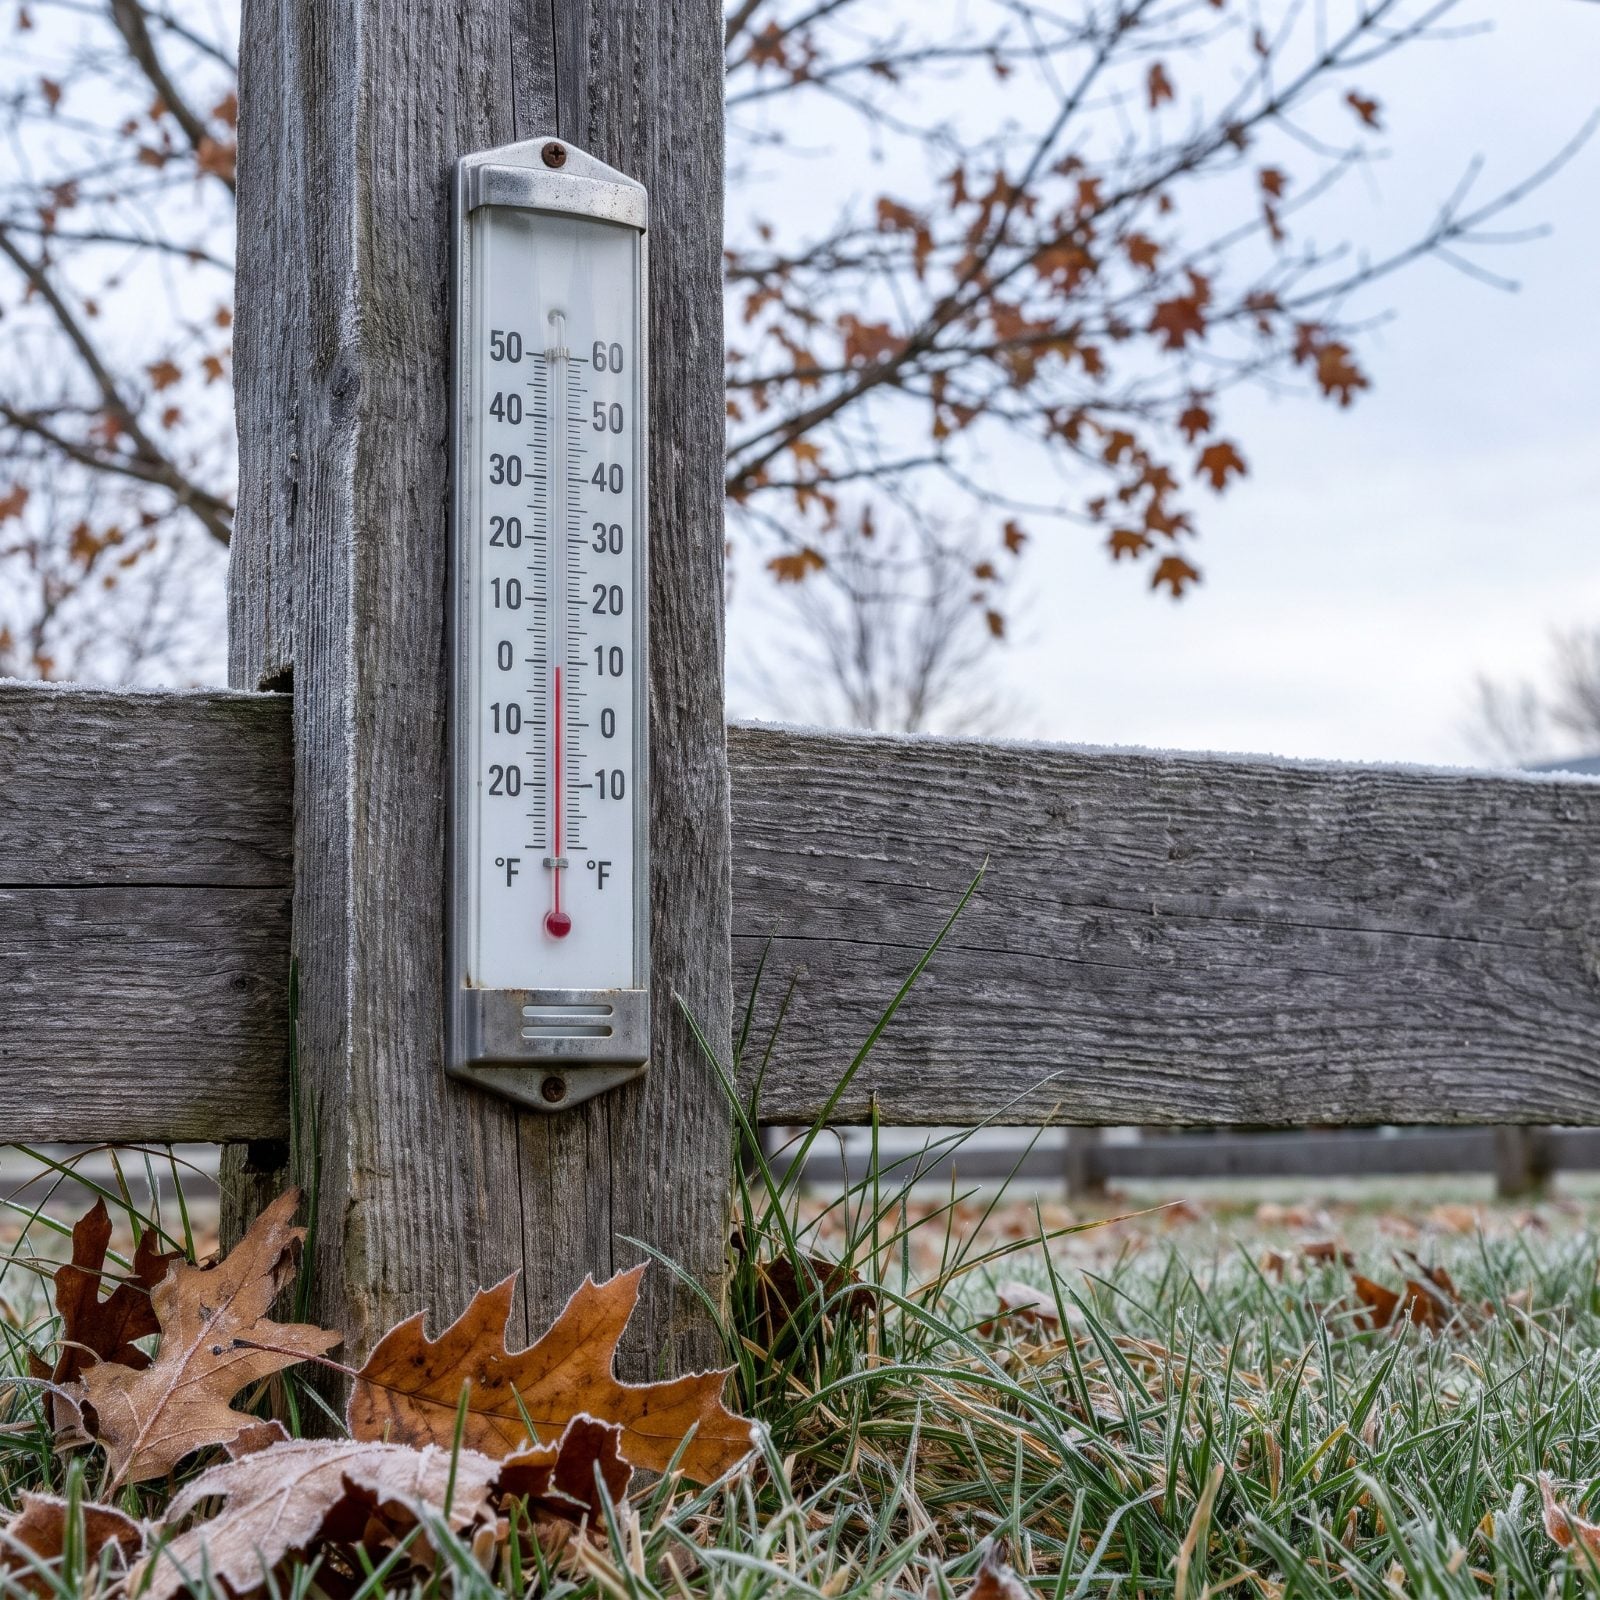
Everything else on this list keys off one number, so find it first. Your average first hard-freeze date — when it hits 28 degrees or lower — tells you how many weeks you actually have, not your gut feeling about the weather. Look it up by zip code on your regional extension service site, then write it on a calendar where you’ll see it.
Here’s the part people skip: your yard is not one date. A low spot near a fence or the bottom of a slope frosts earlier than a south-facing wall by a week or more. Cold air pools. Walk your property on a cold morning and notice where the frost lingers last.
37. Schedule Hazardous-Limb Removal Early
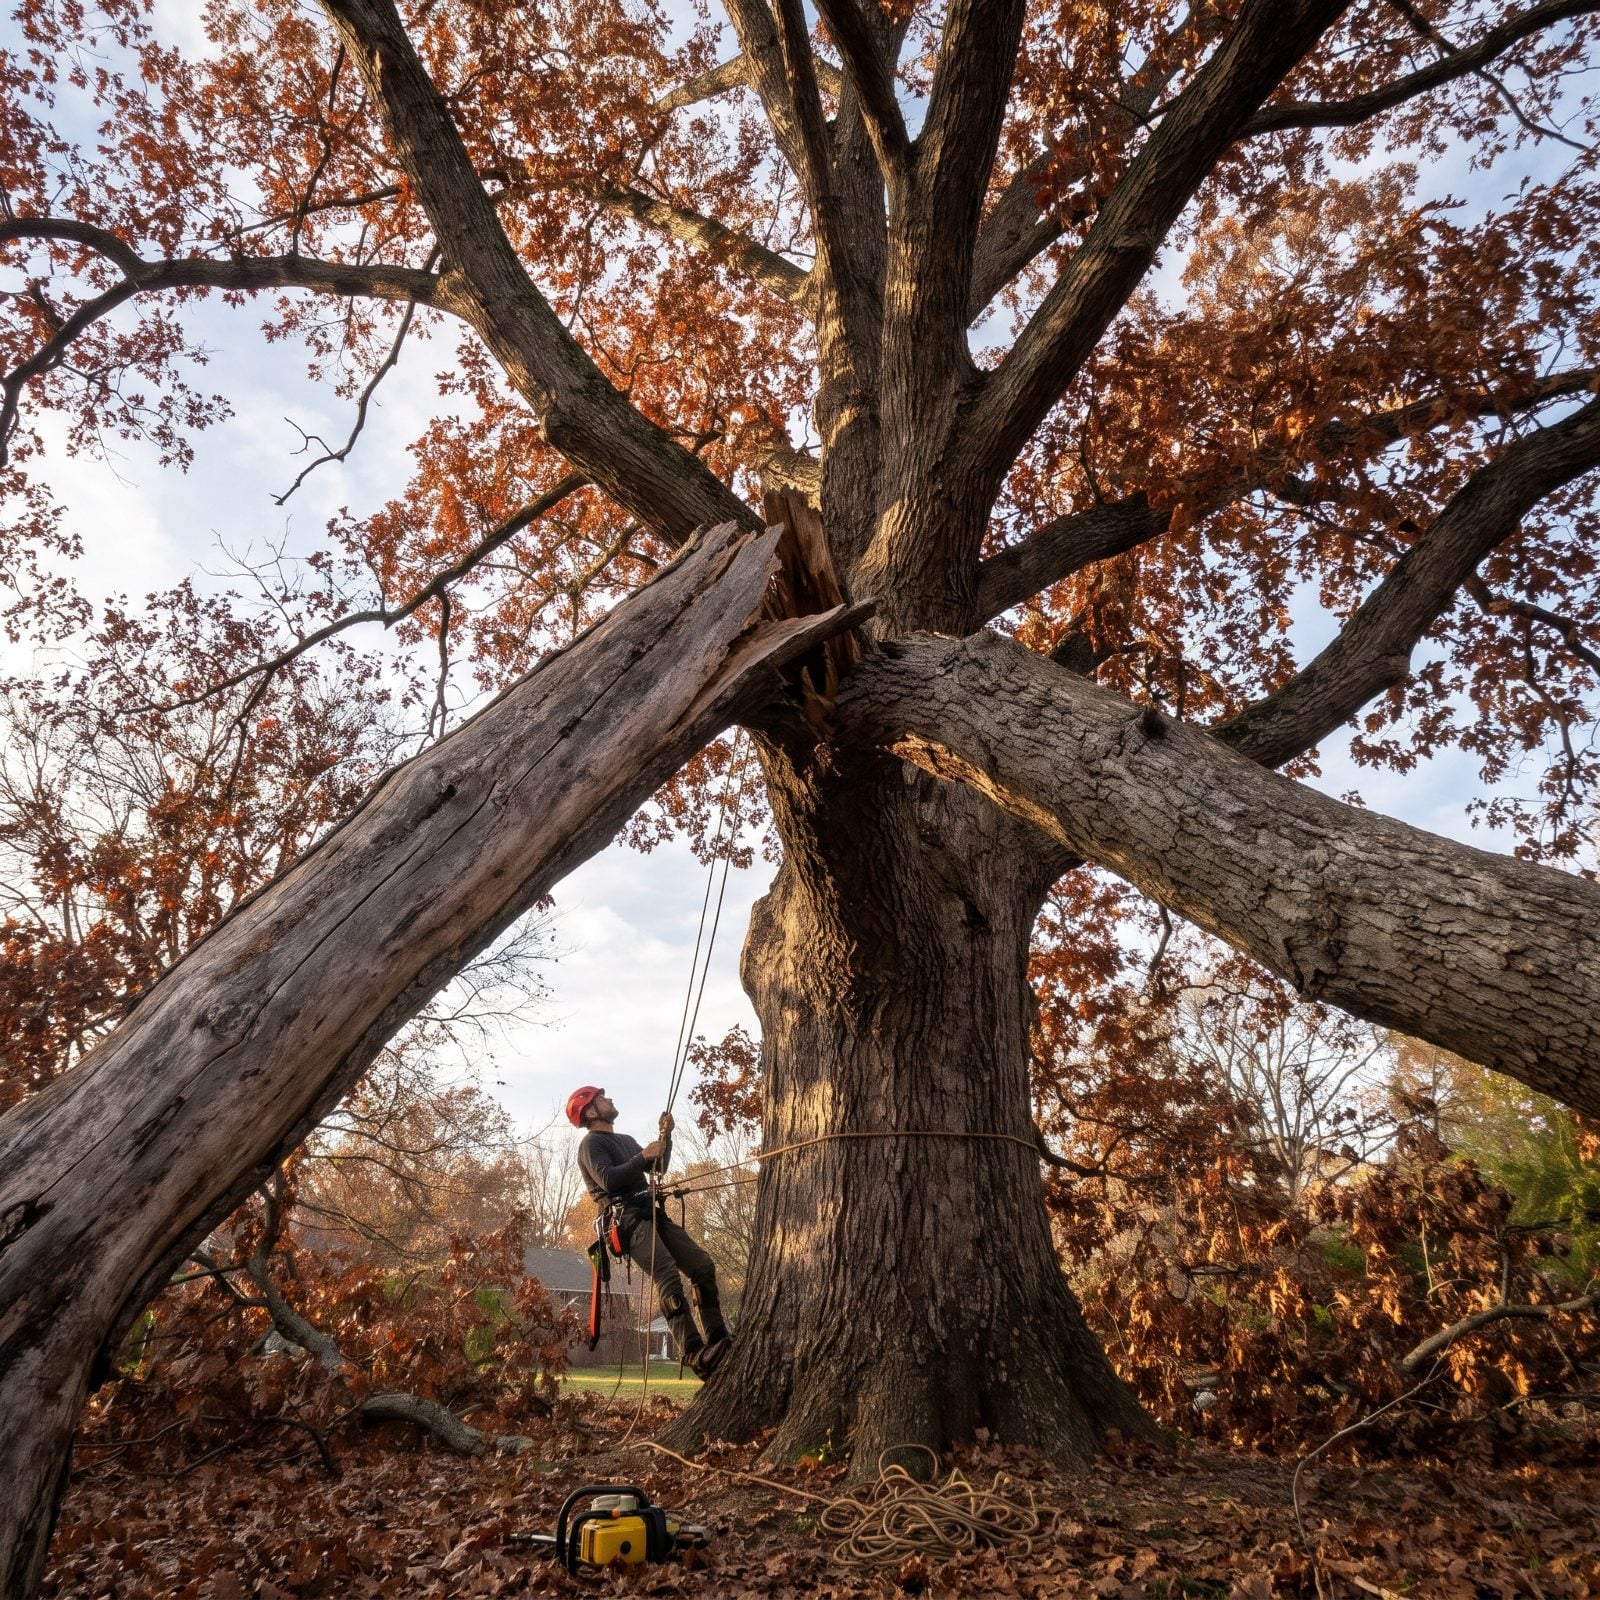
Dead limbs don’t fall on calm days. They come down when ice loads them or a December wind gets under them, and that’s exactly when you don’t want one through your roof or your neighbor’s car. Book this now, because good arborists fill up fast once the first storm scares everybody.
Walk your trees with binoculars before you call. The tells:
- Bare gray branches with peeling bark while the rest of the tree still holds leaves.
- A V-shaped crotch with a dark seam, which splits far easier than a U-shaped one.
- Fungus or mushrooms growing on the trunk or at the base.
And please, hire the climb if it’s over your head. I’ve watched a ladder-and-pole-saw plan go sideways. Not worth your shoulder.
36. Stock Mulch and Frost Cloth Now
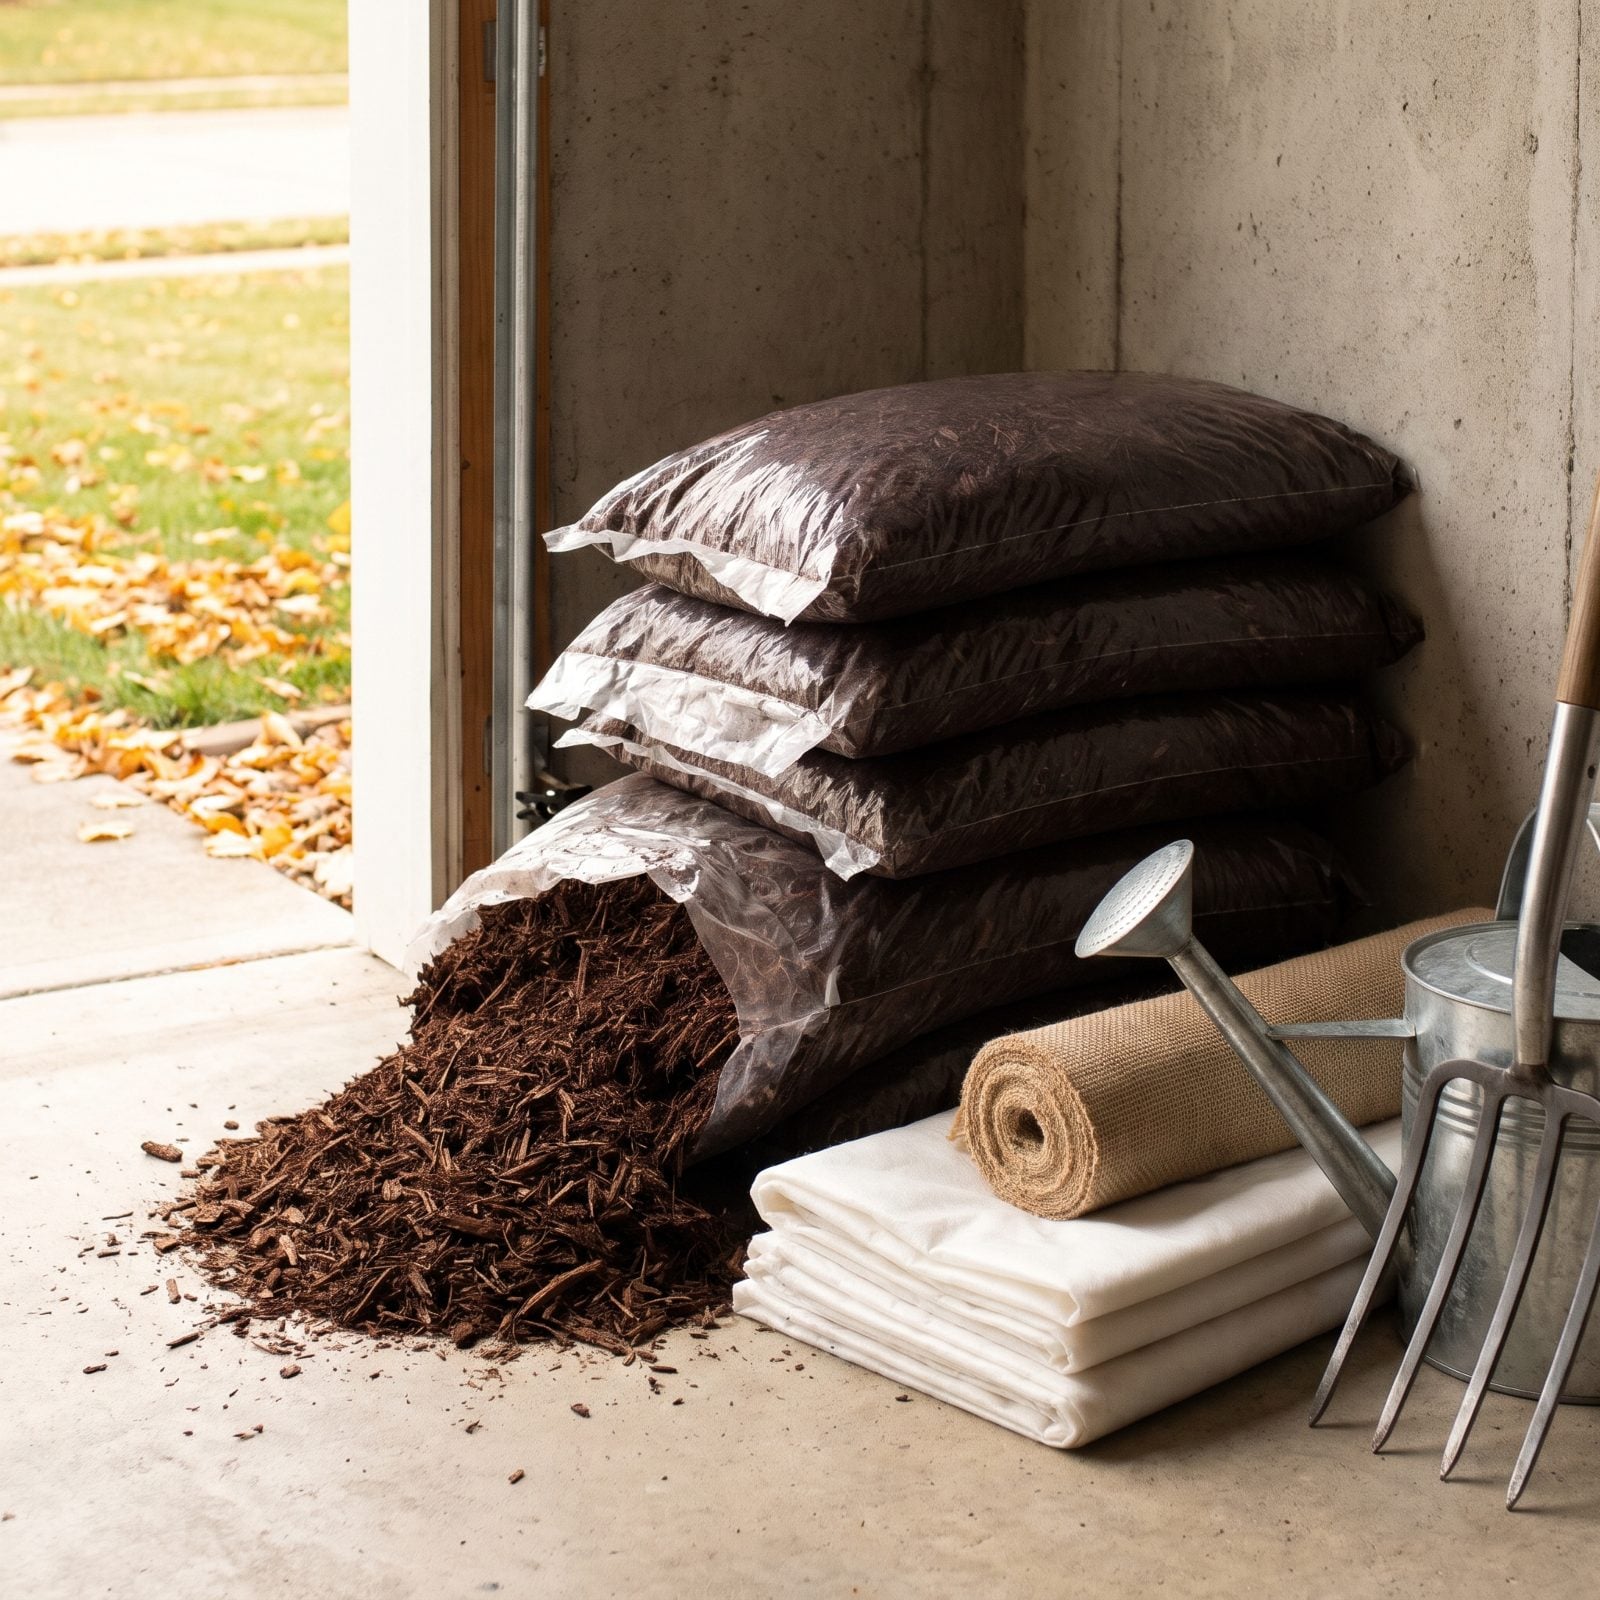
When the forecast flips to a hard freeze, every garden center in town sells out of frost cloth by noon. That’s not a maybe. Buy your protection before you need it, and stash it dry where you can grab it in the dark with a flashlight.
Get real frost cloth. Not bedsheets, and absolutely not plastic — plastic touches the leaf, freezes, and burns it worse than no cover at all. Breathable row-cover fabric traps ground heat and lets moisture escape. For mulch, figure a 2 to 3 inch layer over your beds, which usually means more bags than you’d guess.
35. Divide Crowded Perennials Before Dormancy
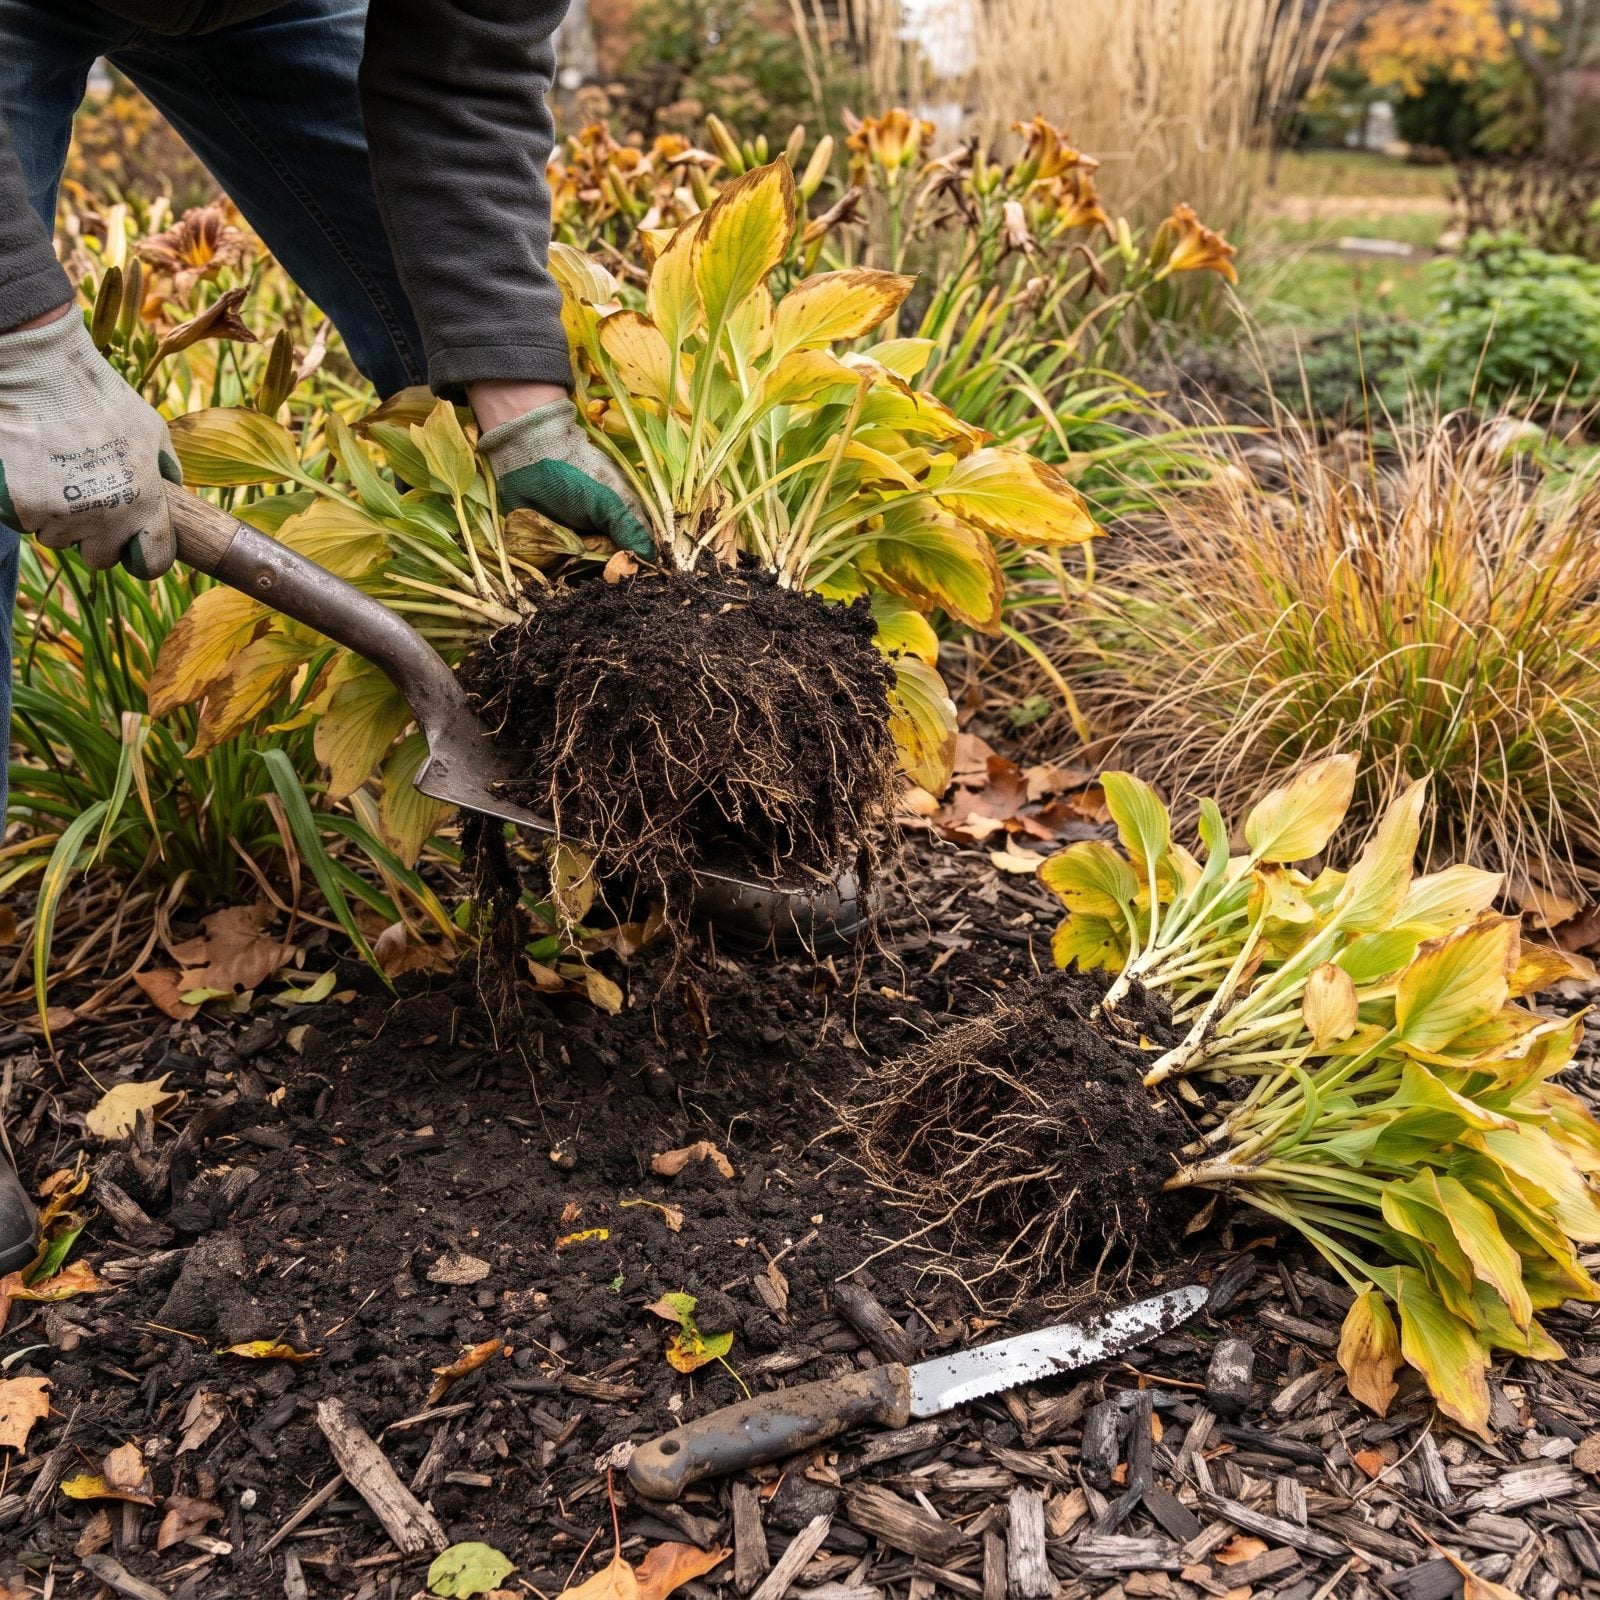
A perennial that flowered weakly this year is usually just overcrowded, fighting itself for root room. Fall division fixes that and hands you free plants — the best deal in gardening. Do it on a cool, cloudy day about four to six weeks before your hard-freeze date, so the roots have time to settle in.
Dig the whole clump, then split it with a sharp spade or two garden forks back to back. Toss the dead woody center. The young outer growth is what you replant.
Now water the divisions in hard and keep watering until the ground freezes. That’s the step people forget, and it’s why half their divisions never see spring. Peonies and poppies are the exception, so leave those be.
34. Plant New Trees and Shrubs
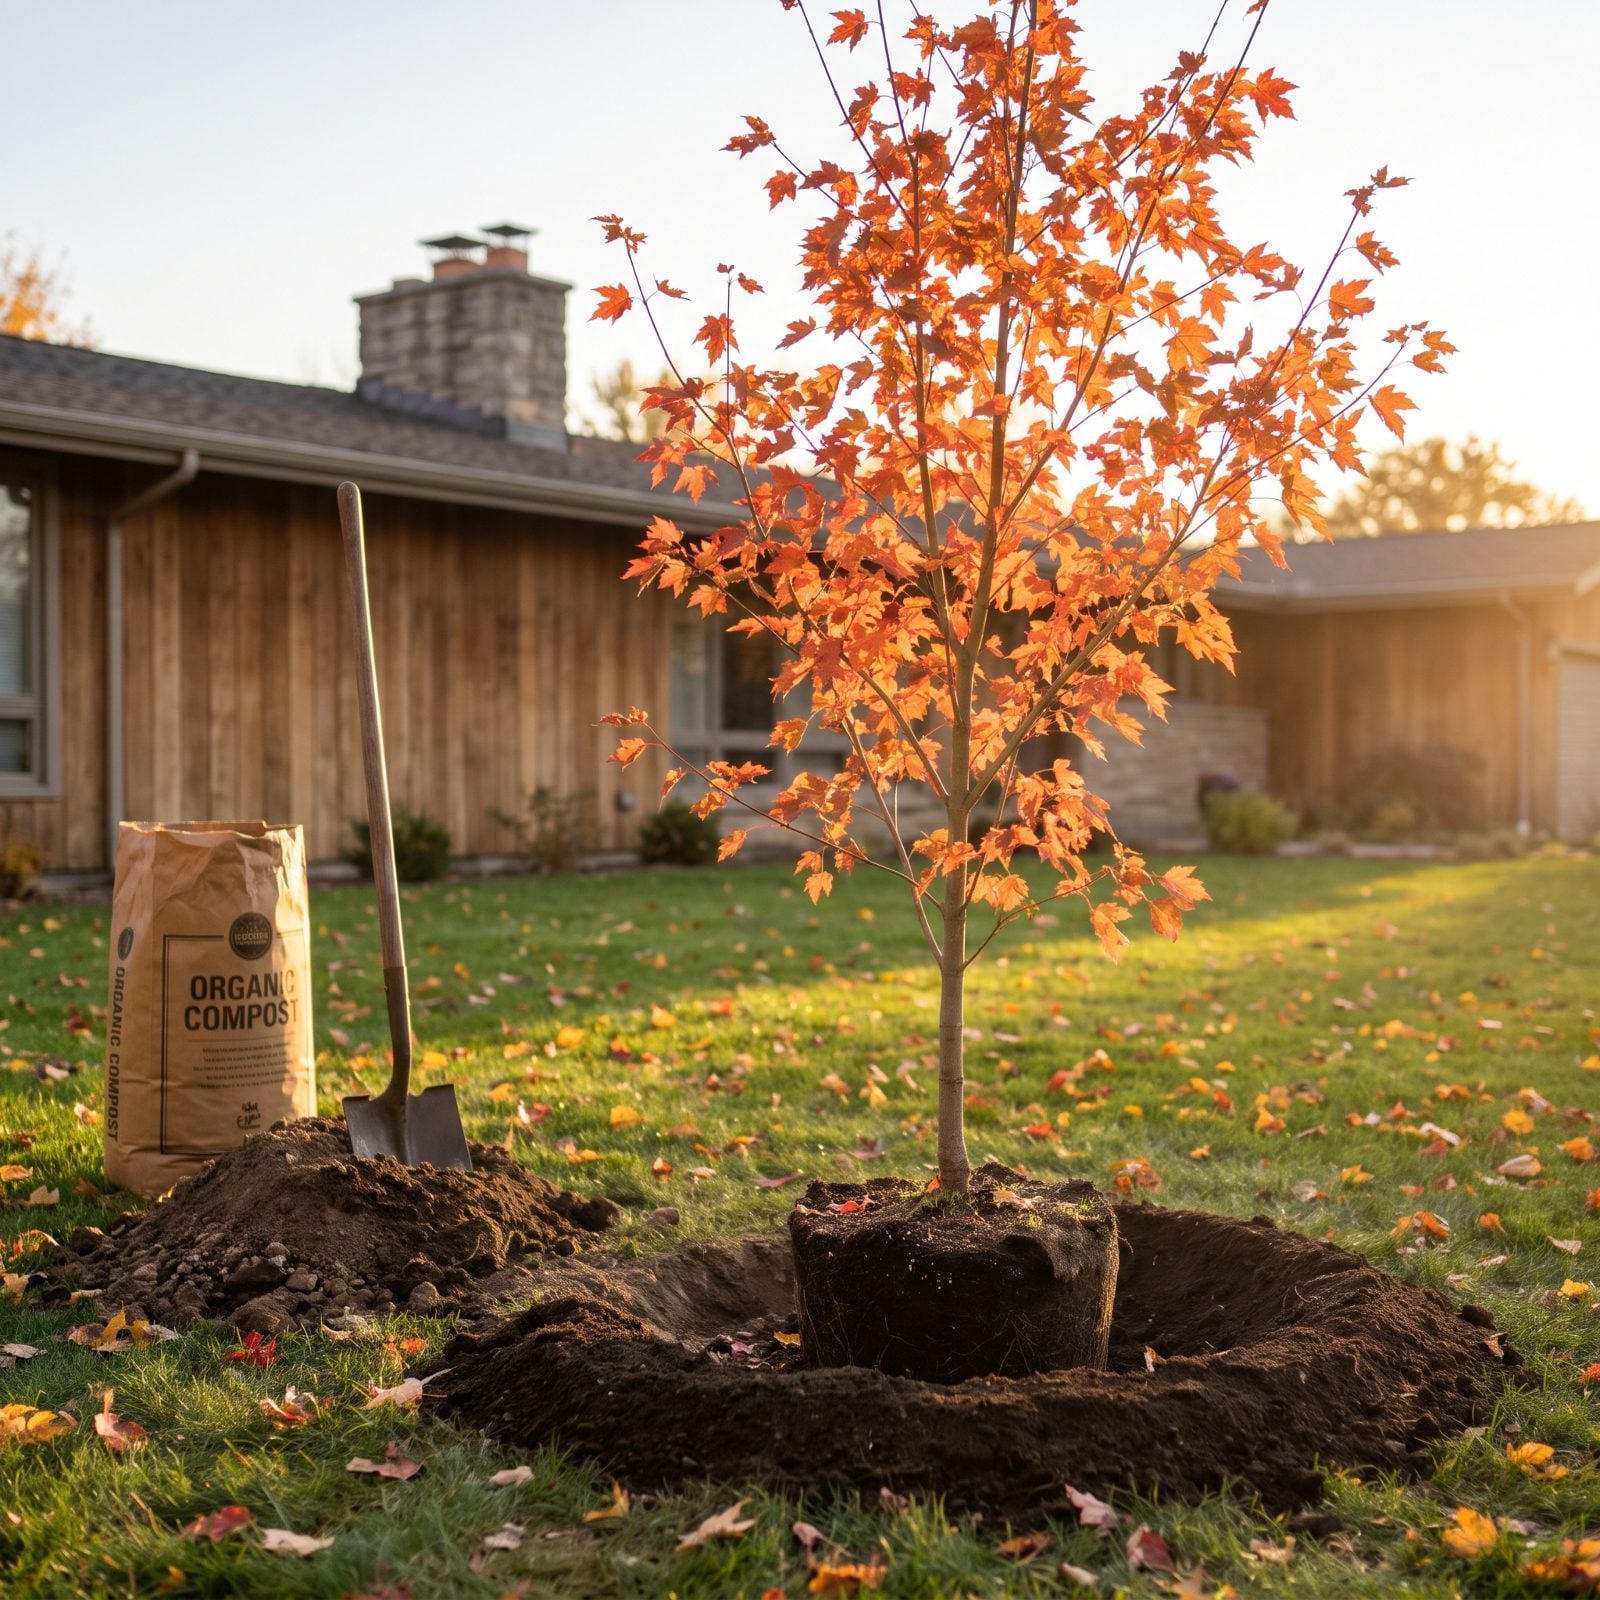
Fall is the best planting window there is, and most people flat refuse to believe it. The air’s cool, so the plant isn’t stressed by heat, but the soil stays warm for weeks and roots keep growing underground long after the leaves drop. Come spring, that tree hits the ground running while the nursery-bought ones are still rubbing their eyes.
Dig the hole twice as wide as the root ball but no deeper. You want the root flare — where trunk meets roots — sitting right at soil level or a hair above. Burying it deeper is the single most common way people slowly kill a young tree.
Plant it at the depth it grew at the nursery. Not deeper. The tree remembers.
Skip the fertilizer for now. You want root growth, not leafy top growth that’ll just freeze.
33. Sow a Winter Cover Crop in Bare Beds
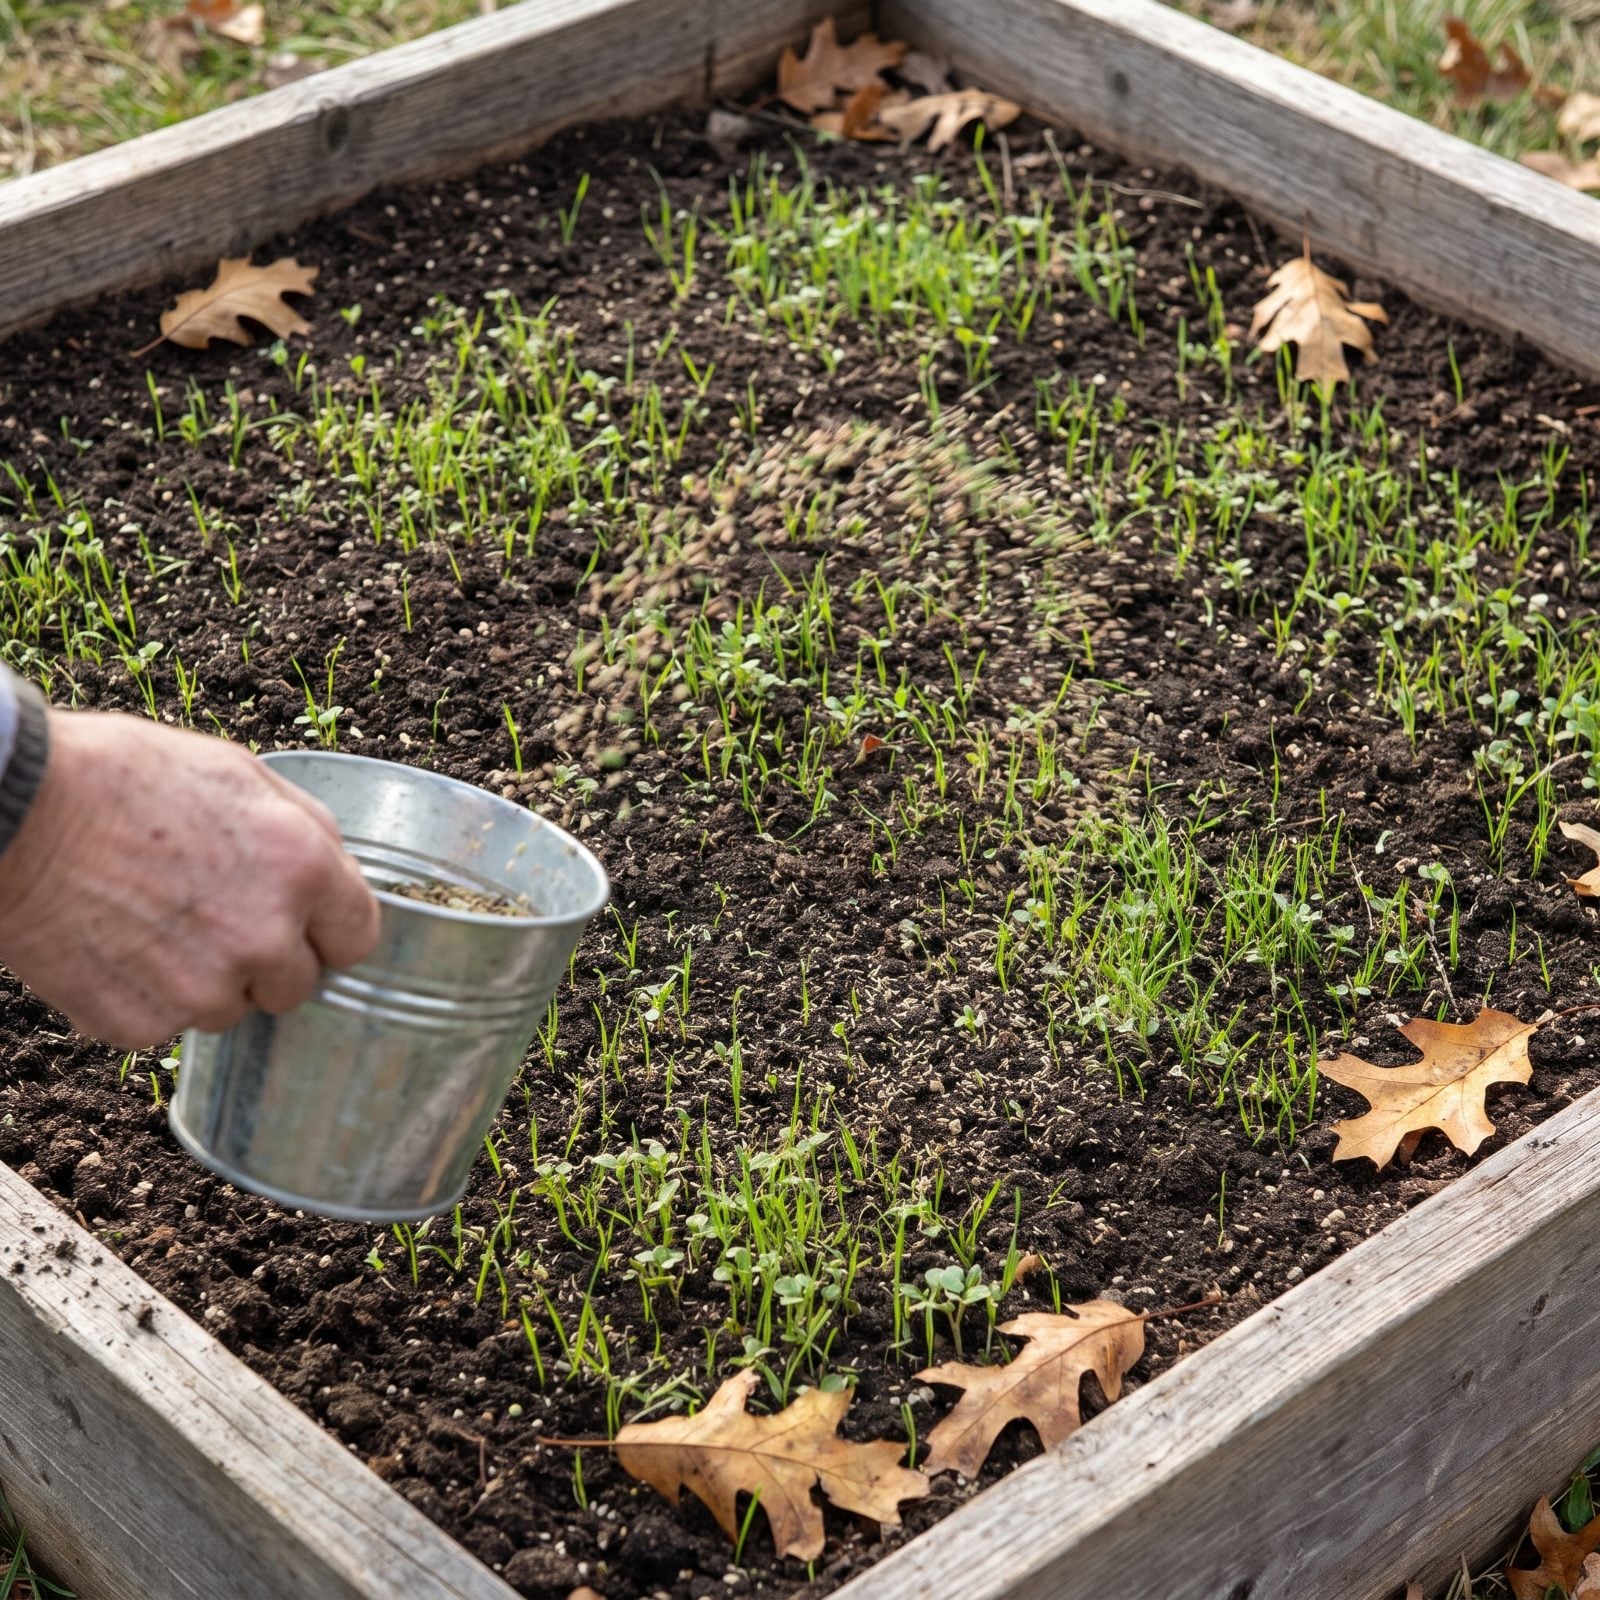
Bare soil over winter is soil getting worse. Rain compacts it, weeds move in, and nutrients wash straight out the bottom. A cover crop stops all of that and feeds the bed for free.
Sow fast-growing cereal rye, winter wheat, or crimson clover across any empty vegetable bed. The trick is timing — get it in while there’s still warm soil for germination, usually several weeks before the ground freezes, so the roots establish before dormancy. Rake it in lightly and water once.
32. Aerate Compacted Lawn Zones
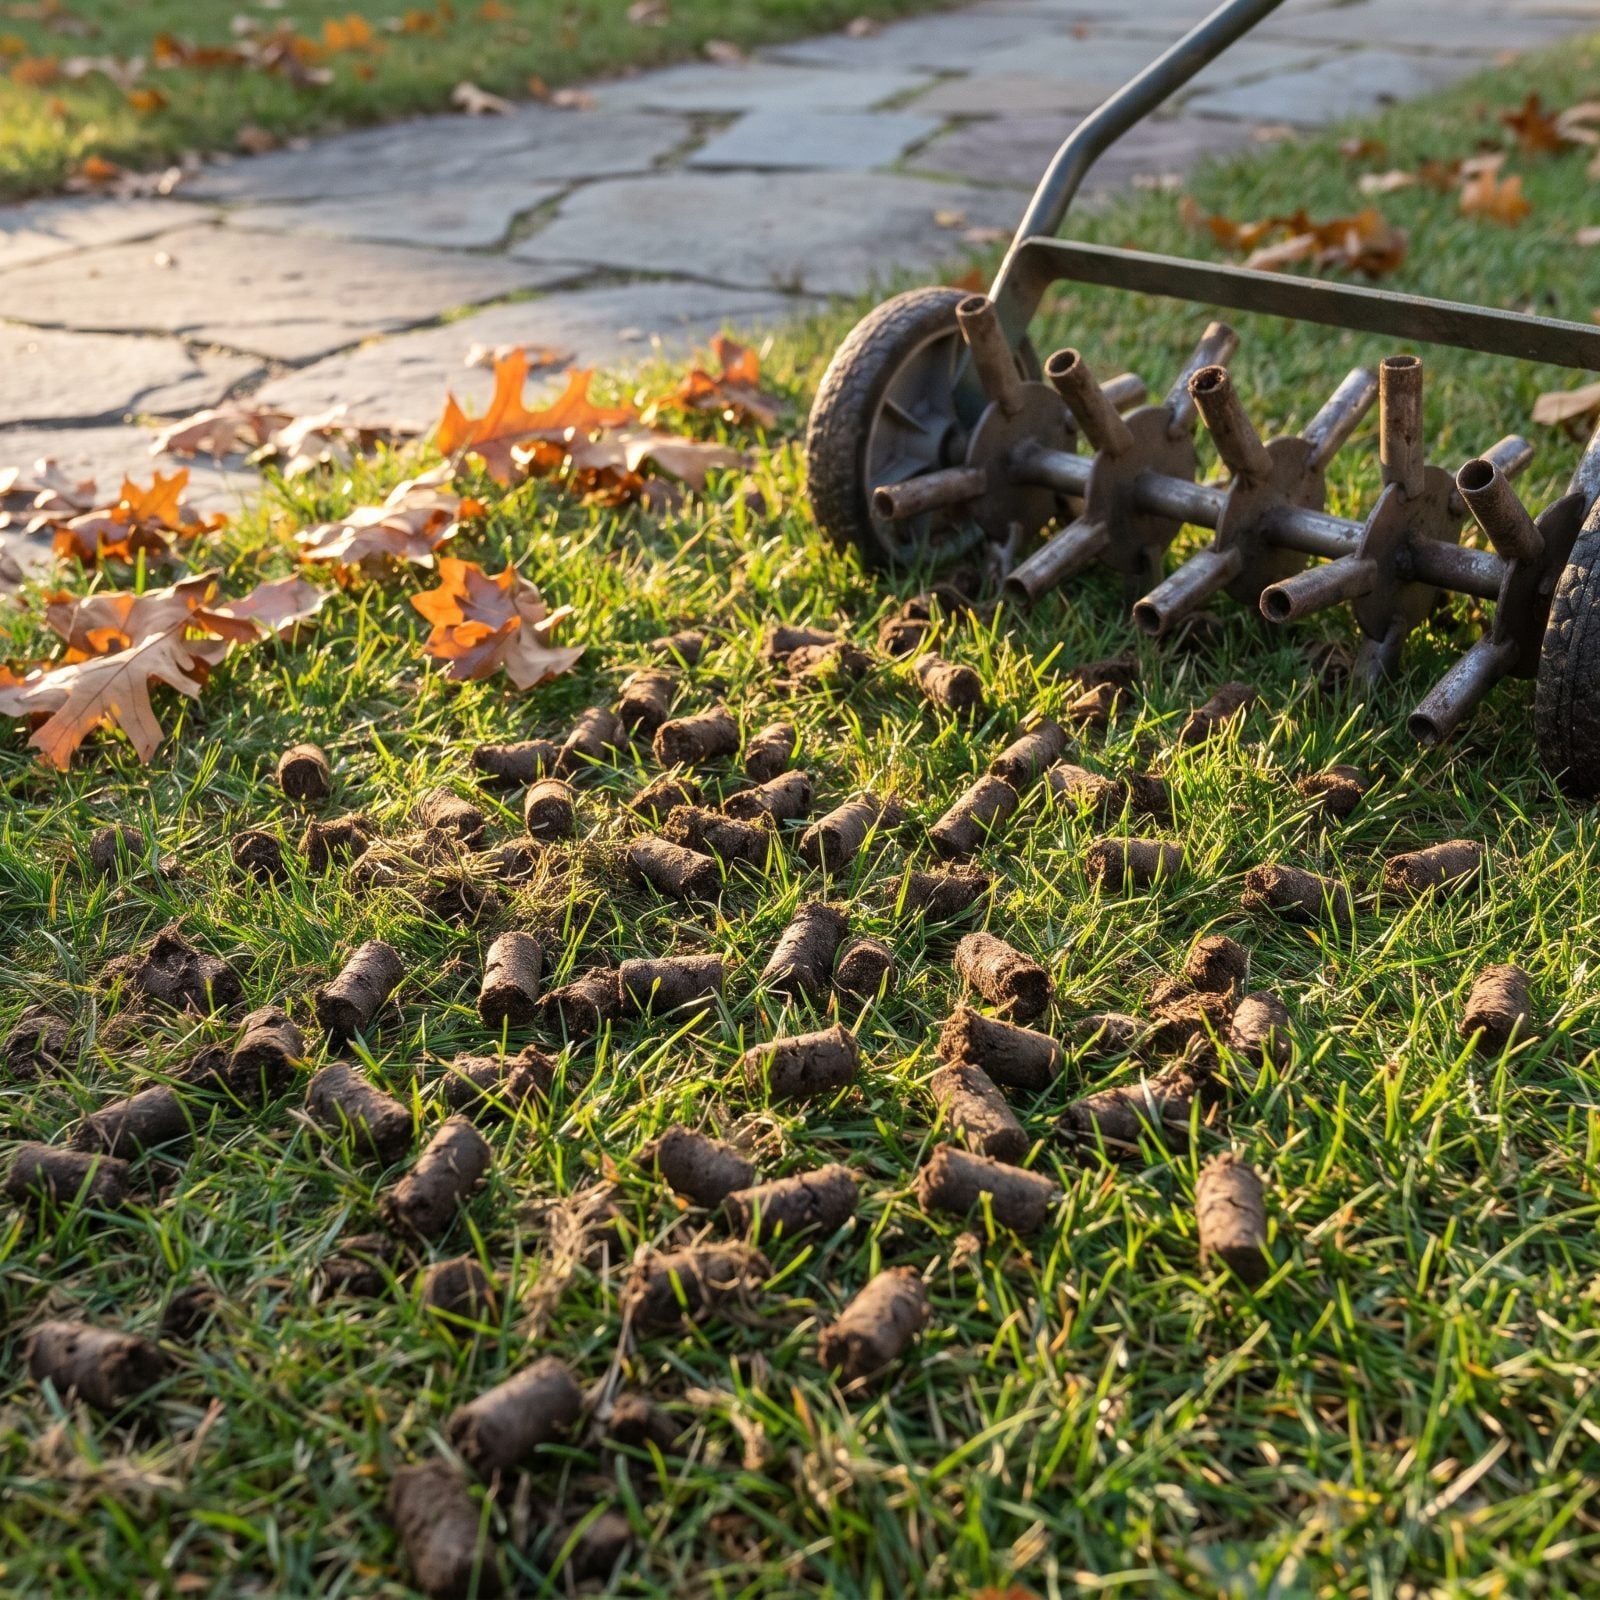
If water puddles on your lawn instead of soaking in, or the ground feels like a parking lot underfoot, it’s compacted and the grass roots can’t breathe down there. Fall aeration opens it back up right when the grass is primed to recover.
Rent a core aerator, not a spike one. Spikes just shove dirt sideways and make compaction worse. A core machine pulls out finger-sized plugs and drops them on the surface.
Leave those plugs where they fall. I know they look messy. They break down in a couple of weeks and feed the lawn back, and raking them up just undoes the favor you did yourself.
Quick test: Jab a screwdriver into your damp lawn. Can’t push six inches in with hand pressure? You’re compacted, and this one’s for you.
31. Overseed Thin Lawn Areas
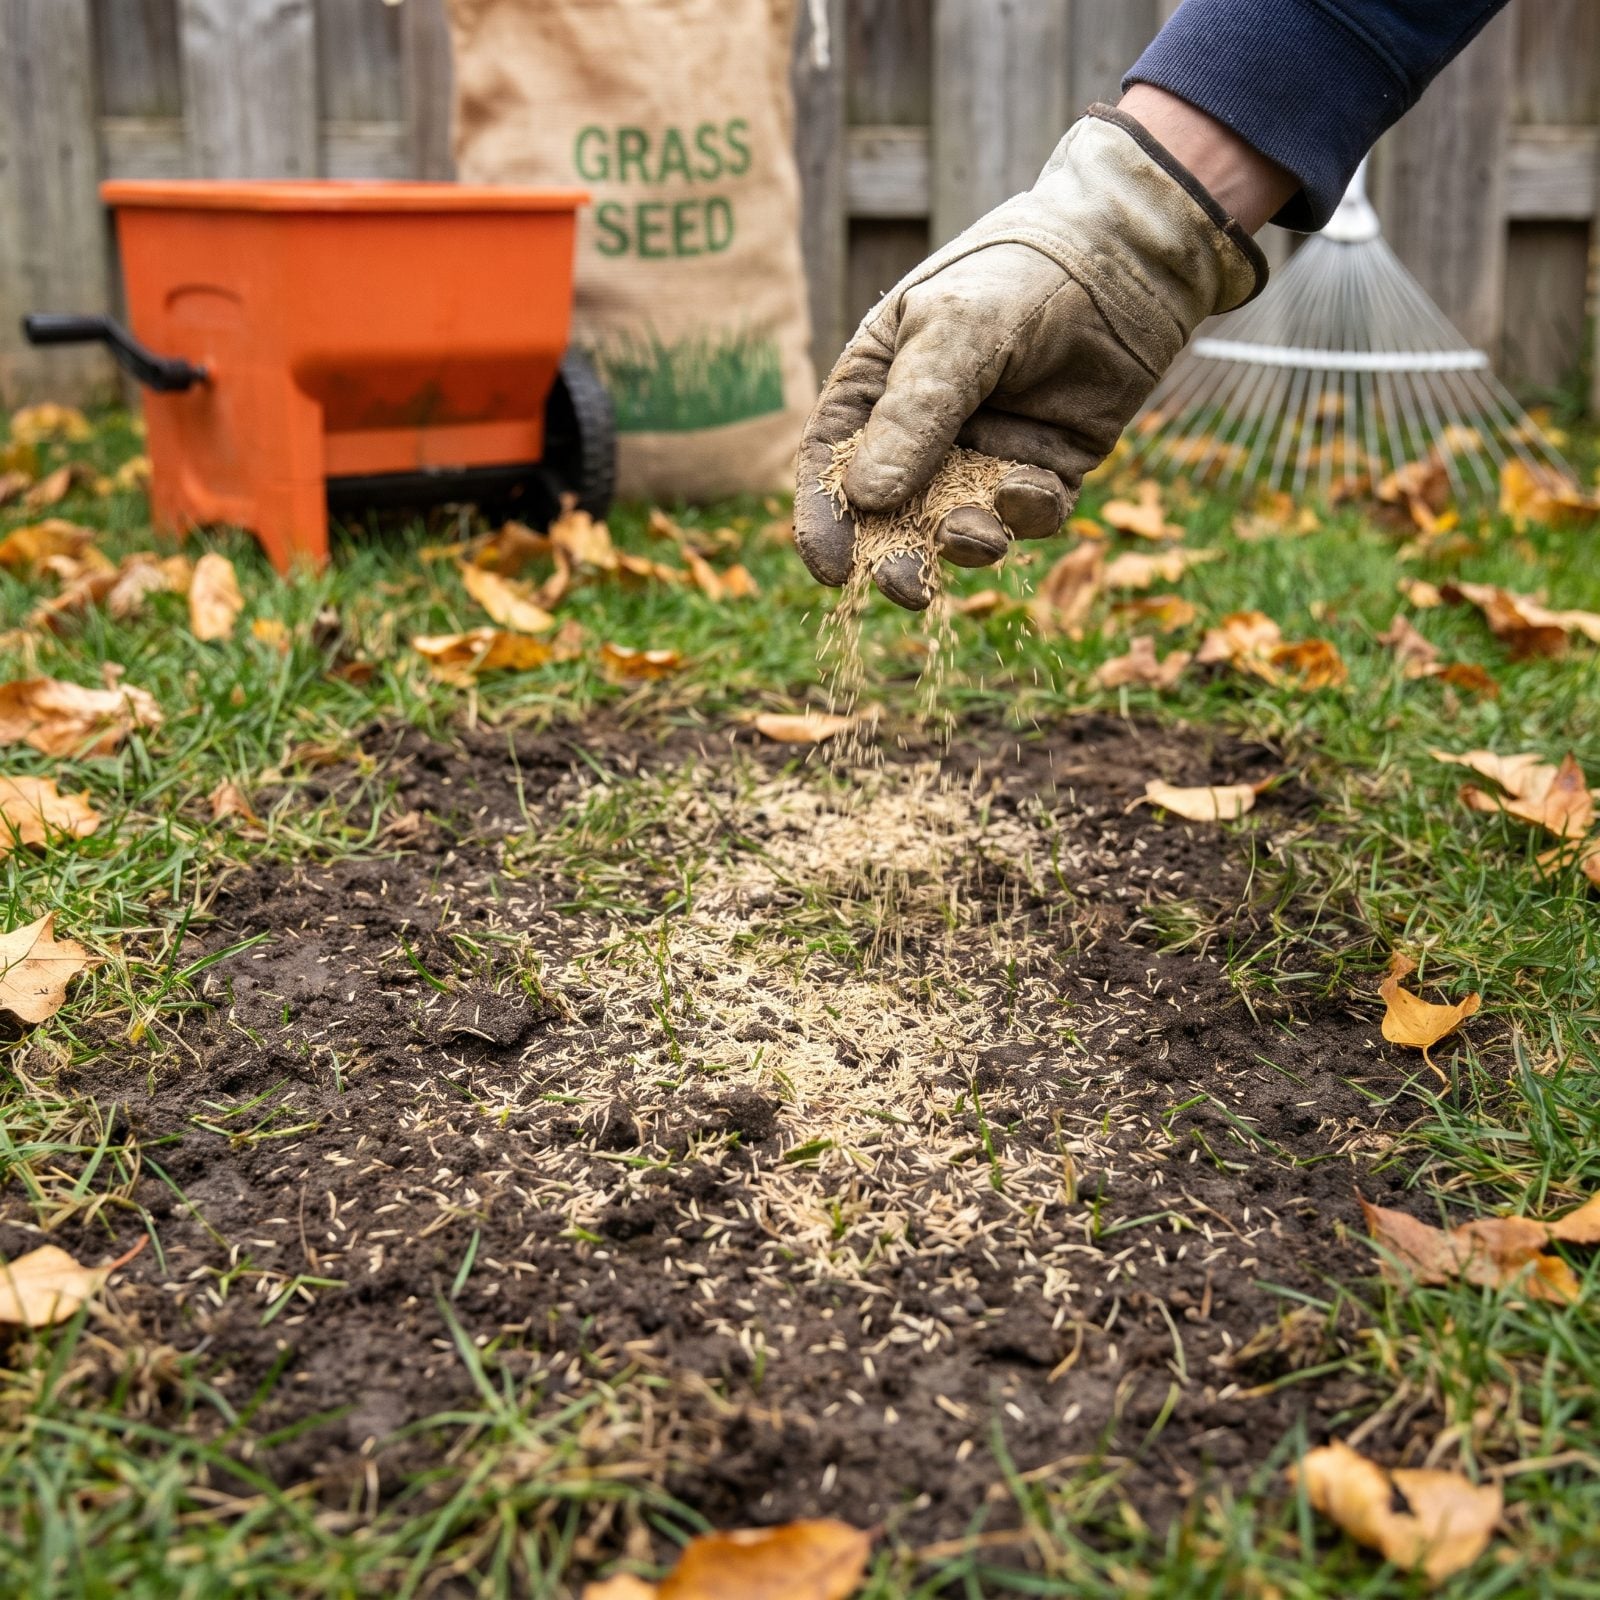
Thin, tired patches won’t fix themselves, and they’re an open invitation to next year’s crabgrass. Fall overseeding beats spring because the new grass establishes before weeds wake up and before summer heat can cook it.
Right after you aerate is the ideal moment. Those open holes give seed direct contact with soil, which is the whole battle. Spread a quality blend matched to your region — cool-season mixes for the north — then keep the top half-inch of soil consistently moist until germination. Light watering once or twice a day, not one deep soak.
30. Remove Seed-Setting Weeds Before They Scatter
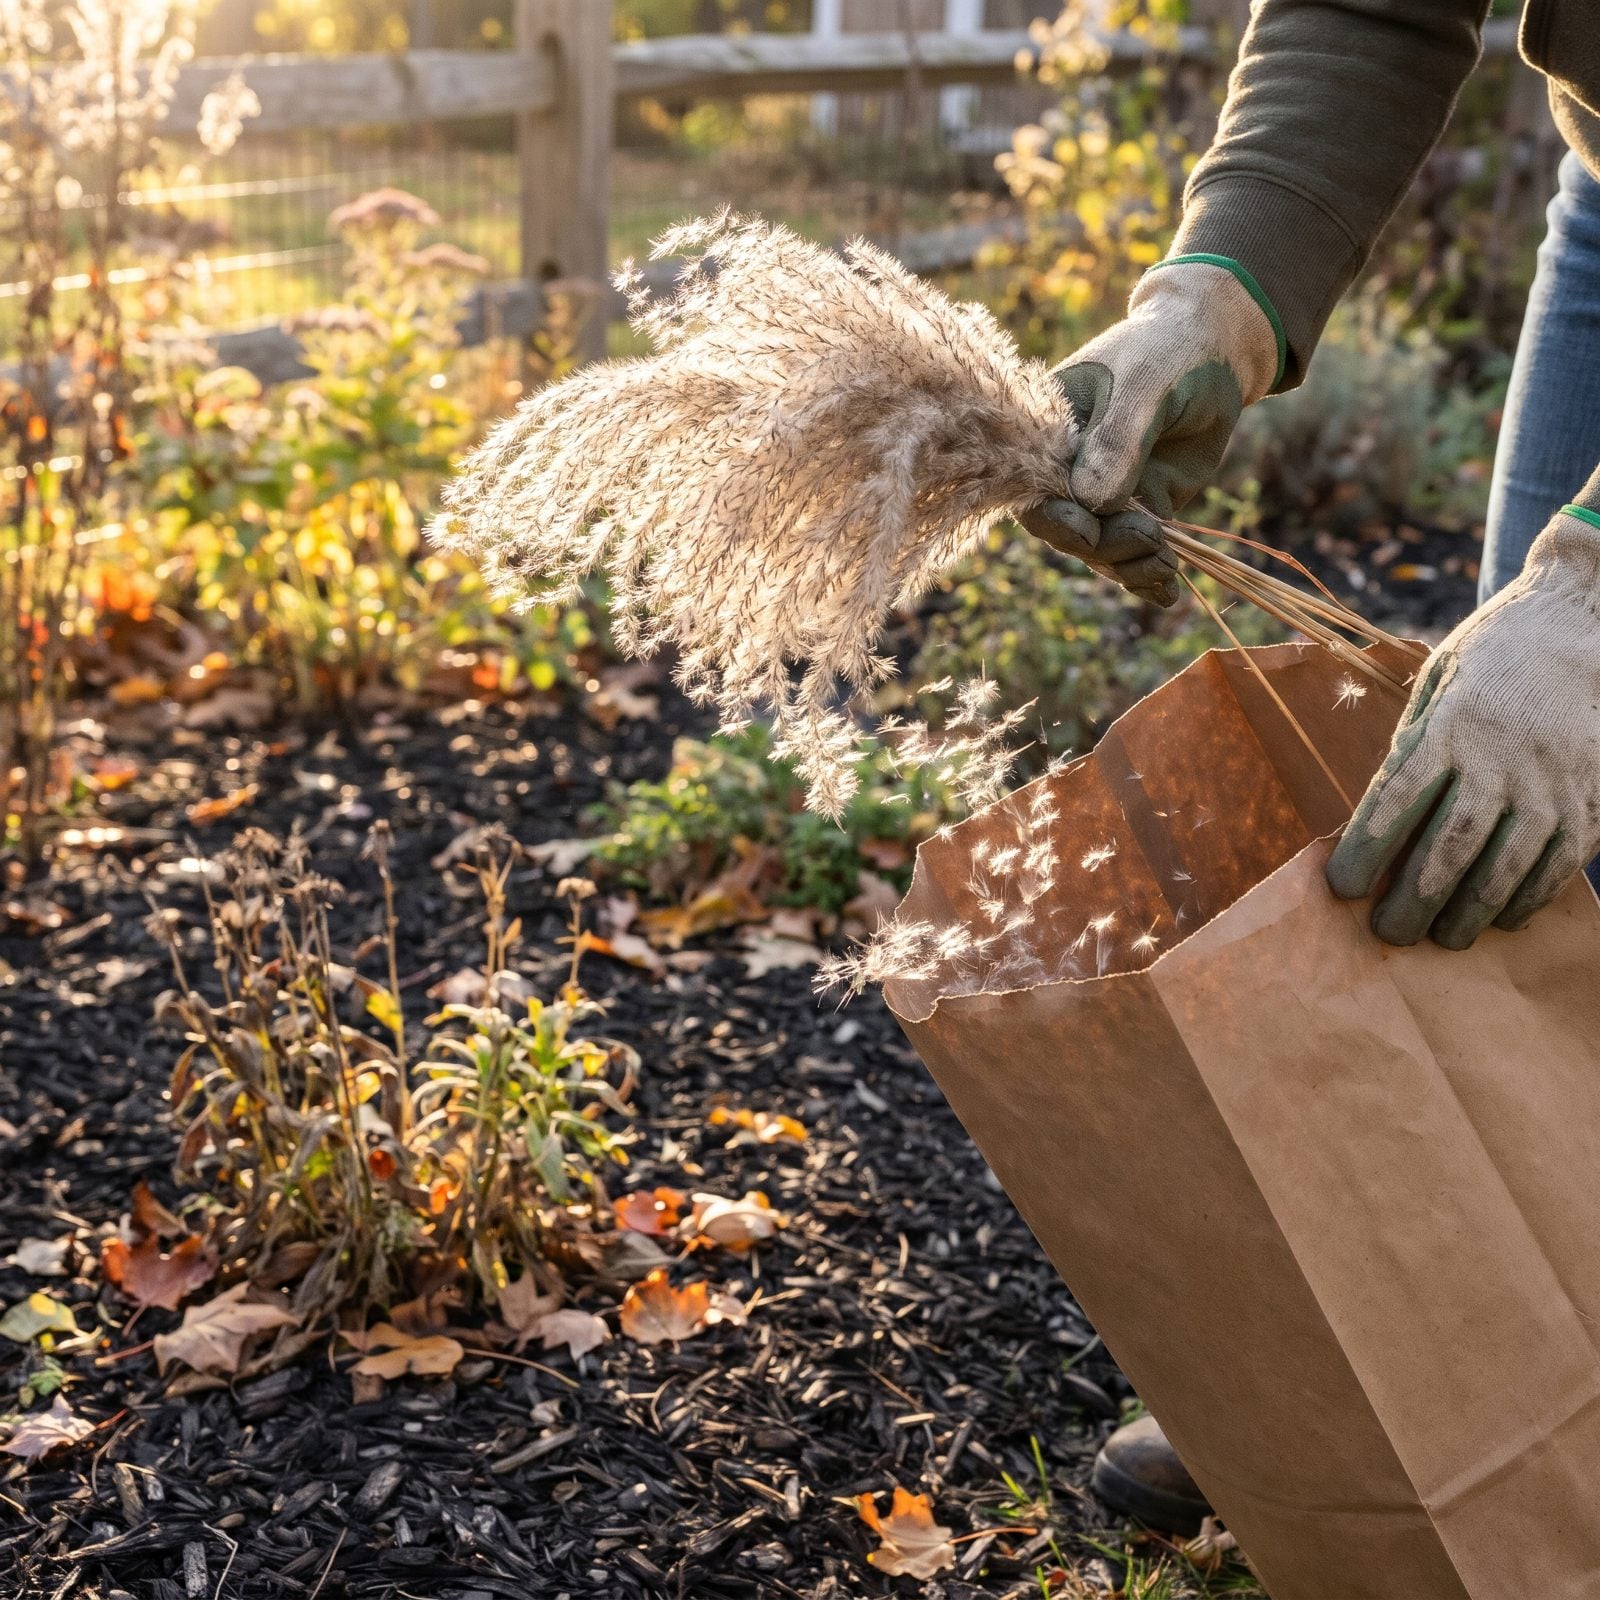
One weed left to go to seed this fall is thousands of weeds next summer. That’s not an exaggeration, it’s arithmetic. A single pigweed or lamb’s quarters can throw off tens of thousands of seeds, and they’ll wait in your soil for years.
Go after the ones that have formed seed heads first. Pull them gently, holding the head over a bag so you don’t shake seed across the bed on your way out. Get the root on perennials like dandelion and bindweed, or they’ll just laugh and come back.
Here’s the one that trips everybody up: never compost weeds that have set seed. Most home piles never run hot enough to kill those seeds, so you’re just stirring up a fresh batch and spreading it back next year. Bag them for the curb.
29. Plant Spring-Flowering Bulbs
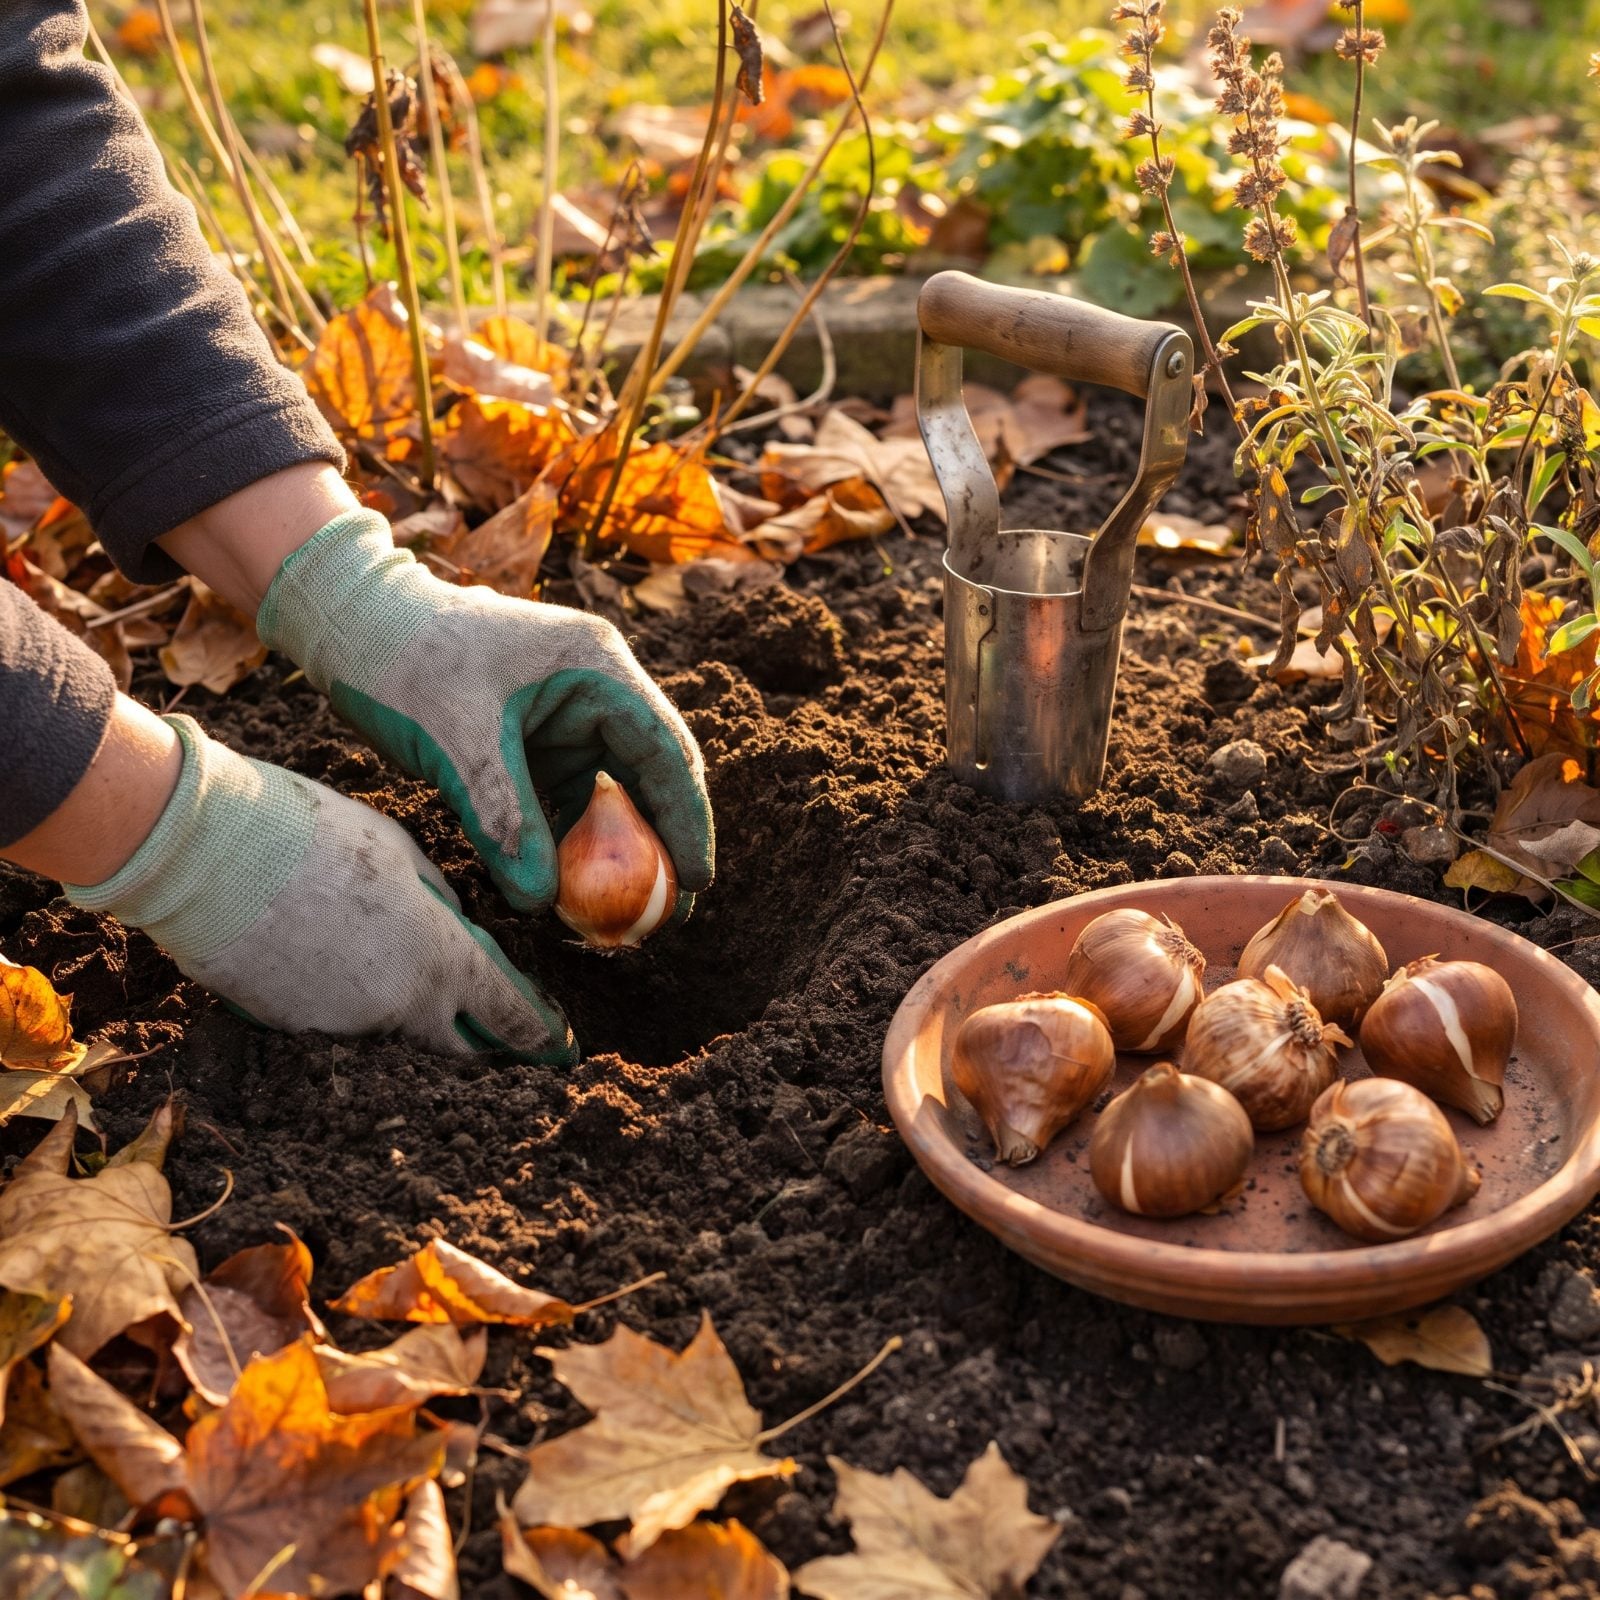
This is the one job that pays off while you’ve forgotten you did it. Plant now in cold ground, and in March, when you need it most, tulips and daffodils punch up through the mud. Bulbs need weeks of cold to bloom, so they go in before the ground freezes solid — usually once soil temperatures drop into the low 50s.
Depth rule: plant two to three times as deep as the bulb is tall, pointed end up. Too shallow and they heave out over winter. Can’t tell which end is up? Plant it sideways and the stem will sort itself out.
28. Plant Next Summer’s Garlic
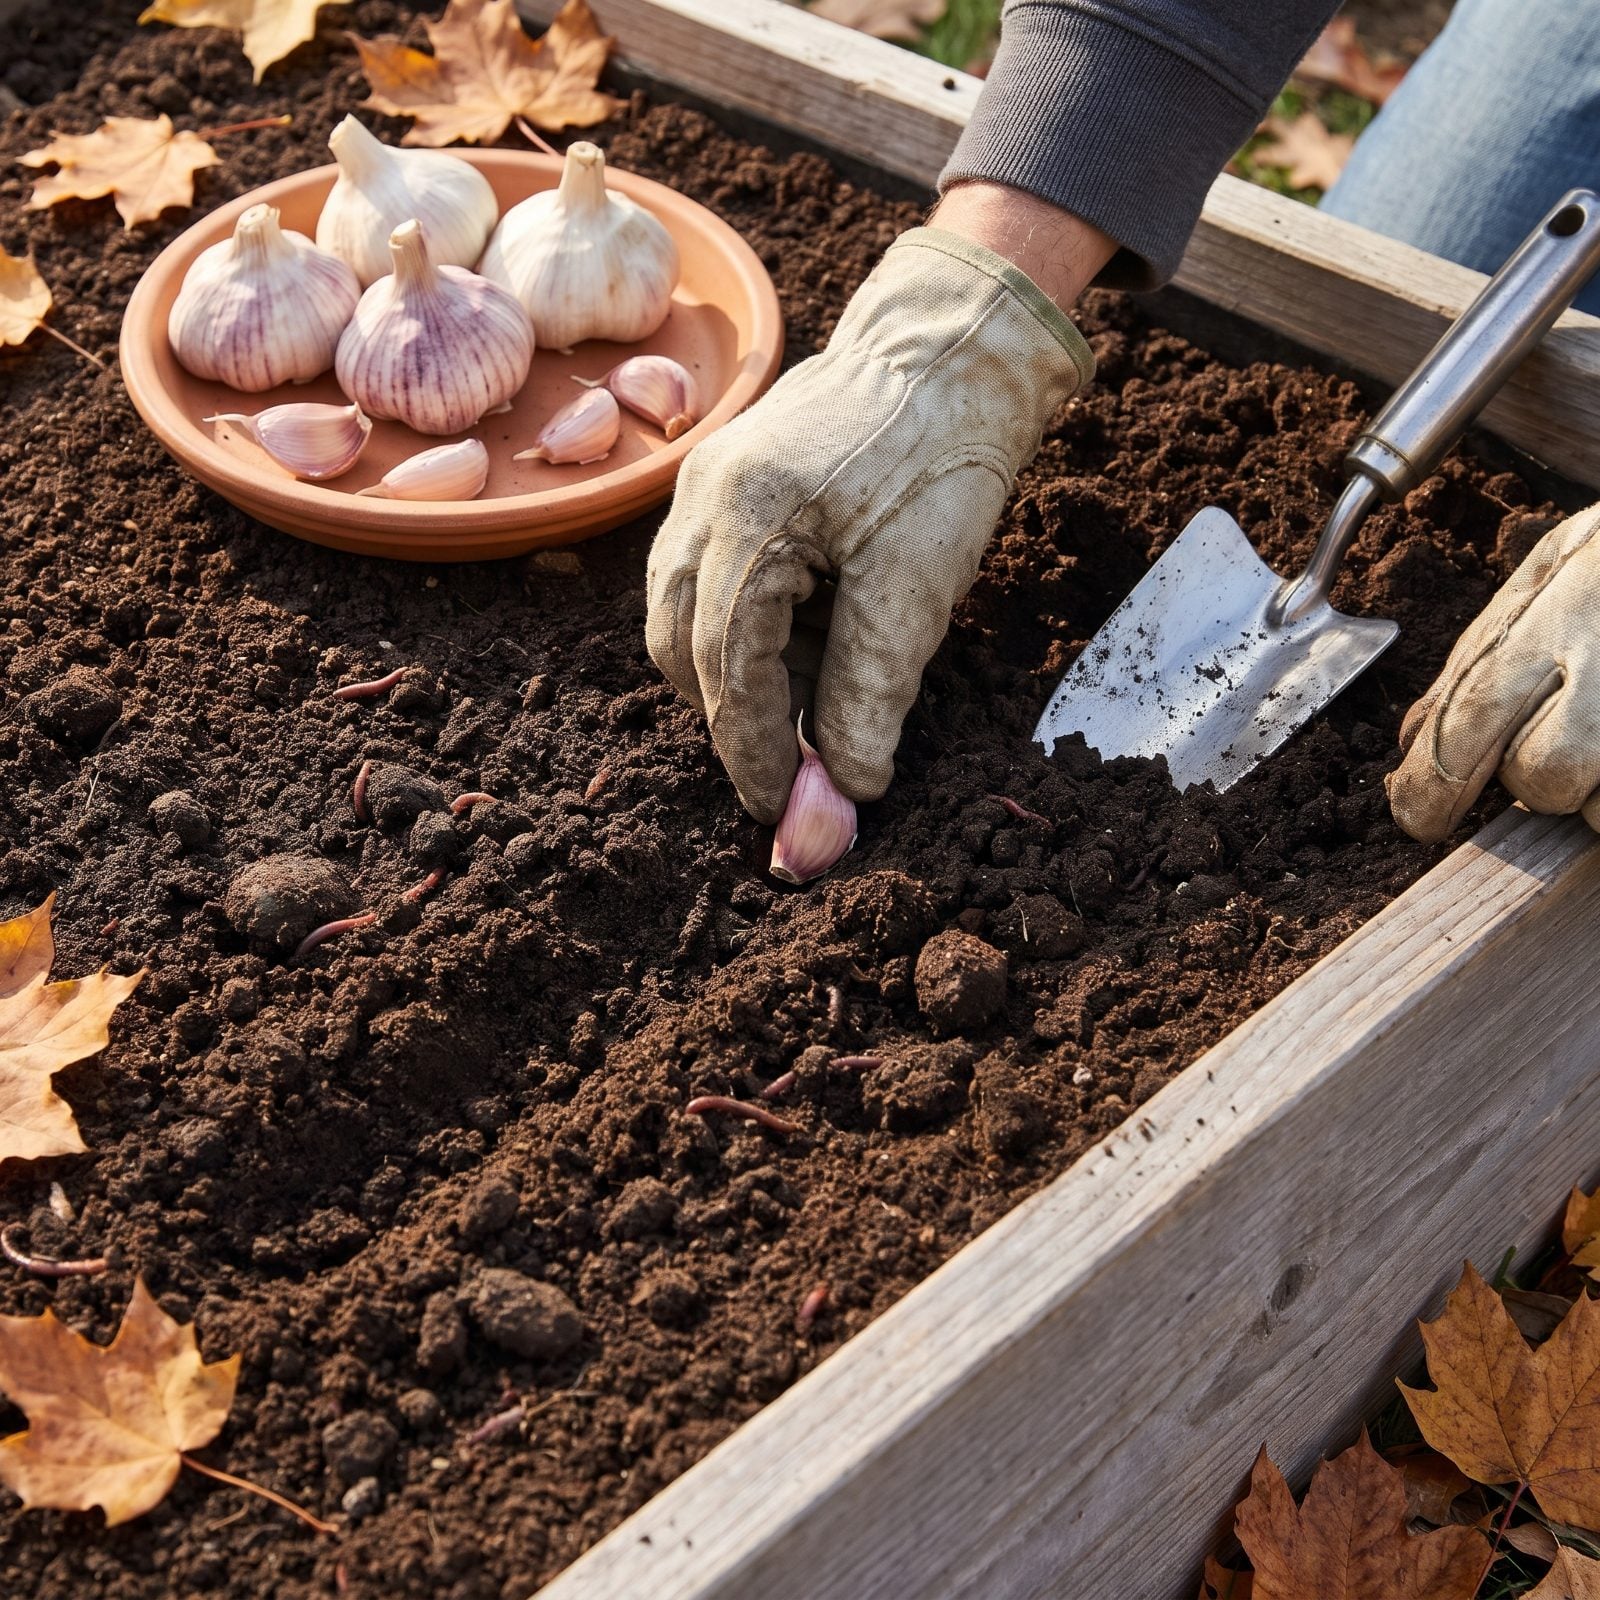
Garlic is planted in fall and harvested next summer, and it needs the winter cold in between to form proper bulbs. Aim to get cloves in the ground roughly four to six weeks before the soil freezes. That gives them time to grow roots without pushing much green growth above ground.
Break the heads apart right before planting and keep the papery skin on each clove. Set them pointed end up, about two inches deep and four to six inches apart, in loose soil that drains well. Once the ground starts to cool hard, cover the bed with a few inches of straw or shredded leaves so freeze-thaw cycles don’t heave the cloves out.
Buy seed garlic from a nursery or seed supplier, not the grocery store. Store garlic may be treated to resist sprouting, and it’s often a softneck type grown in a mild climate. In cold regions, hardneck varieties are usually the safer bet.
27. Take Cuttings of Tender Favorites
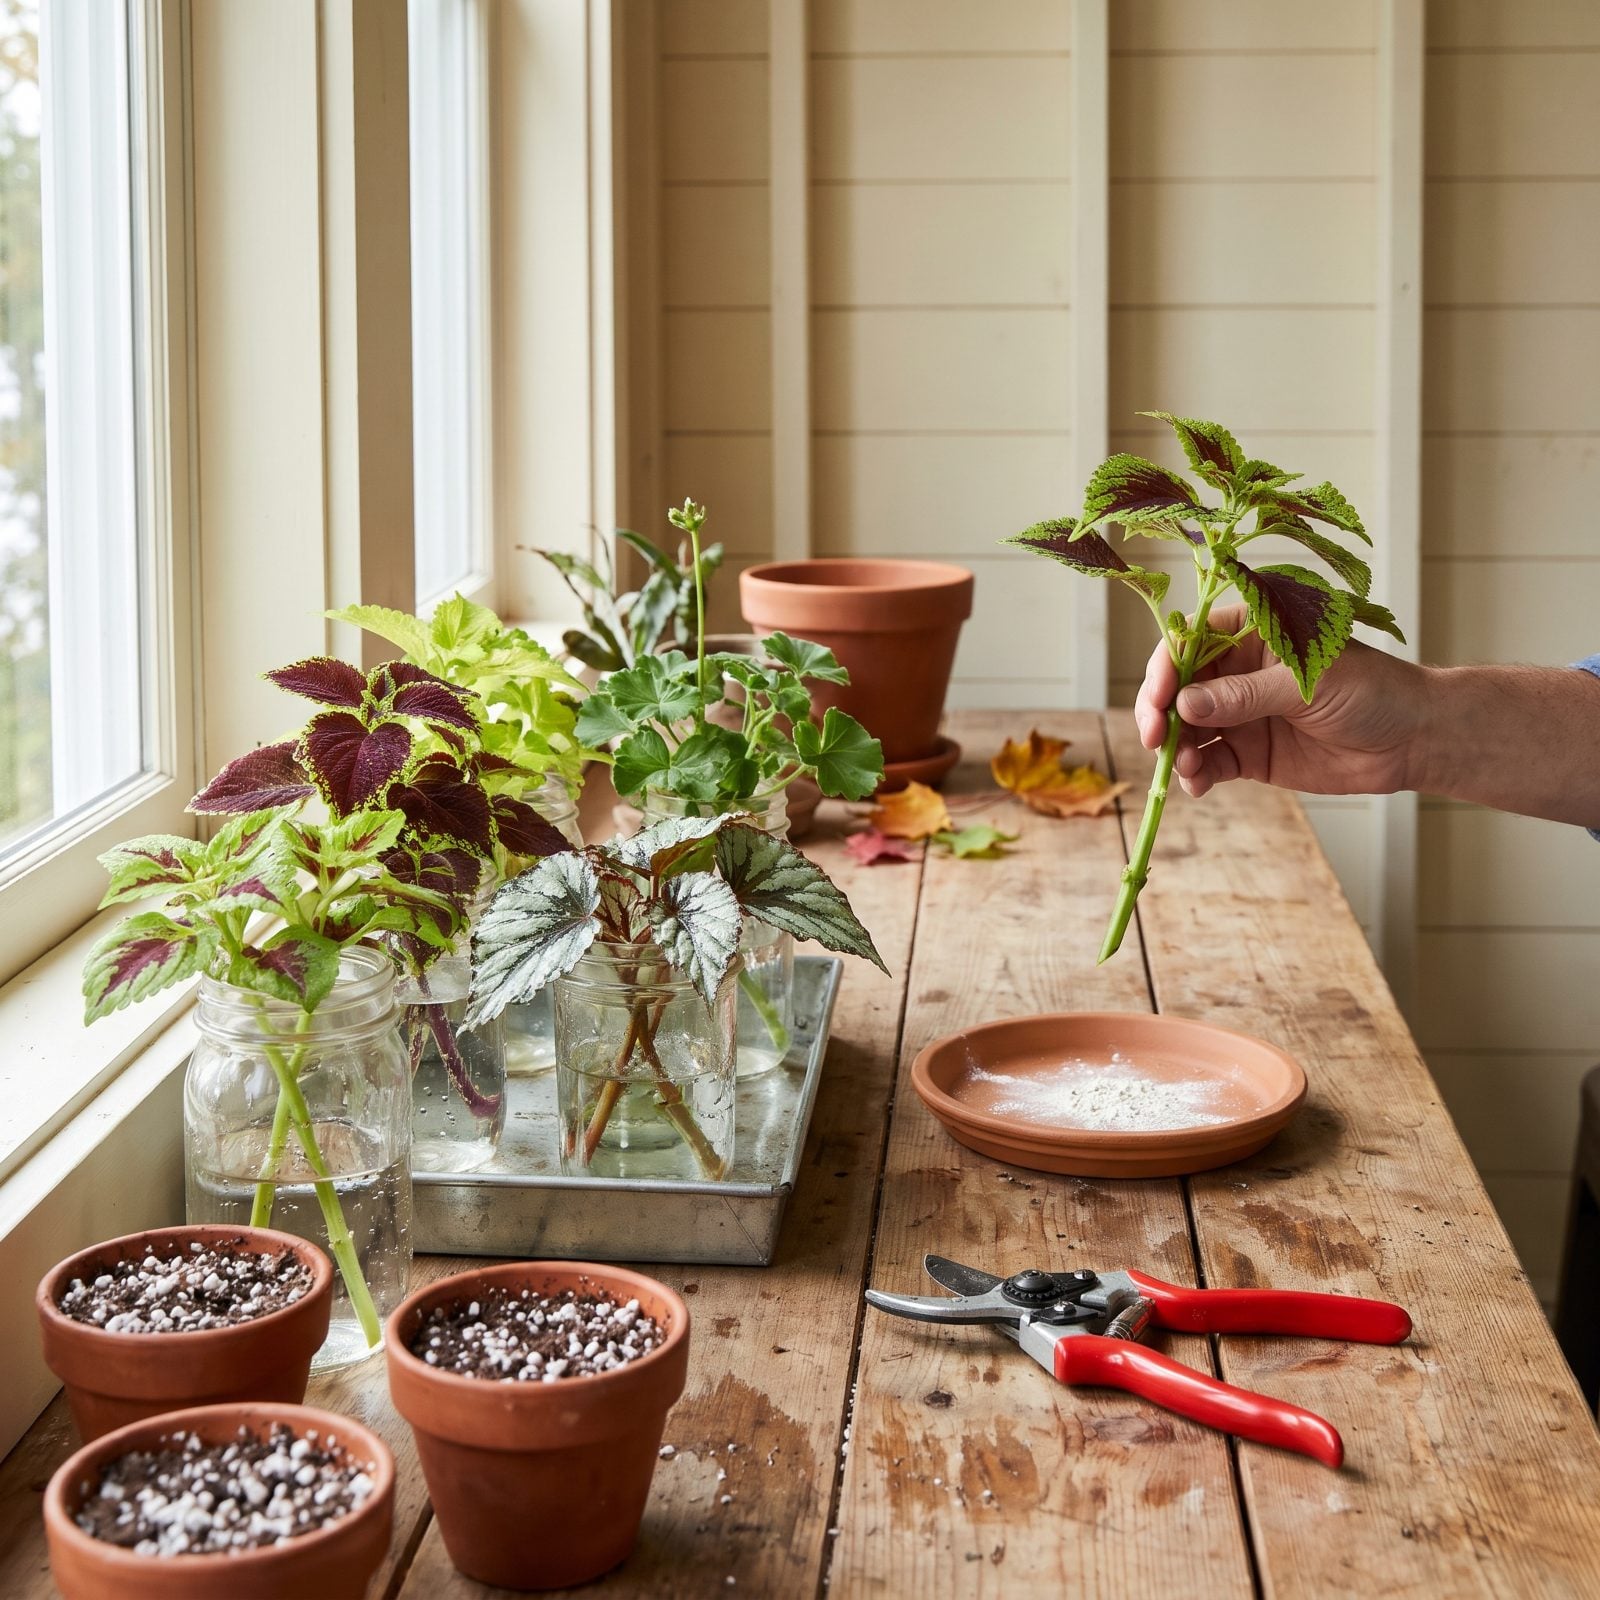
That coleus you loved all summer, the geranium in the exact shade you can never find again, the fuchsia on the porch: frost kills them all in one night. A few cuttings taken now carry them through winter on a windowsill for almost nothing.
Snip four- to six-inch tips from healthy stems, choosing stems without flower buds, cutting just below a leaf node. Strip the lower leaves so nothing rots below the surface, then stand the stems in a glass of water or push them into moist potting mix. Many of these root within a few weeks in bright indirect light.
Do this before the cold arrives, not after. Stems that have been chilled or nipped by frost root poorly, if at all. Take a few more cuttings than you think you need, because not every one will make it, and come spring each rooted cutting becomes a plant you didn’t have to buy.
26. Inspect Houseplants for Hitchhiking Pests
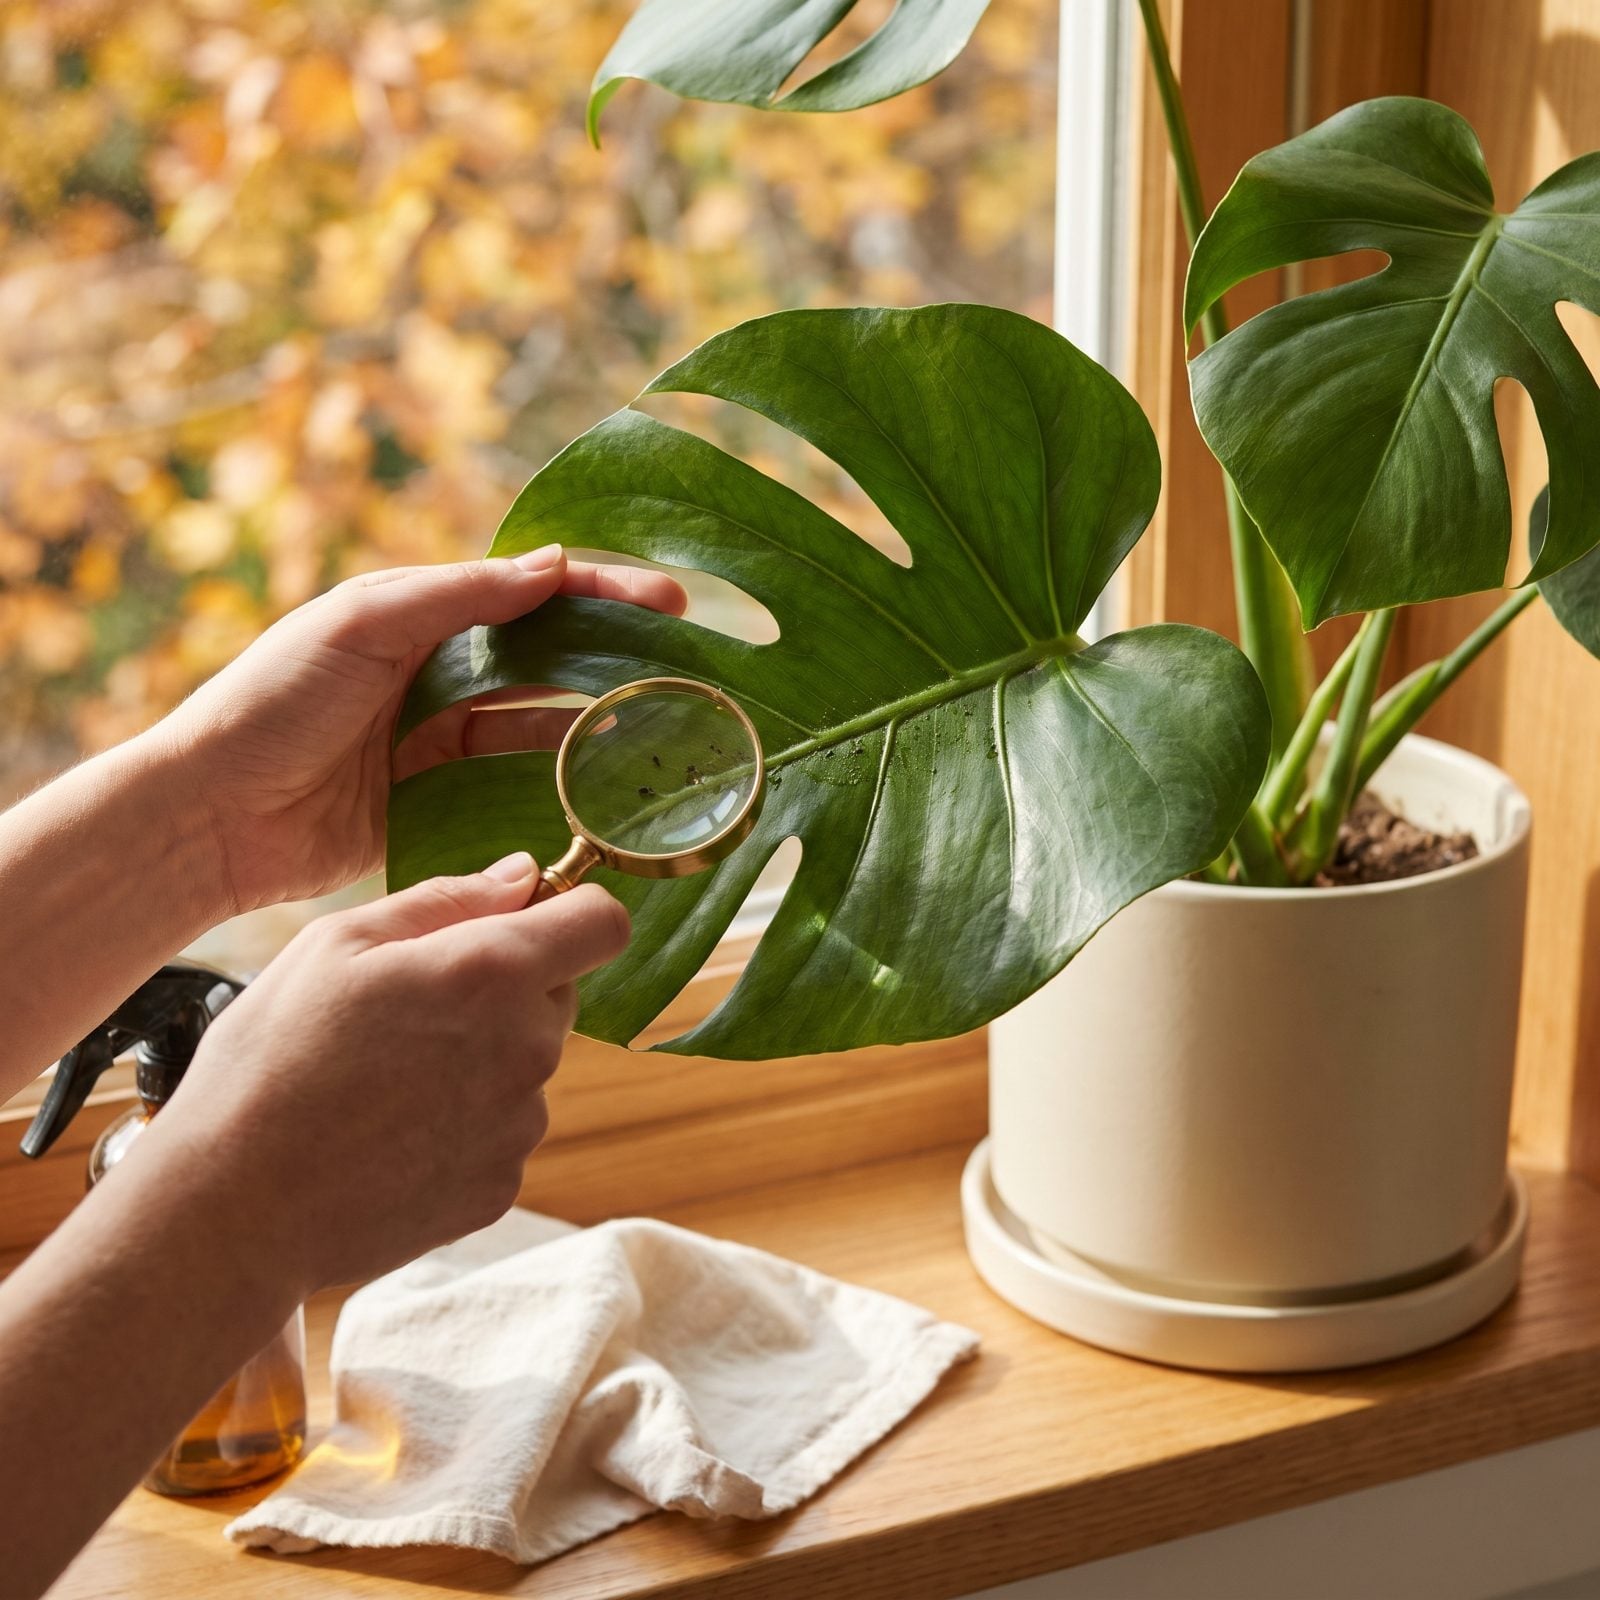
Every potted plant that spent summer outside is coming back in with company. Aphids, mealybugs, spider mites, and scale ride in on the leaves, and ants, earwigs, and slugs move into the potting soil. Bring them inside unchecked and they’ll spread to every plant you own by January.
Go over each plant before it crosses the threshold. Check the undersides of leaves, where stems join, and the drainage holes. Look for sticky residue, fine webbing, or white cottony clumps. Hose the foliage down hard, treat anything suspicious with insecticidal soap, and keep newly arrived plants away from the rest for a couple of weeks so problems show up before they spread.
25. Bring Tropical Houseplants Indoors

Tropical plants don’t wait for frost to get hurt. Many of them, including hibiscus, mandevilla, crotons, and most common foliage plants, start suffering chilling injury once nights drop into the low 50s. If you wait for the frost warning, you’ve usually waited too long.
Don’t jump them straight from full sun to the living room. Indoor light is much dimmer than outdoor light, and a sudden move triggers leaf drop. Shift them into shade for a week or two first, then bring them in to the brightest window you have. Expect some yellowing leaves anyway; that’s the plant adjusting, not dying.
Once inside, cut back on water. Plants grow more slowly in low winter light and soggy soil is what does them in. A spot beside glass patio doors gives them plenty of light, but keep them away from heating vents and keep the door shut on cold days. Hot, dry air and chilly drafts dry them out or chill them fast.
24. Harvest Long-Keeping Root Crops
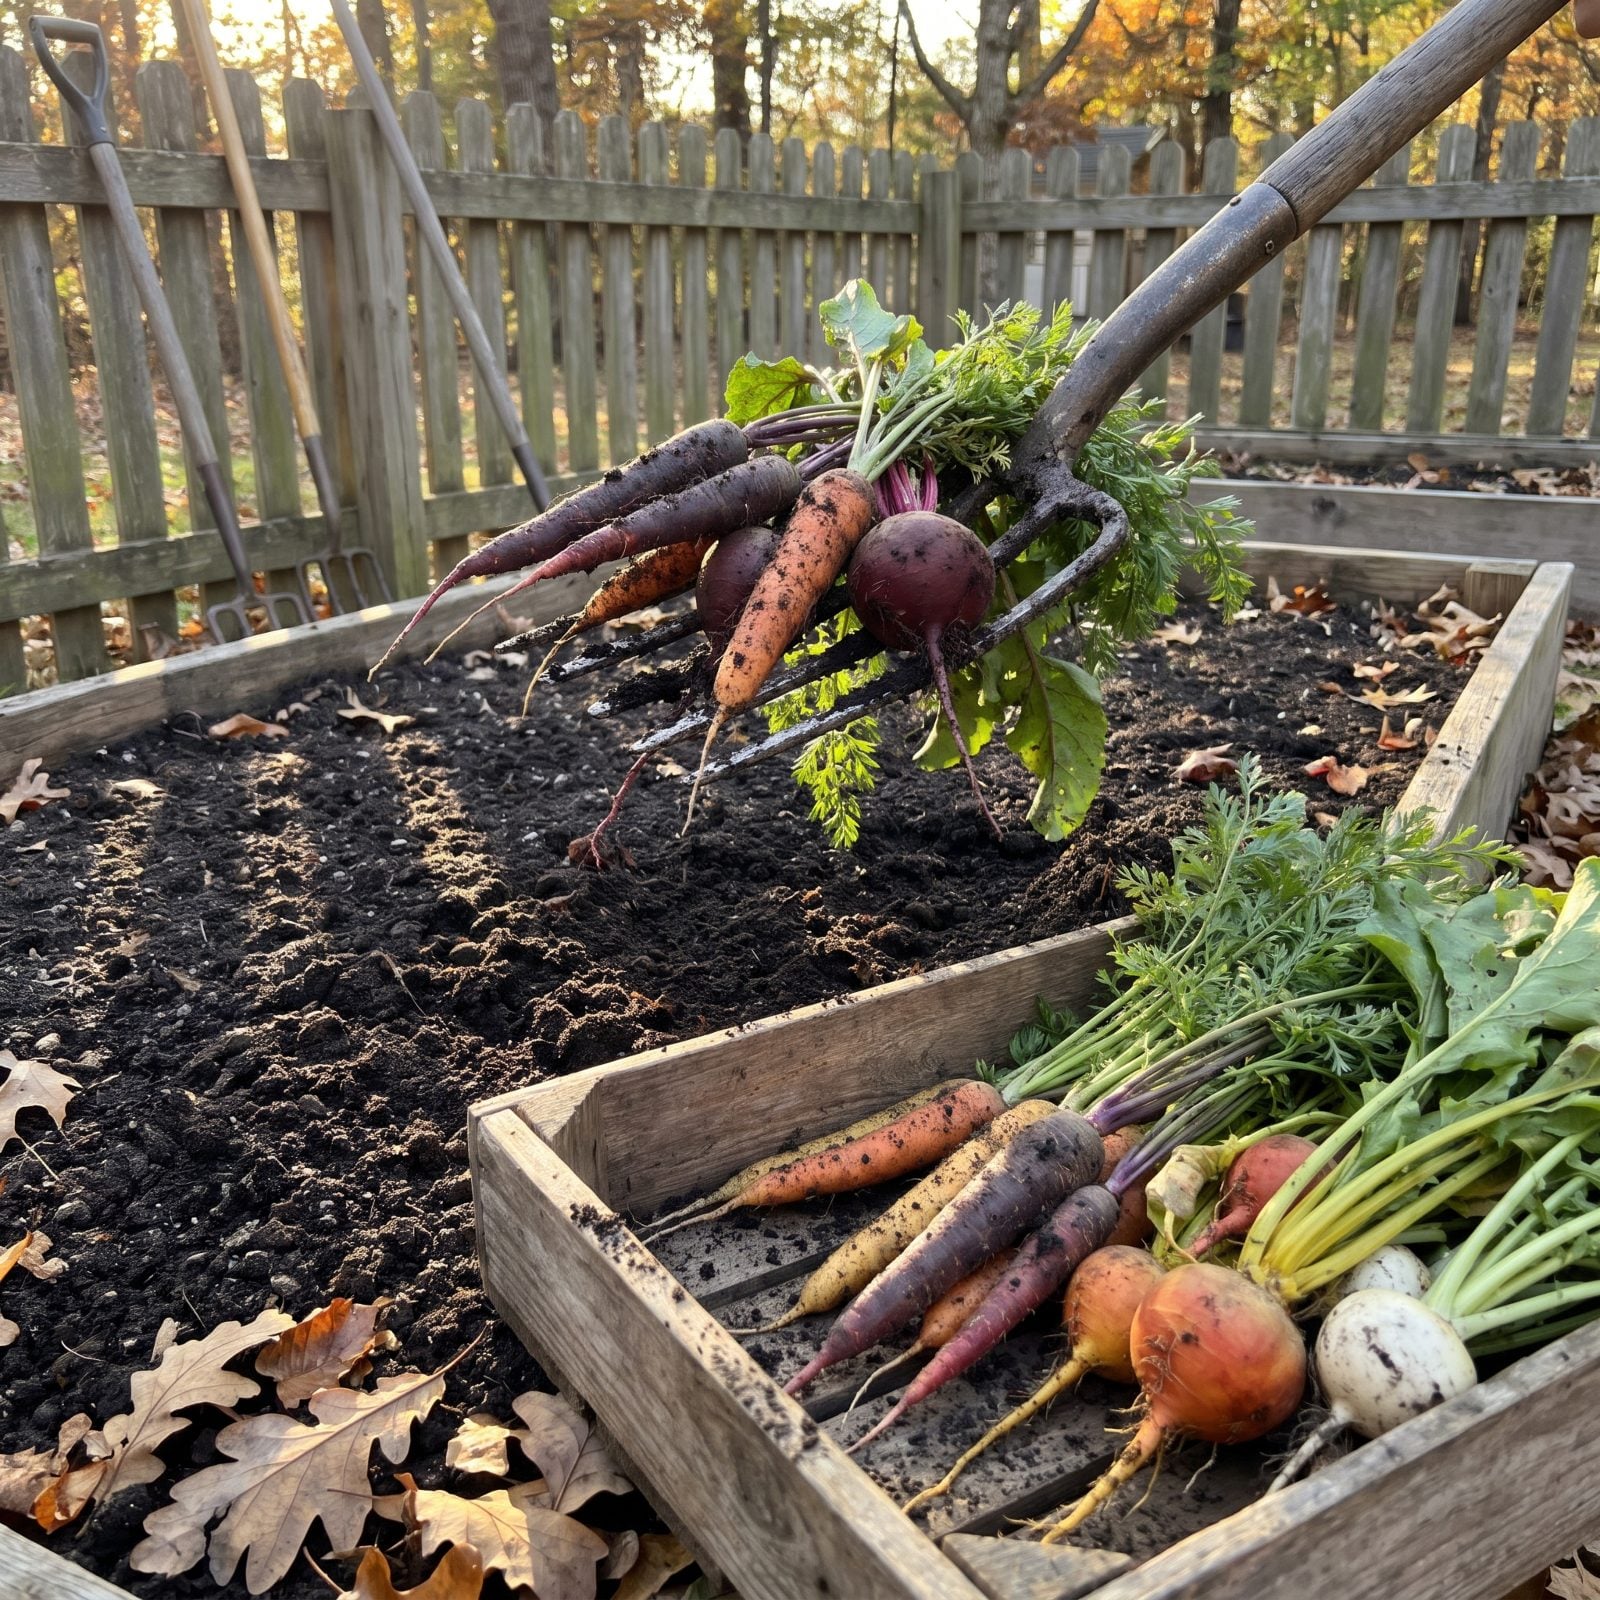
Carrots, parsnips, beets, turnips, and rutabagas can sit in the ground well into fall, and a few light frosts actually help. Cold converts some of the starch in carrots and parsnips to sugar, which is why a November carrot tastes sweeter than an August one. The deadline is the hard freeze, when digging becomes a chore with a pickaxe.
Lift them with a garden fork on a dry day, loosening the soil beside the row rather than stabbing straight down into the roots. Twist or cut the greens off, leaving about an inch of stem. Brush off the dirt but don’t wash them, and set aside any damaged roots to eat first.
Root crops keep longest cold and humid, just above freezing. Pack them in damp sand or sawdust in a bin in a cold garage or root cellar, or bag them in the fridge crisper. Keep carrots away from apples, which give off ethylene gas that can turn carrots bitter.
23. Cure Winter Squash Properly

Winter squash picked and tossed straight into the basement often rots by Christmas. Cured squash can last for months. The difference is a couple of weeks of warmth right after harvest that toughens the skin and heals small nicks.
Harvest when the rind is hard enough that your thumbnail won’t dent it and the stem has turned dry and corky. Cut the squash from the vine with one to two inches of stem attached, and never carry it by that stem; if it snaps off, that squash goes to the front of the eating line. Get everything in before a hard freeze, which damages the fruit.
Cure butternut, hubbard, and pumpkins somewhere around 80 to 85 degrees with good airflow for about ten days, then move them to a cool, dry spot around 50 to 55 degrees. Acorn squash is the exception: skip the curing, store it cool right away, and use it first.
22. Lift and Label Tender Bulbs
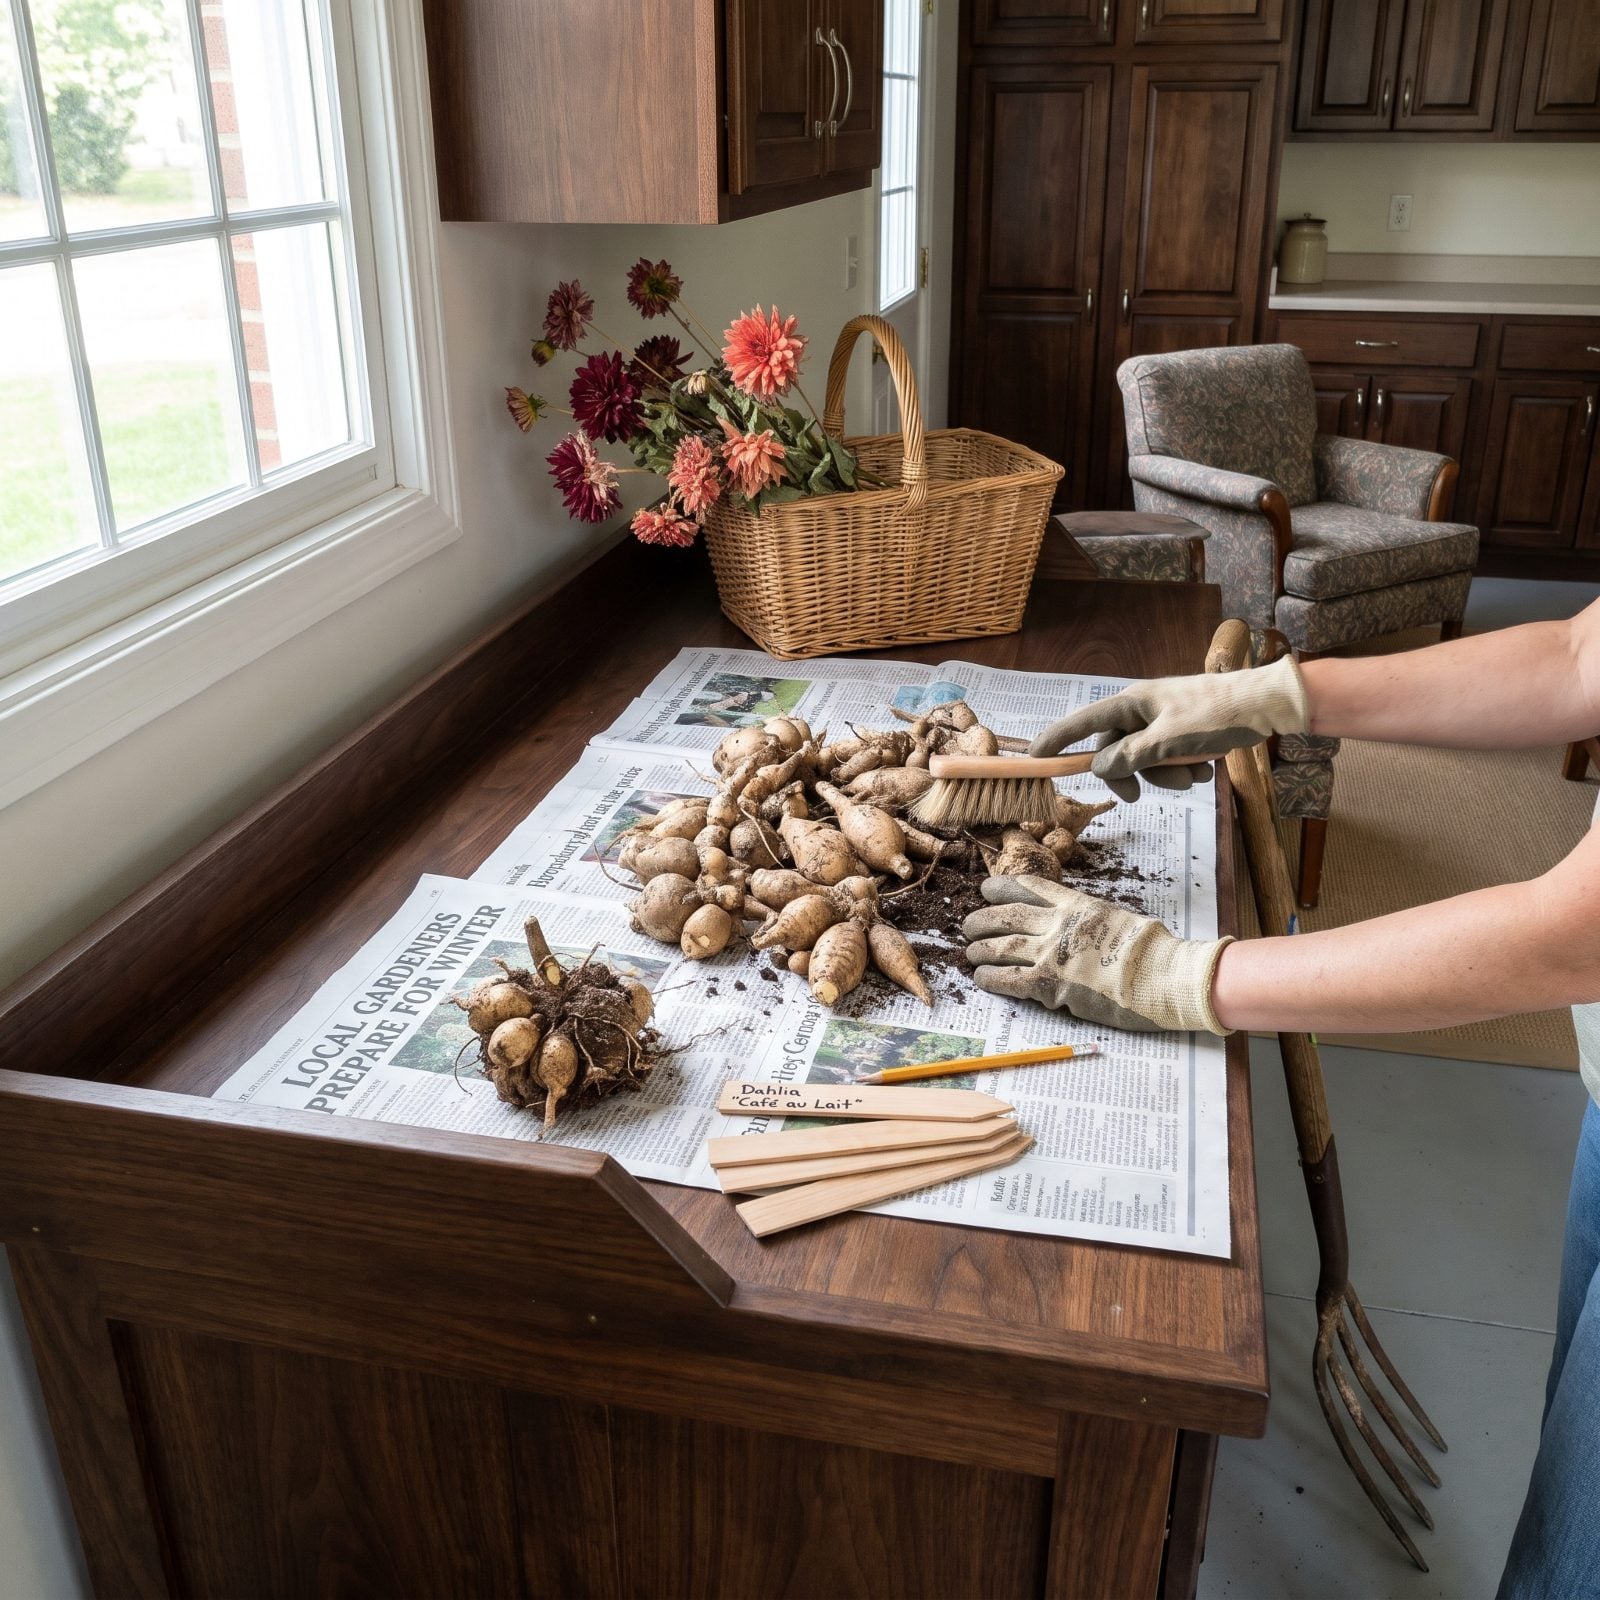
Dahlias, cannas, gladiolus, and caladiums won’t survive a winter in frozen ground in most cold climates. Leave them and they turn to mush. Dig them, and the same tubers come back bigger next year.
For dahlias and cannas, wait until a frost blackens the foliage, then dig within a few days. Cut the stems back to a few inches, lift the clumps gently with a fork, shake off the soil, and let them dry in a sheltered spot for a few days. Store them in a box of peat moss, vermiculite, or wood shavings somewhere cool and dark that stays above freezing, ideally in the 40s. Gladiolus corms can dry for a couple of weeks and then go into mesh bags.
Label every clump as you dig it, with the variety and color written right on the tuber or the bag. Once the leaves are gone, a red dinner-plate dahlia and a white pompon look exactly alike, and spring planting turns into guesswork.
21. Remove Diseased Vegetable Plants
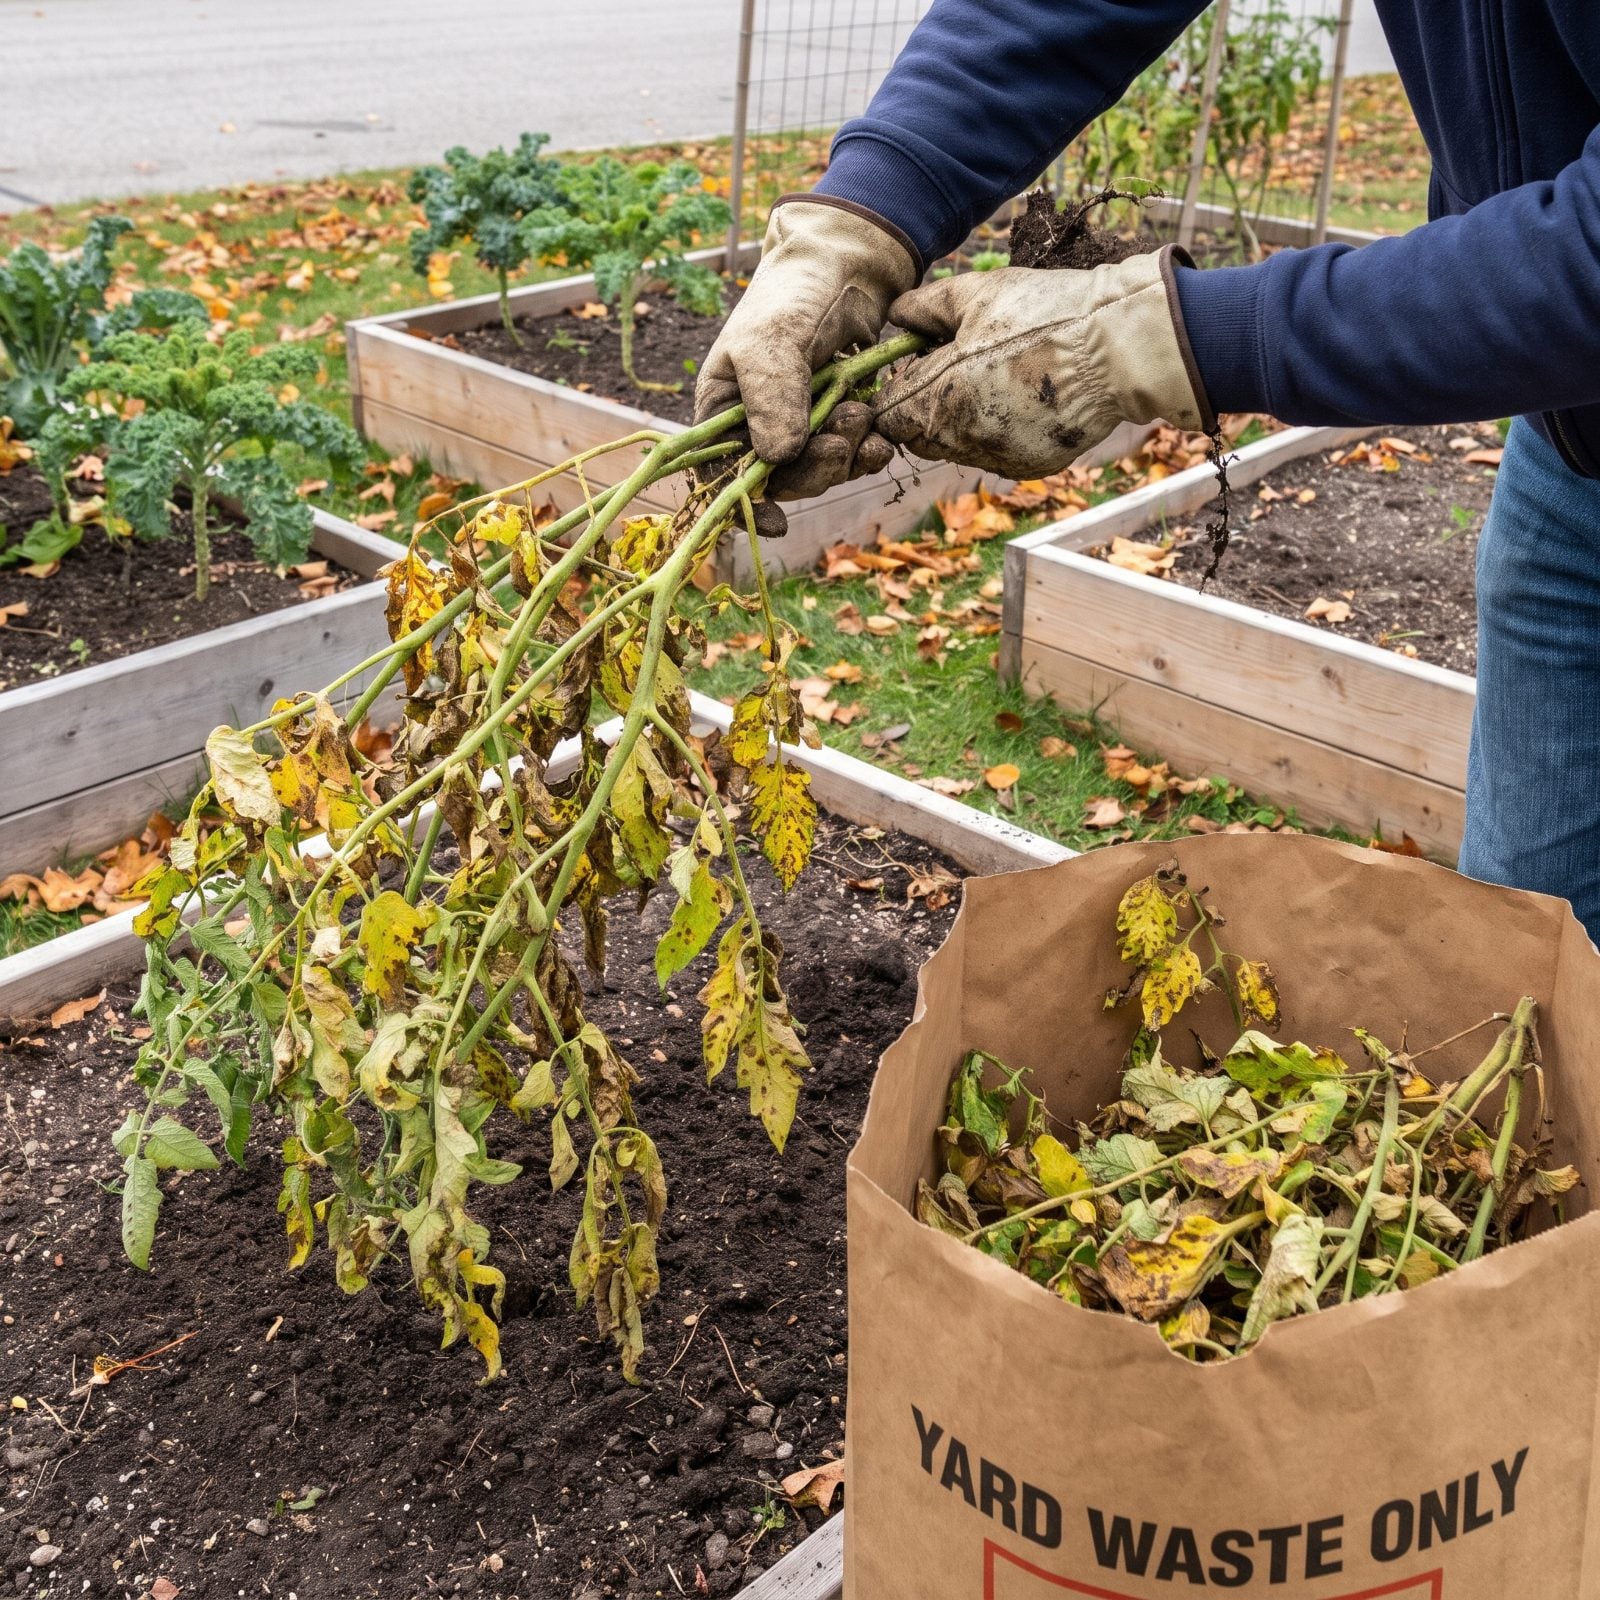
That tomato with the spotted, yellowing leaves and the squash coated in white powdery mildew aren’t finished causing trouble when they stop producing. Many plant diseases overwinter on dead foliage and stems, then splash back onto next year’s plants with the first spring rains.
Pull any plant that showed blight, leaf spot, mildew, or wilt, roots and all. Bag it in a yard-waste bag for municipal collection, where large-scale composting runs much hotter, rather than tossing it on your own compost pile. A home compost heap rarely gets hot enough throughout to kill disease spores, so you’d just be spreading the problem around your garden next year. Rake up fallen leaves and rotted fruit from around those plants too.
Wipe down tomato cages and stakes that held sick plants with a diluted bleach solution before storing them. Make a note of where those crops grew, and plant something from a different family in that spot next year.
20. Leave Sturdy Seed Heads Standing
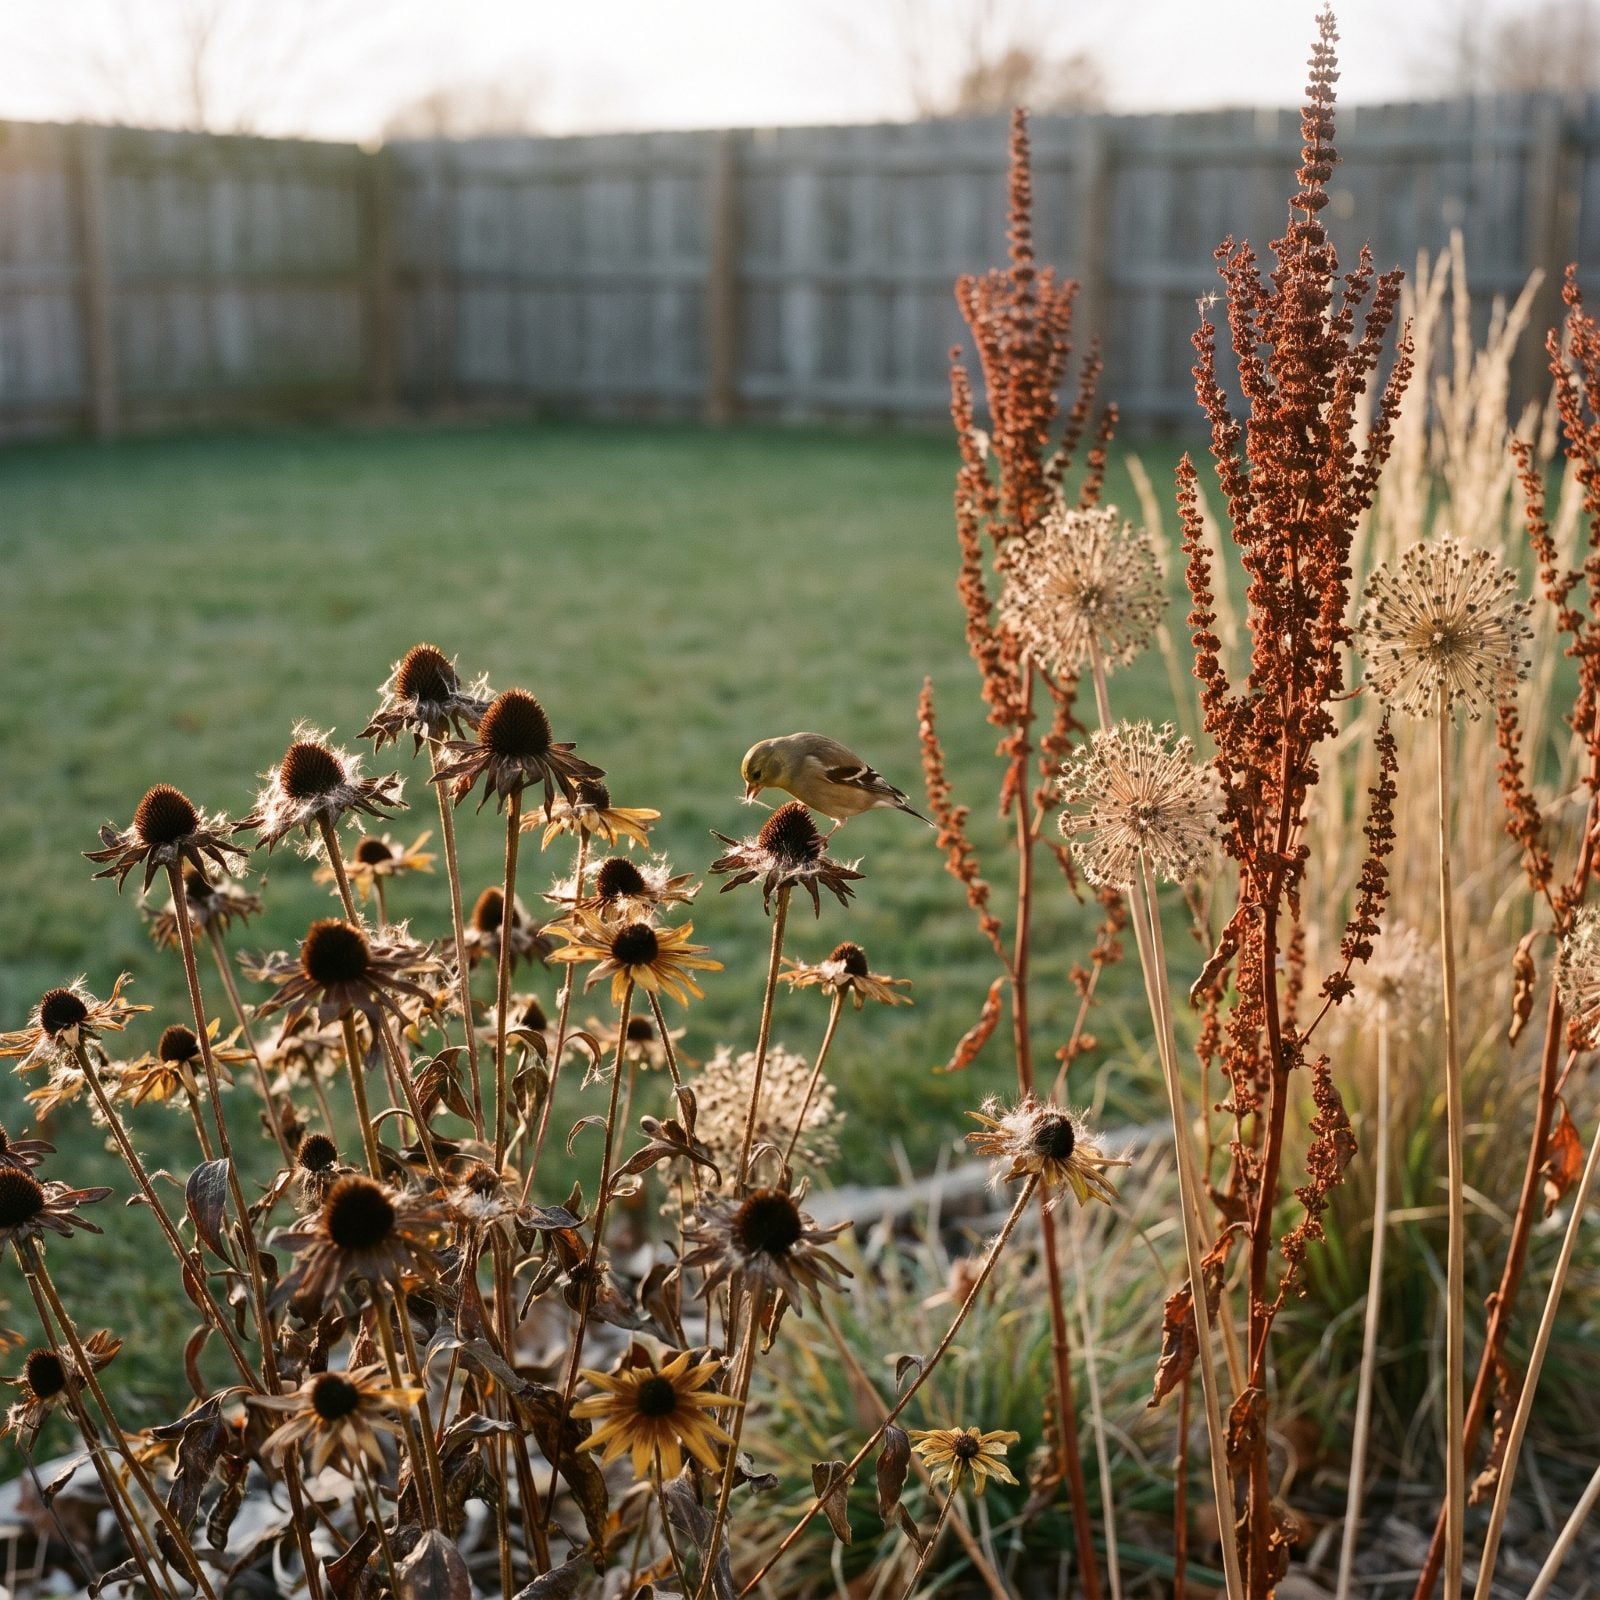
Not everything needs a fall haircut. Coneflowers, black-eyed Susans, sedum, sunflowers, and ornamental grasses hold their seed heads well into winter, and goldfinches and other seed-eating birds will work them over for months. It’s a free bird feeder you never have to fill.
Standing stems do more than feed birds. Hollow and pithy stems shelter beneficial insects through the cold, and the dried heads catch frost and snow so the bed looks like something instead of bare dirt. Cut it all back in spring once new growth starts.
Be choosy about it. Leave the plants that stand up sturdy and healthy, and cut down anything that flopped, rotted, or had disease. If a plant self-seeds more aggressively than you’d like, snip off those heads now before they drop, or you’ll be pulling seedlings all next spring.
19. Remove Mummified Orchard Fruit
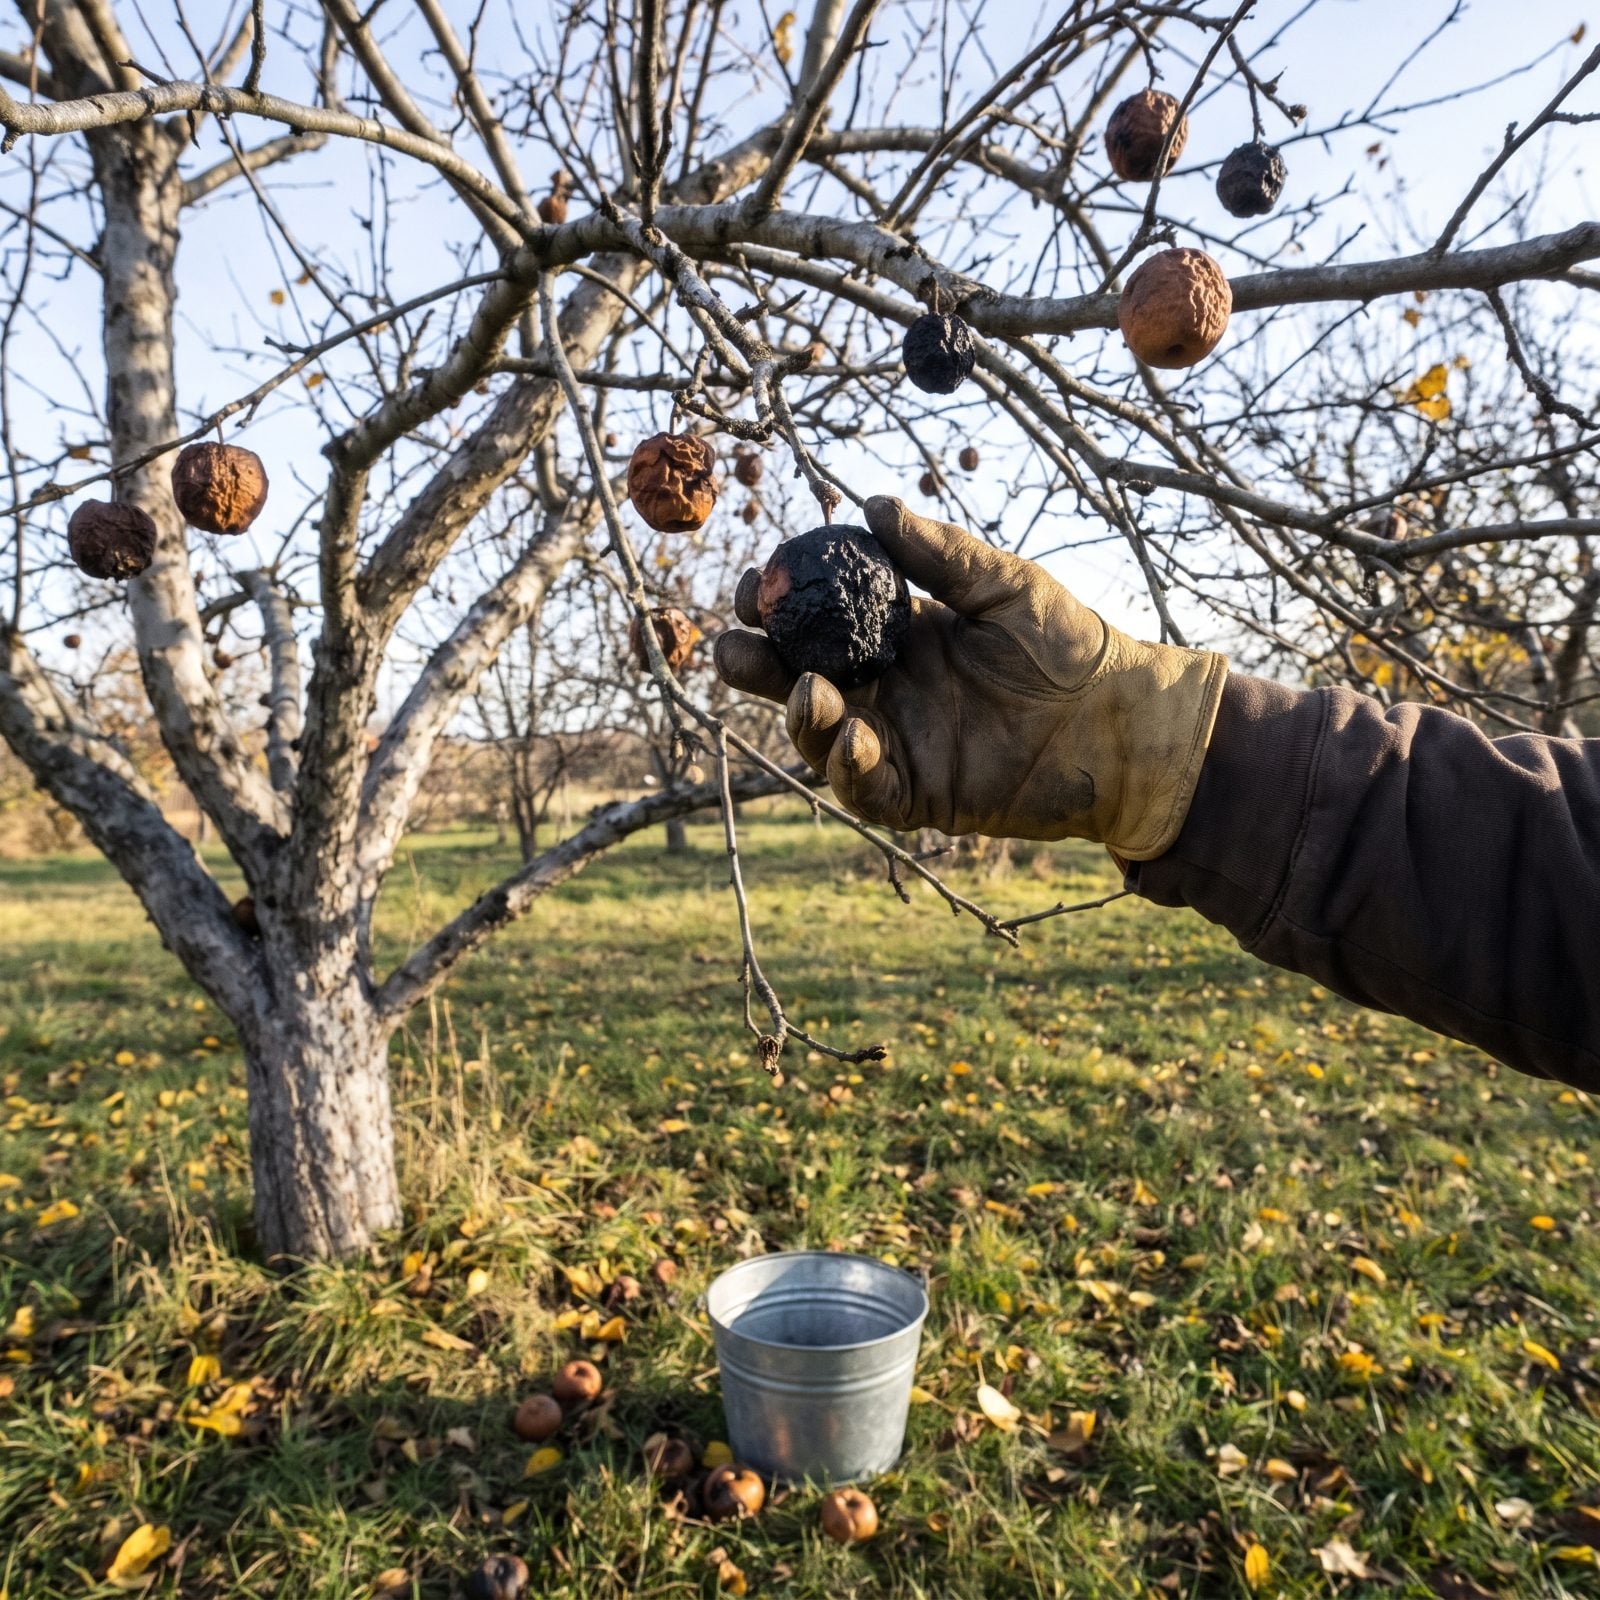
Those shriveled, leathery fruits still hanging on your peach, plum, or apple tree aren’t harmless leftovers. They’re called mummies, and they carry fungal diseases like brown rot through the winter. In spring, right as the tree blooms, they release spores onto the new flowers and fruit.
Pick every mummy off the branches and rake up any dropped fruit underneath. Use a pole pruner or a ladder for the high ones, because one missed fruit can reinfect a tree. Bag them and put them in the trash instead of the compost.
While you’re under the tree, pull up fallen fruit that’s just rotting on the ground too. Besides harboring disease, it draws yellowjackets in fall and mice and voles as the weather cools, and you don’t want either camped at the base of a trunk all winter.
18. Install Young-Tree Trunk Guards
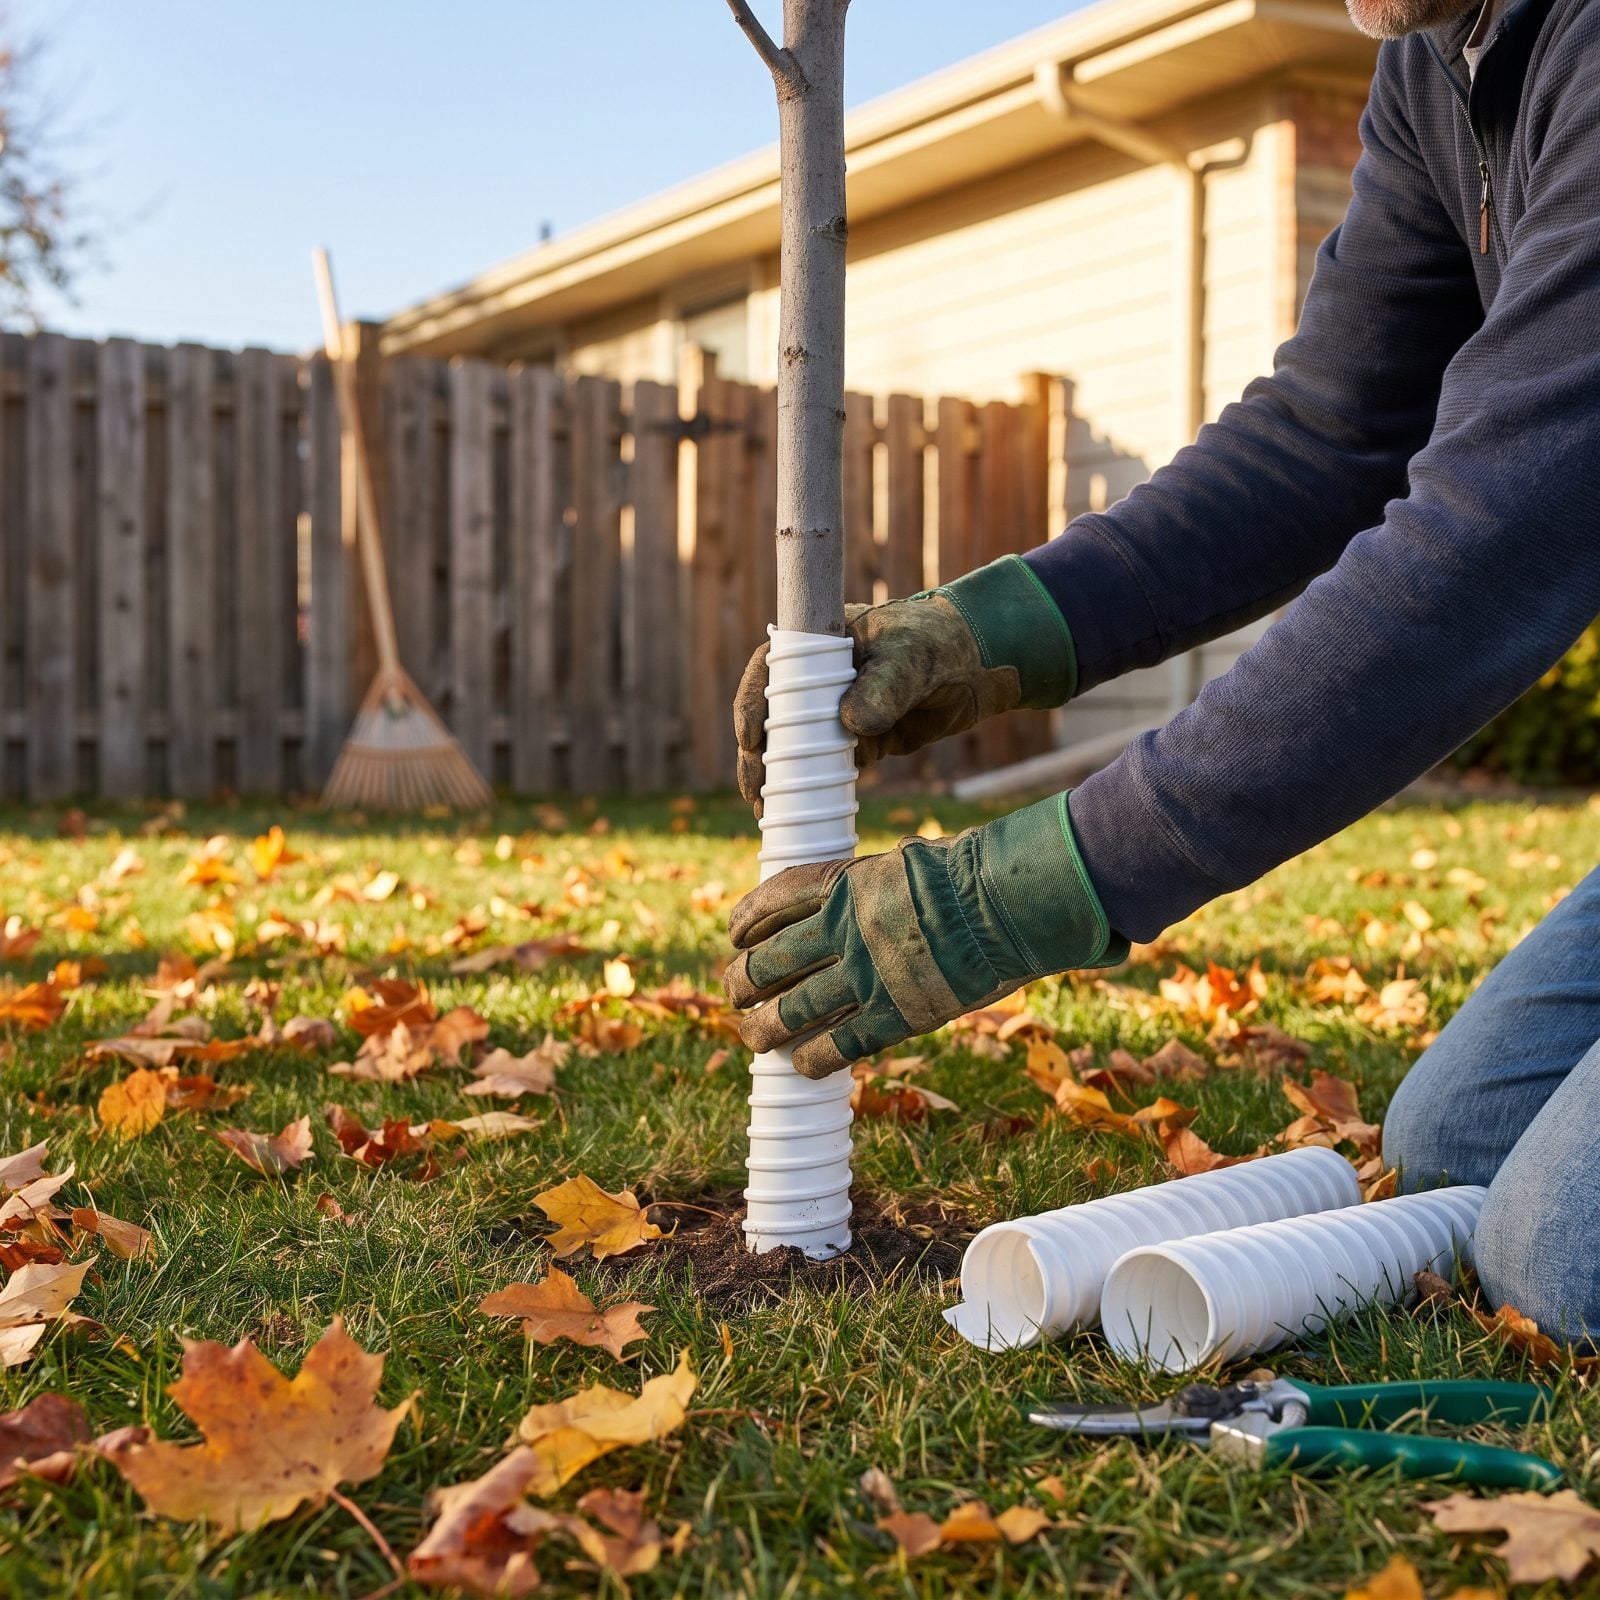
Every winter, rabbits and voles find the thin bark of young trees and treat it like a buffet. They chew a ring around the base, the tree can’t move water past the damage, and come spring you’ve got a dead sapling and no idea why. Sunscald does its own quiet work too: the south side of a trunk warms on a bright February day, then freezes hard at night, and the bark splits.
Wrap a spiral or mesh guard from the soil line up past the snow line, usually eighteen to twenty-four inches, loose enough to slide a finger under. Here’s the part most people skip. Pull the guards back off in spring. Leave them on year-round and you trap moisture and insects against the bark, which is its own slow problem.
17. Refresh Mulch Around Shrubs
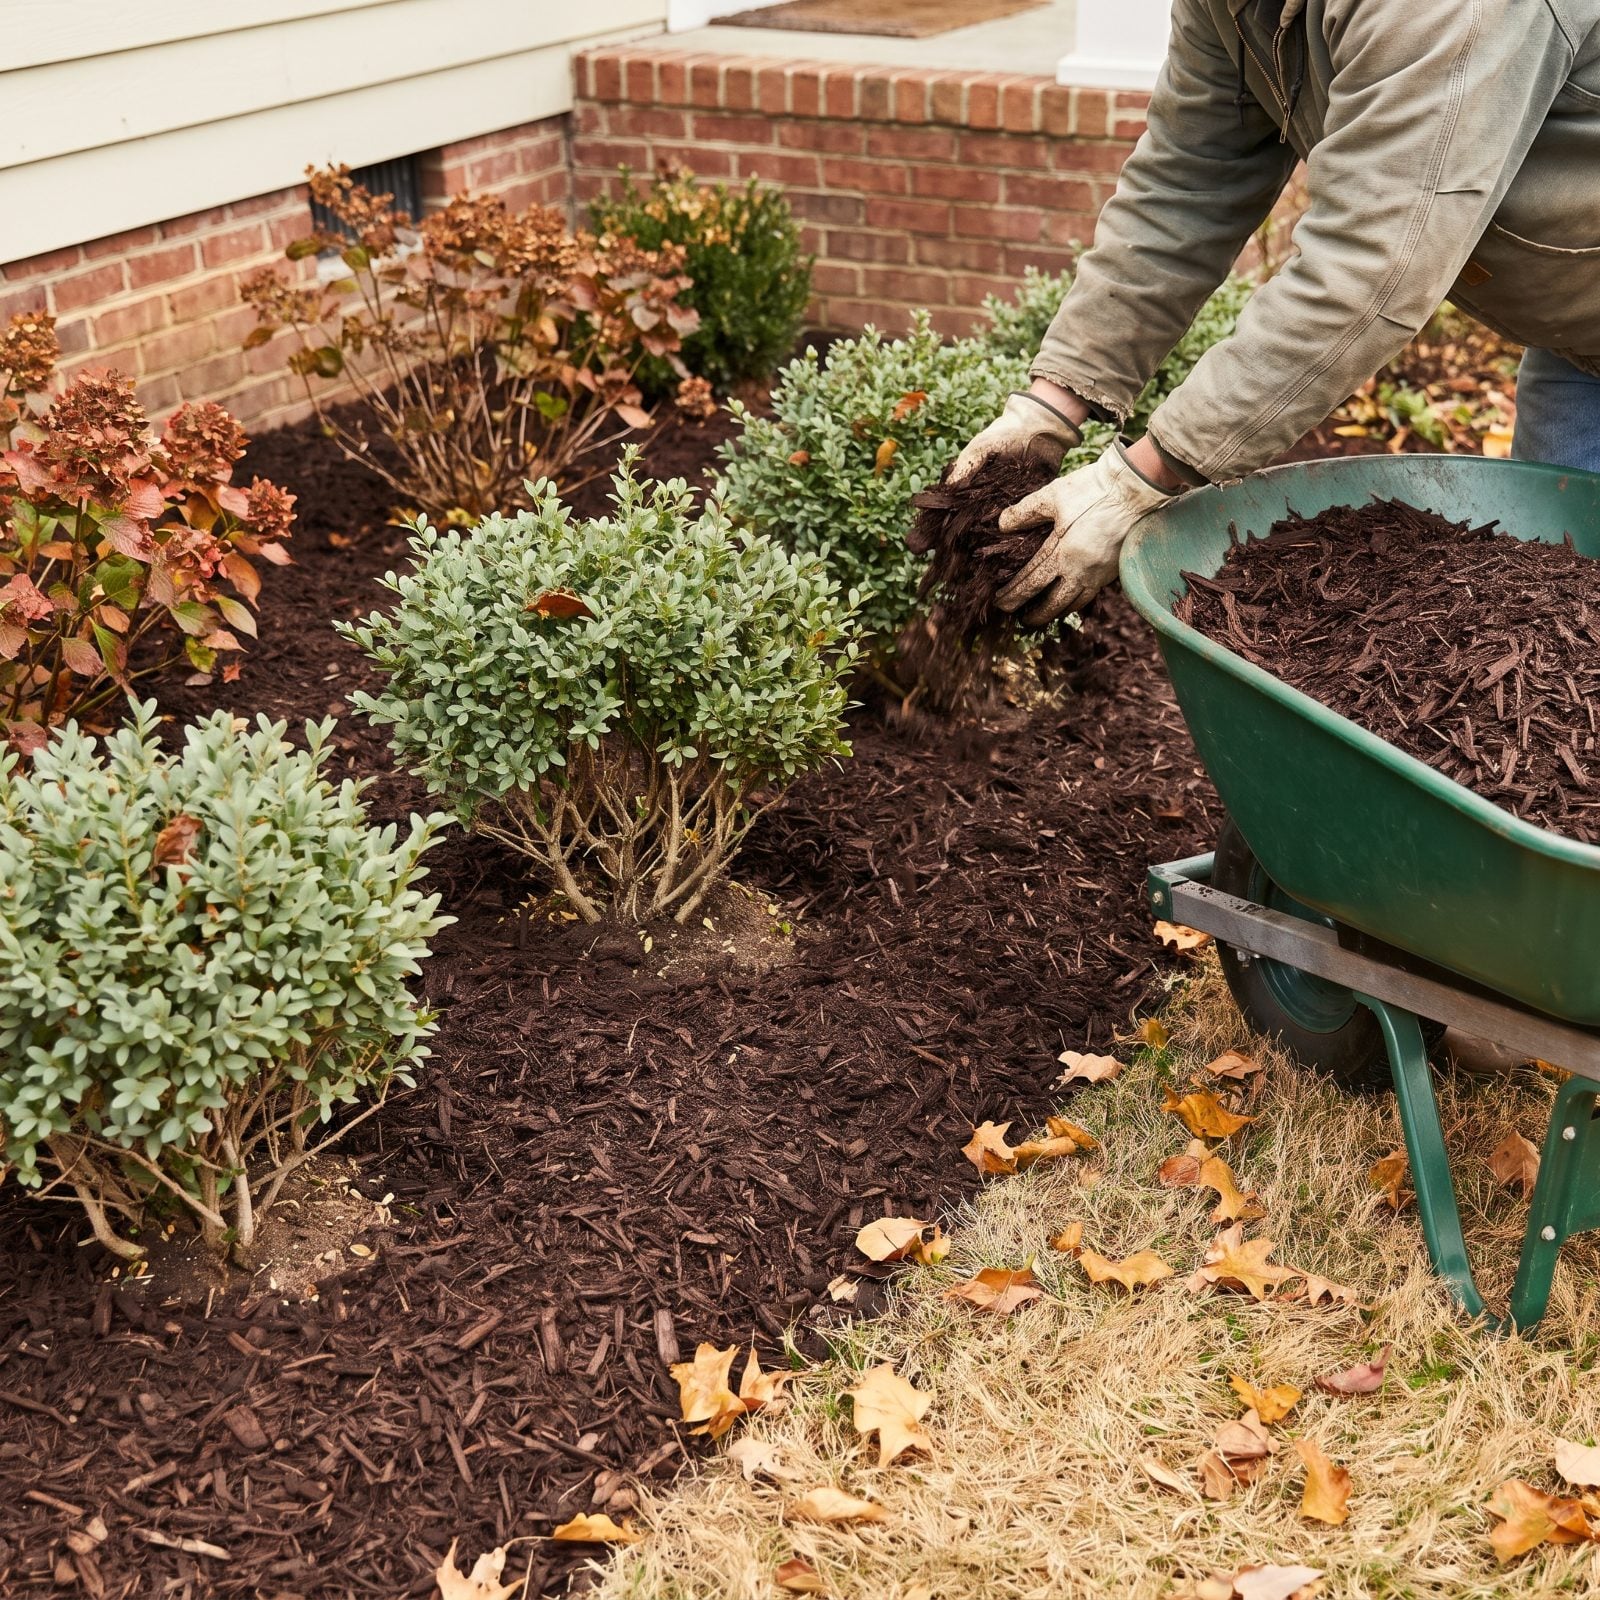
Mulch isn’t decoration in fall. It’s insulation. A couple of inches over the root zone keeps soil temperature from swinging wildly through freeze-thaw cycles, and that swinging is exactly what heaves shallow roots right out of the ground.
Spread two to three inches and no more. Pile it against the stems in those volcano cones you see out front of every strip mall and you’ll rot the bark and roll out the welcome mat for rodents, who’ll nest right where they can chew. Keep a two-to-three inch gap around every trunk. And rough up any old crusted mulch with a rake before you top it, so water soaks through instead of sheeting off the hard surface.
16. Deep-Water Young Trees and Evergreens
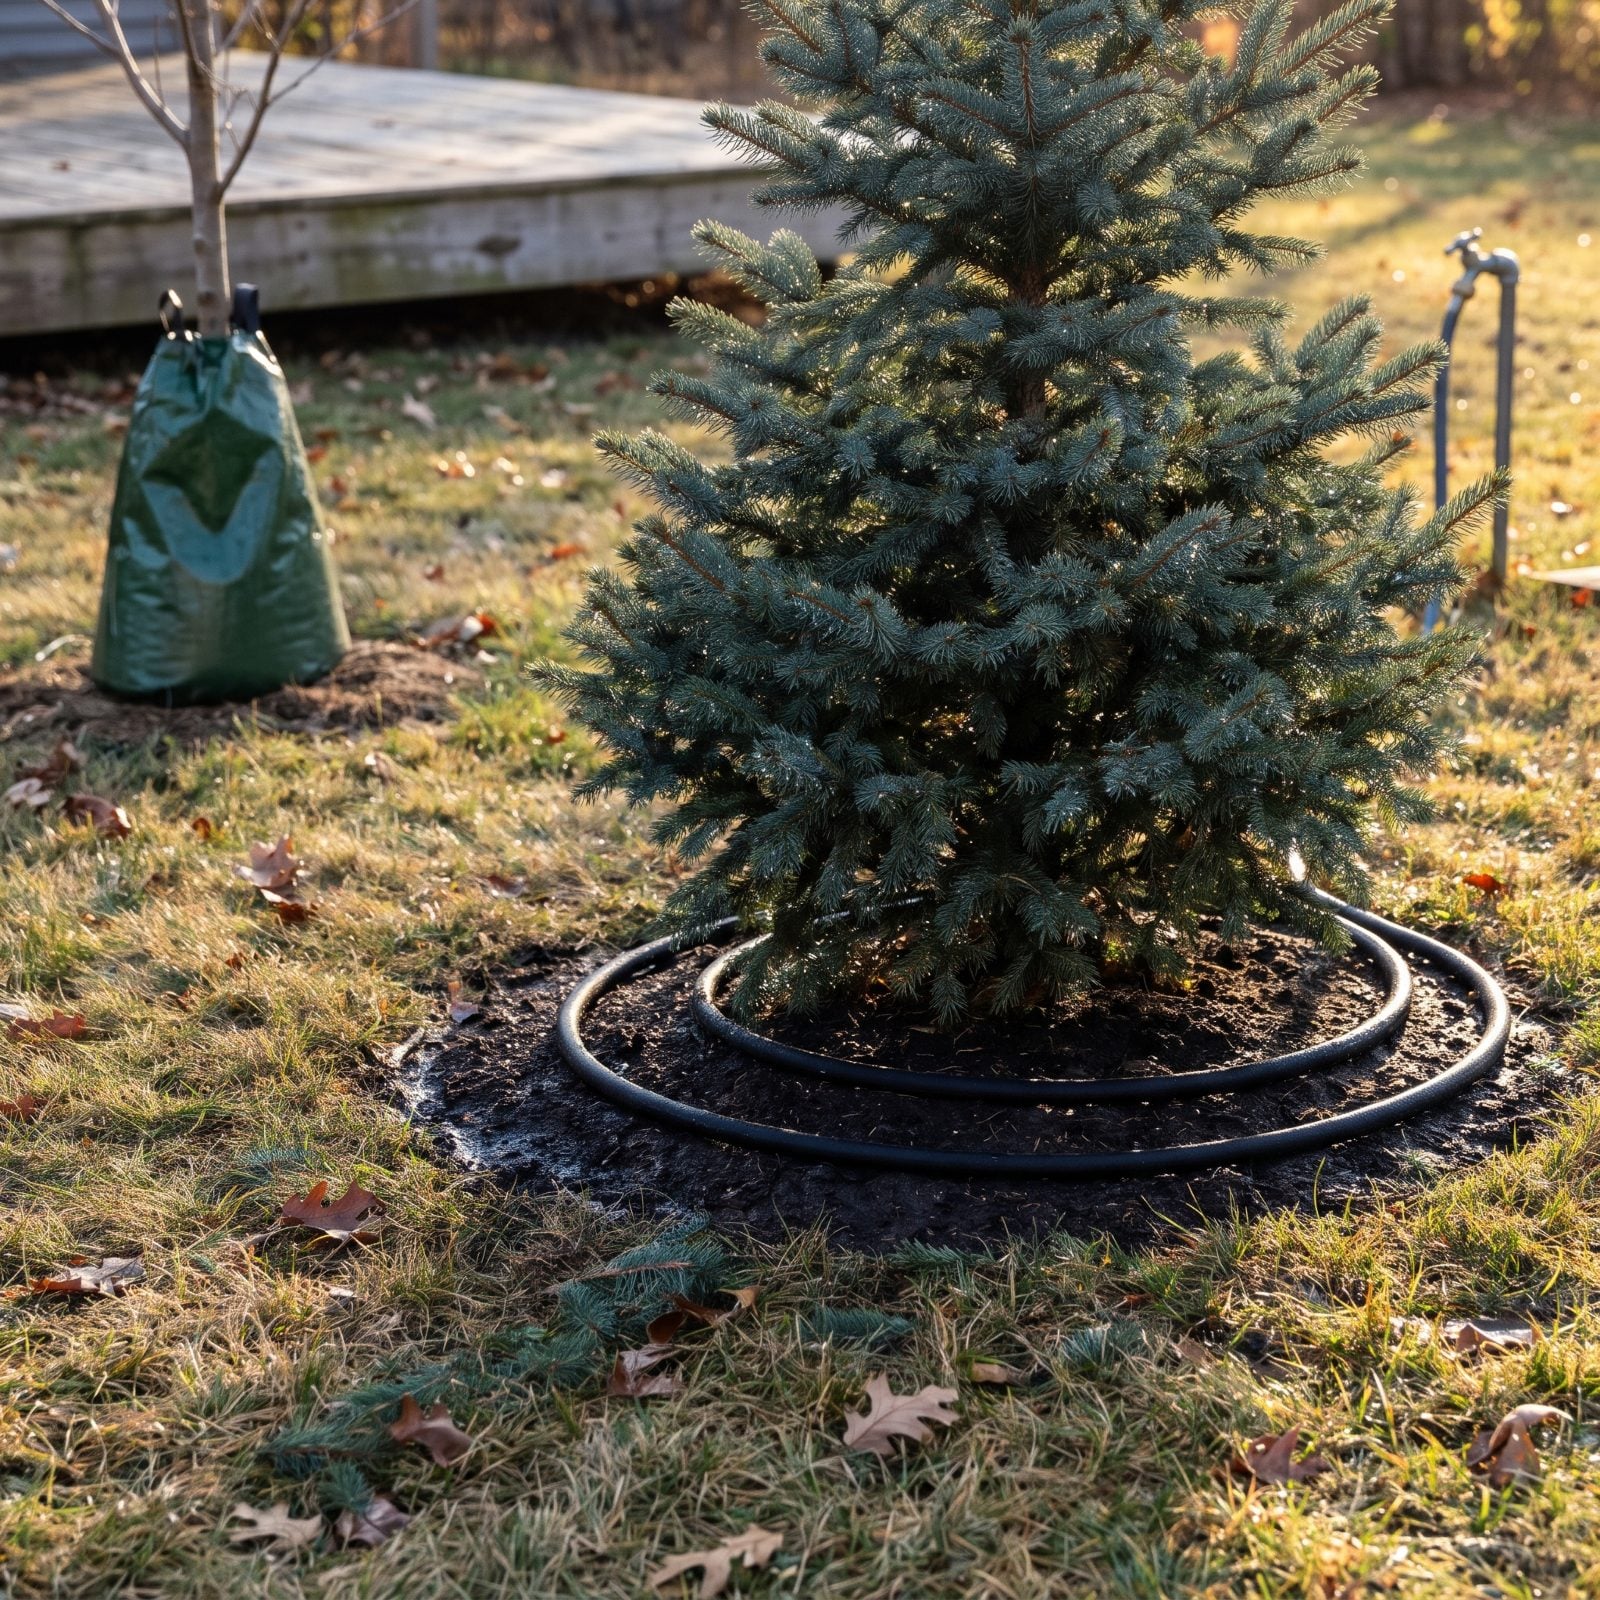
Evergreens never got the memo about dormancy. They keep losing moisture through their needles all winter, and if the ground is bone dry when it freezes, those needles brown out and drop. People blame the cold. It’s usually thirst.
Give young trees and every evergreen one long, slow soak before the ground freezes, aiming for water that reaches six to eight inches deep at the drip line. A soaker hose running low for an hour, or a slow-release bag, beats five minutes with a sprinkler that just wets the top inch.
Save this one for last, after the leaves are gone, so you catch the warm-soil window before the first hard freeze locks everything up.
15. Rake Leaves Off Lawn
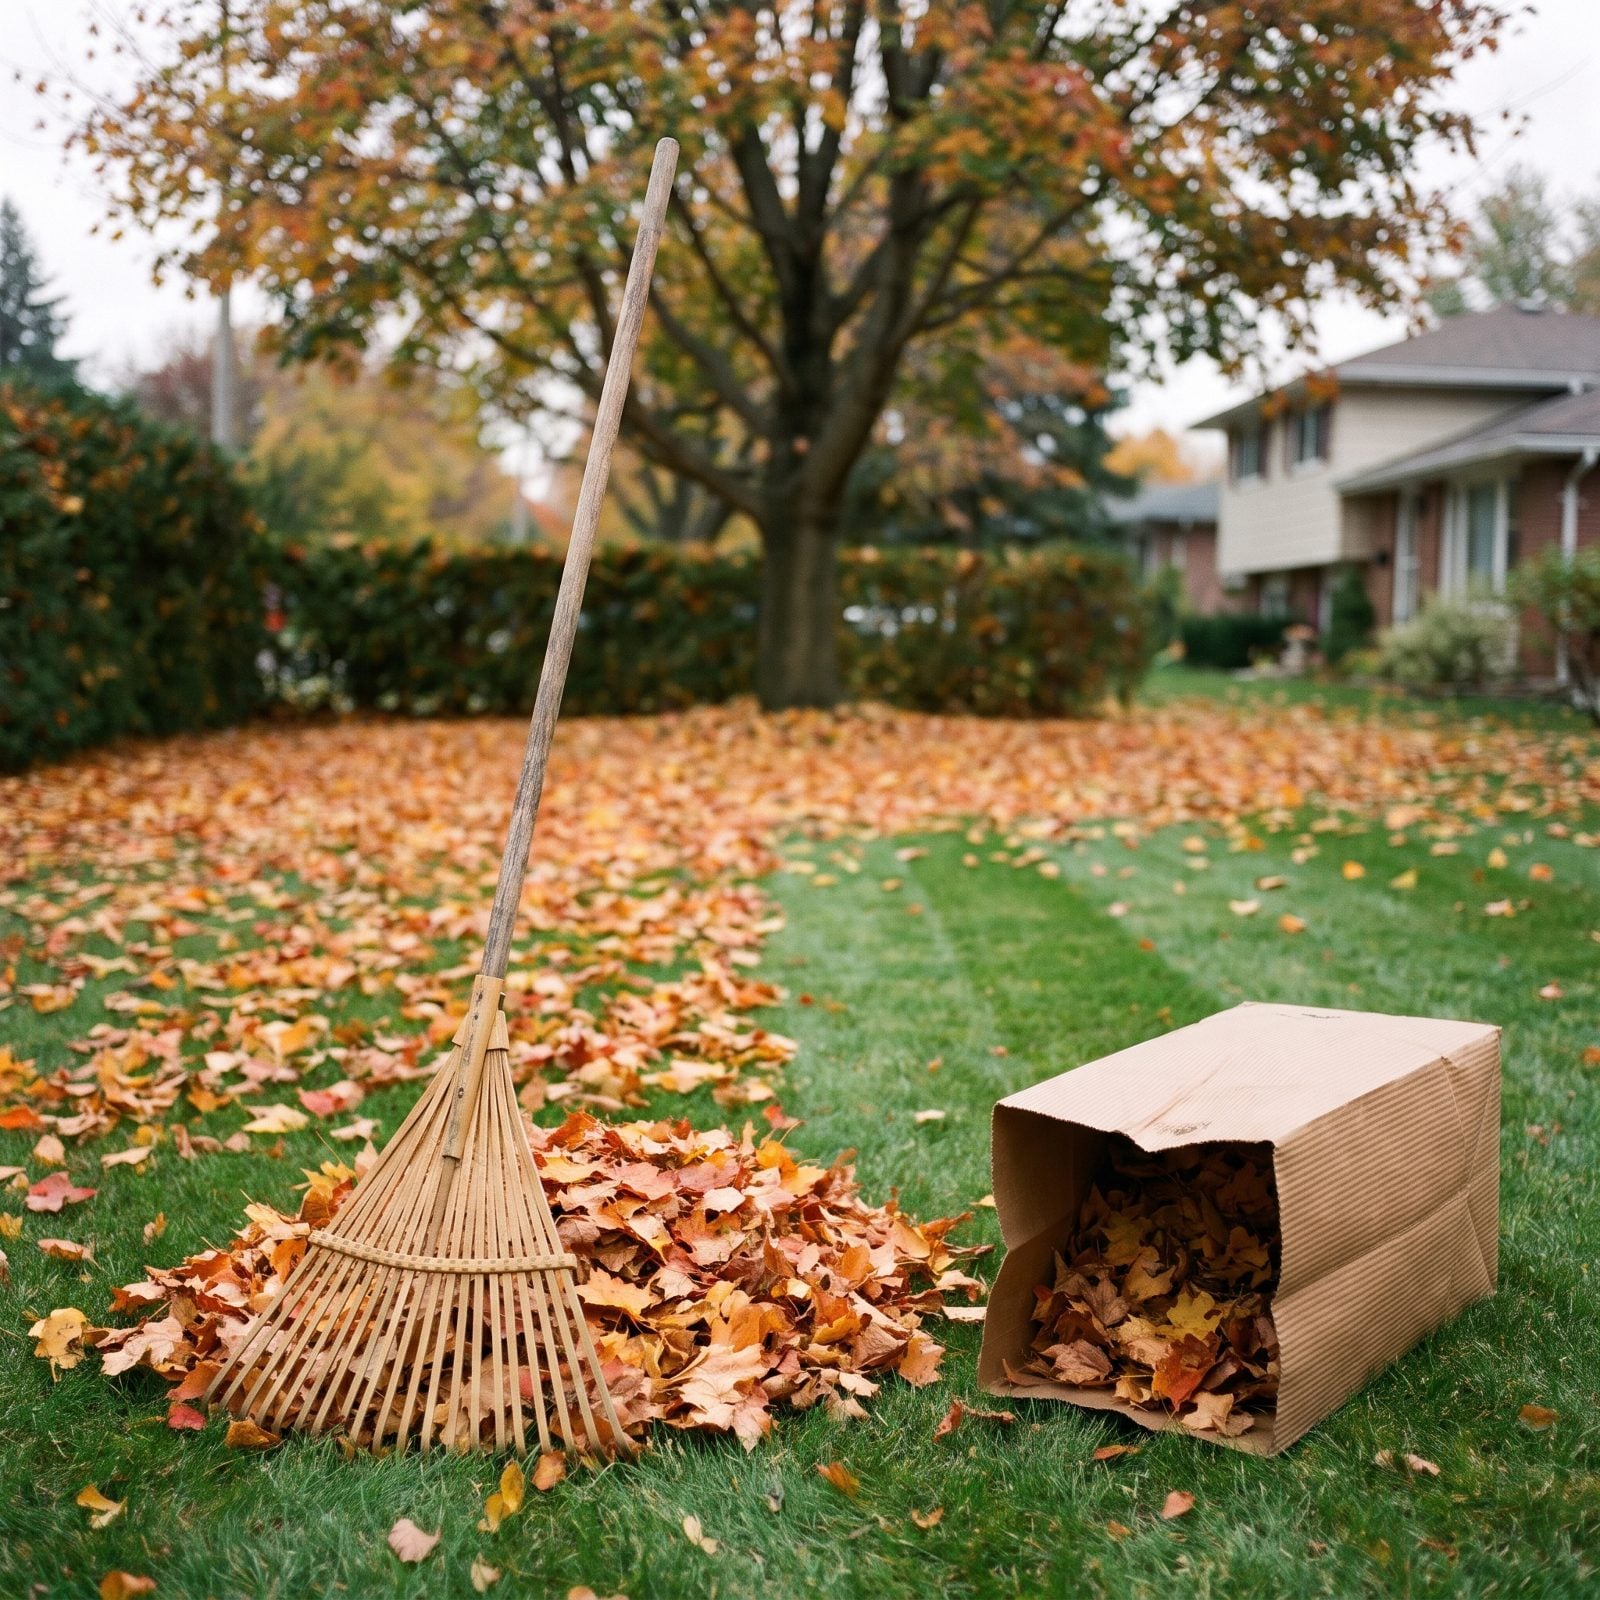
A thick leaf mat left on turf is a wet blanket. It blocks light, traps moisture against the crowns, and by spring you’ve got matted brown patches and snow mold where a lawn used to be.
Don’t wait for every last leaf to drop before you start. Rake in stages through October and November so the cover never piles deep enough to smother. The test is simple: if you can still see grass blades poking through, the lawn can breathe and you can wait a few more days. Once the green vanishes, it’s time.
I used to leave it all for one heroic weekend. My back and my patchy spring lawn both told me that was a mistake.
14. Shred Leaves for Bed Mulch
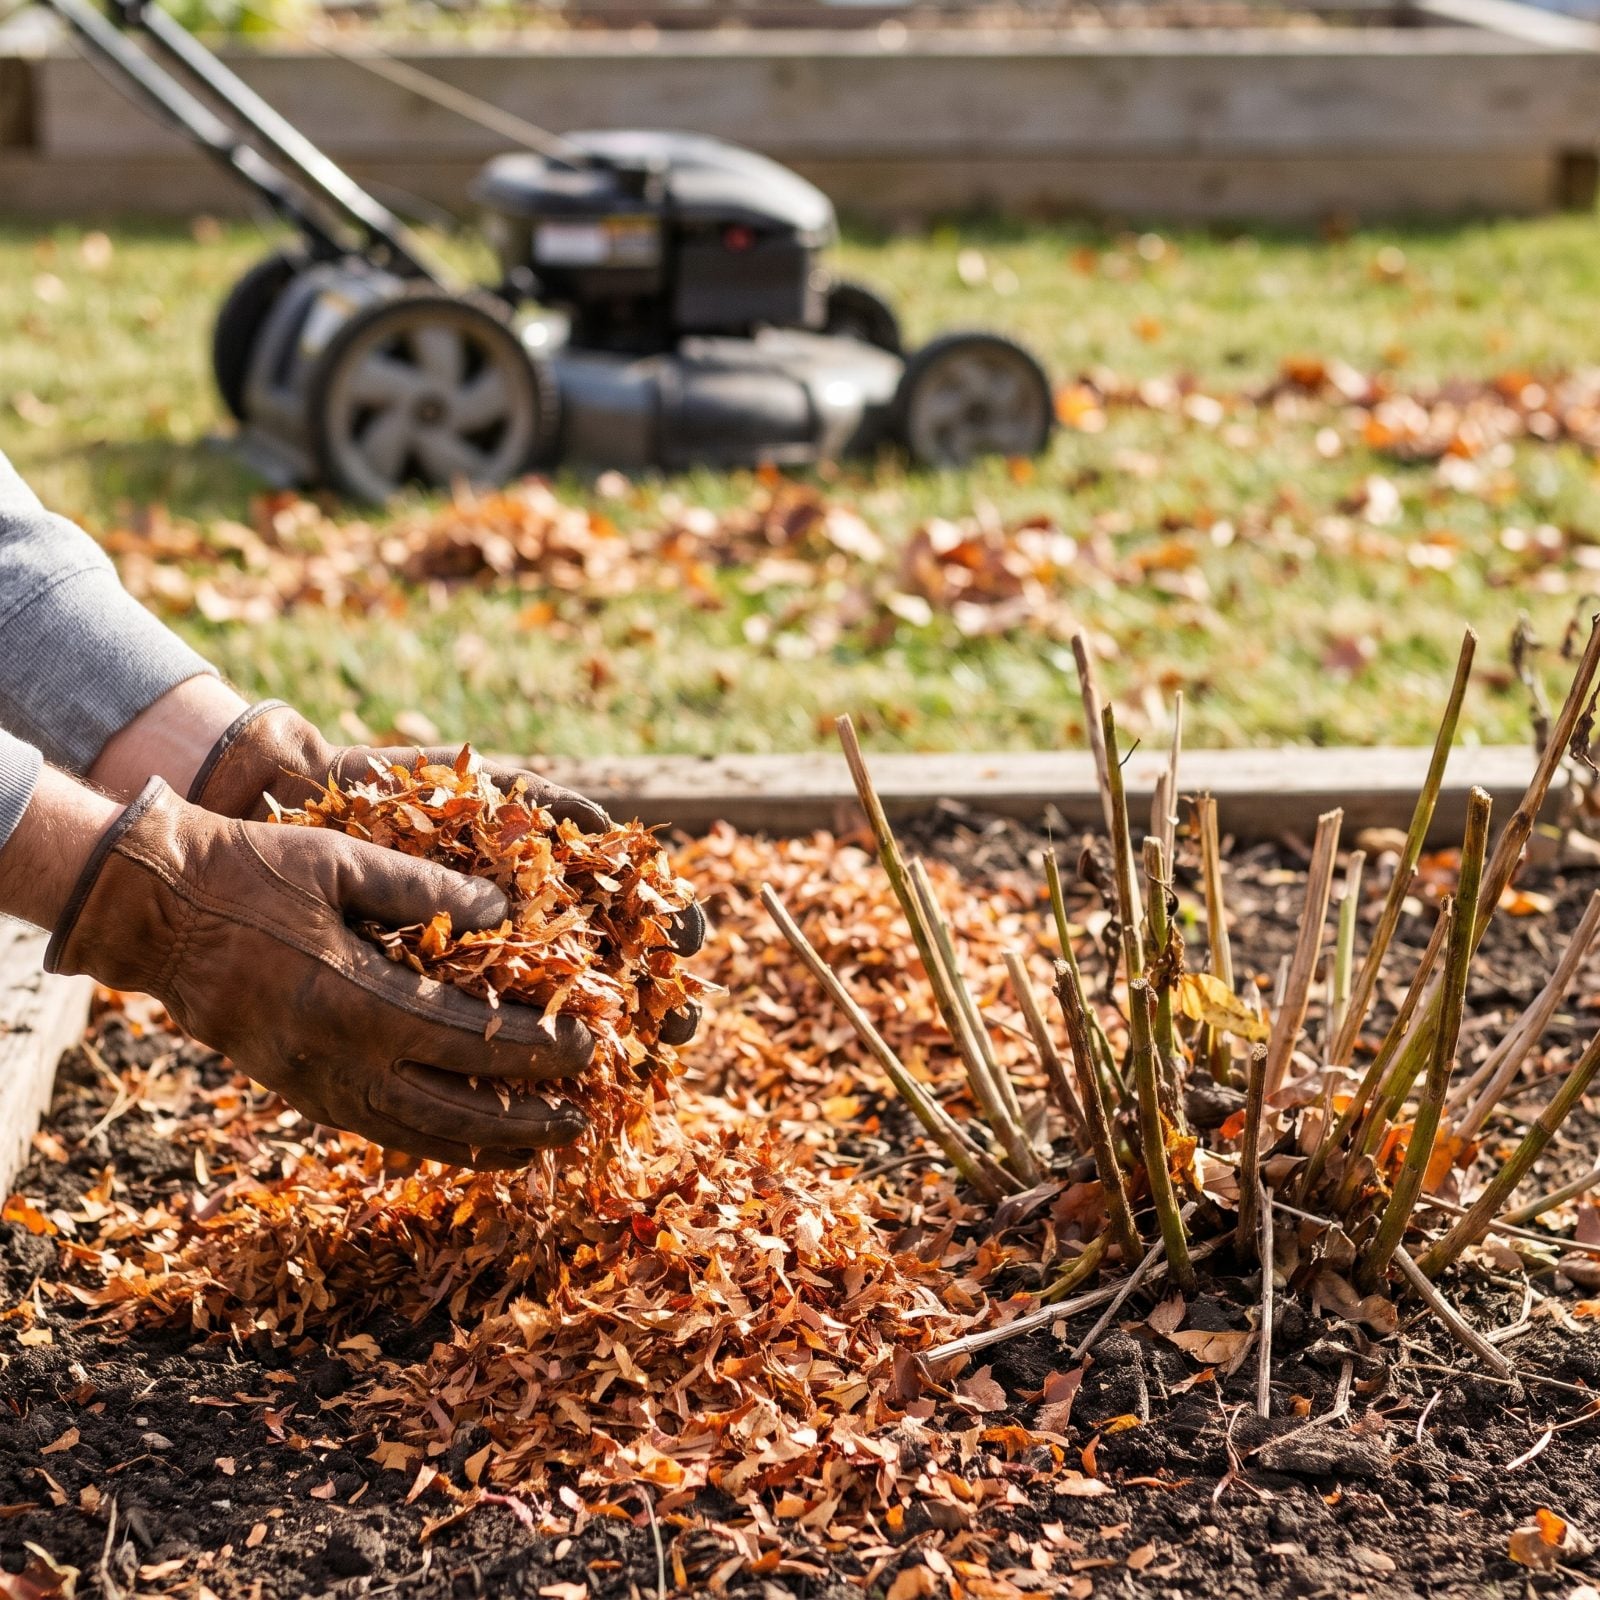
Don’t bag all those leaves. The good ones are free mulch. Run a mower over a dry leaf layer and it chops them into dime-sized pieces that break down fast and feed the soil. Whole leaves mat and smother. Shredded leaves crumble and insulate.
Rake or blow the leaves into a loose row, run the mower over them a couple of passes, then scoop the shreds onto perennial beds and around shrubs at about two inches deep. Oak and beech leaves shred best because they’re stiff. Big floppy maple and sycamore leaves are the ones that mat if you skip this step, so those especially earn a trip under the blade.
13. Make the Final Lawn Cut
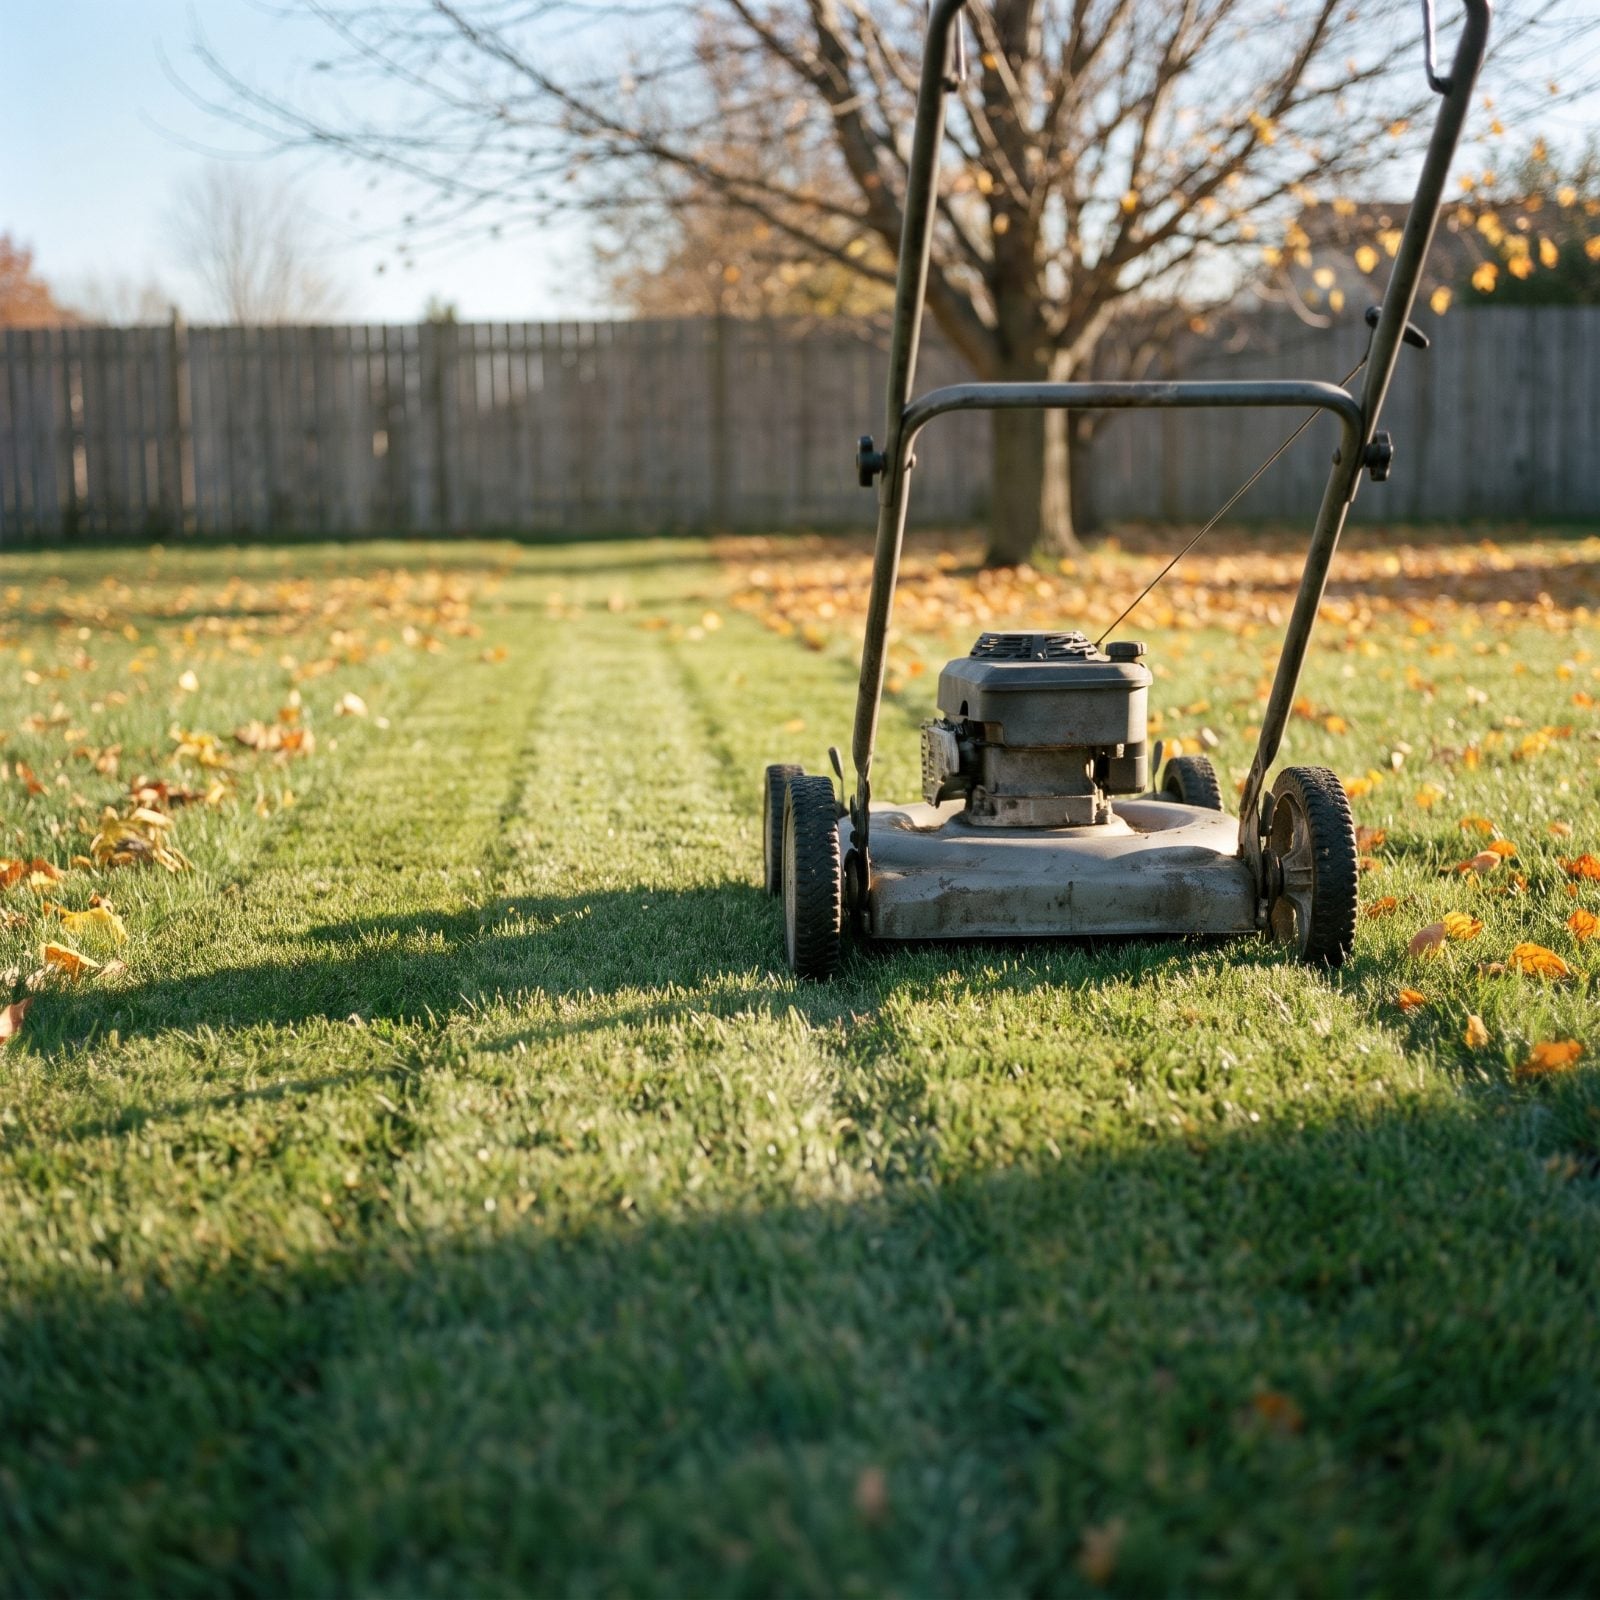
The last cut of the year should run shorter than the rest, and most people never touch the deck. Tall grass heading into winter flops over, mats under snow, and grows the gray fuzzy mold that kills patches by spring. Scalp it instead and you expose the crowns to cold. You want the middle ground.
Drop your mower height for the final pass or two and bring cool-season grass down to around two to two and a half inches. Do it once the grass has stopped actively growing but before the ground freezes. Catch the clippings on this one rather than leaving them, since there’s no growing season left to break them down.
Clean the mower deck afterward. Wet grass packed under there all winter rusts the metal and jams the blade, which you’ll discover at the worst possible moment next April.
12. Clean Leaves From Gutters
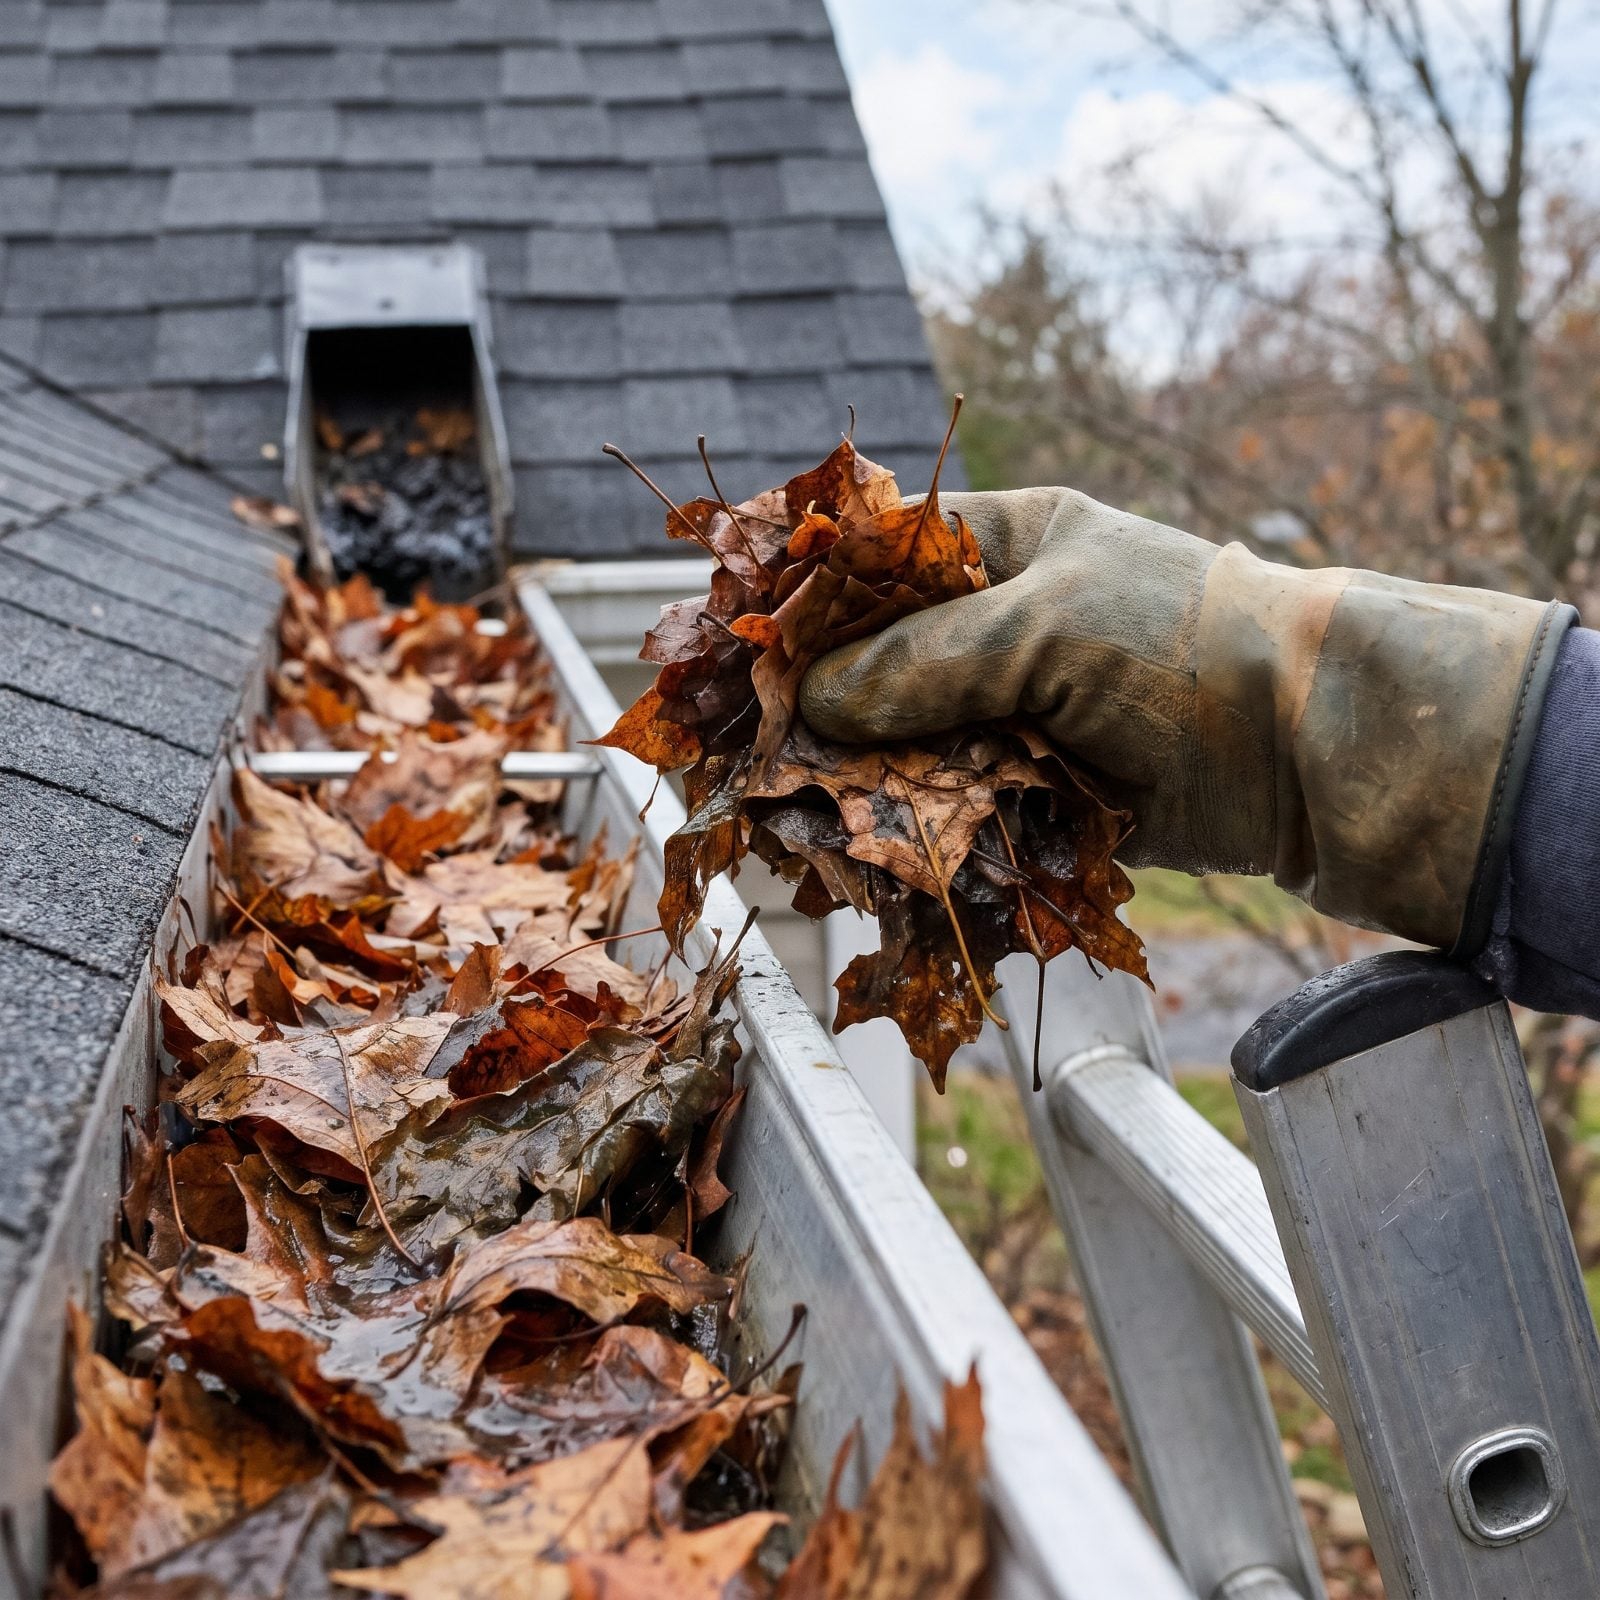
Clogged gutters are a drainage problem wearing a roof problem’s costume. Water that can’t run off backs up under shingles, spills over the edge, and freezes into ice dams that pry the whole gutter loose. By then you’re looking at a repair bill, not a chore.
Wait until most leaves are actually down before you clean, usually late in the season, or you’ll be back up the ladder in two weeks. Scoop the gutters out, then run a hose into each length and watch the downspouts. If water pools instead of draining, you’ve got a clog lower down that scooping won’t reach.
11. Clear Yard Storm Drains
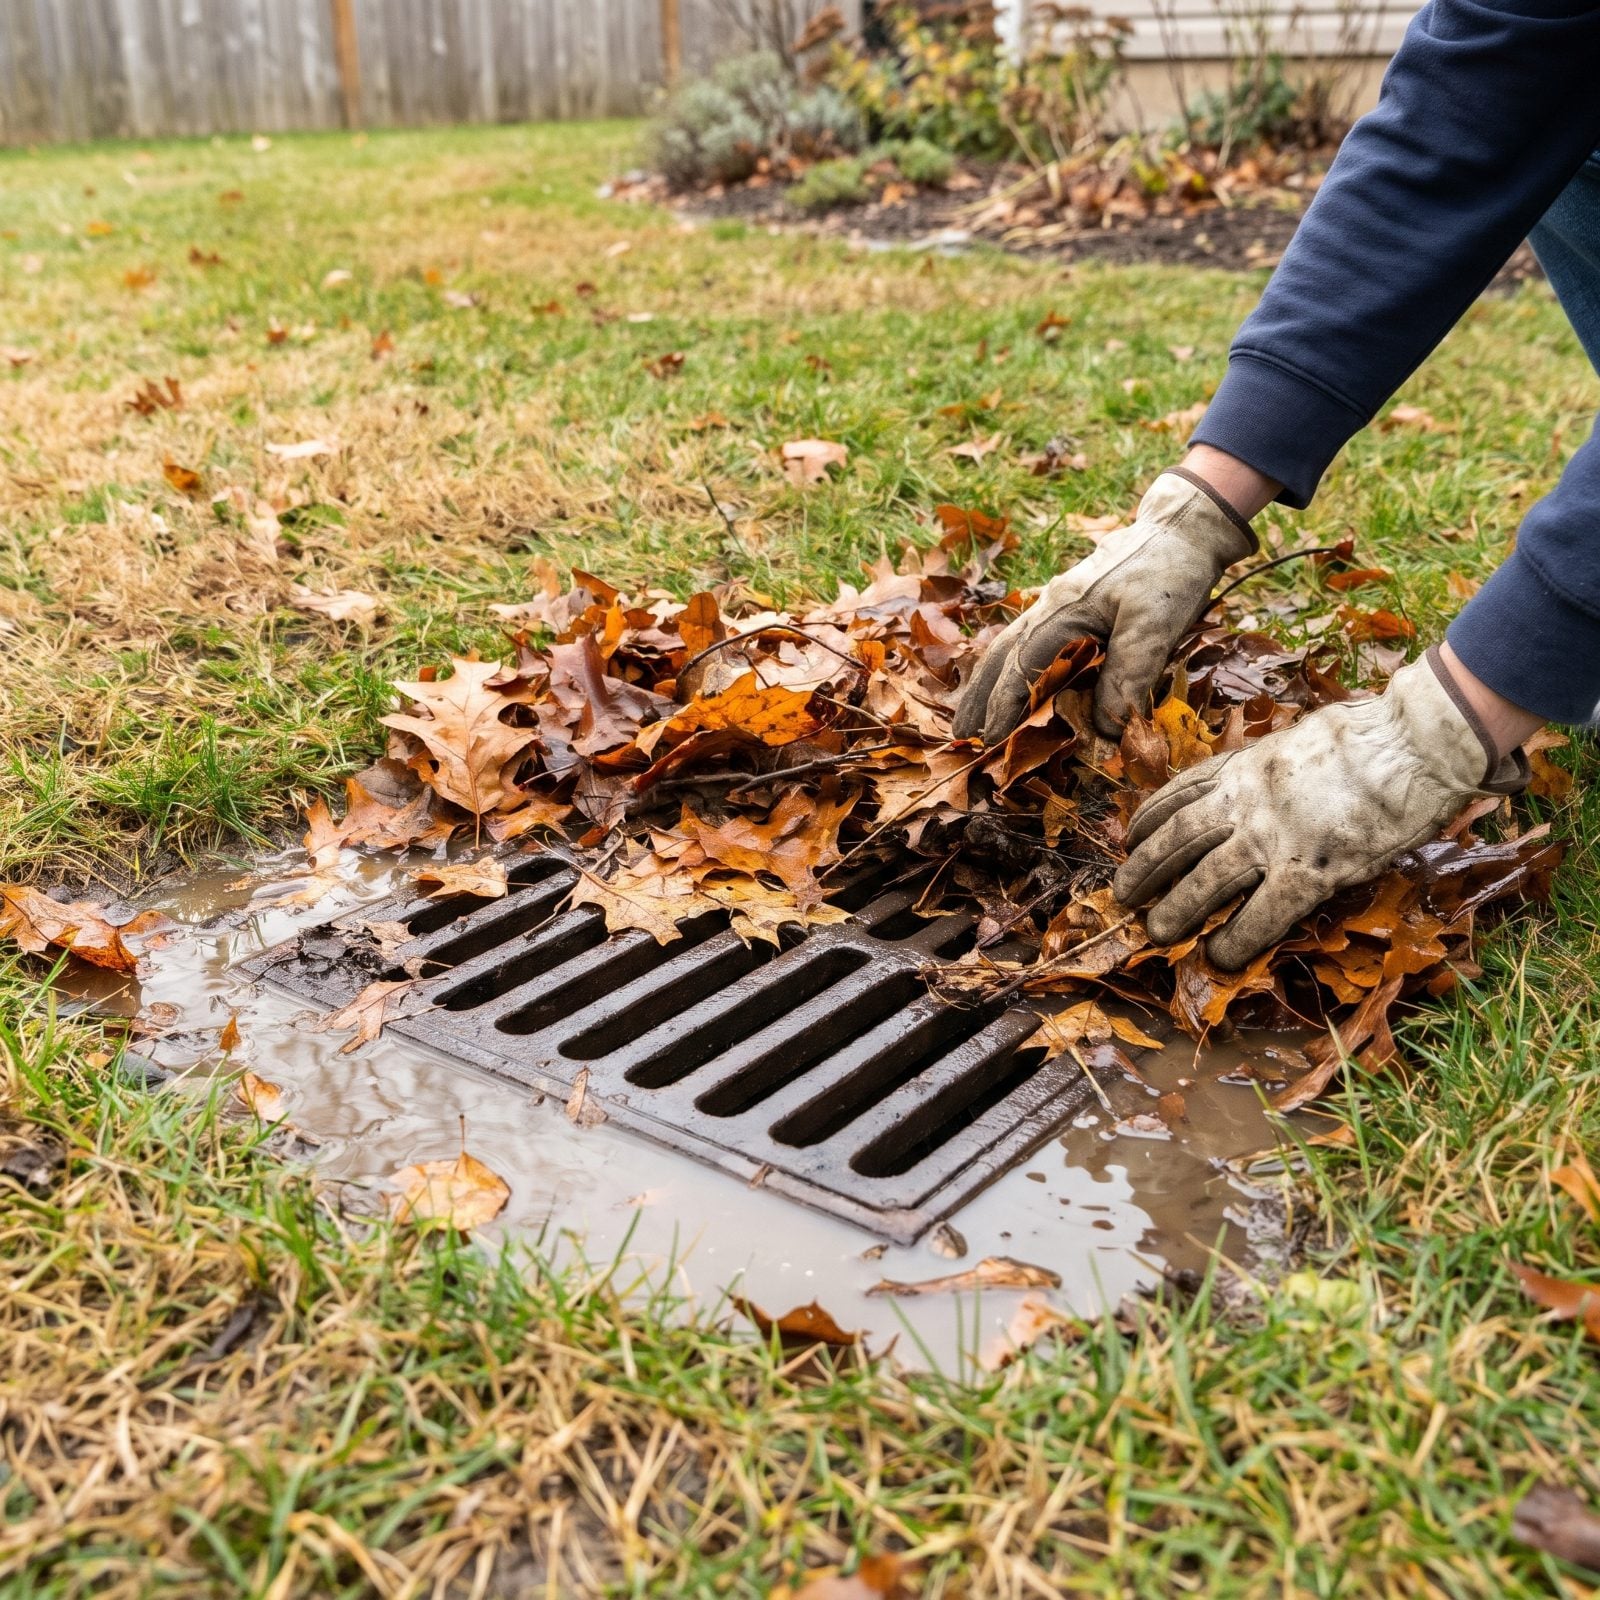
That little grate in the low corner of the yard, the one you forget exists, decides whether water drains away or sits against your foundation. Leaves and silt pack over it quietly, and the first big fall rain announces the clog by flooding the exact spot you didn’t want flooded.
Pull the leaf mat off the grate and lift it if you can to clear what’s caught underneath. Check the French drains and channel drains too, anything that moves water away from the house. A clear path matters most right before the ground freezes, because a clogged drain plus a freeze means ice exactly where you don’t want it, usually across a walkway you have to use every morning.
10. Drain In-Ground Irrigation
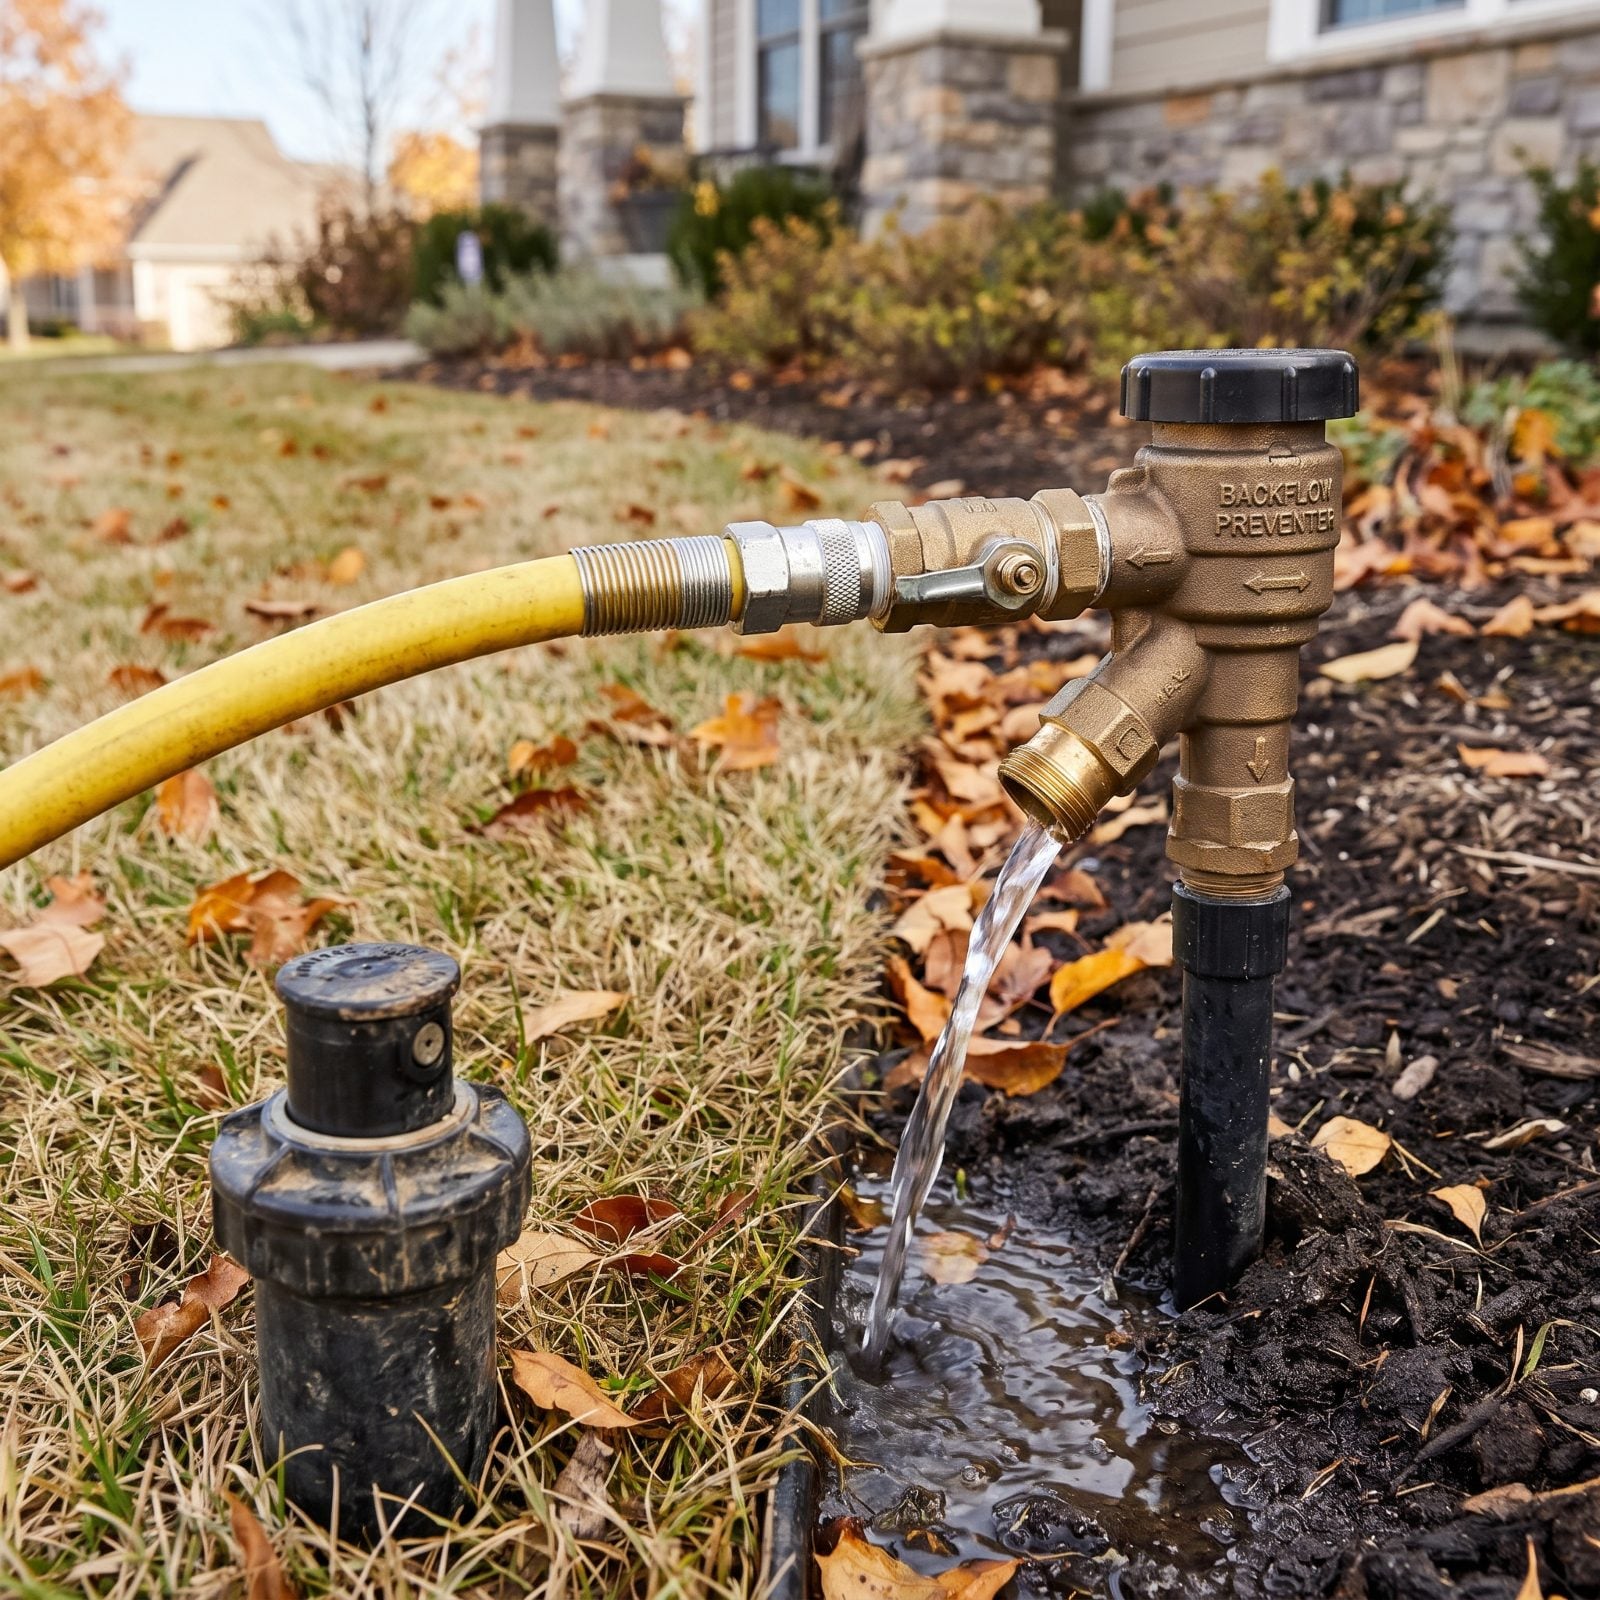
Water left in irrigation lines over winter freezes, expands, and cracks PVC, backflow valves, and sprinkler heads. You won’t know until you turn the system on in spring and watch a geyser erupt from the middle of the lawn. A cracked backflow preventer alone can run into real money.
Shut off the water supply to the system, then drain the lines. Most setups need the lines blown out with compressed air to clear water that won’t gravity-drain, and this is the one fall task where I’ll just say hire a pro if you’re unsure. Too much air pressure wrecks the heads; too little leaves water behind.
Insulate the above-ground backflow assembly while you’re there. It’s the part most exposed to cold, and the most expensive to replace.
9. Disconnect and Coil Hoses
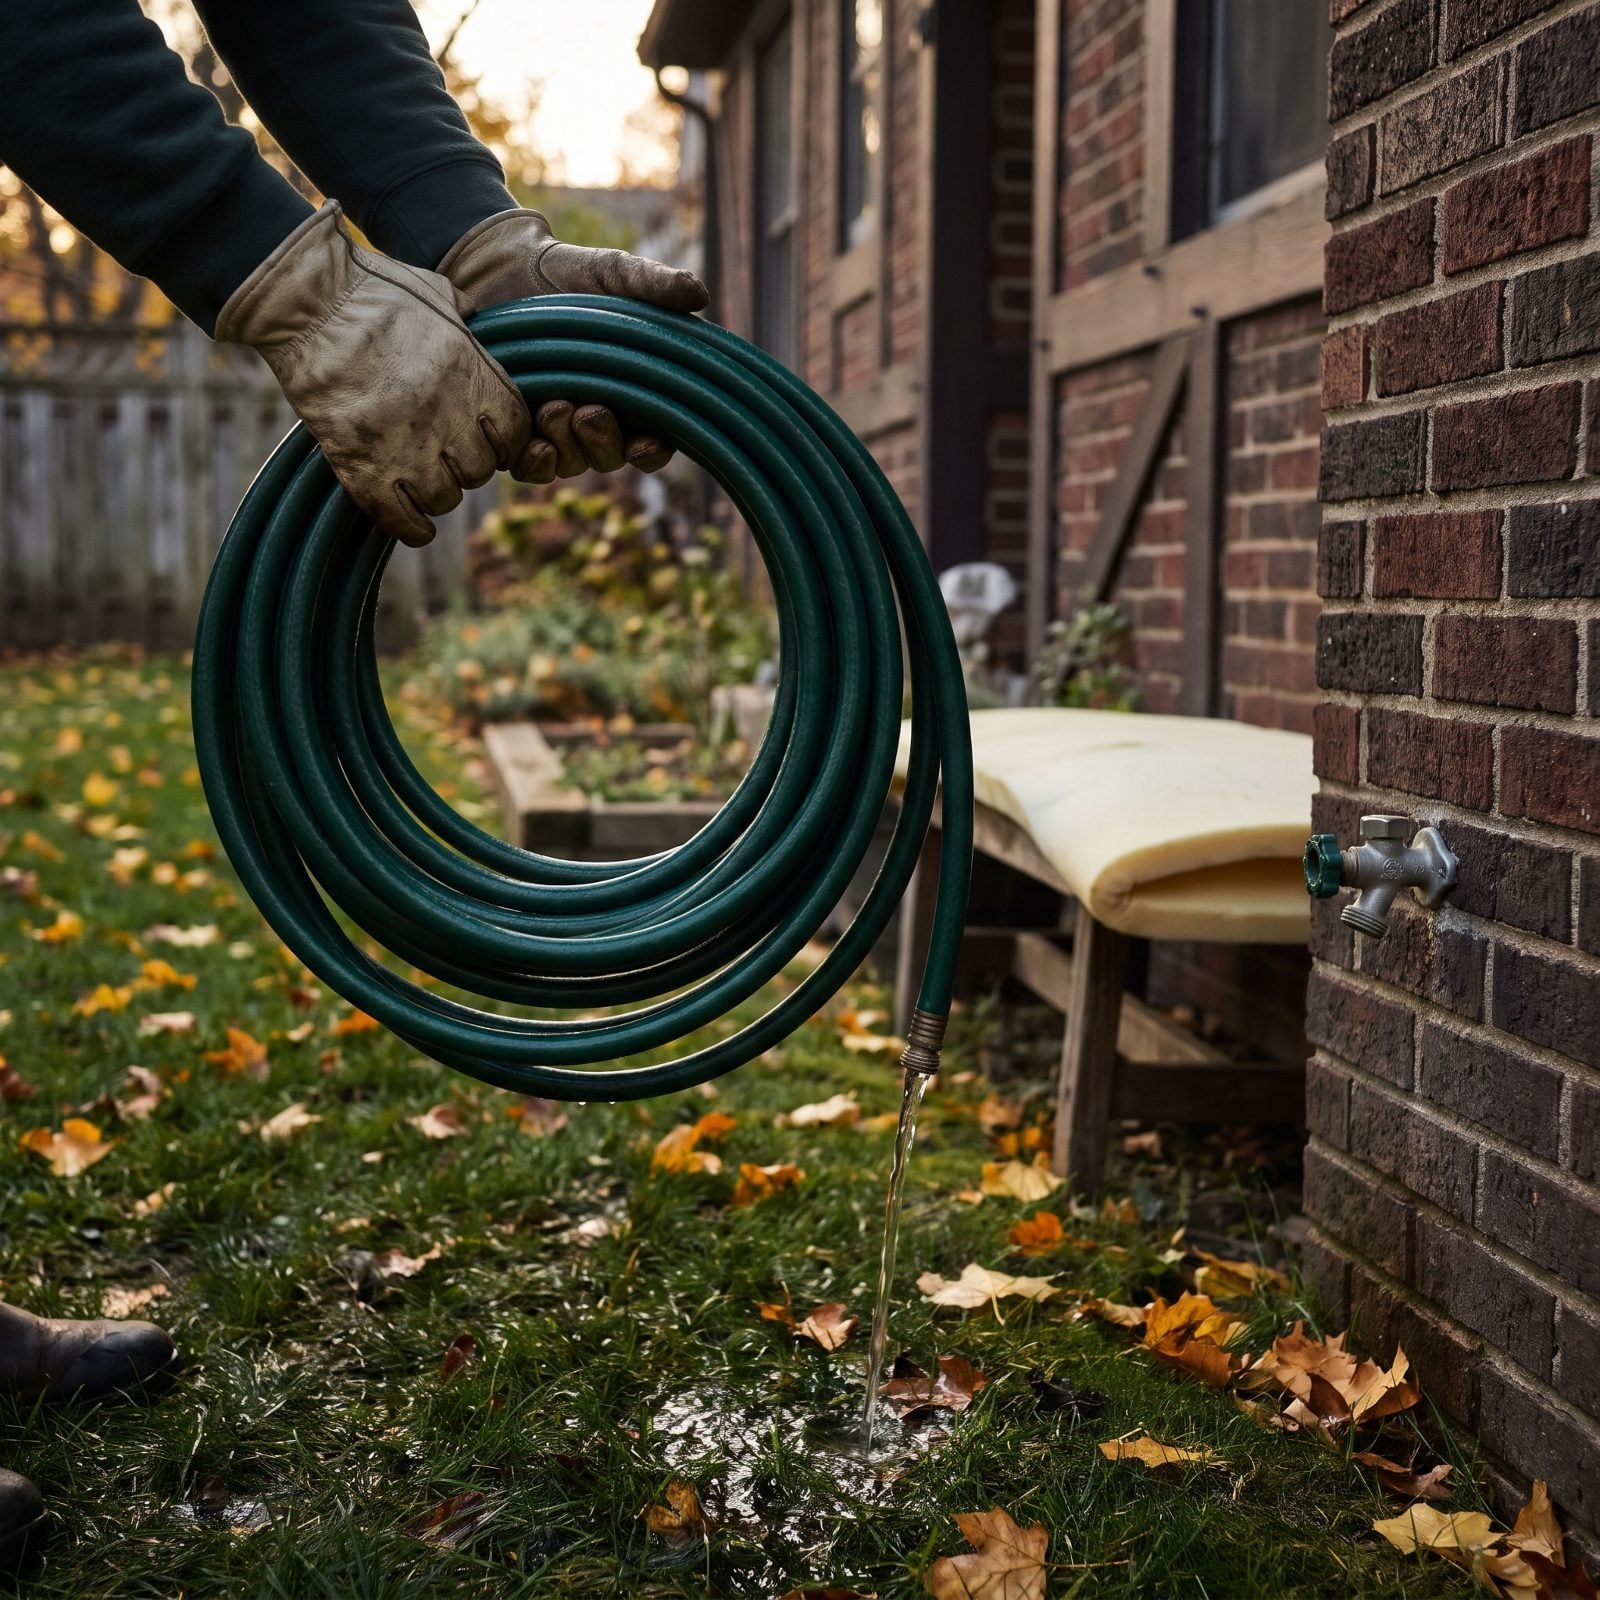
Leave a hose connected over winter and water sits trapped in the faucet, freezes, and splits the pipe inside the wall. Even a frost-free spigot can’t drain properly with a hose screwed on, which is the detail almost everyone misses. The hose holds water in the one spot that’s supposed to empty.
Disconnect every hose, drain it by walking one end over your shoulder to let gravity empty it, then coil it loosely and tuck it somewhere it won’t freeze stiff and crack. Slip an insulating foam cover over each exterior spigot while you’re at it.
Store hoses in big relaxed loops, not tight kinks. A hose folded hard and left all winter develops permanent crimps that block flow, and you’ll be shopping for a new one come May.
8. Drain Outdoor Shower Plumbing
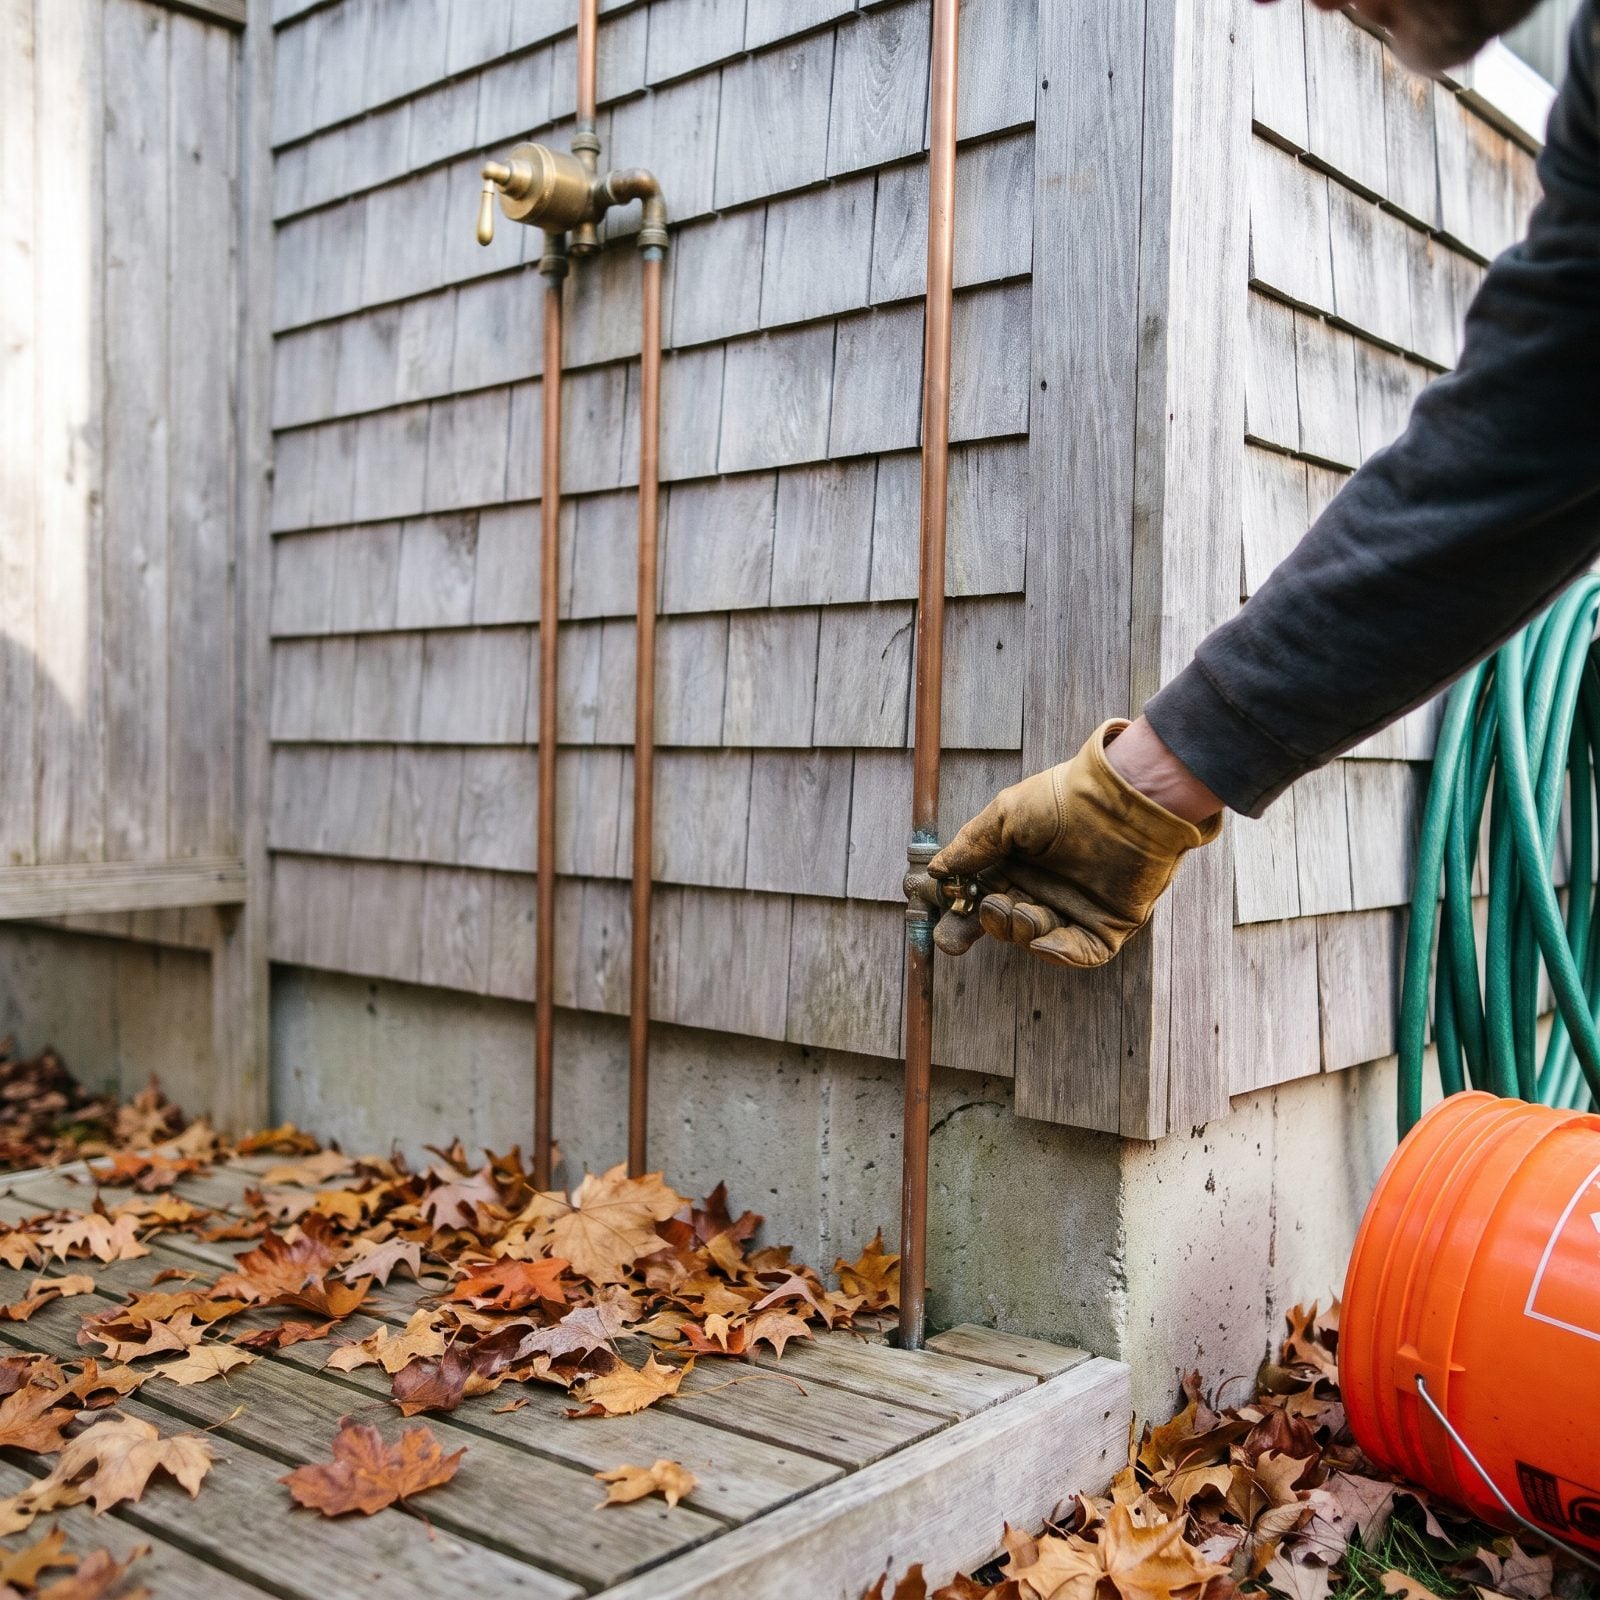
Trapped water in an outdoor shower line is the quiet saboteur of fall. Water expands when it freezes, and a single cup left in a horizontal run of copper can split a pipe you won’t discover until spring, when you turn it on and soak the siding.
Shut the supply at the indoor valve first. Then open the showerhead and every faucet on the line to break the vacuum, and find the low-point drain valve near the base. Open it and let gravity do the work. Stubborn sections respond to a shop vac on reverse or a few short bursts of compressed air, if you’ve got the right fitting.
7. Empty and Store Rain Barrels
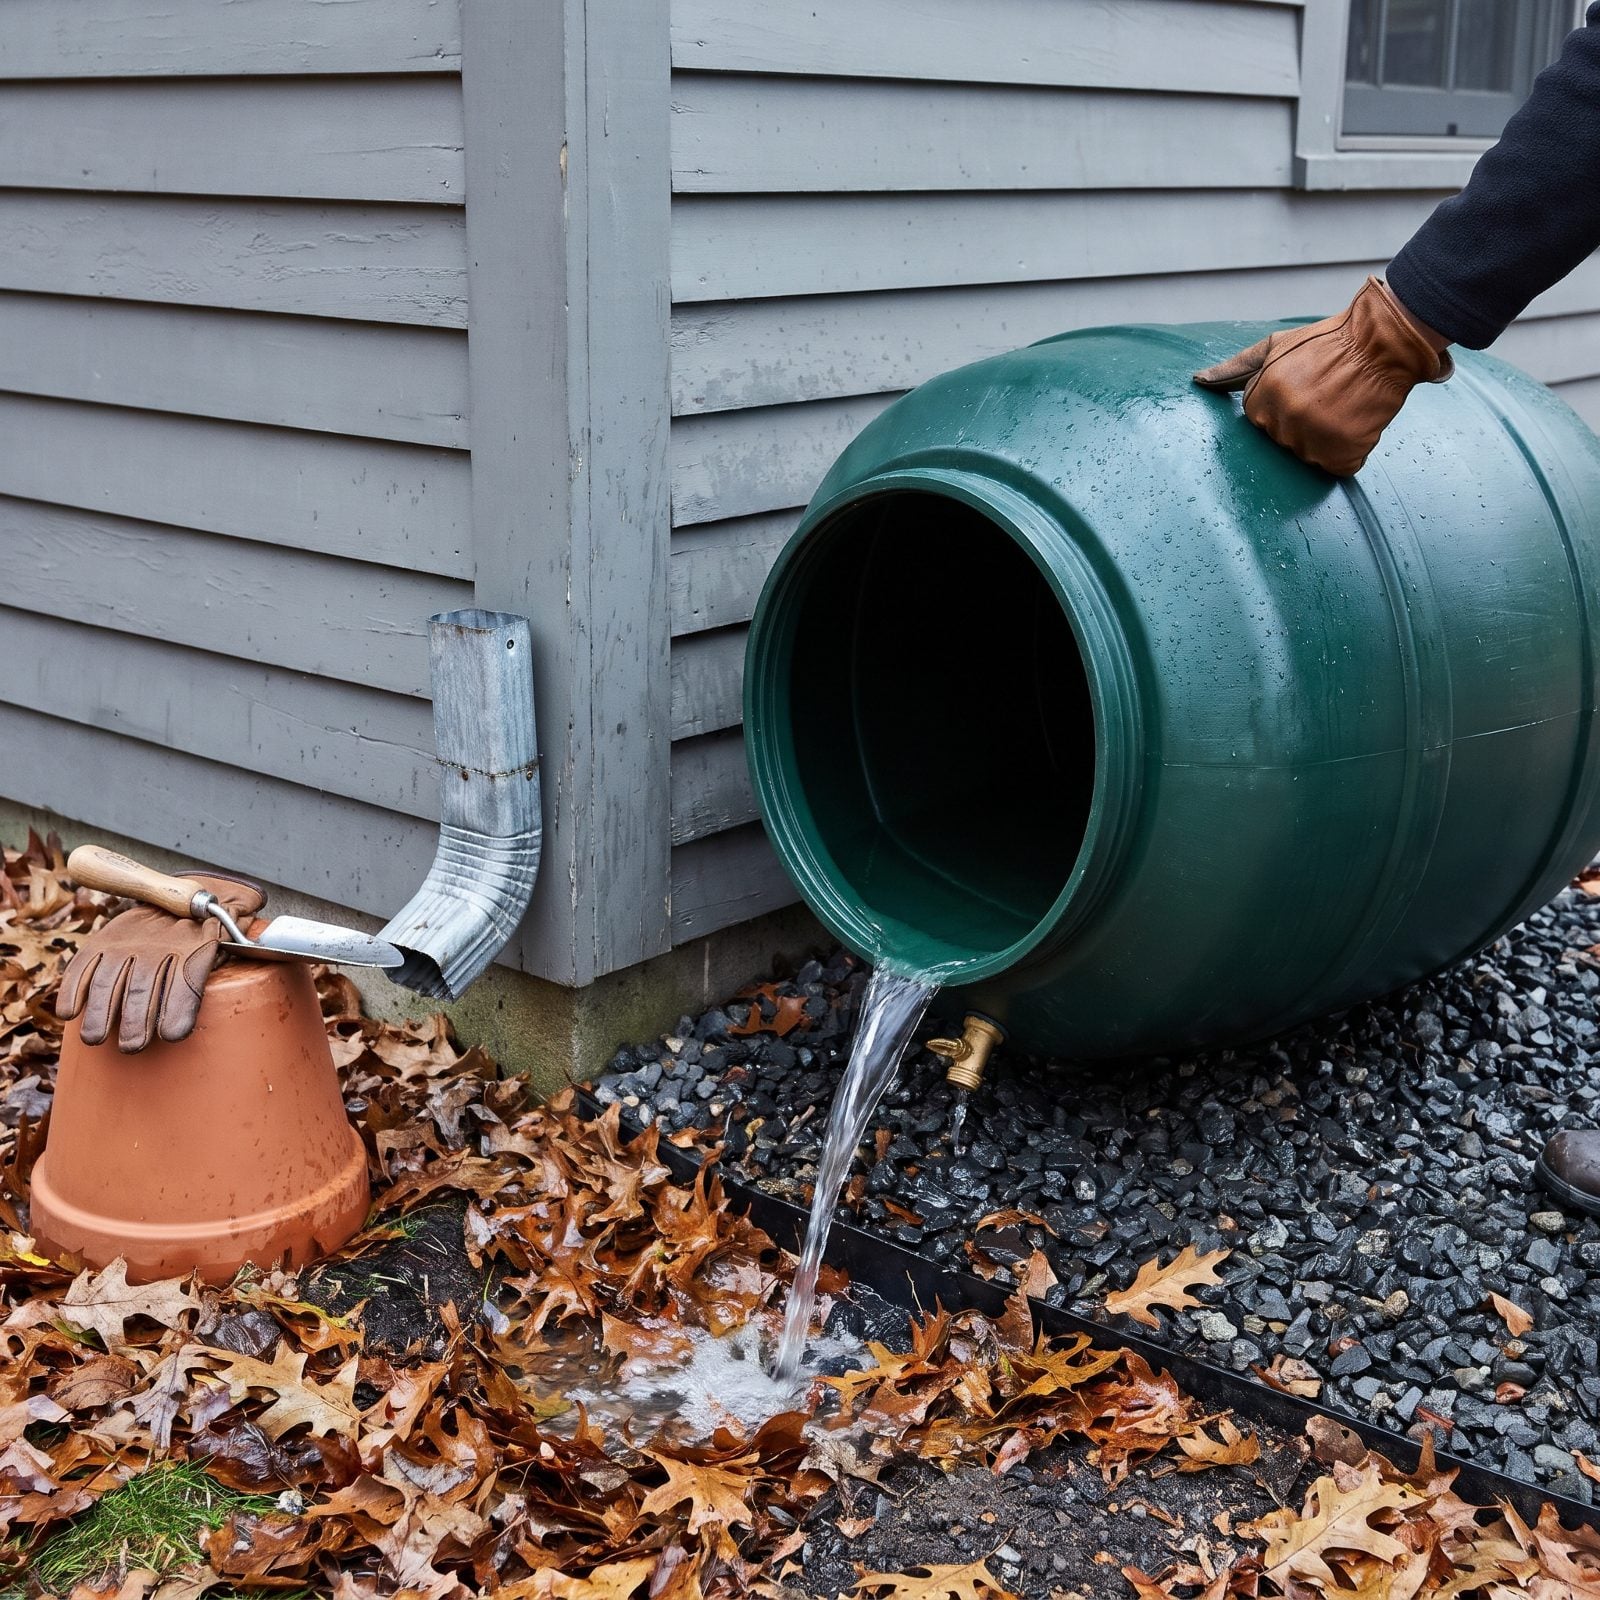
A full rain barrel holds enough water to become a several-hundred-pound ice block, and that block can crack the barrel wall or the base it sits on. Empty it completely before the first hard freeze.
Open the spigot and let it run into a bed that could use the drink. Tip the barrel to clear the inch or two below the outlet, then rinse out the sludge and leaf gunk at the bottom while you’re down there. If the downspout is still feeding into the top, you’re refilling the barrel as fast as you drain it, so swing it off the barrel first and back to normal winter flow so meltwater has somewhere to go.
Store it upside down or indoors if you can. I learned this the hard way, after one cracked barrel and a spring puddle where my herbs used to be.
6. Winterize Decorative Fountains
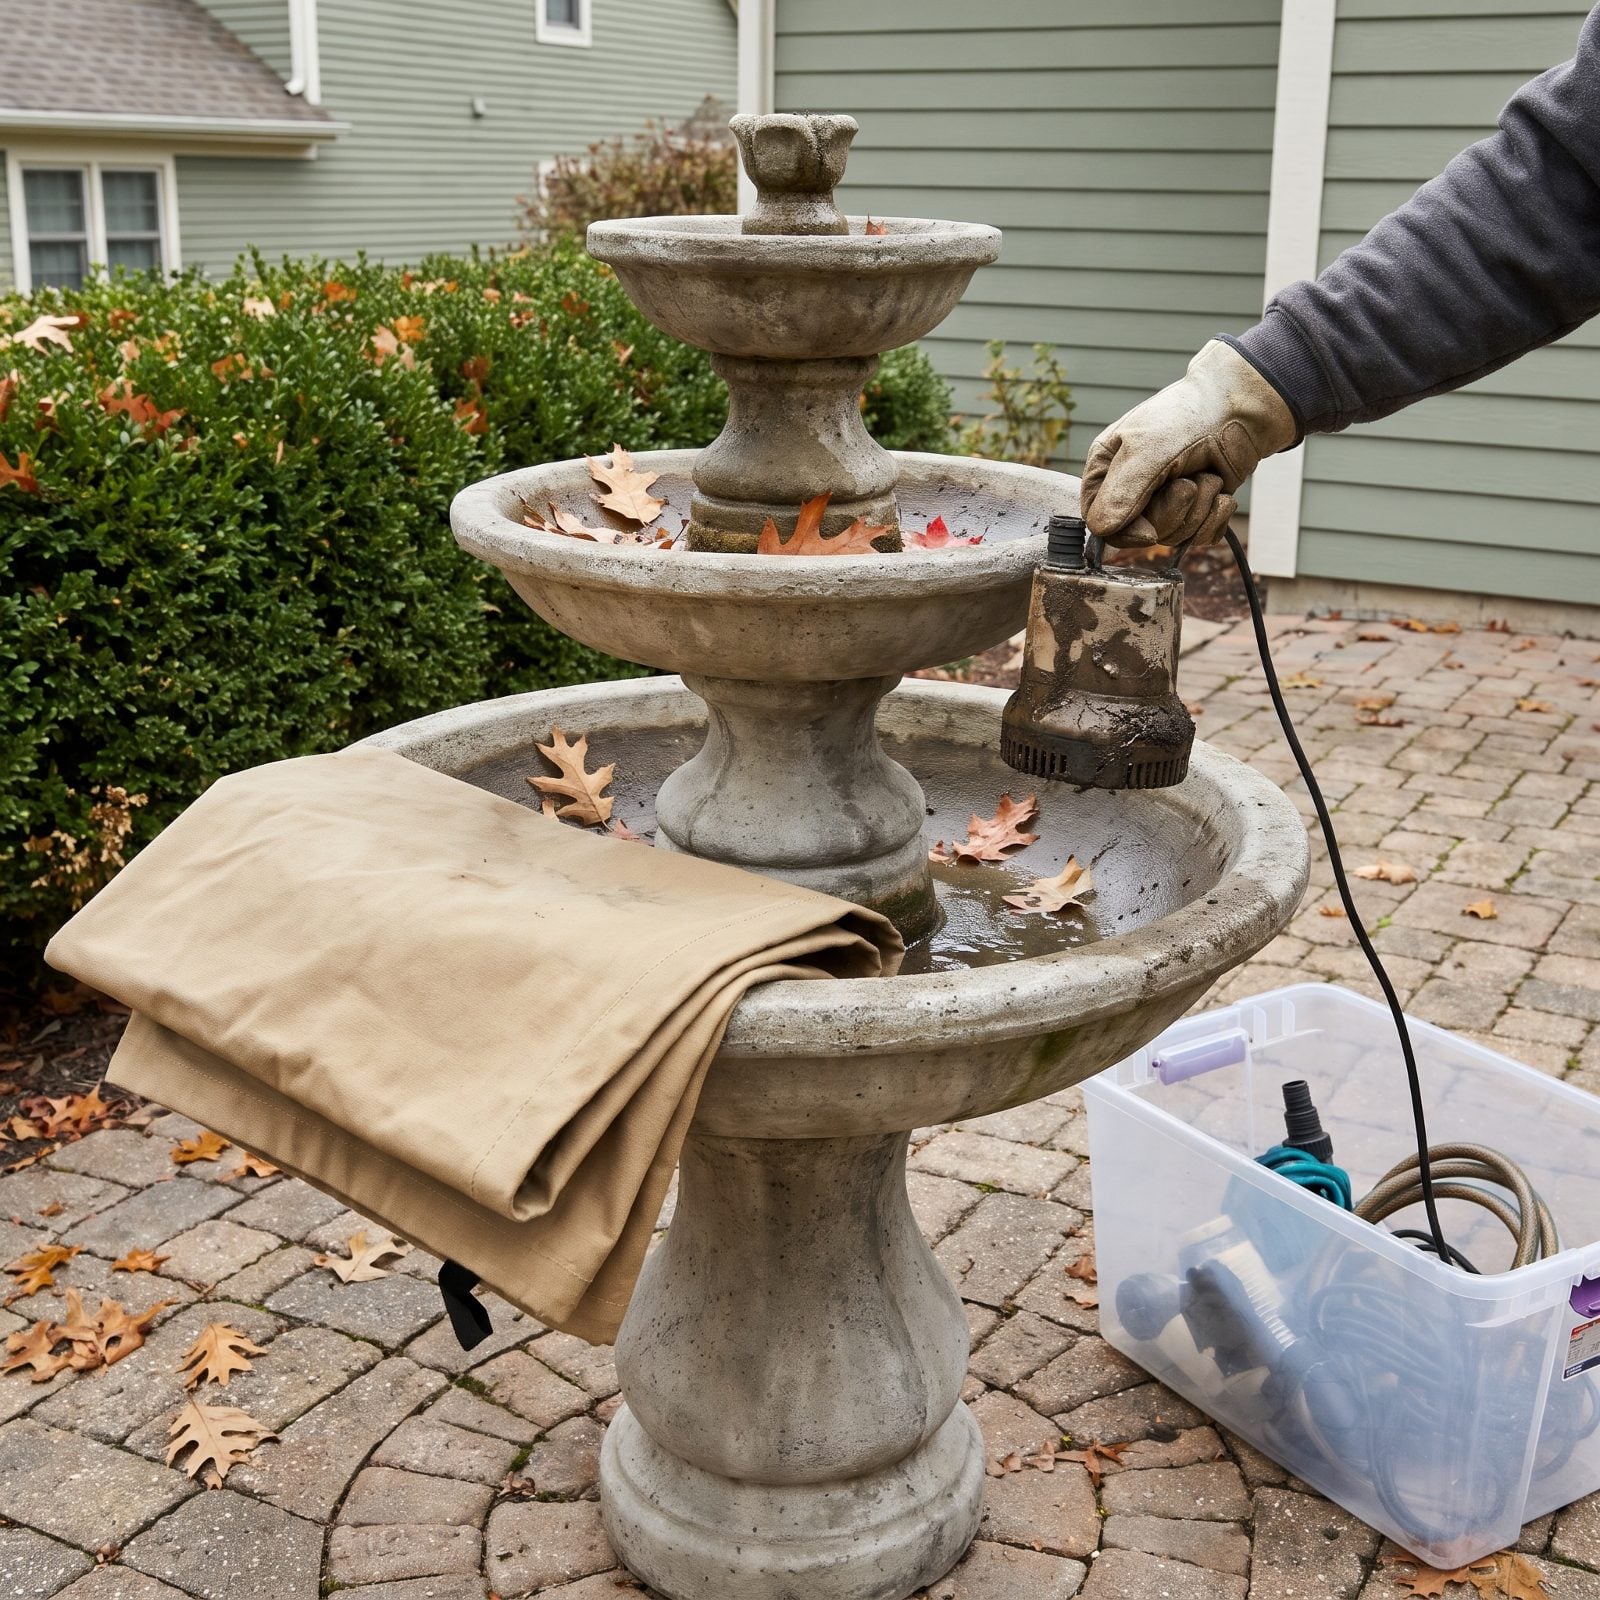
Concrete and standing water are a bad winter marriage. Water seeps into the porous surface of a fountain basin, freezes, expands, and flakes the concrete apart one layer at a time. Come March you’ve got a crumbling rim and a pump that drowned in its own ice.
Drain every bowl and basin. Pull the submersible pump, rinse it, and let it dry, and pack it in a clear plastic storage bin indoors along with its hoses and cords. Sponge out the low spots the drain can’t reach. Then cover the fountain with a breathable waterproof tarp — not plastic sheeting, which traps condensation against the stone.
5. Drain Pressure-Washer Pump
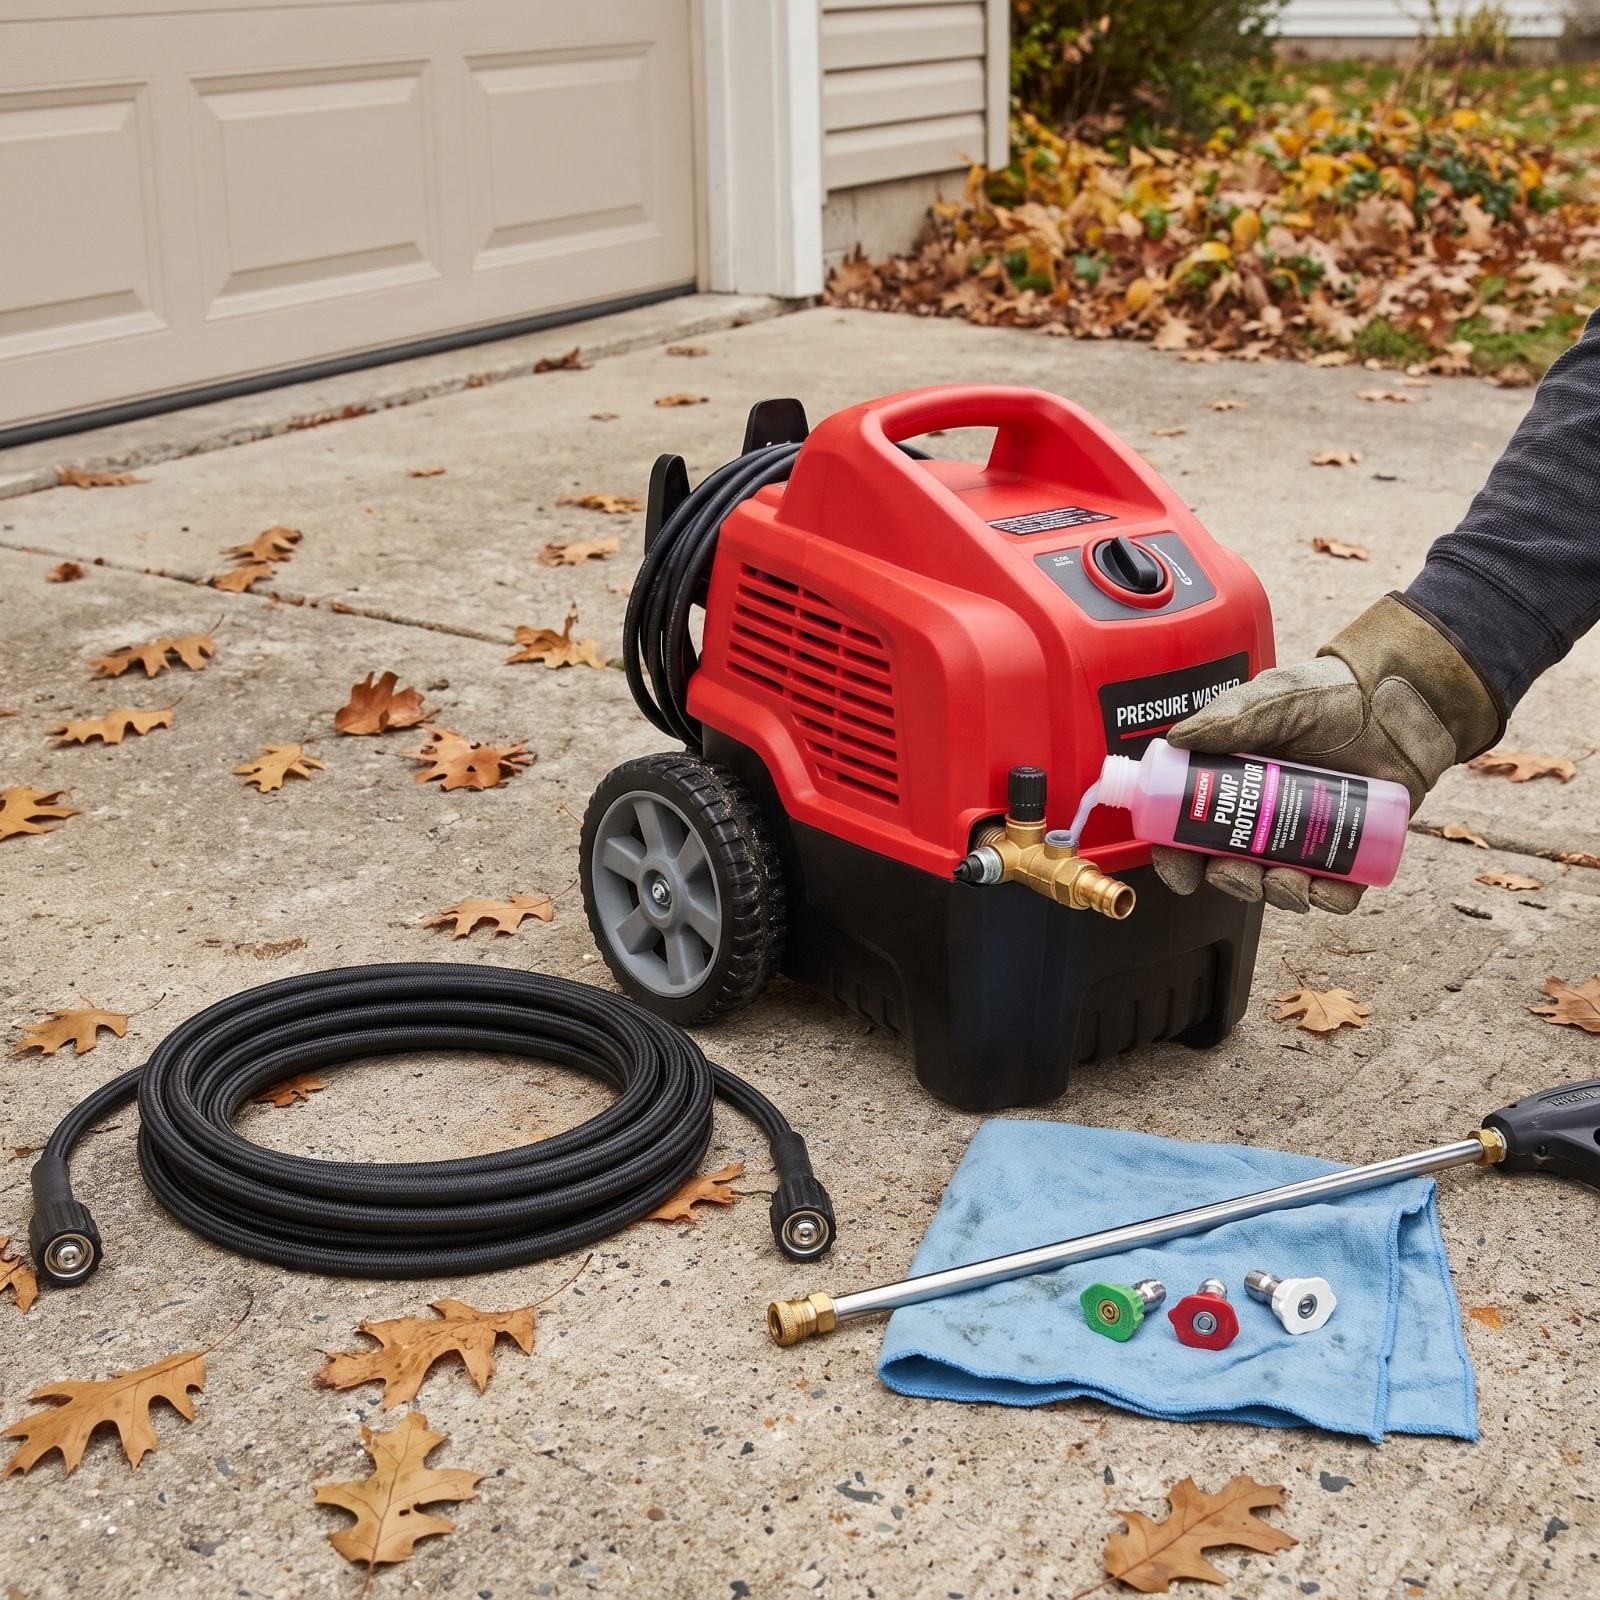
The pump is the heart of a pressure washer, and it’s full of water you can’t see. Let that water freeze and the housing cracks — which almost always costs more than the whole machine is worth. A few minutes now saves the unit.
Run the machine briefly to purge, then disconnect the hose and squeeze the trigger to release pressure. Pour pump antifreeze — the pink non-toxic kind rated for plumbing — into the water inlet and crank the motor a second or two until it shows at the outlet. That coats the internal seals and pistons so nothing dry-rots or freezes.
Drain the fuel or stabilize it if it’s gas-powered, and store it somewhere above freezing if you can swing it.
4. Position Frost-Cloth Supports
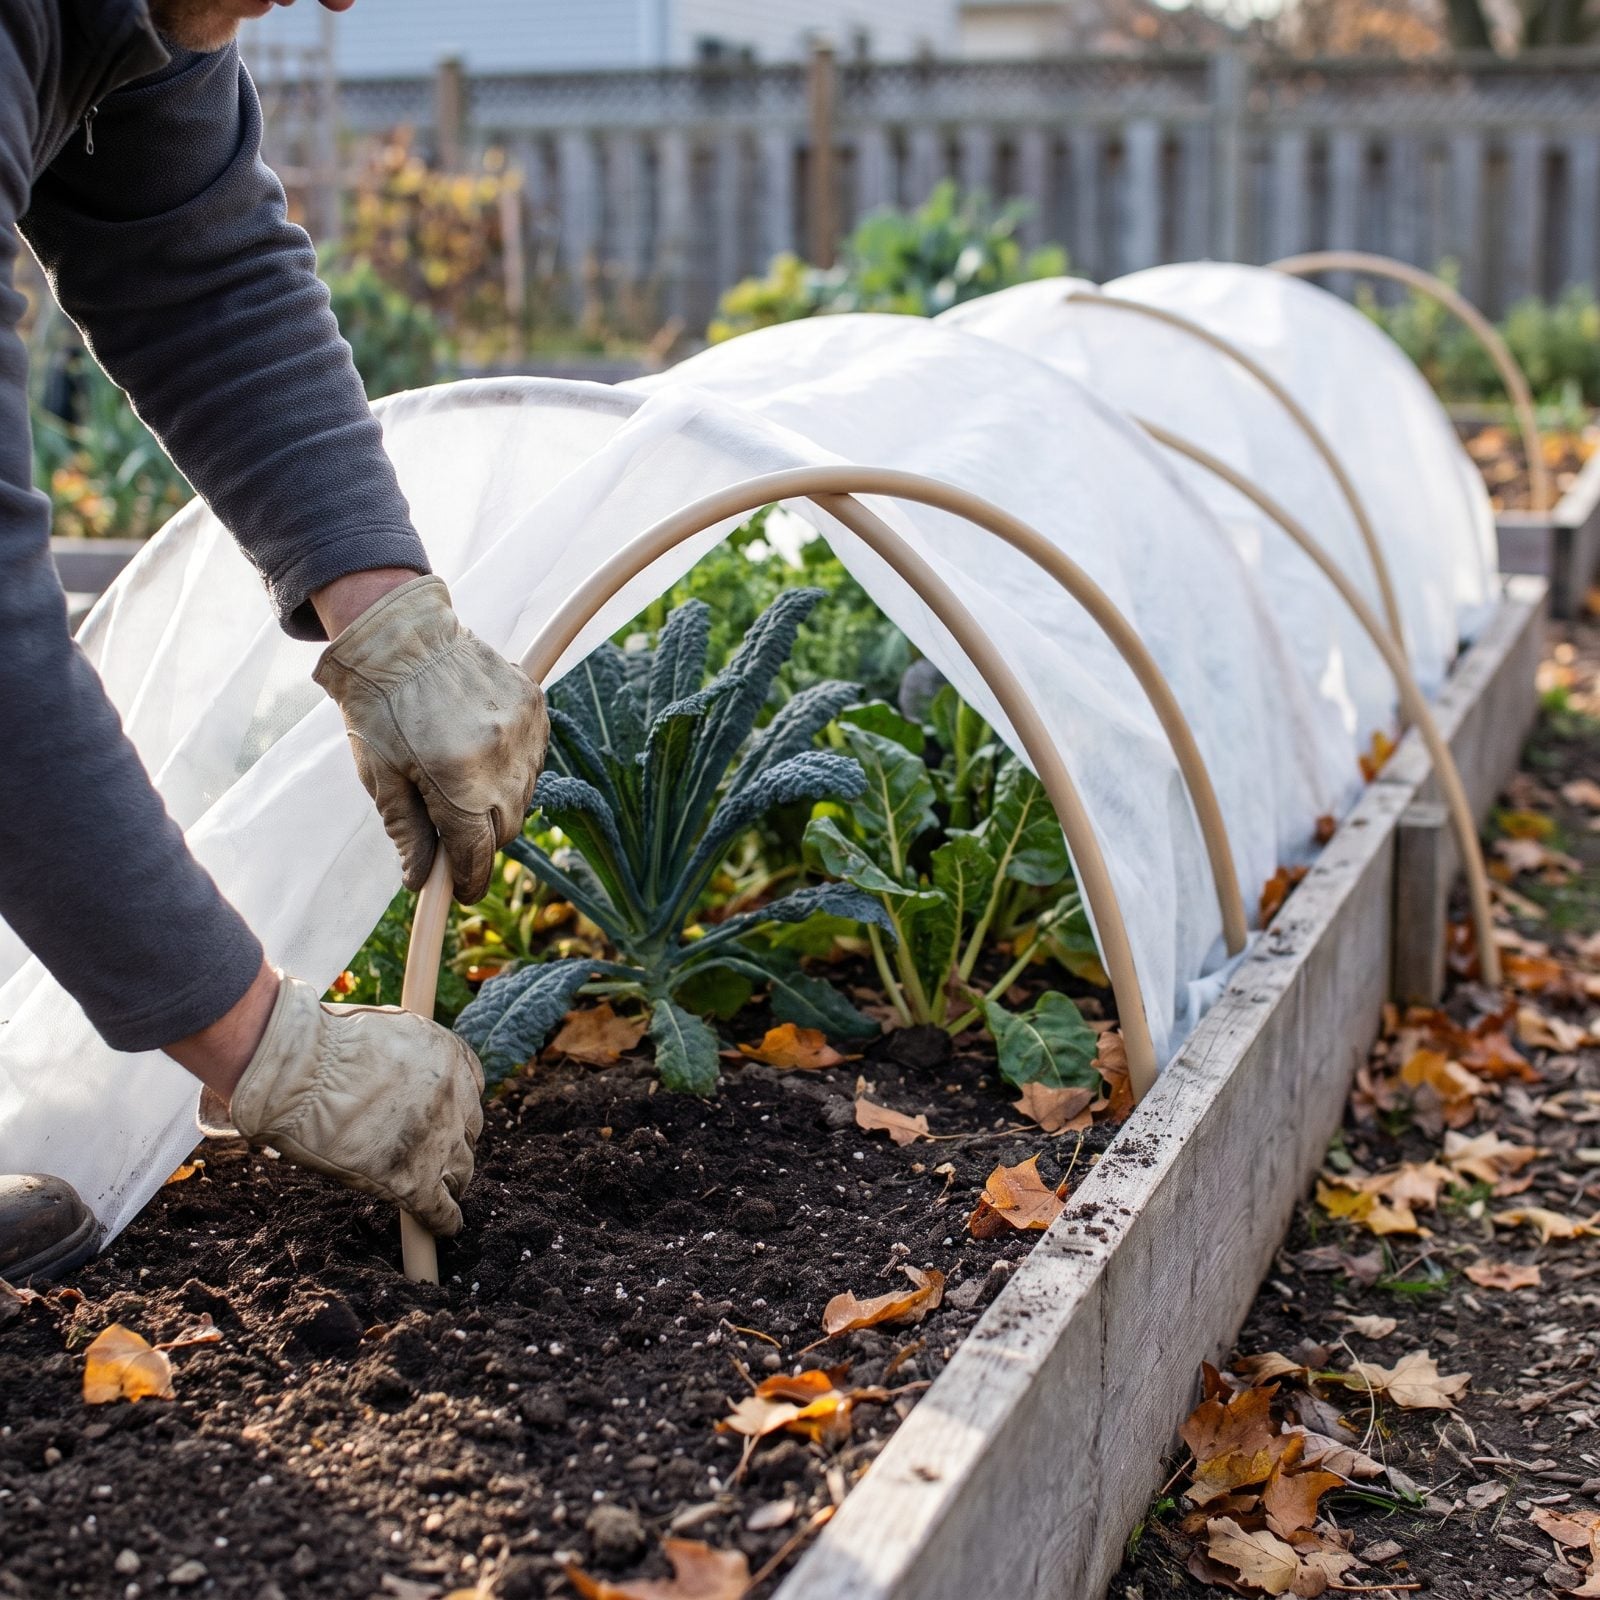
Frost cloth laid flat on plants is nearly useless. Where the fabric touches a leaf it conducts cold straight through, and you get freeze damage in exactly the spots you were trying to protect. The cloth needs to float above the foliage on a frame, and you want that frame up before the night it matters.
Push low hoops of PVC, heavy wire, or bent conduit into the soil so they arch a few inches above the tallest plants. Space them close enough that the cloth won’t sag and touch leaves between them. Then leave the supports standing, with the cloth folded at one end, ready to pull over the moment the forecast drops.
Building hoops in the dark at 10pm under a frost warning is a special kind of misery. Set them now.
3. Harvest Remaining Tender Produce
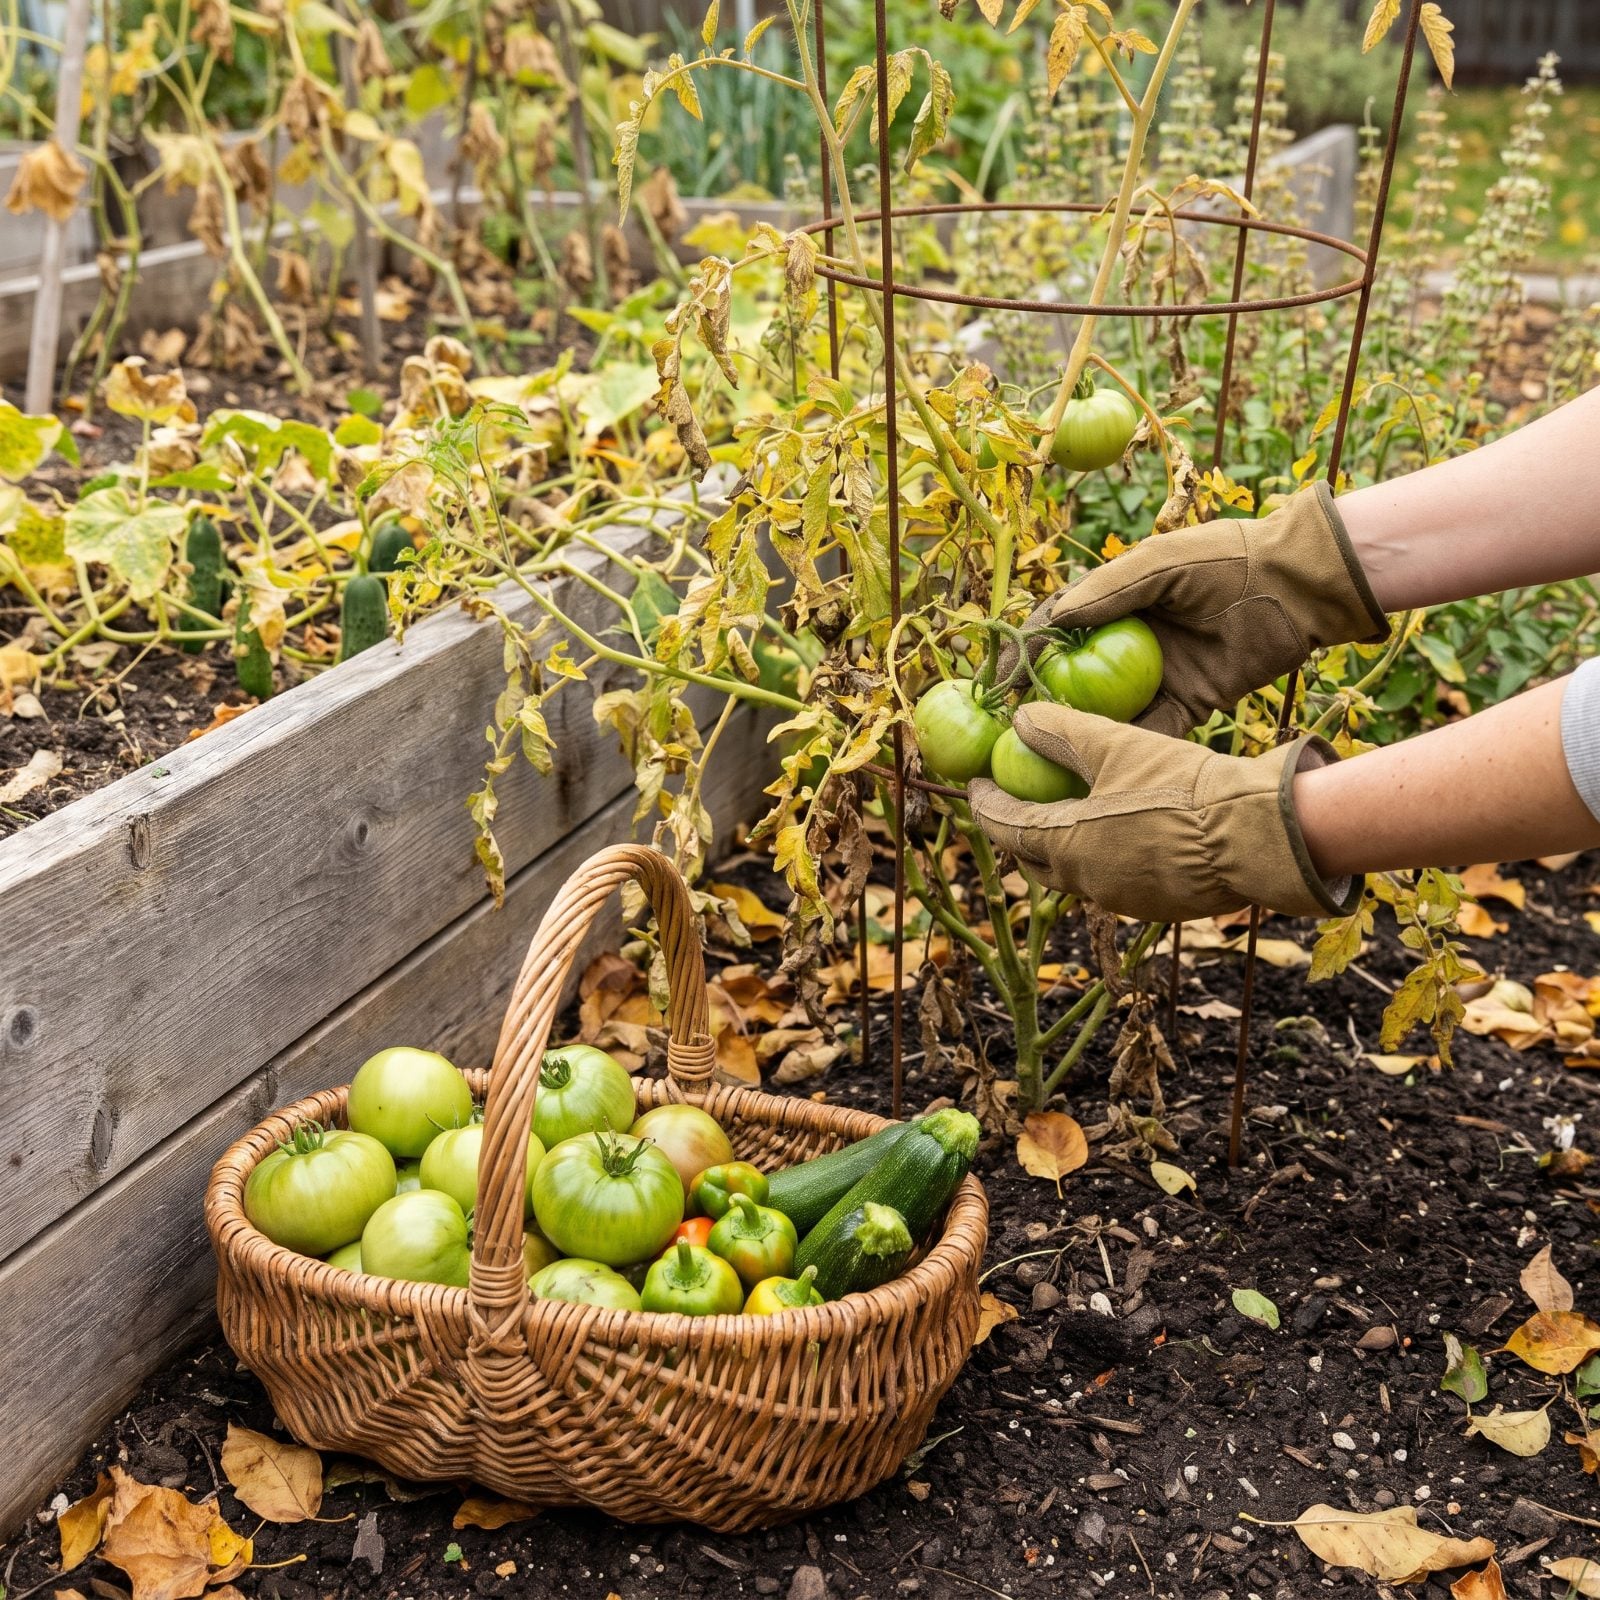
The first hard frost doesn’t negotiate. Tomatoes, peppers, squash, beans, basil, cucumbers — these turn to mush the morning after the mercury drops below freezing, and anything still on the vine is lost.
Watch the forecast and clear the beds the day before a predicted frost, not after. Pick everything, green tomatoes included. Plenty of them will ripen on a windowsill or in a paper bag with an apple over the next couple of weeks, and the stubborn green ones make decent pickles or fried green tomatoes.
Basil especially won’t give you a second warning. One cold night and it blackens like it was scorched. Strip the whole plant and freeze the leaves in oil if you can’t use them fast.
2. Move Containers Into Shelter
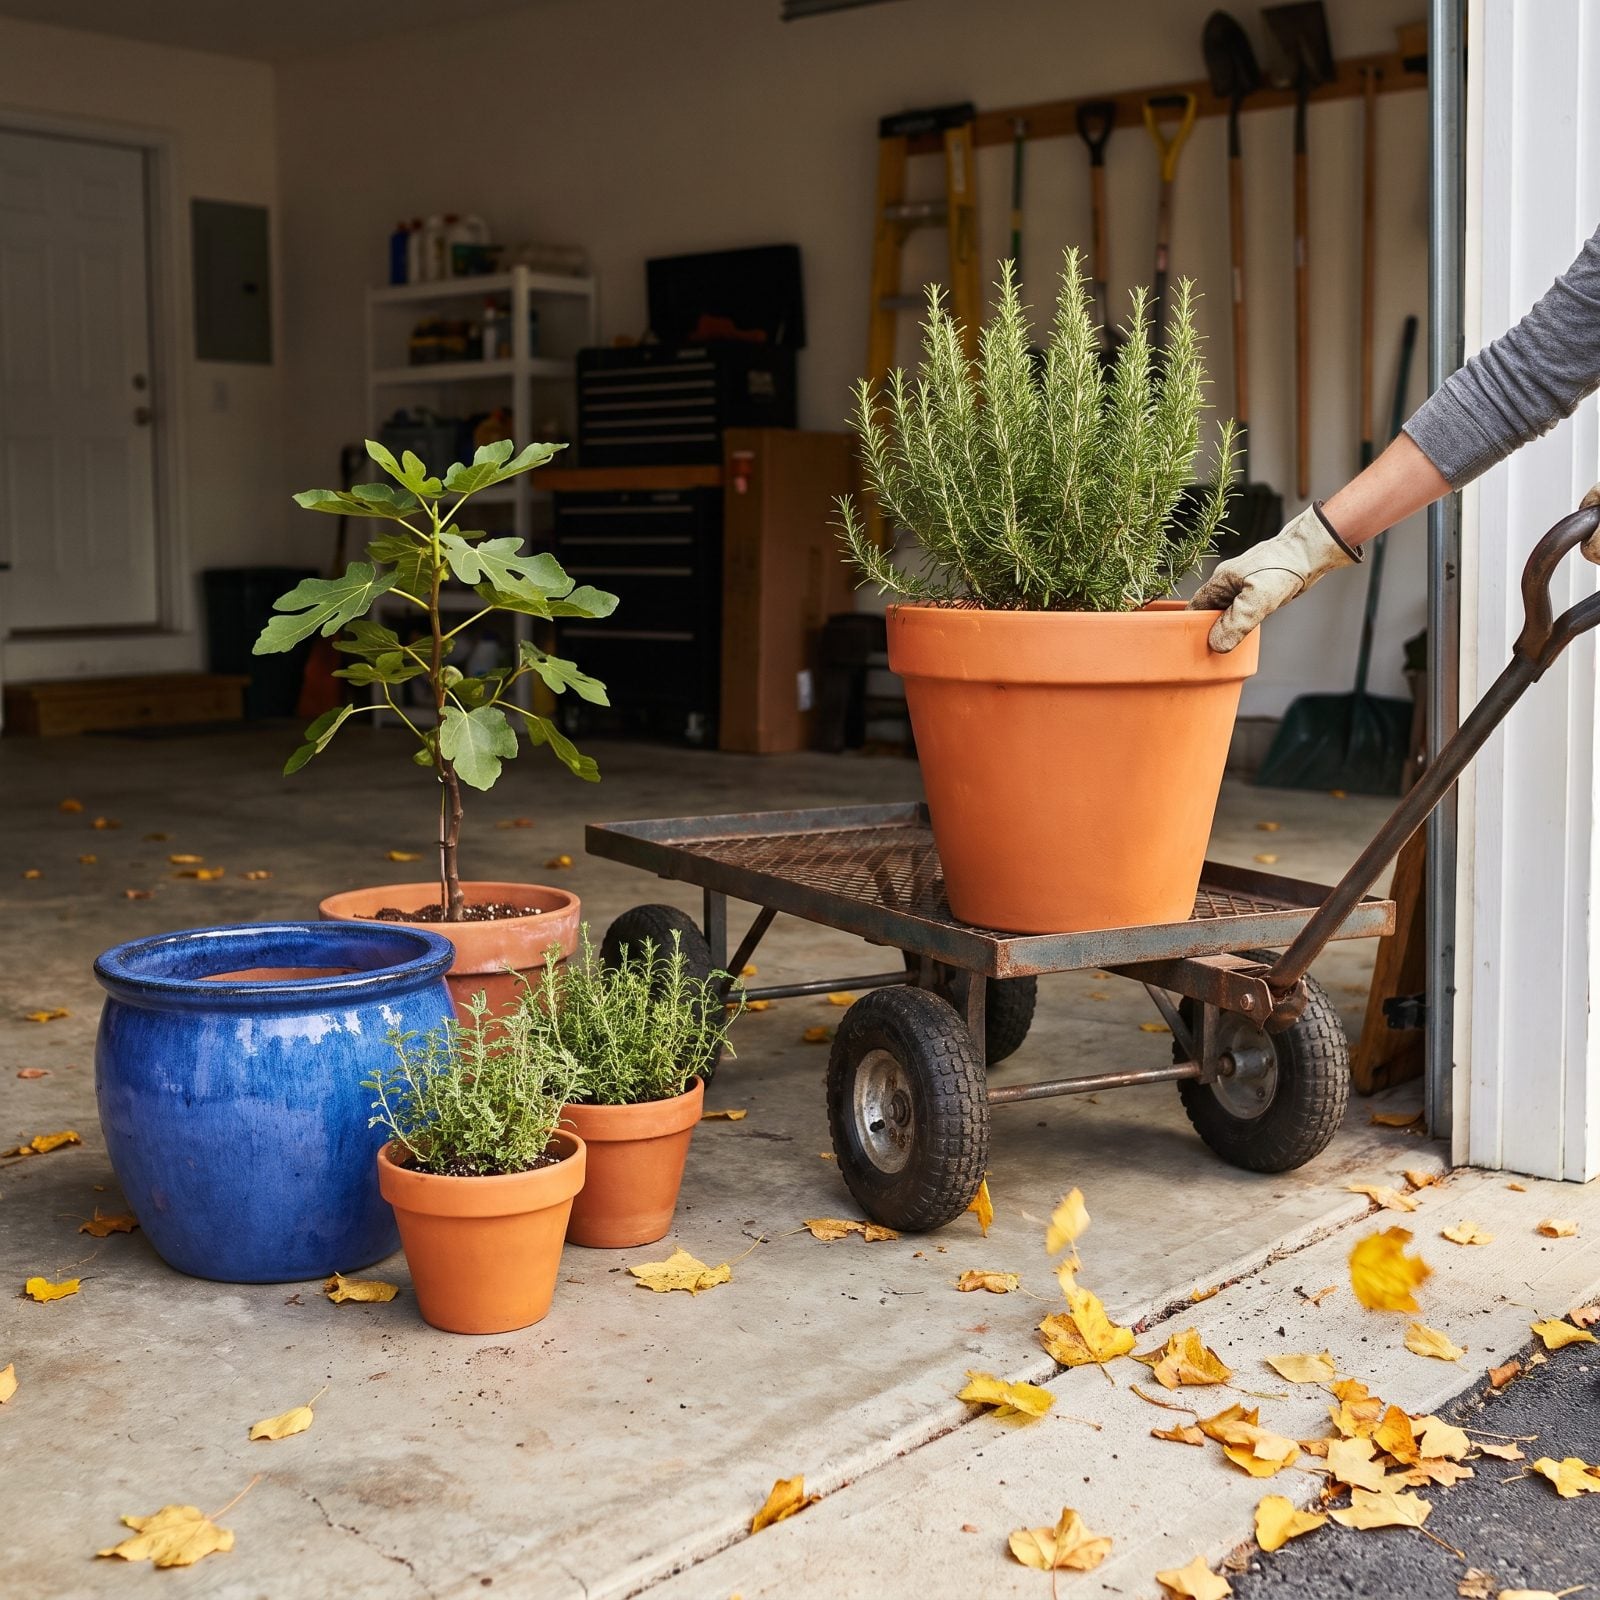
Terracotta and freeze cycles don’t get along. Clay pots drink in moisture, and when that moisture freezes it pops the glaze and flakes the walls until a prized pot splits at the seam. The plant inside is exposed too — roots in a pot have no deep soil mass to buffer the cold the way ground-planted roots do.
Move tender perennials, herbs, and anything in a crack-prone pot into a garage, shed, or unheated porch before the first freeze. They don’t need much light while dormant, just shelter from the hard cold. Empty and flip the glazed and terracotta pots you’re not using, or stash them under cover.
1. Cover Frost-Sensitive Garden Beds
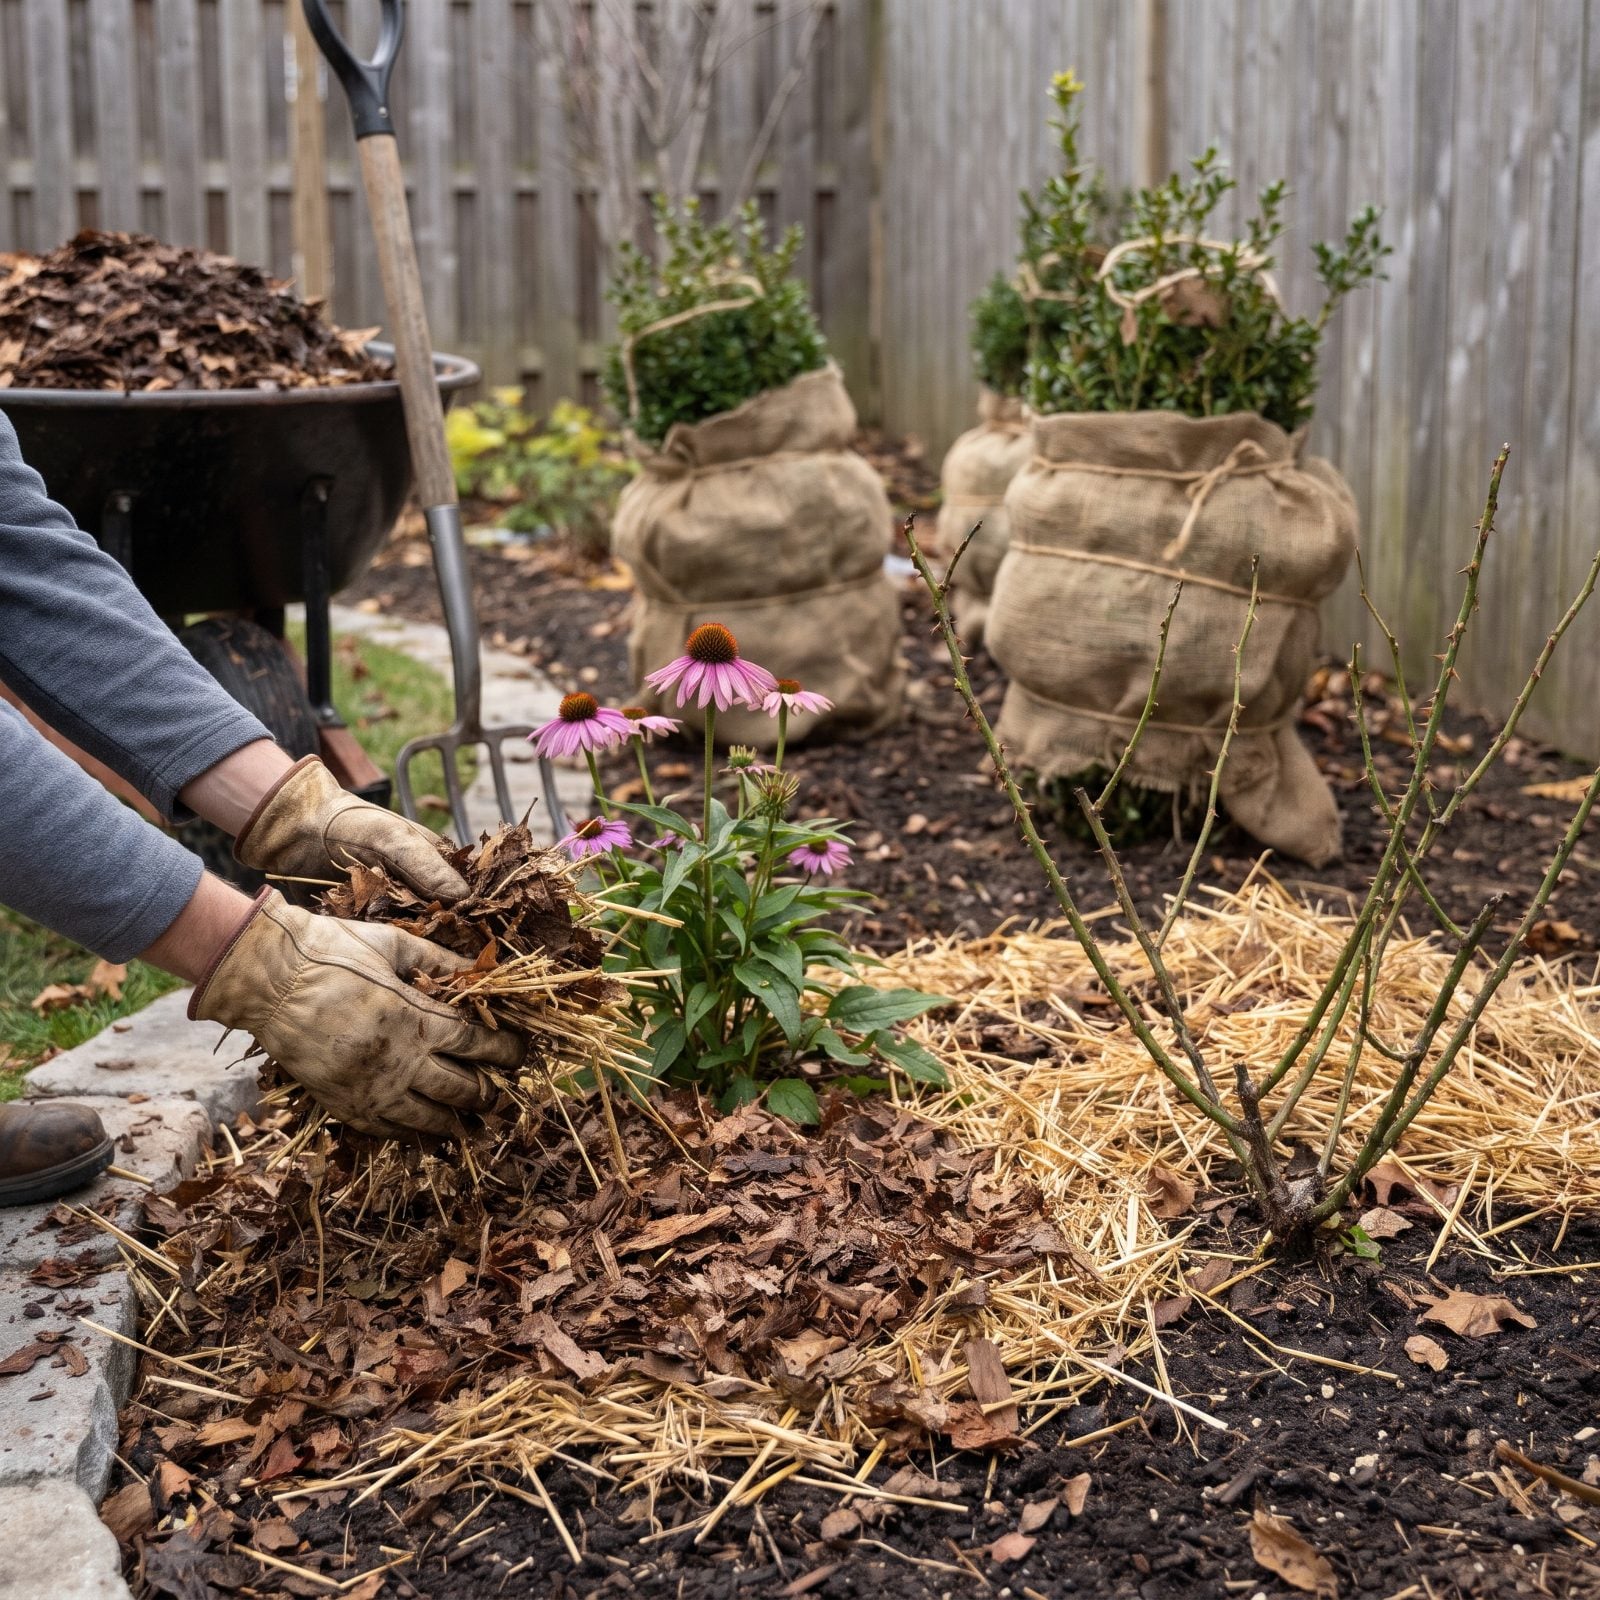
The threat to perennials isn’t the steady cold. It’s the freeze-thaw whiplash that heaves plants right up out of the soil, snapping roots and exposing crowns to the air, where they dry out and die. Mulch isn’t about keeping the ground warm. It’s about keeping it evenly cold so the soil stops seesawing.
Once the ground has had its first real chill, lay several inches of shredded leaves, straw, or bark around the crowns of perennials, strawberries, and anything newly planted. Got a shrub in a windy, exposed corner? Wrap the young or tender ones in burlap.
Mulch too early, though, and you build a cozy winter condo for voles, who’ll spend the cold months gnawing your roots. Timing matters more than most people think.
Your Printable Checklist
Save it to Pinterest or print it — every check from the list above on one page.