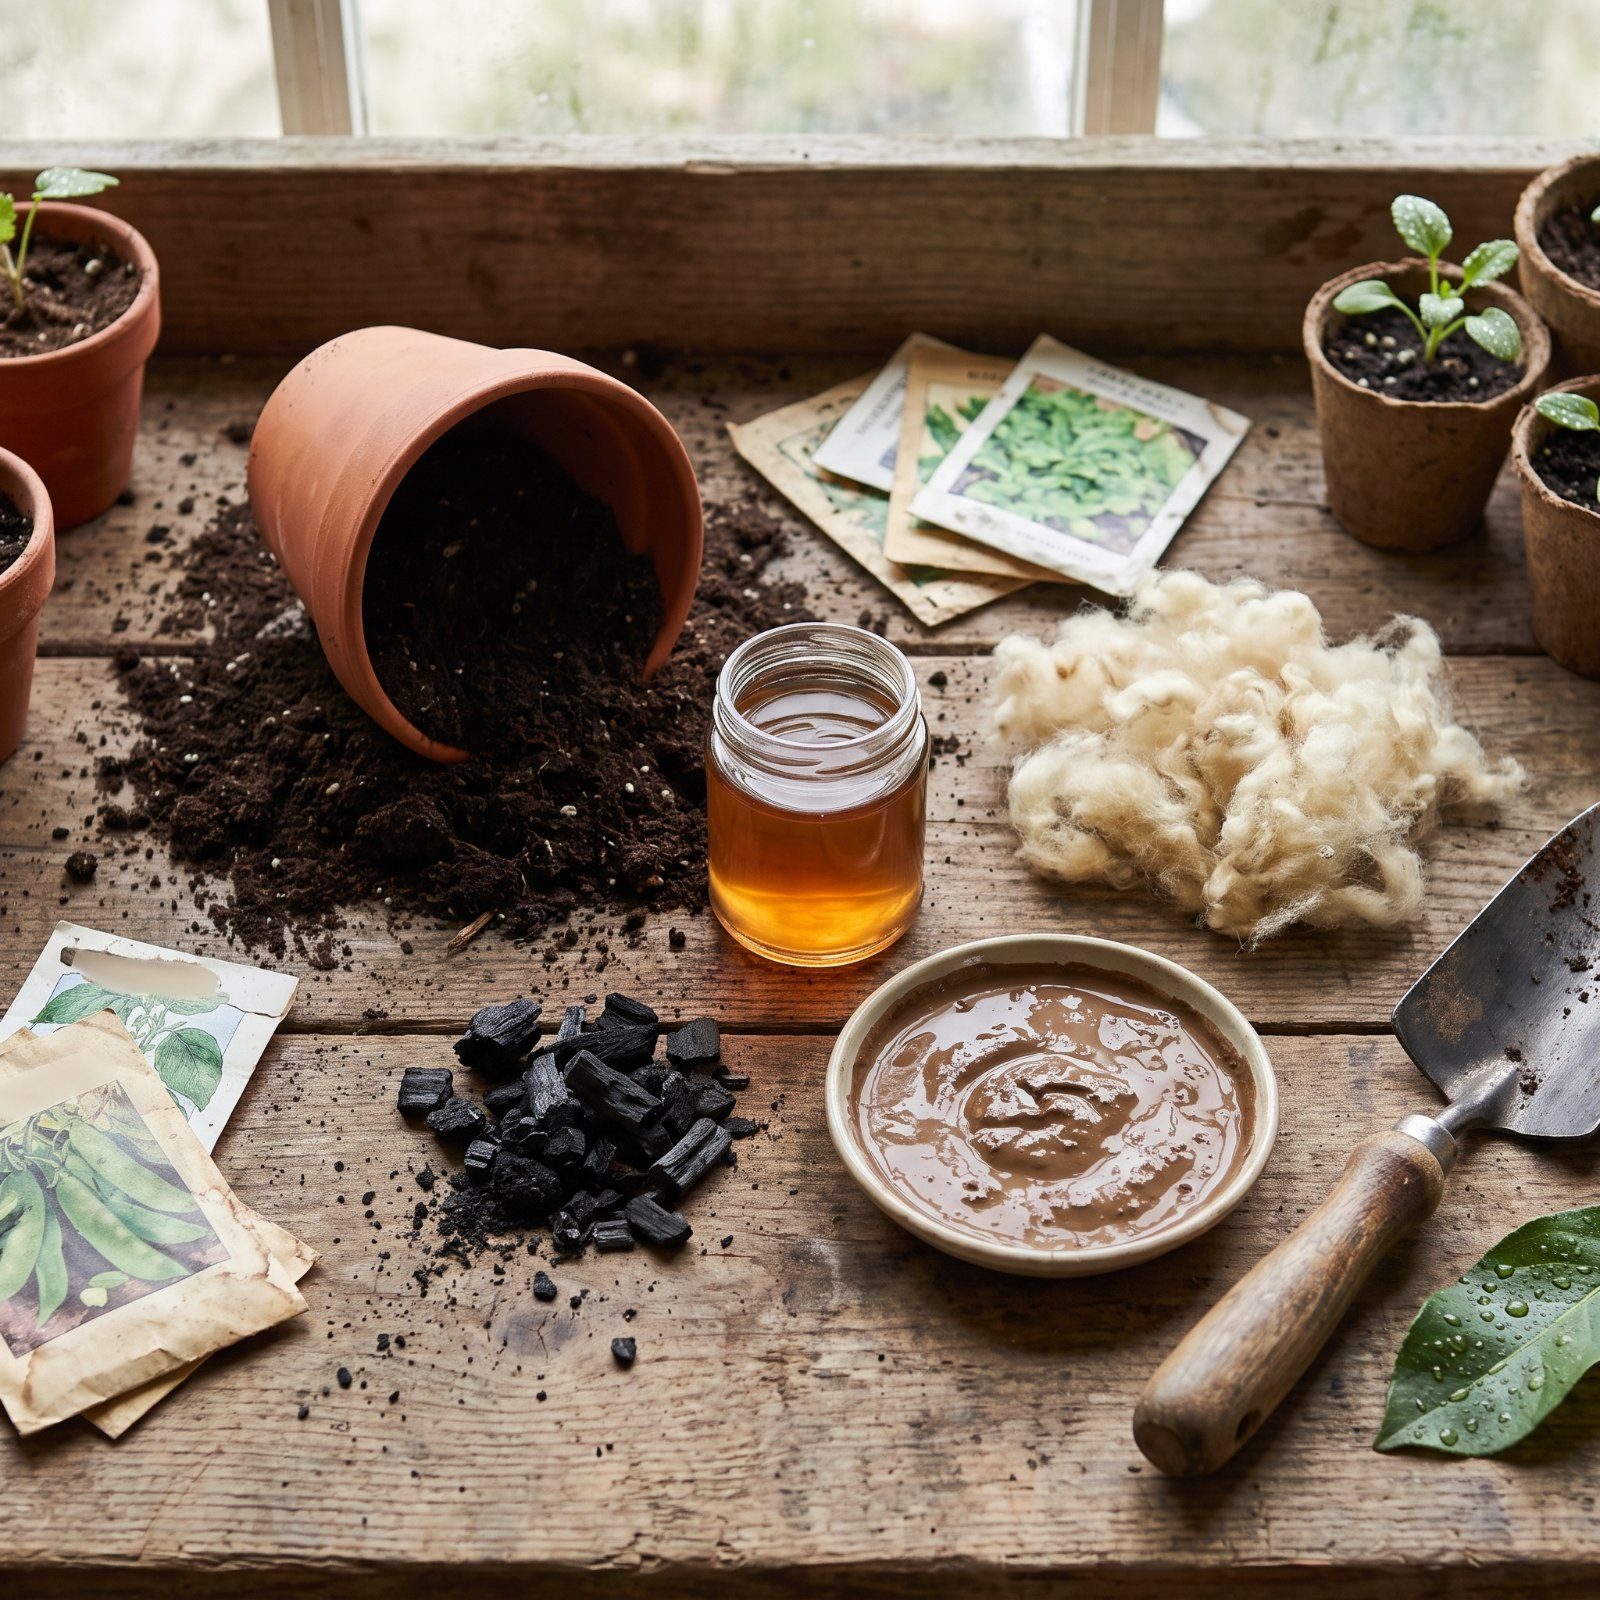
Somewhere right now, a pair of cotton underwear is rotting underground on purpose. Not a prank — a soil test. The gardeners with the best tomatoes tend to do things that look faintly ridiculous to the neighbors, and it turns out the neighbors are the ones missing out. These habits hide in the margins of old field notes and new research alike: small, strange, grounded in how roots and microbes and bees actually behave. None of them cost much, and all of them earn their keep. Start with the ones below that make you squint, because those are usually the best ones.
Please note that some of the images in this article were created with the assistance of AI.
44. Bury Cotton Underwear to Read the Soil’s Biological Activity
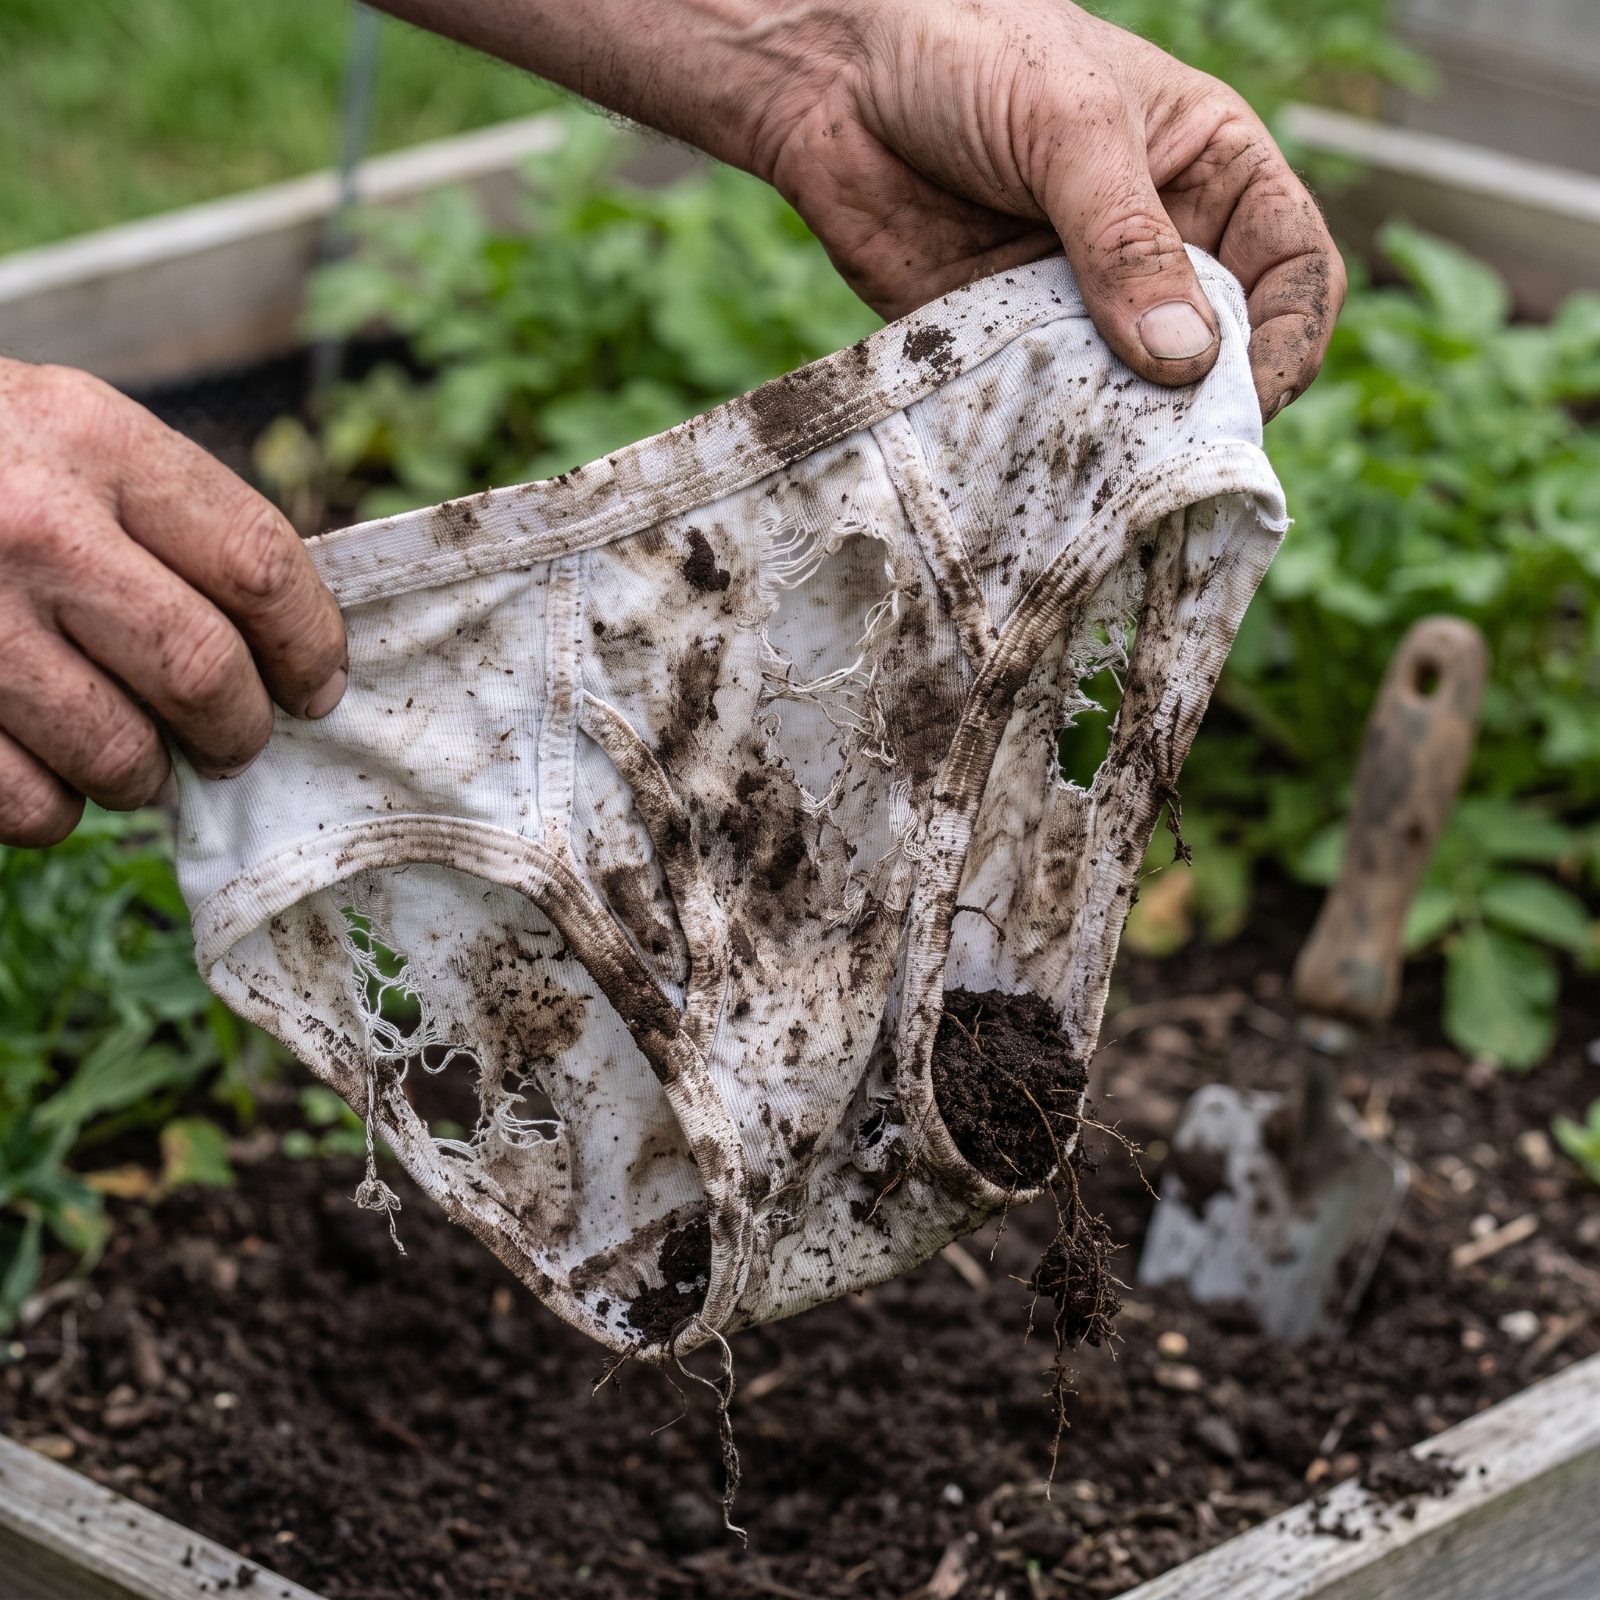
Bury a pair of 100 percent cotton underwear, waistband and all, about four inches down, then dig it up two months later. If it comes out in shreds, your soil is alive with the fungi and bacteria that break down organic matter. If it comes out mostly intact, your microbes are napping, and your plants are paying for it.
This is a real method, sometimes run as the “Soil Your Undies” challenge by conservation districts. Cotton is cellulose — the same stuff plant roots feed back into the ground. Hungry soil eats it fast.
43. Use Smoke Water to Wake Up Fire-Adapted Seeds
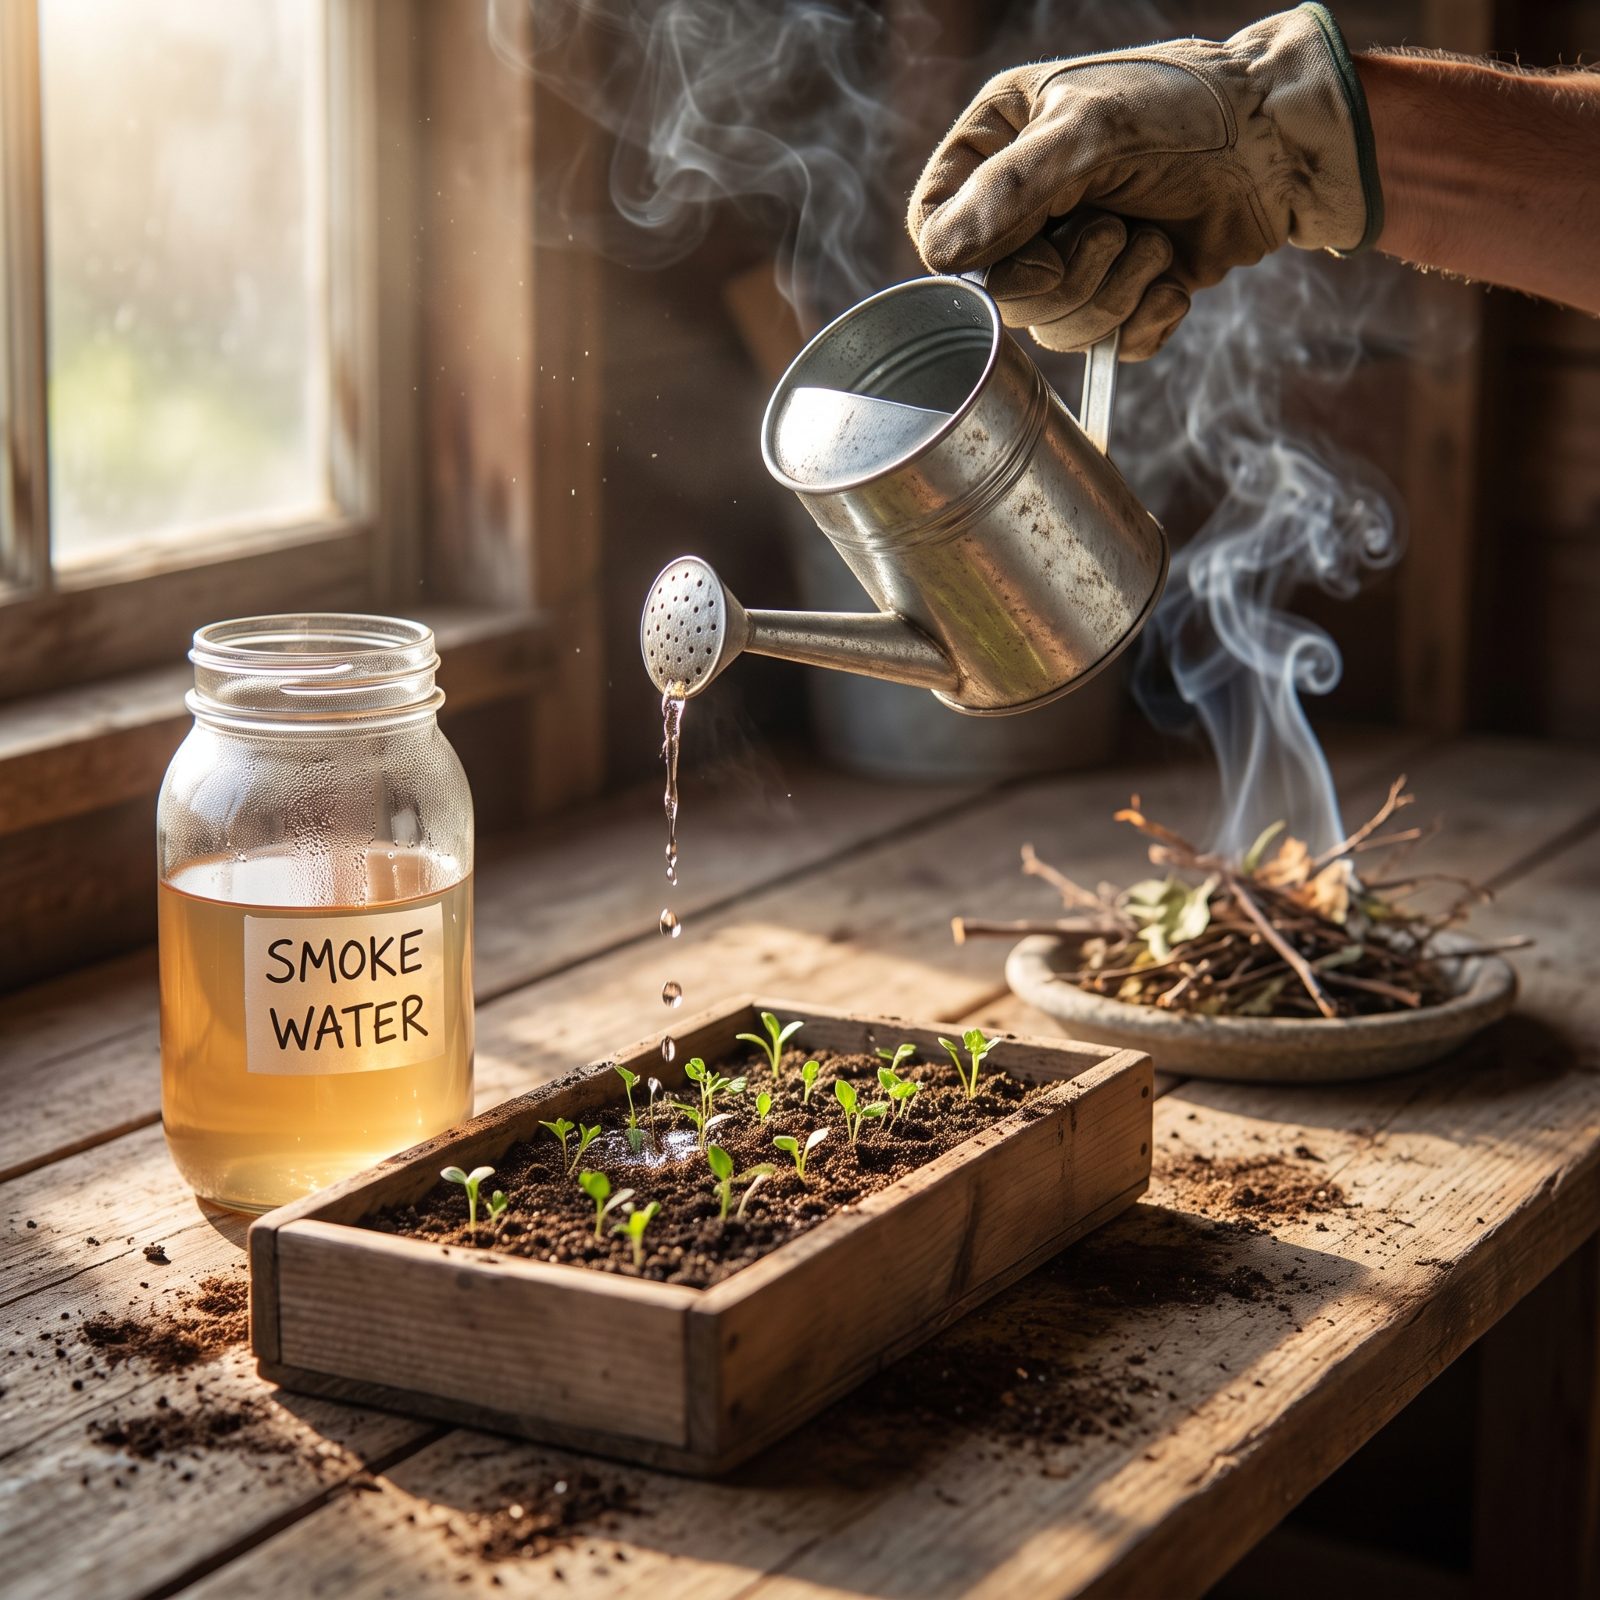
Some seeds refuse to sprout until they smell a wildfire. Plants from fire-prone places — many California natives, certain proteas, a handful of wildflowers — evolved to stay dormant until flames clear the competition above them. The chemical trigger is in the smoke itself.
So fake the fire. Smoke water, made by bubbling smoke through water or sold as a concentrate, carries compounds called karrikins that tell these seeds the coast is clear. Soak the seeds or water them in with the diluted solution.
Ever bought a packet of native wildflowers and gotten nothing? This is often the reason. The seeds weren’t dead. They were waiting for a disaster that never came.
42. Tuck Untreated Sheep’s Wool Beneath Your Thirstiest Crops
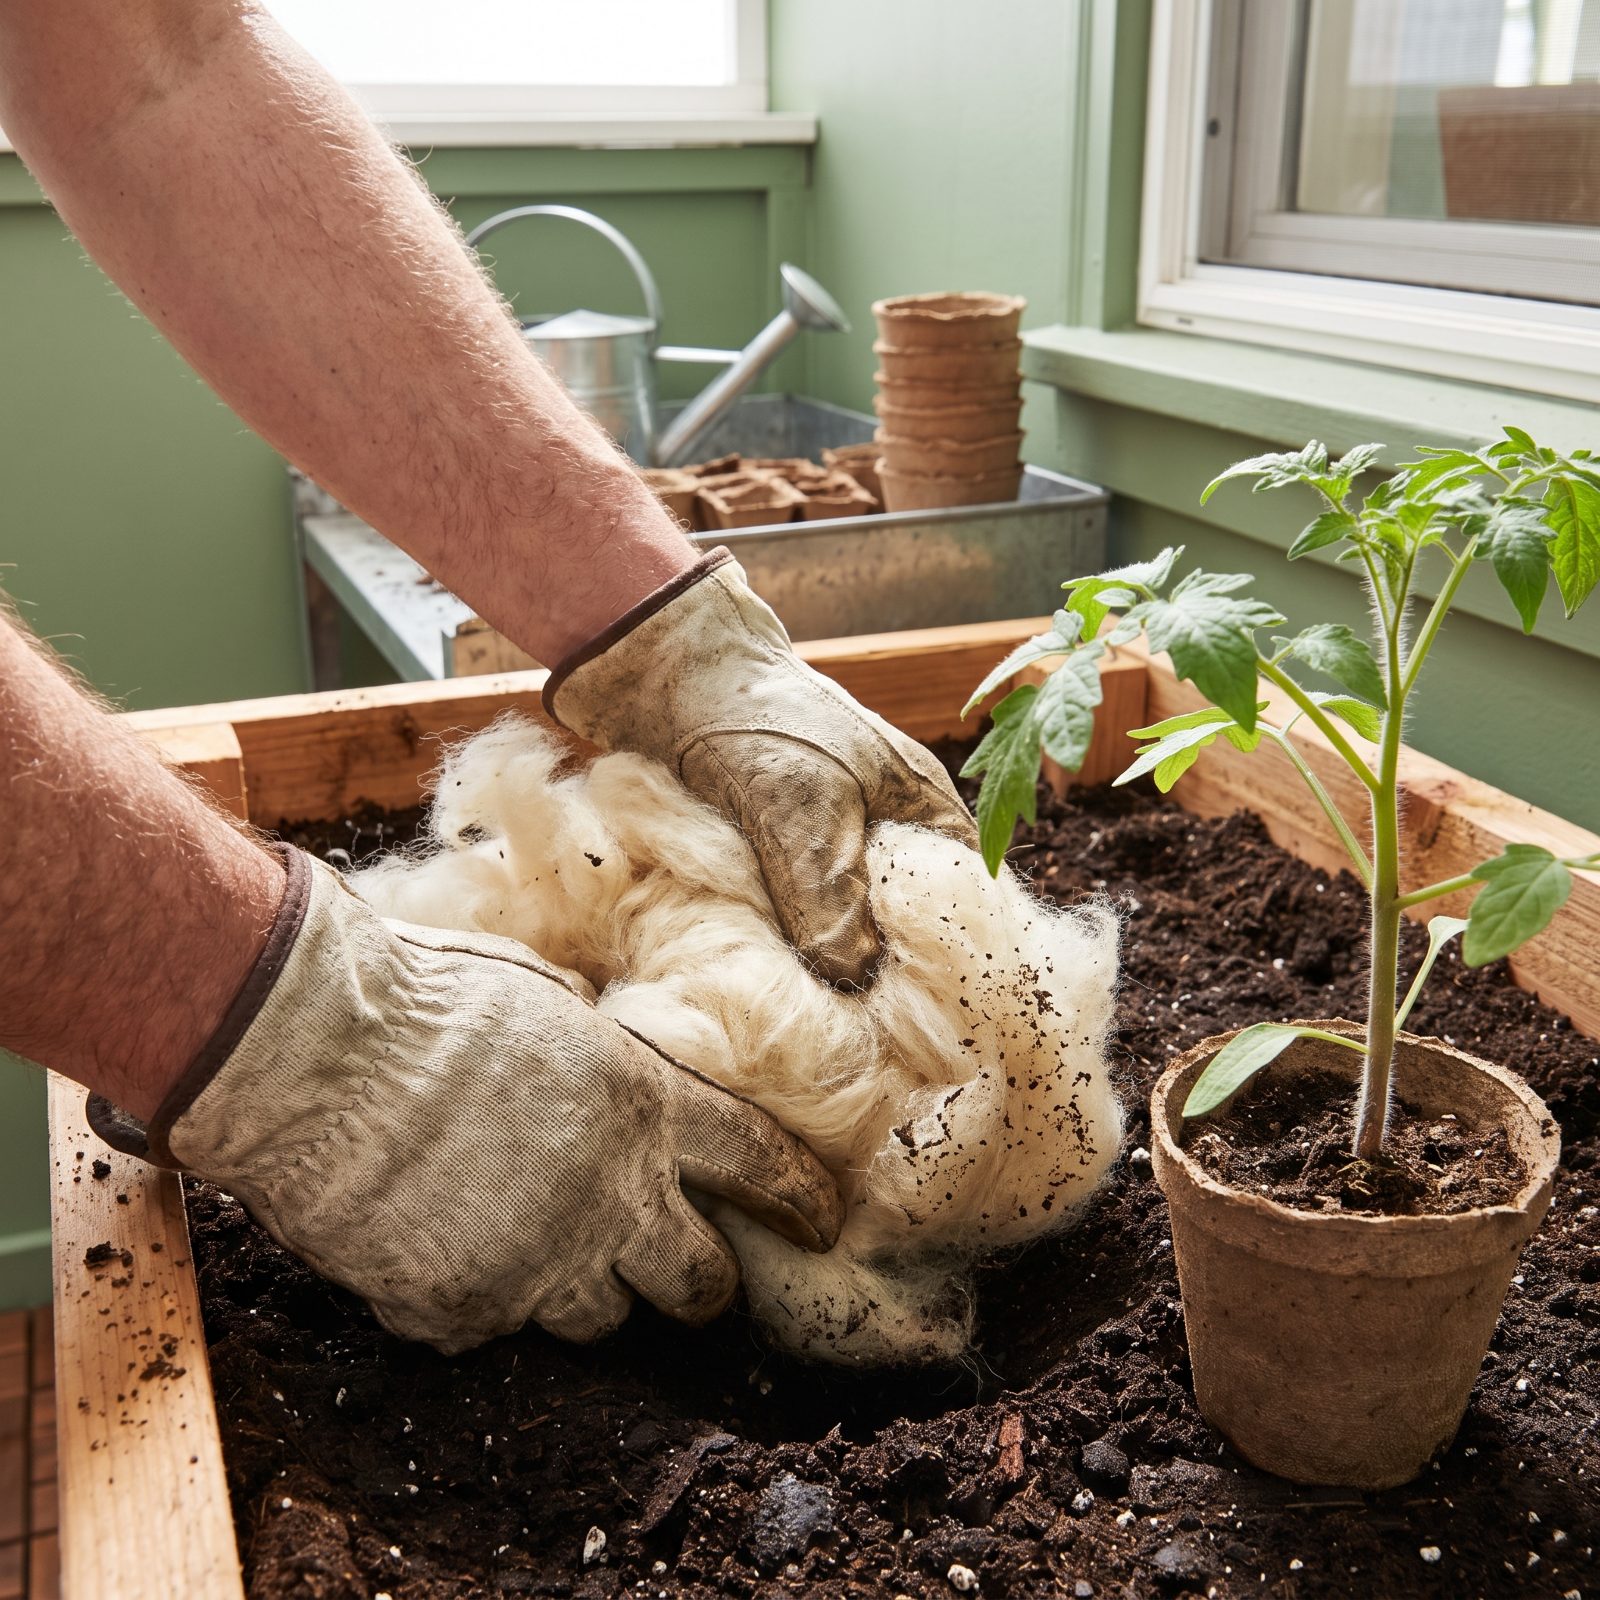
Raw sheep’s wool holds a staggering amount of water for its weight and lets it go slowly, right at root level. Tuck a handful into the planting hole under tomatoes, squash, or anything that wilts the second you skip a day.
As it breaks down over the season it releases nitrogen, keratin, and other nutrients the plant can use. Slugs also hate dragging themselves across greasy, lanolin-rich fibers, so you get a mild pest deterrent thrown in for free.
Use untreated, unwashed wool if you can find it — a local farm or fiber mill is your best bet. The dog-bed stuffing from the big-box store is often coated with things you don’t want anywhere near food.
41. Charge Your Biochar With Compost Before It Ever Touches the Garden
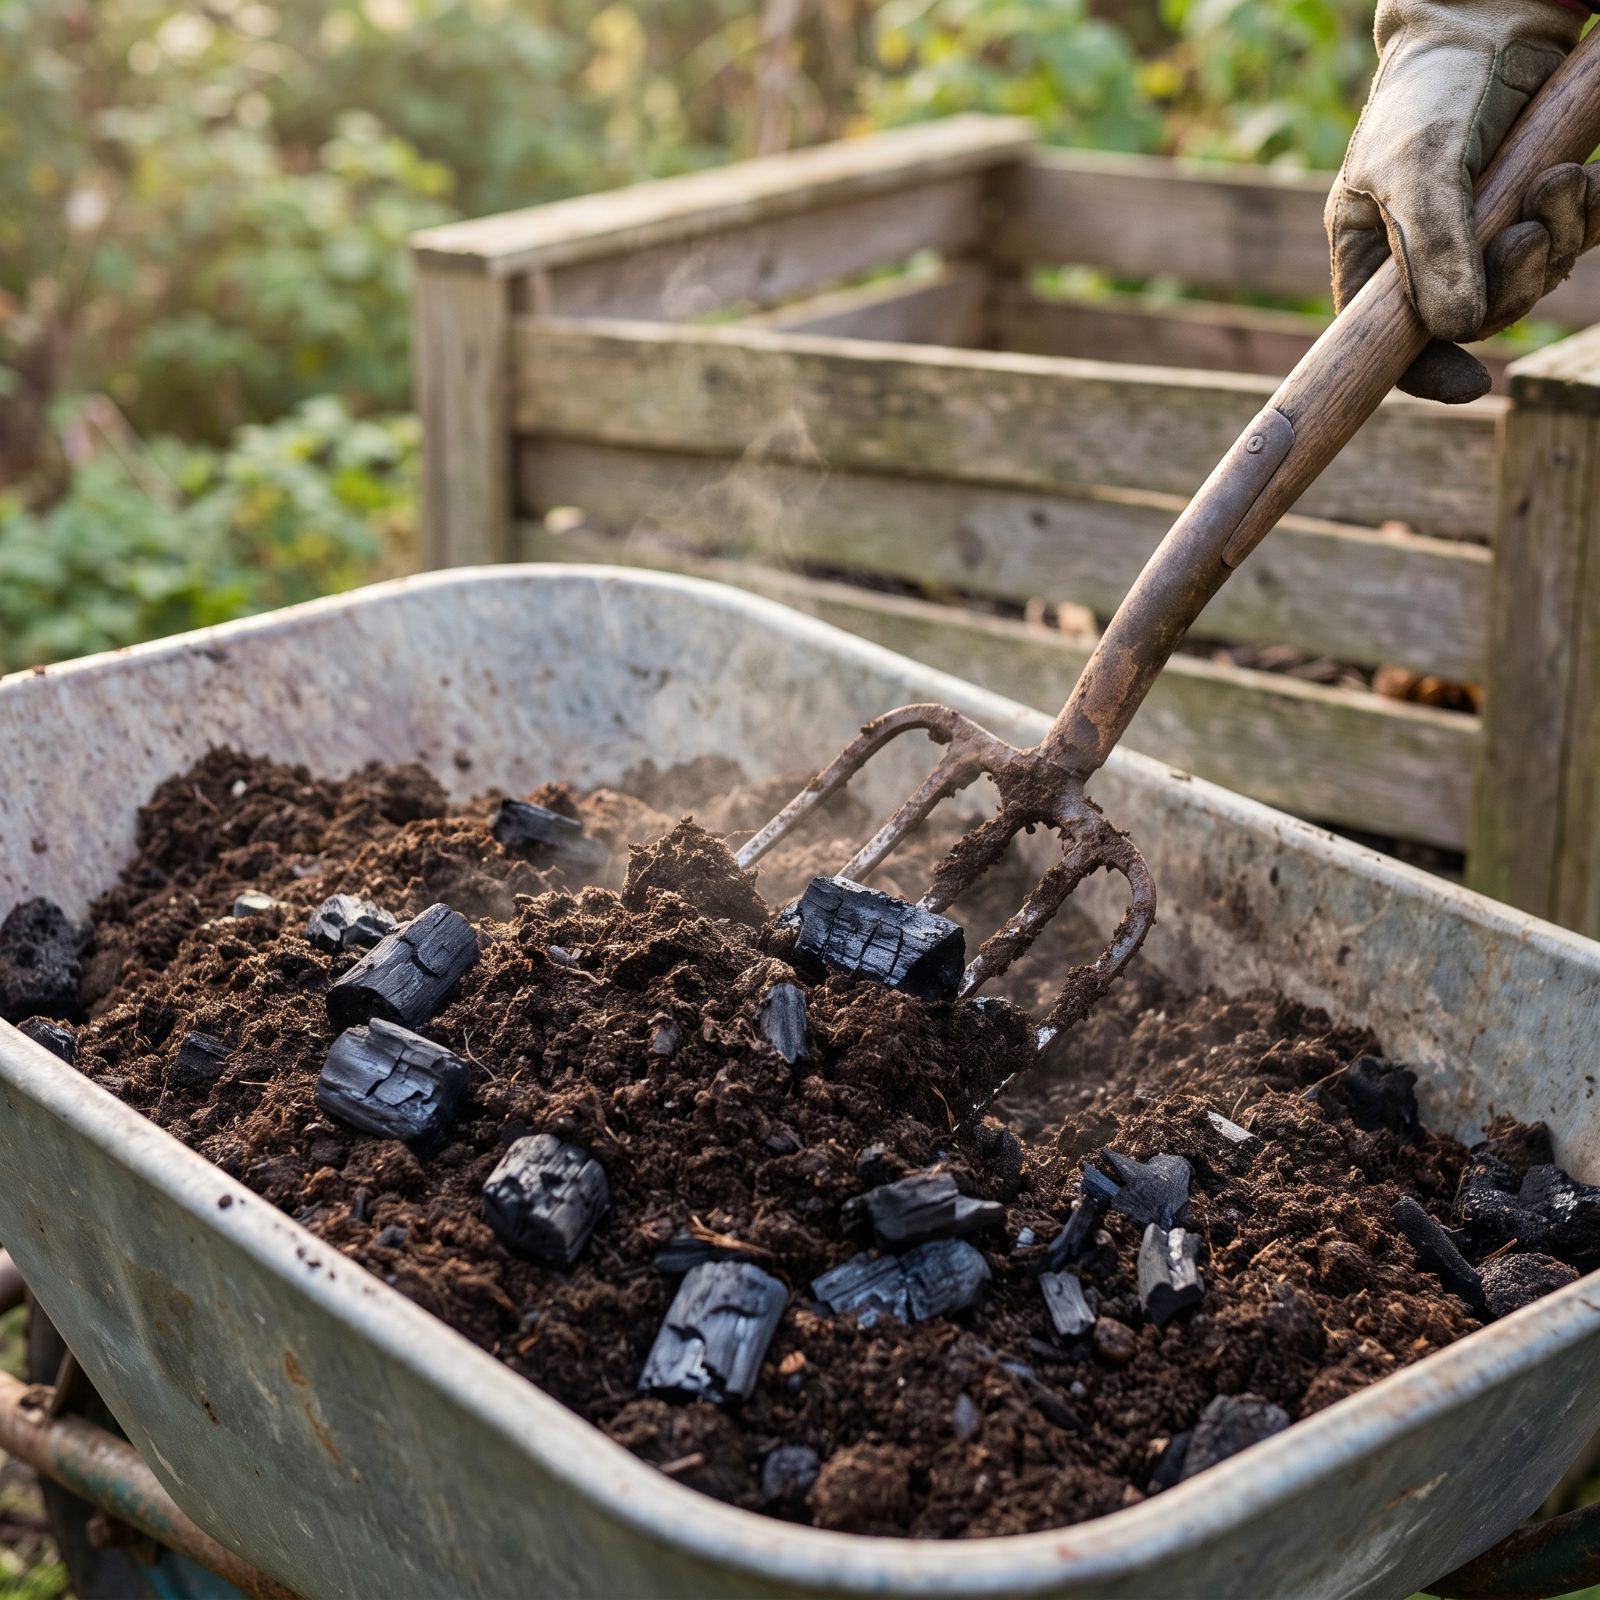
Raw biochar is a trap. Dig fresh charcoal straight into your beds and it acts like a sponge for exactly the nutrients your plants want, stealing nitrogen out of the soil for its first season. Your garden gets worse before it gets better.
The fix is to “charge” it first. Mix the biochar into finished compost or soak it in diluted liquid feed and let it sit for a few weeks. All those microscopic pores fill up with nutrients and microbes, so when it finally goes in the ground it gives instead of takes.
40. Brush Your Seedlings Daily for Stockier, Tougher Stems
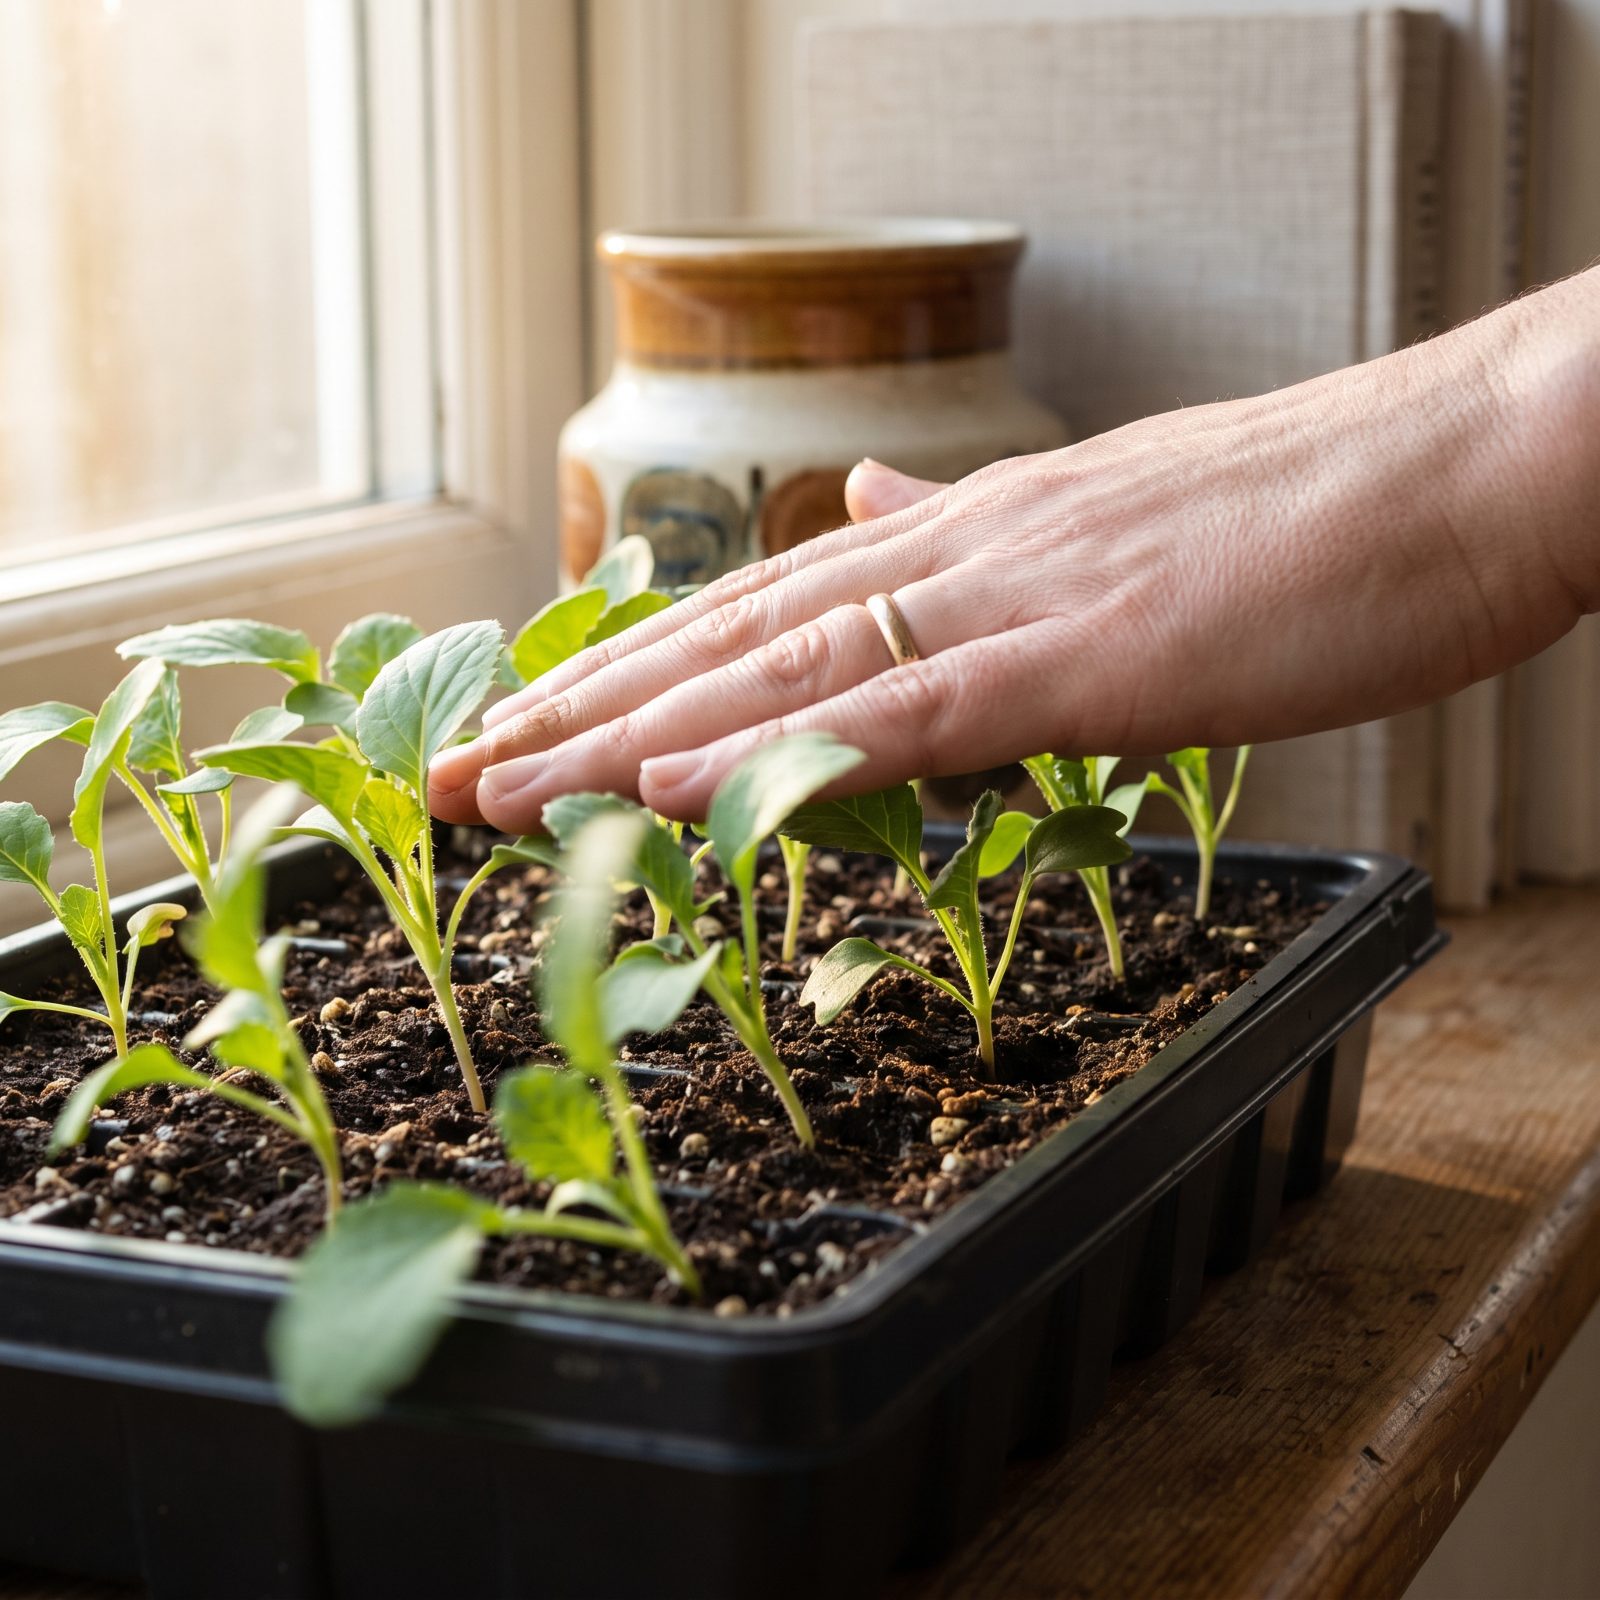
Run your hand lightly across the tops of your indoor seedlings once or twice a day. That’s it. The plants read the brushing as wind and respond by growing shorter, thicker, sturdier stems instead of the leggy, floppy ones that collapse the moment you move them outside.
Researchers call this thigmomorphogenesis, which is a mouthful for “plants that get touched grow tougher.” A small fan near the tray does the same job while you’re at work.
Plenty of gardeners ignore this for years and wonder why their tomato starts always flop over like wet noodles. Turns out they just need to be bothered a little.
39. Shake Your Plants Over a White Sheet to Catch the Invisible Pests
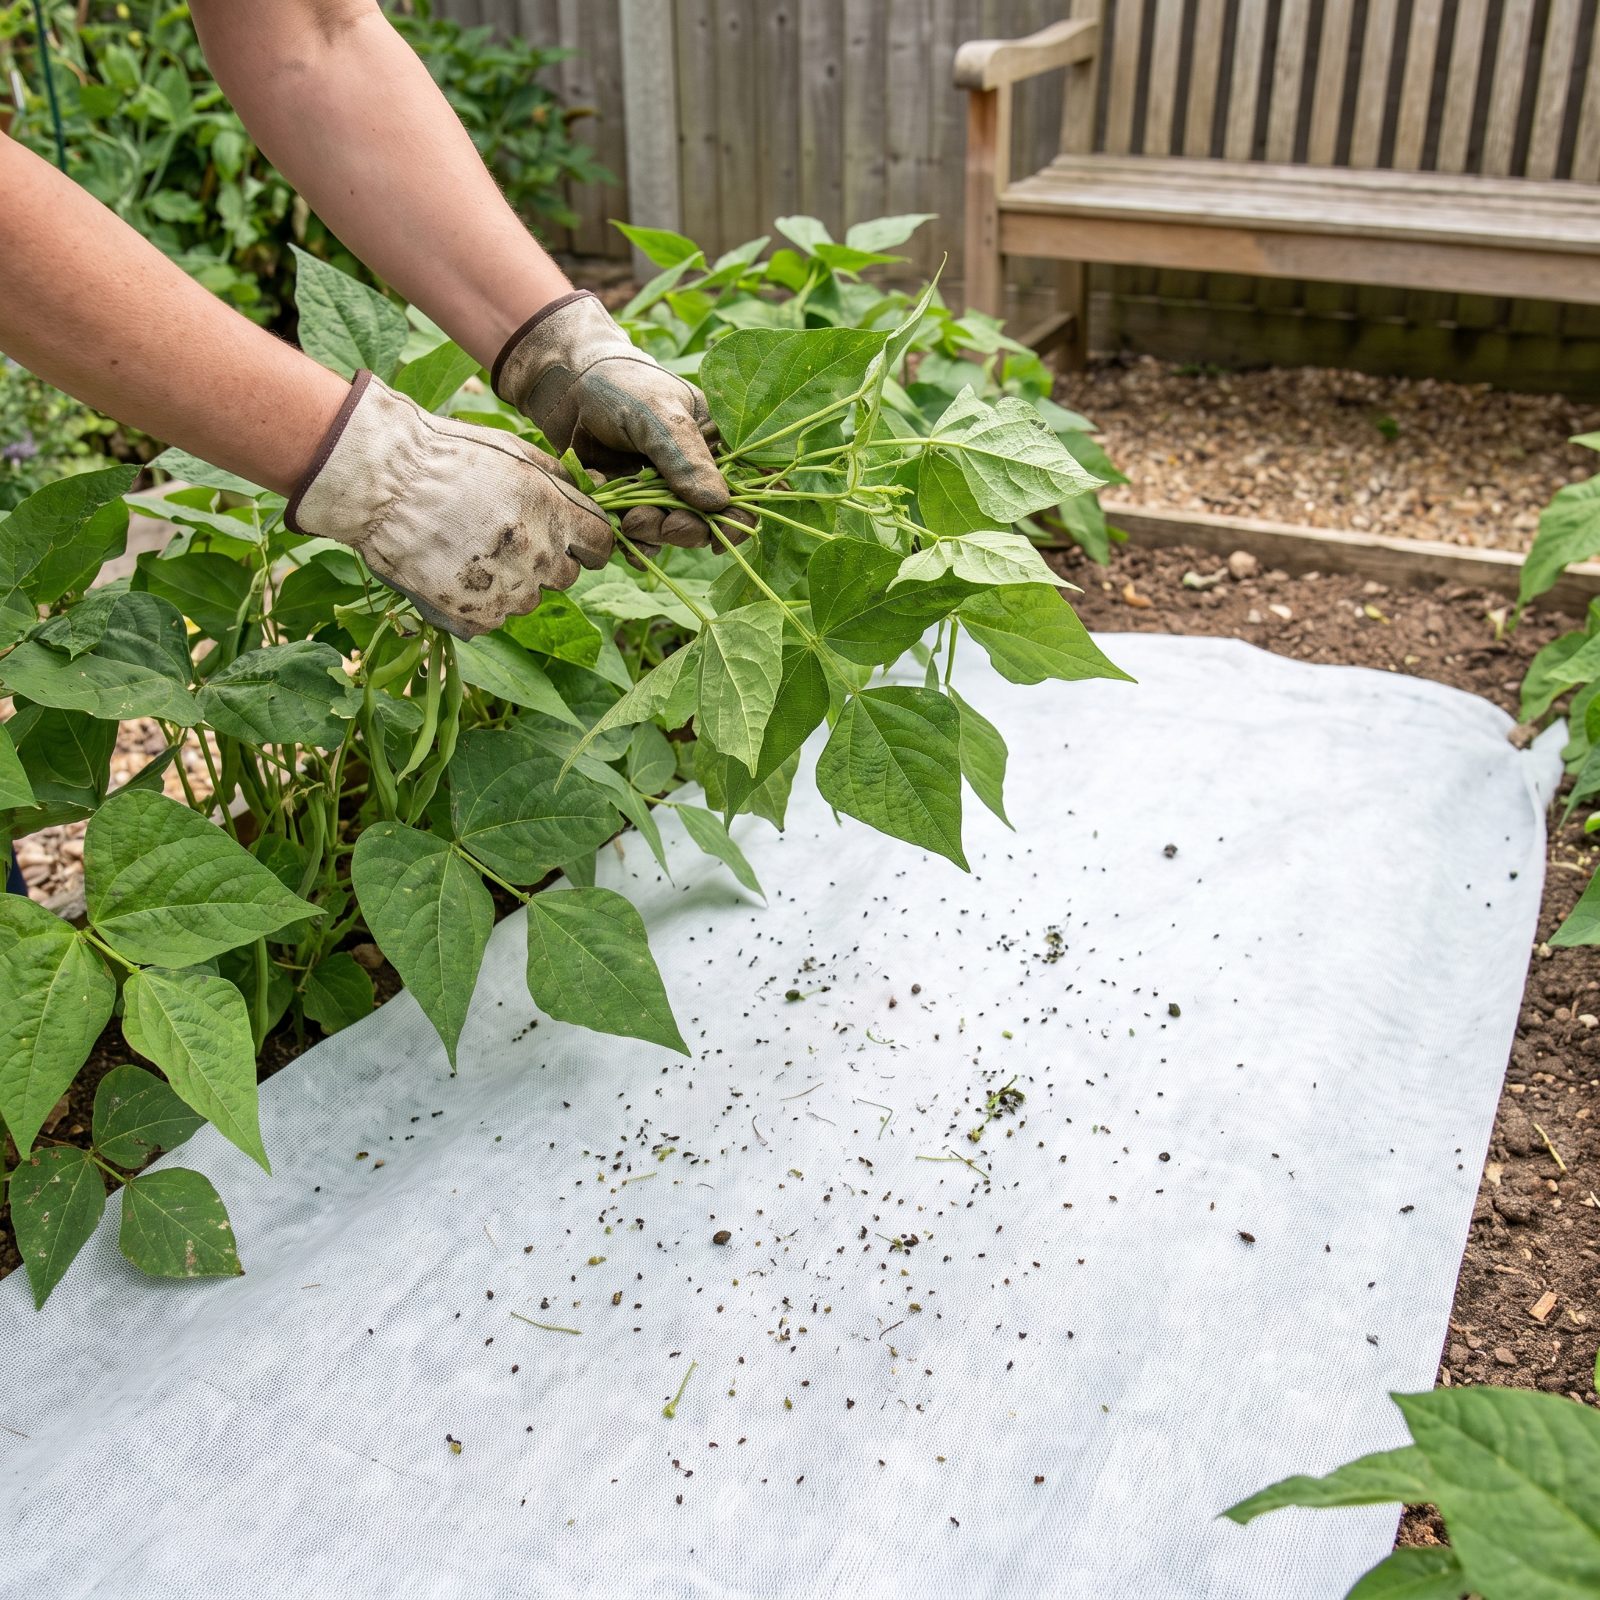
Half the pests destroying your plants are too small or too skittish to spot on the leaf. So stop squinting at the leaf.
Lay a white sheet, pillowcase, or piece of paper under a branch and give it a sharp shake. Spider mites, thrips, aphids, and tiny caterpillars tumble down and show up instantly against the pale background, which tells you what you’re dealing with before you spray anything.
Entomologists call this beat-sampling and use it in the field constantly. It costs you a bedsheet and thirty seconds, and it stops you from treating the wrong problem — which is how most pest control goes sideways.
38. Bury Unglazed Clay Ollas for Watering That Happens Underground
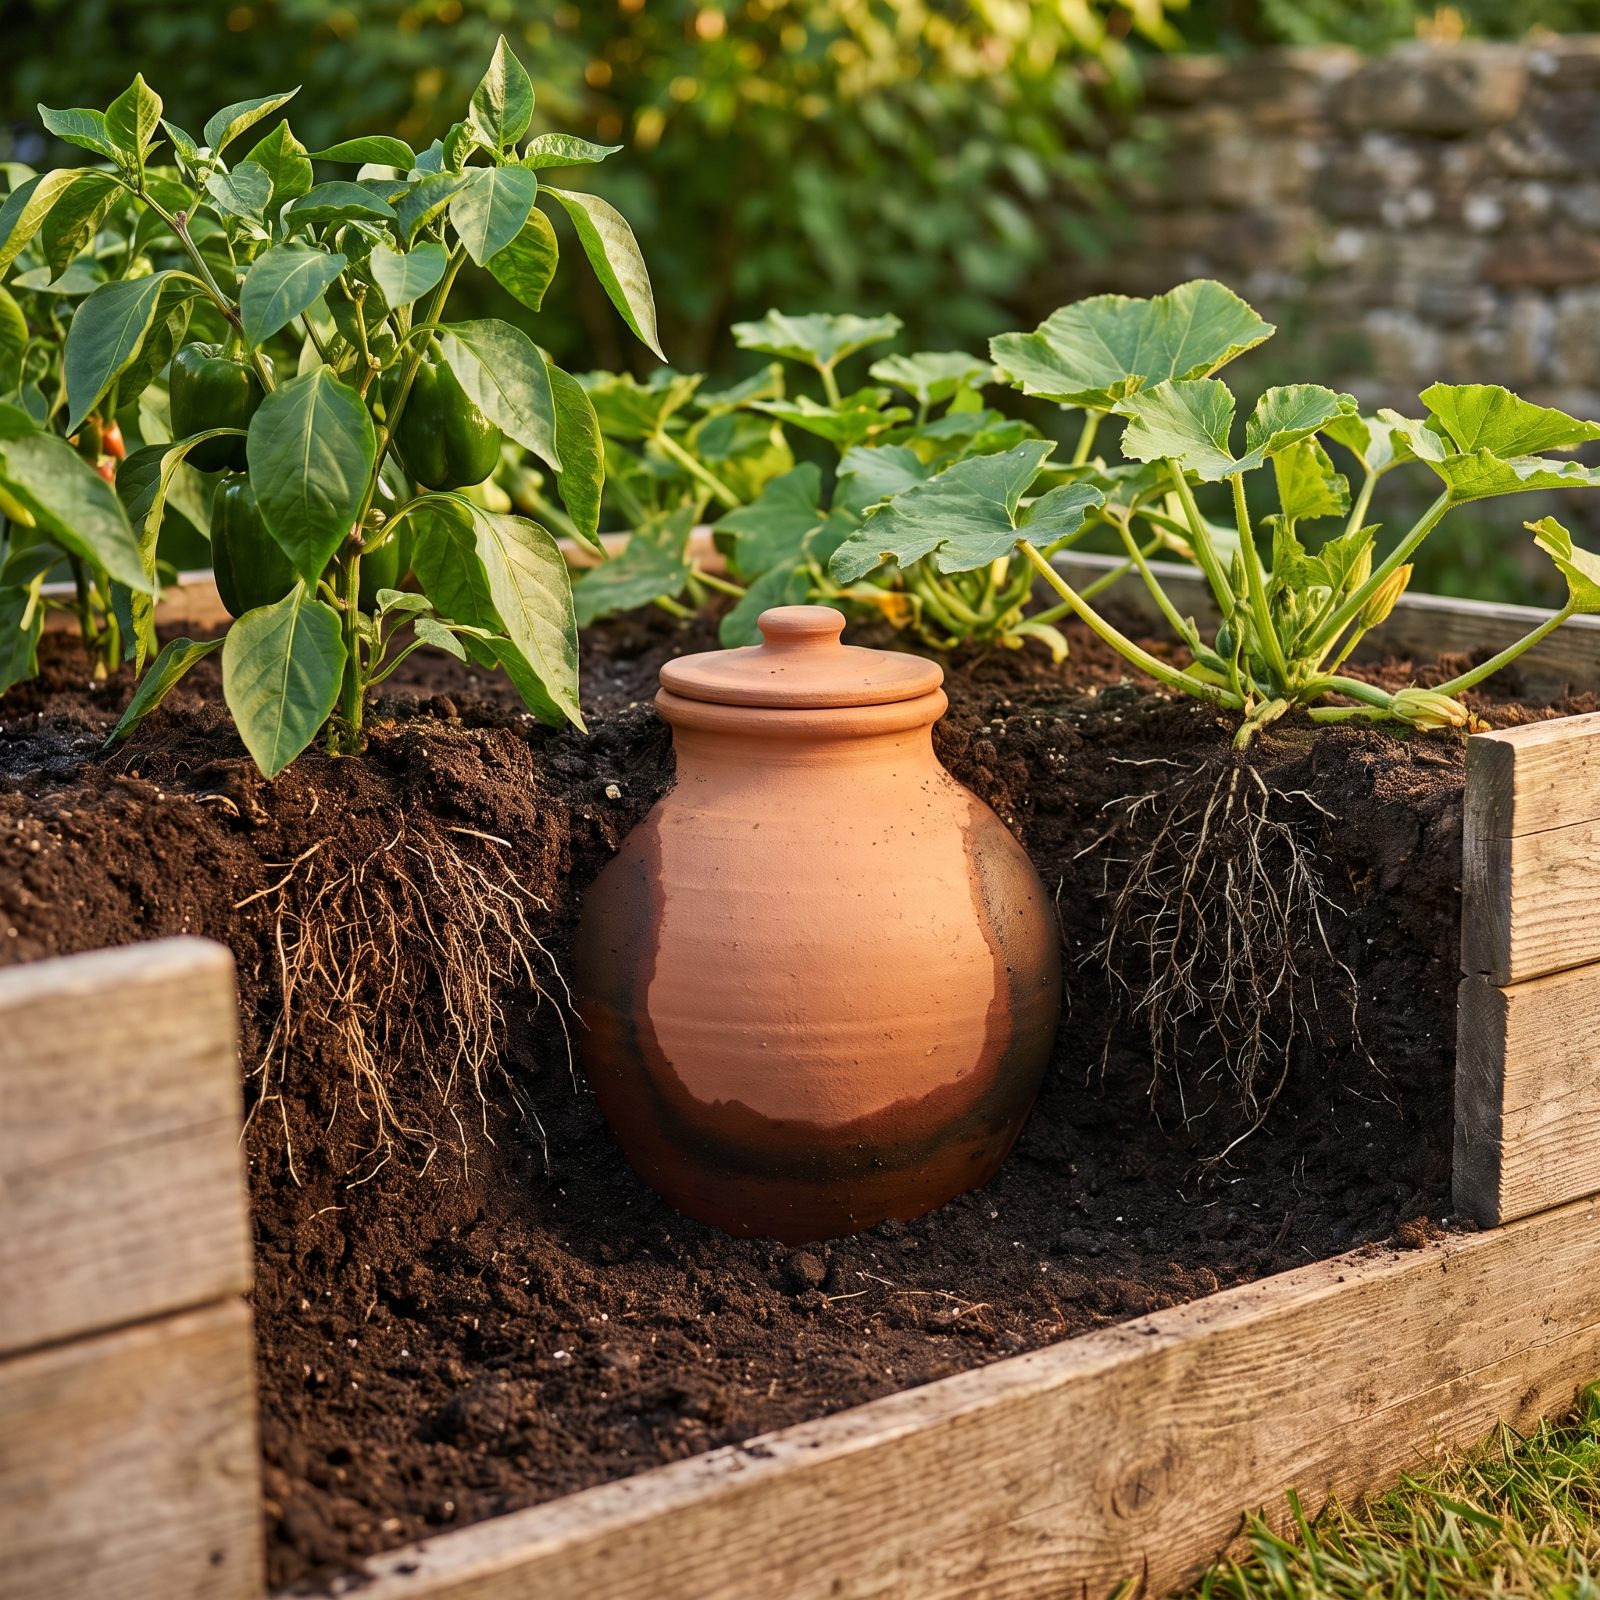
People figured this one out thousands of years ago, and it still outperforms a lot of modern gear. An olla is an unglazed clay pot you sink into the soil beside your plants and fill with water. The porous walls seep moisture out slowly, straight to the roots, only as fast as the surrounding soil draws it.
Nothing evaporates off the surface. Nothing runs off. The plants pull what they need and the pot stays fuller when it rains, so a single olla can quietly water a cluster of plants for a week.
37. Hunt Tomato Hornworms After Dark With a UV Flashlight
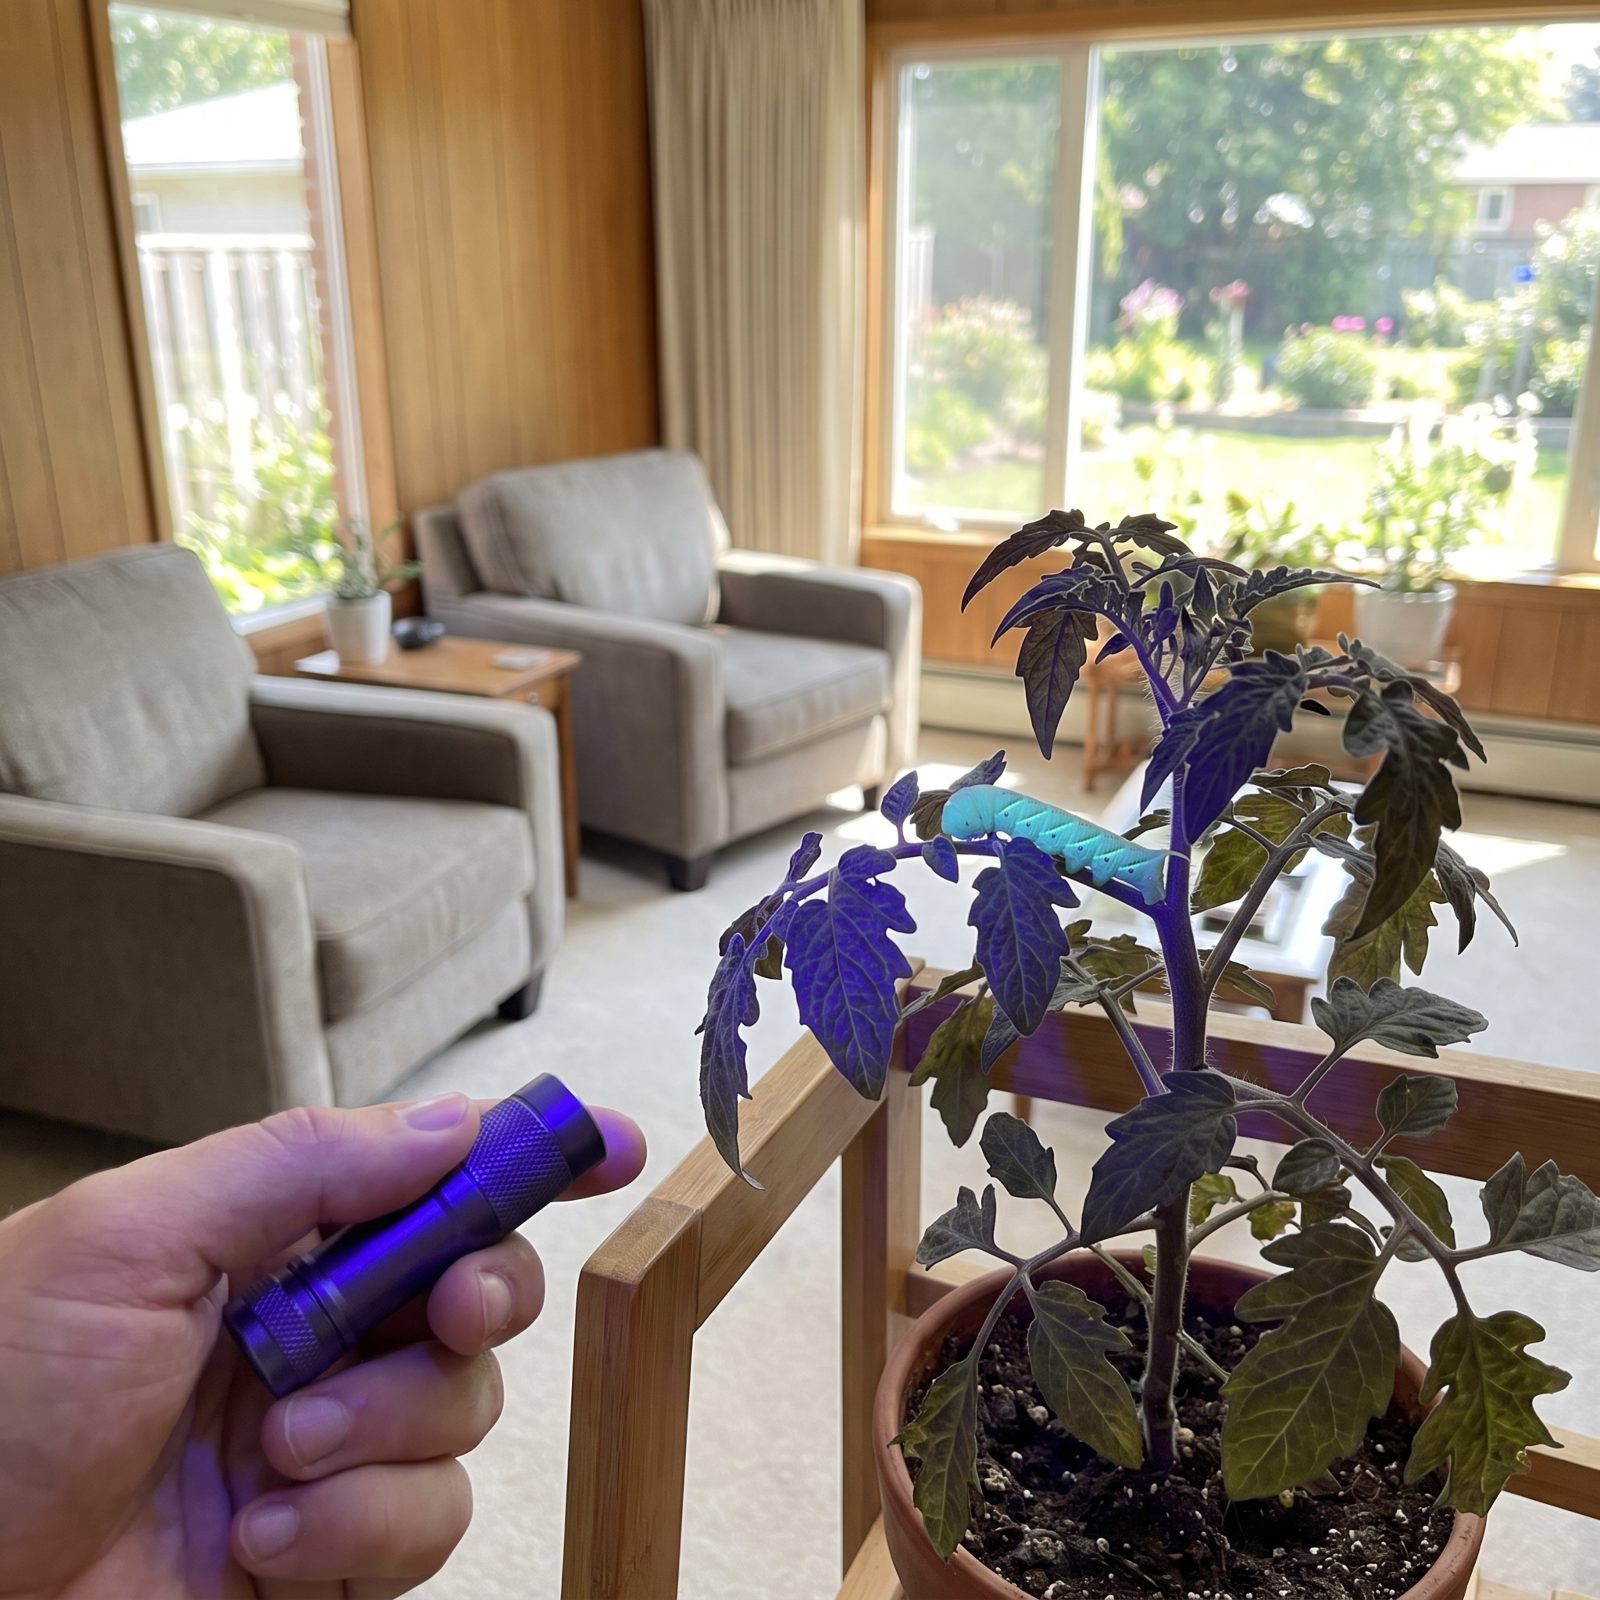
Tomato hornworms are nearly impossible to see in daylight. They’re exactly the green of the leaves they’re shredding, and they hide on the undersides, so you usually find one by accident after it has stripped a whole branch.
Sweep an ultraviolet flashlight over the plants after dark instead. The caterpillars fluoresce, glowing a ghostly green-cyan under UV while the leaves around them just turn a dull purple-blue. They light up like little lanterns and you can pick them off in minutes.
A cheap UV torch runs a few dollars and turns the most frustrating pest in the tomato patch into the easiest one to catch.
36. Keep a Small Damp Mud Patch Going for Your Mason Bees
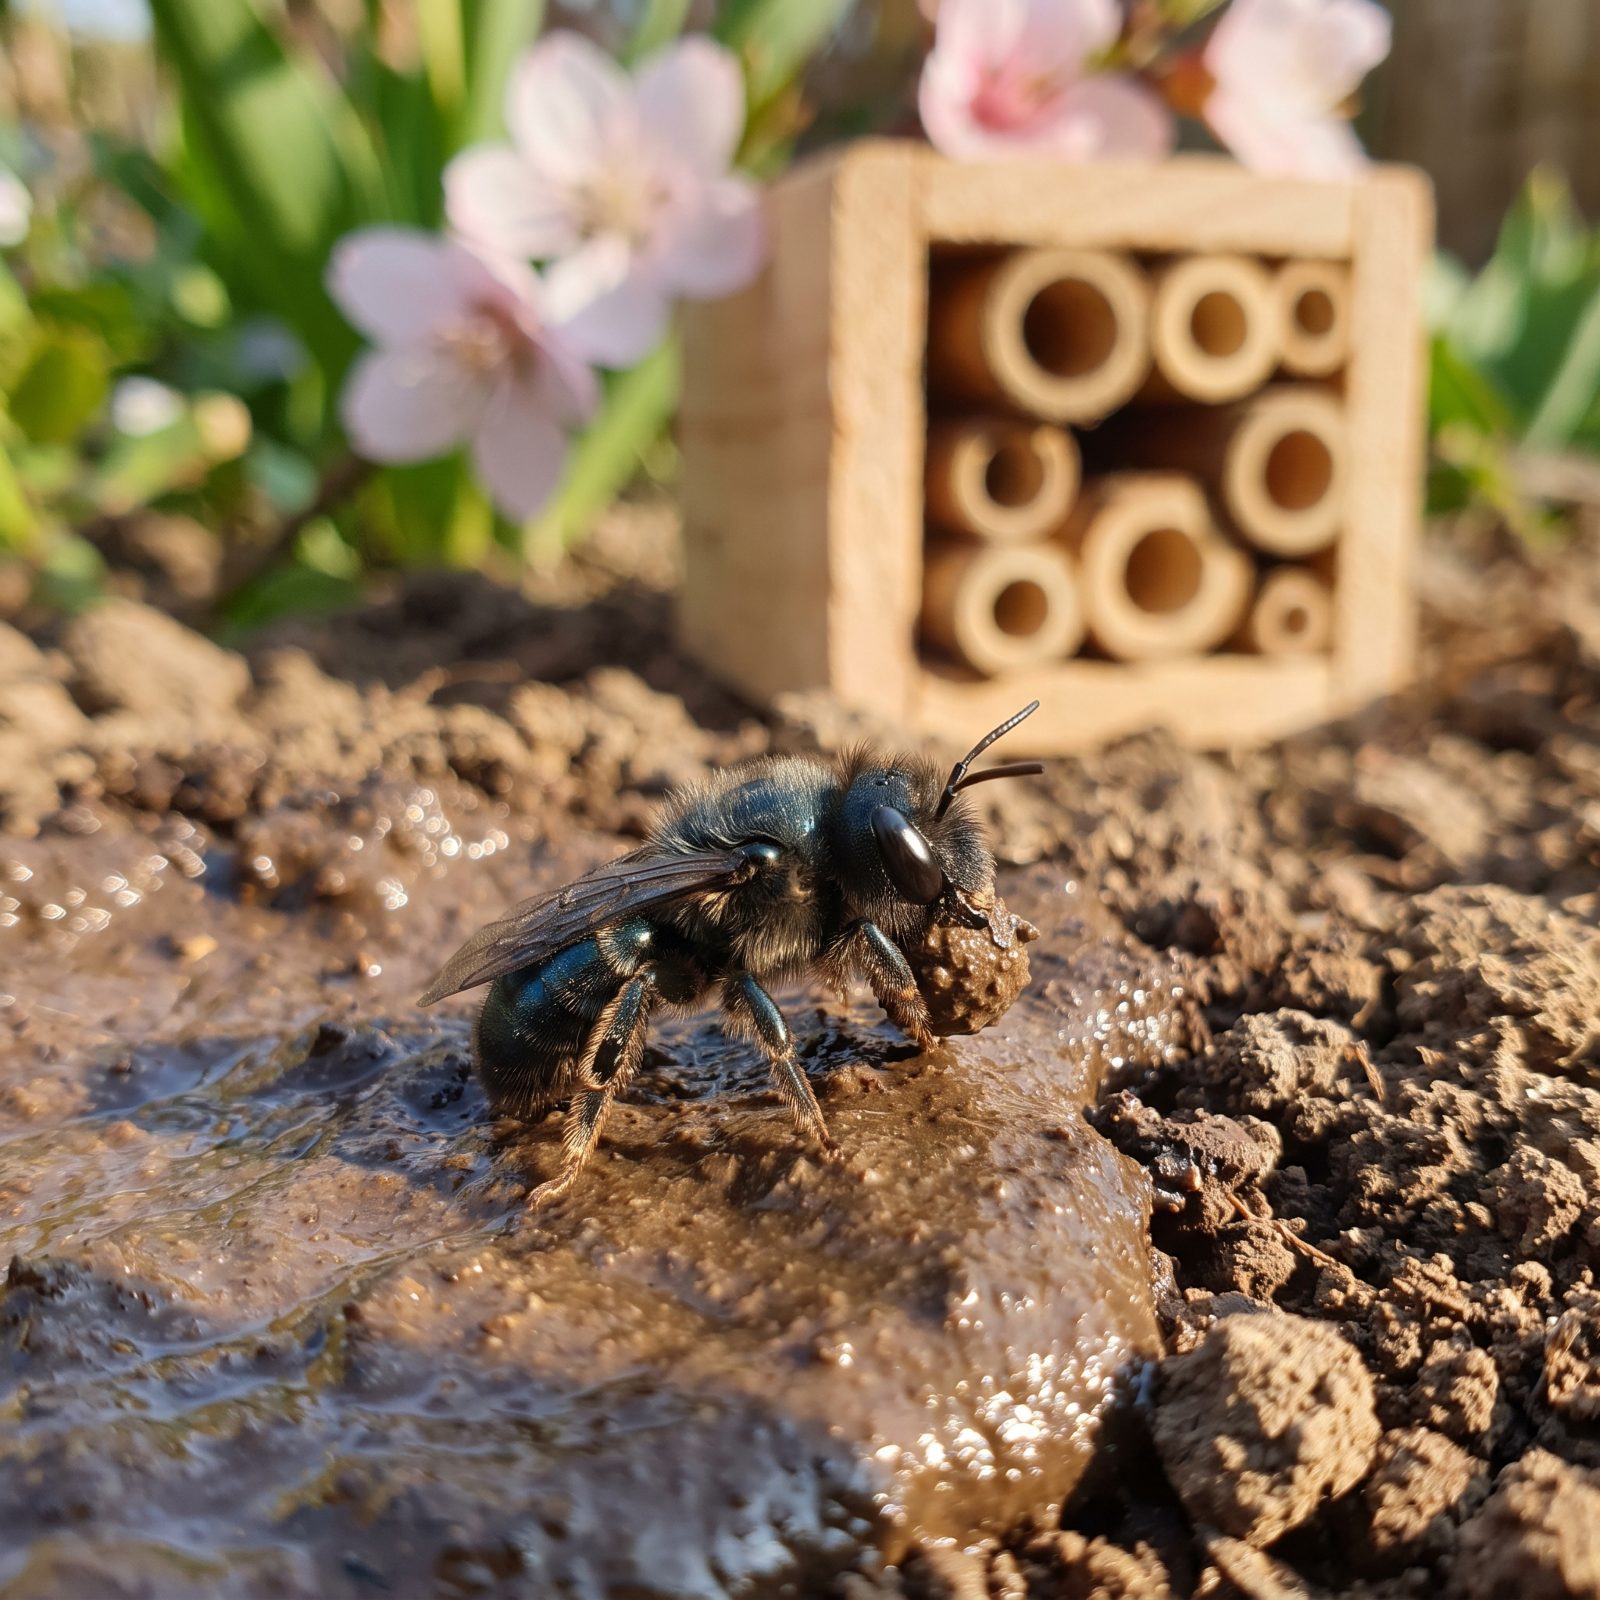
Mason bees are some of the best fruit pollinators going. They barely sting, make no honey, and live alone rather than in hives. What they need is mud. They build the walls between their egg chambers out of it, and if there’s no damp workable mud nearby, they simply move on.
Keep a small patch of bare soil wet, roughly the consistency of pie dough, near a nesting block or a spot they already visit. That’s the whole favor.
Give them mud and a few early blossoms and a handful of them will out-pollinate a swarm of honeybees in your spring orchard.
35. Feed Established Hungry Crops With Heavily Diluted Urine
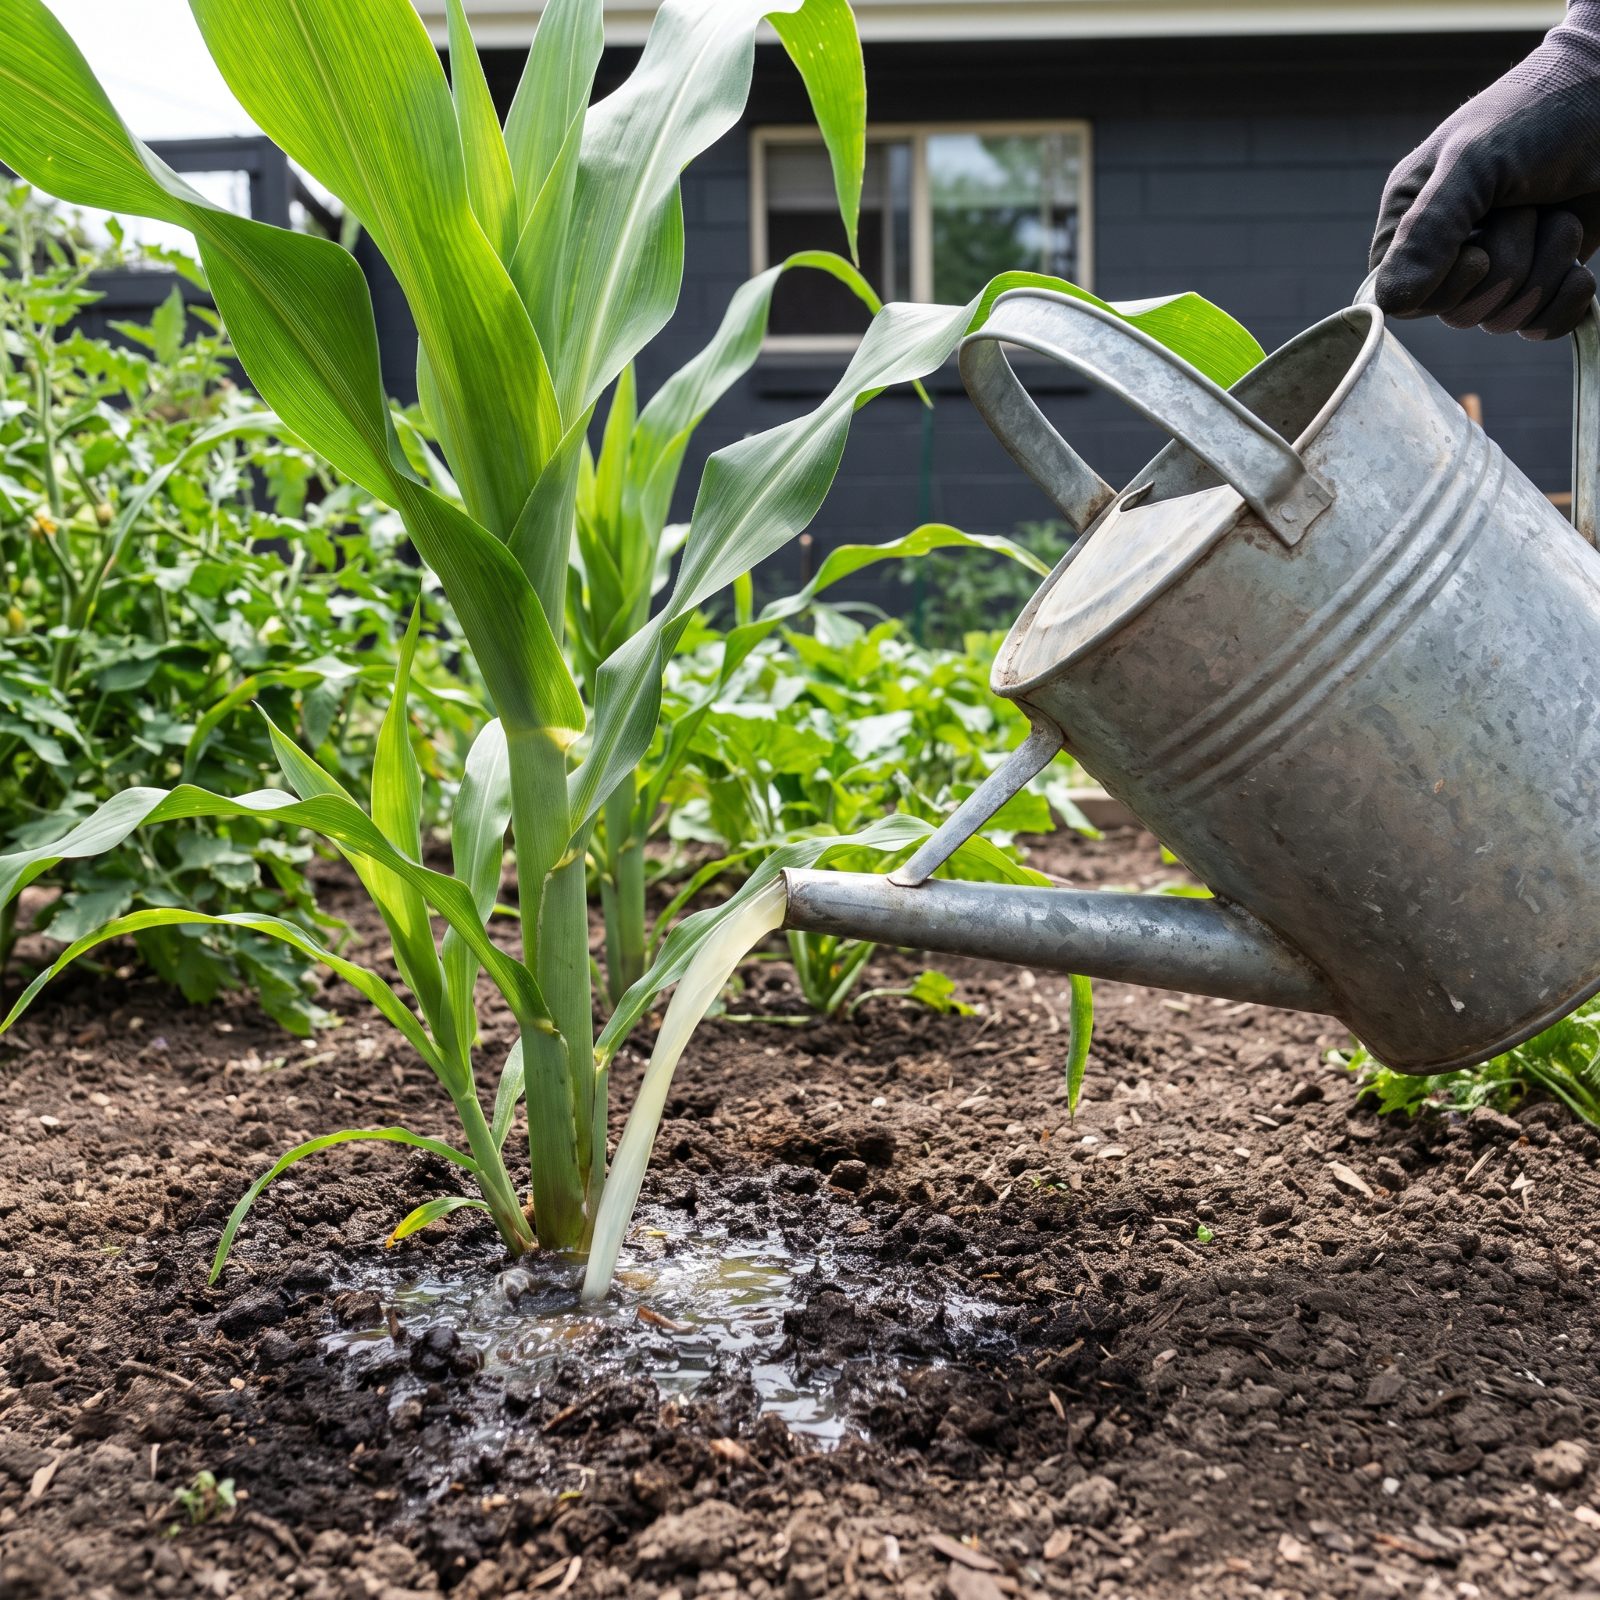
Yes, this one. Human urine from a healthy person is close to sterile when fresh and loaded with nitrogen, phosphorus, and potassium — a free, fast-acting fertilizer gardeners have leaned on for centuries.
The non-negotiable part is dilution. Roughly ten parts water to one part urine, poured on the soil around established heavy feeders like corn, squash, and leafy greens. Never on the leaves. Never on seedlings. Undiluted, the salts and nitrogen will scorch roots dead.
Stop a couple of weeks before you harvest anything you’ll eat raw, and skip it entirely if anyone in the house is on medication. Used sensibly, it’s the most efficient recycling your garden will ever do.
34. Pour Old Aquarium Water on Ornamentals Instead of Dumping It
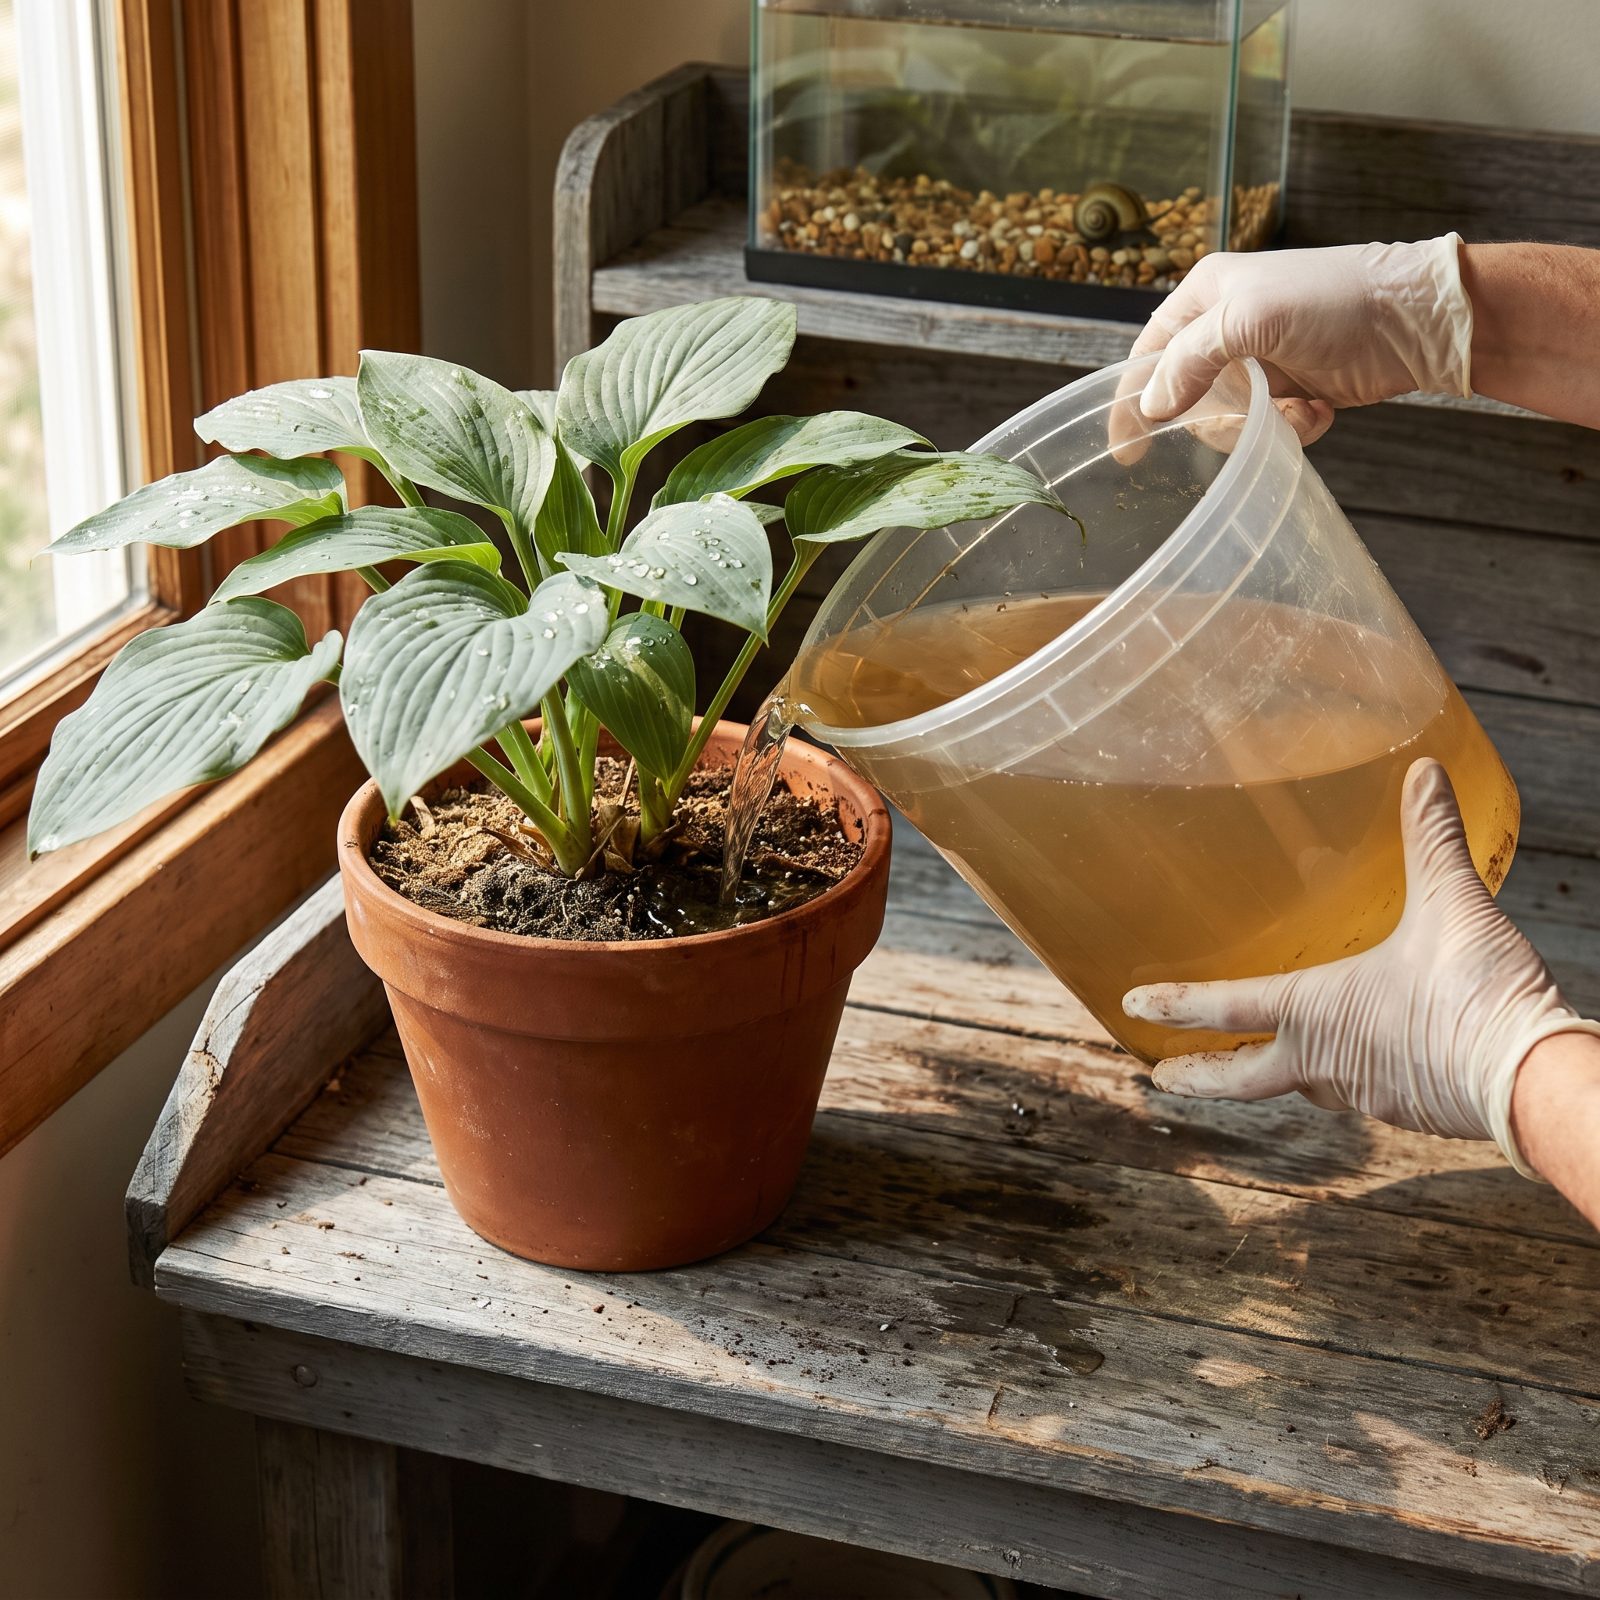
That murky water you siphon out during a tank change is loaded with dissolved fish waste, which is basically free nitrogen plus a mild dose of other nutrients. So pour it around the roots of hostas, ferns, hydrangeas, anything leafy and hungry, rather than sending it down the drain.
A few things to keep straight, though. Use freshwater tank water only, never saltwater, and never water that’s just been dosed with medication or algaecide. It’s weak fertilizer, not a miracle — it supplements your normal feeding, it doesn’t replace it. Fishkeepers have quietly done this for decades without ever once calling it gardening.
33. Give Floppy Summer Perennials a Chelsea Chop in Late Spring
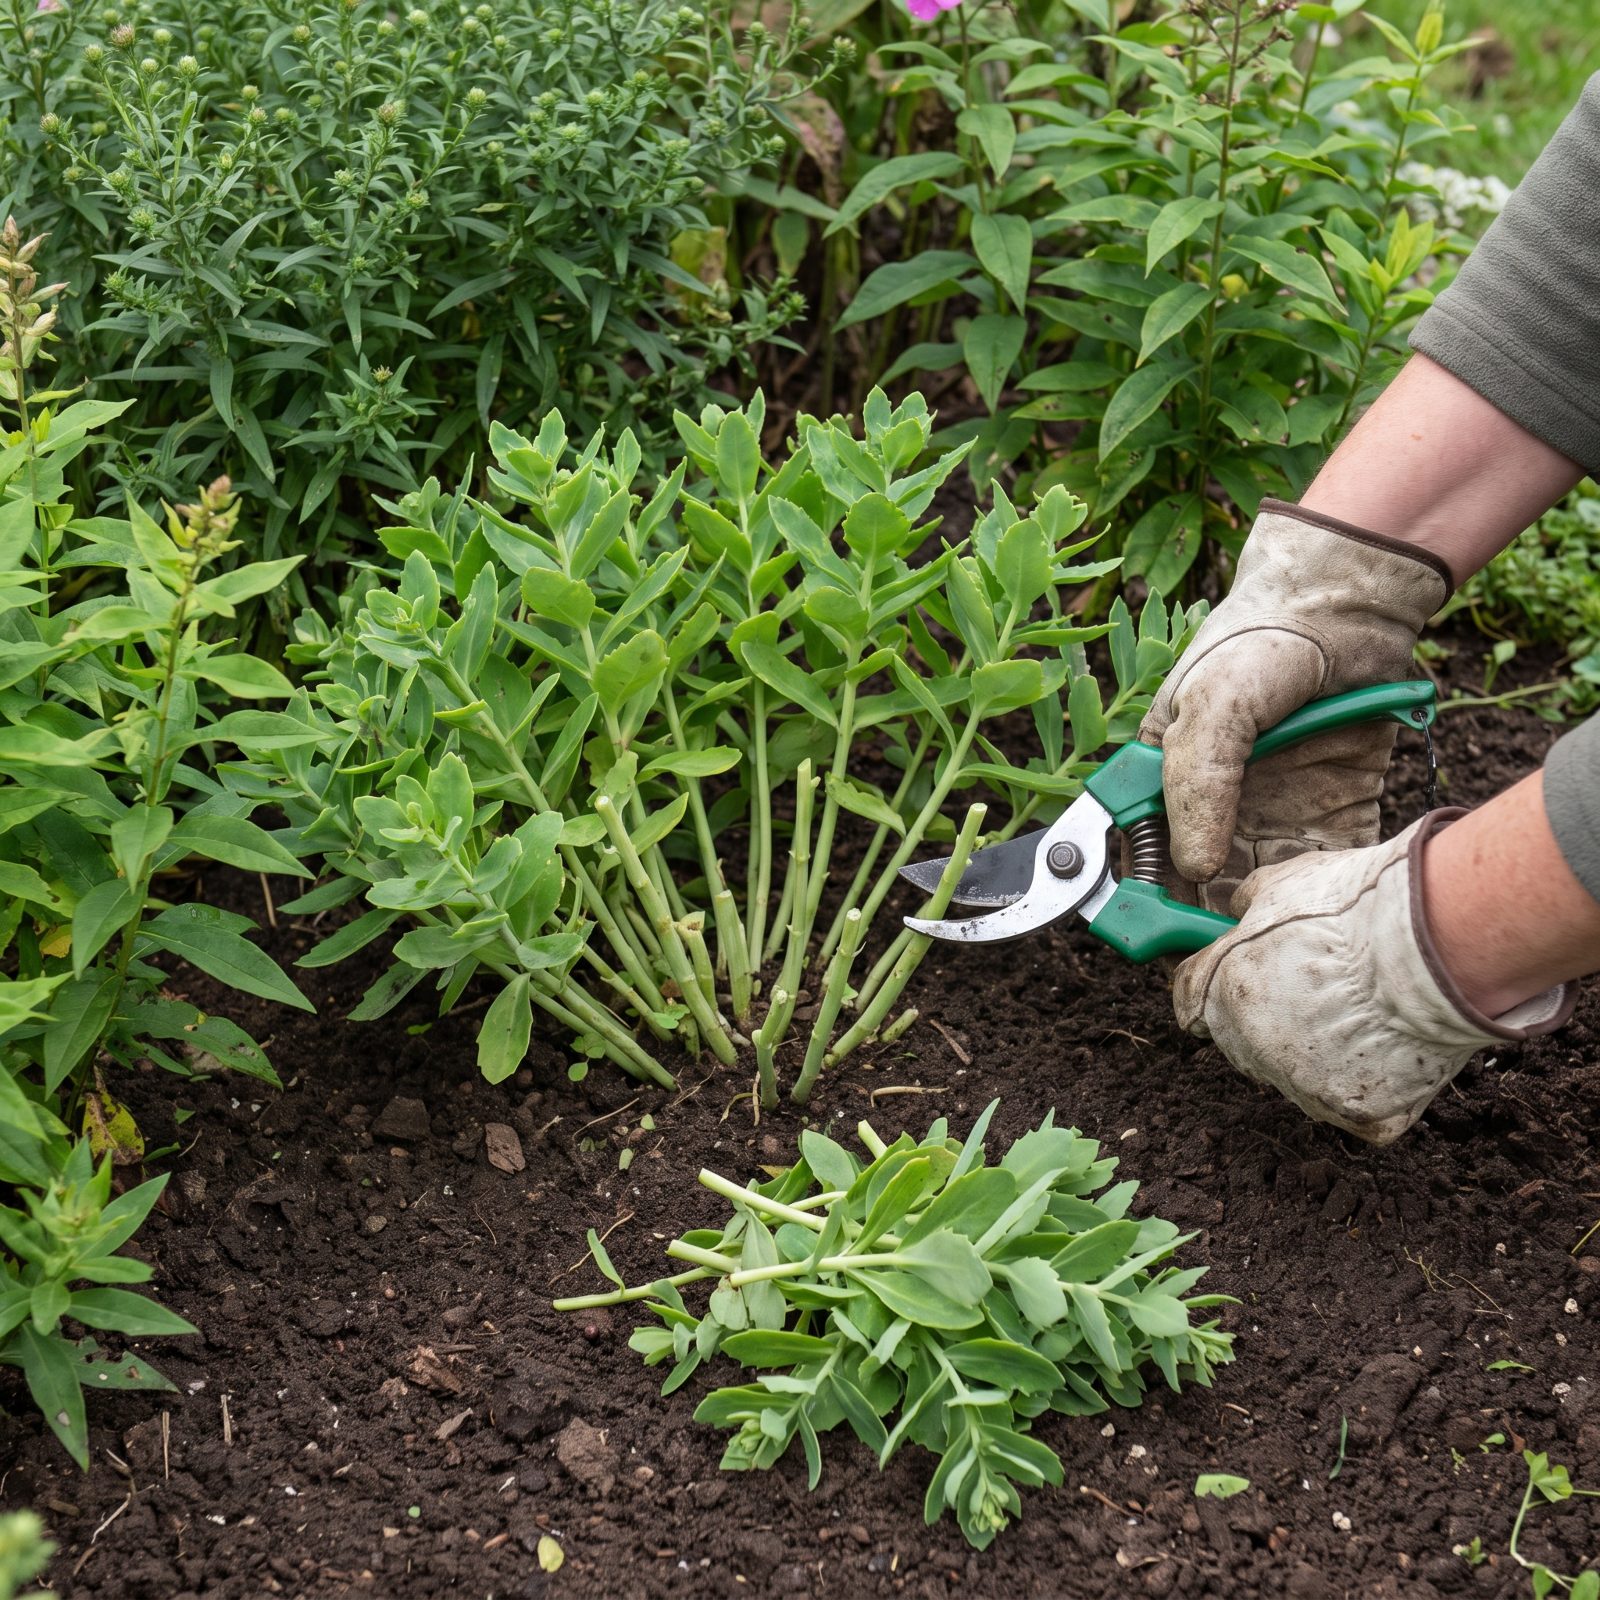
Cutting a healthy plant in half feels wrong until you see what it does. The Chelsea chop — named for the timing around the famous London flower show in late May — means shearing back late-flowering perennials like sedum, phlox, asters, and rudbeckia by a third or so, before they bloom.
The plant answers by branching. You get a bushier, sturdier shape and a cloud of smaller flowers instead of a few tall stems that keel over in the first storm. Blooming slips back a week or two. That delay is exactly the point if you’re sick of staking.
32. Drop Leek Seedlings Into Deep Holes and Just Add Water
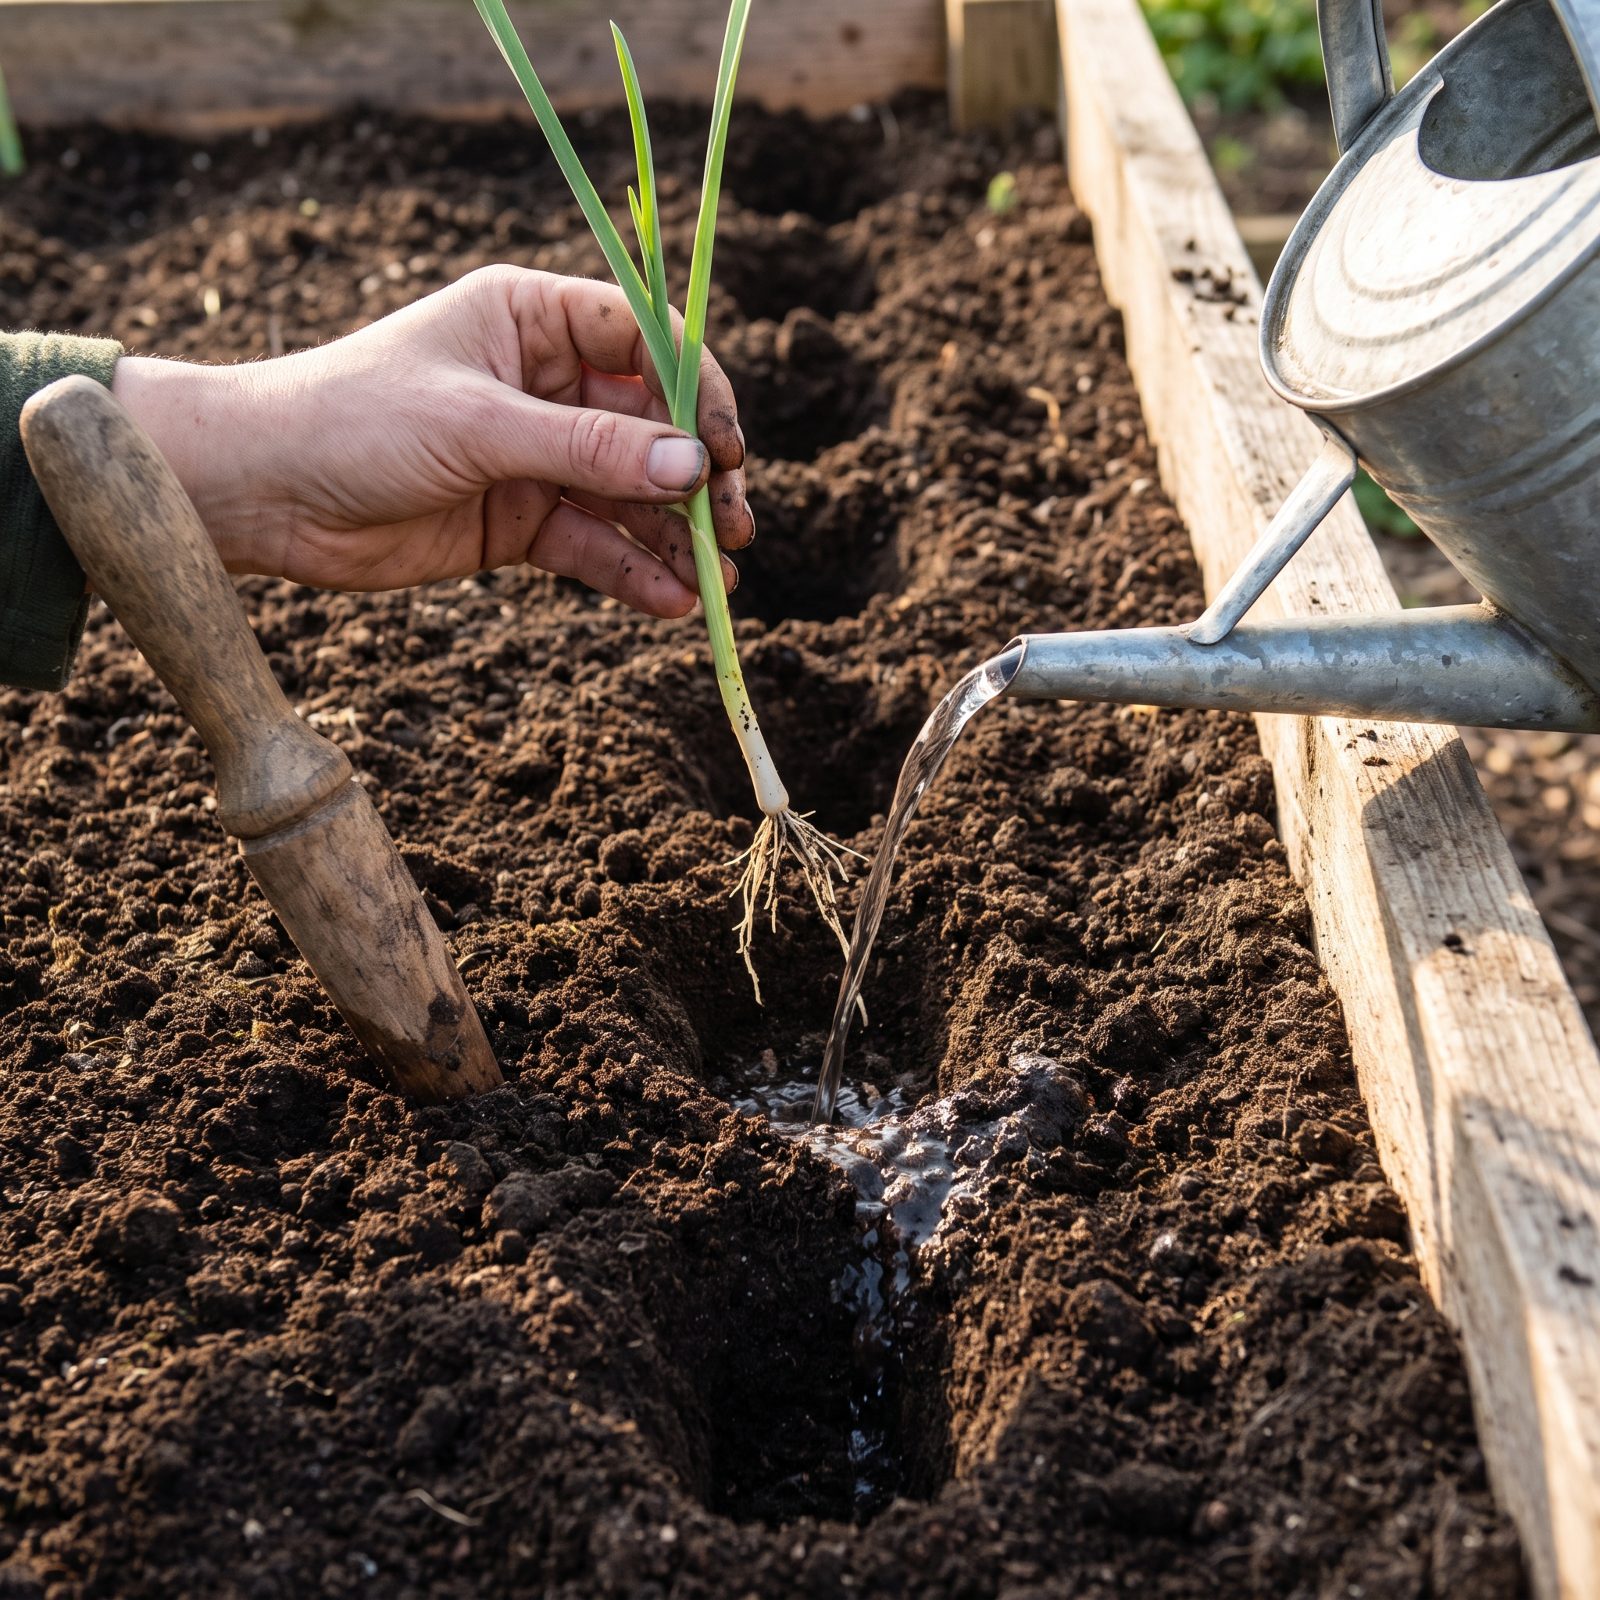
Want leeks that grow long and white? Poke a hole about six inches deep with a dibber, drop the seedling in, and leave the hole unfilled. Just water it.
The water trickles enough earth over the roots to settle them, while the shaft grows up inside the hollow, blanched and tender from the lack of light. That pale lower section is the part worth eating. Backfill and you lose the whole advantage — a lesson most people learn after one disappointing crop of short, green, gritty leeks.
31. Sow Radish Seeds Alongside Carrots to Mark the Row
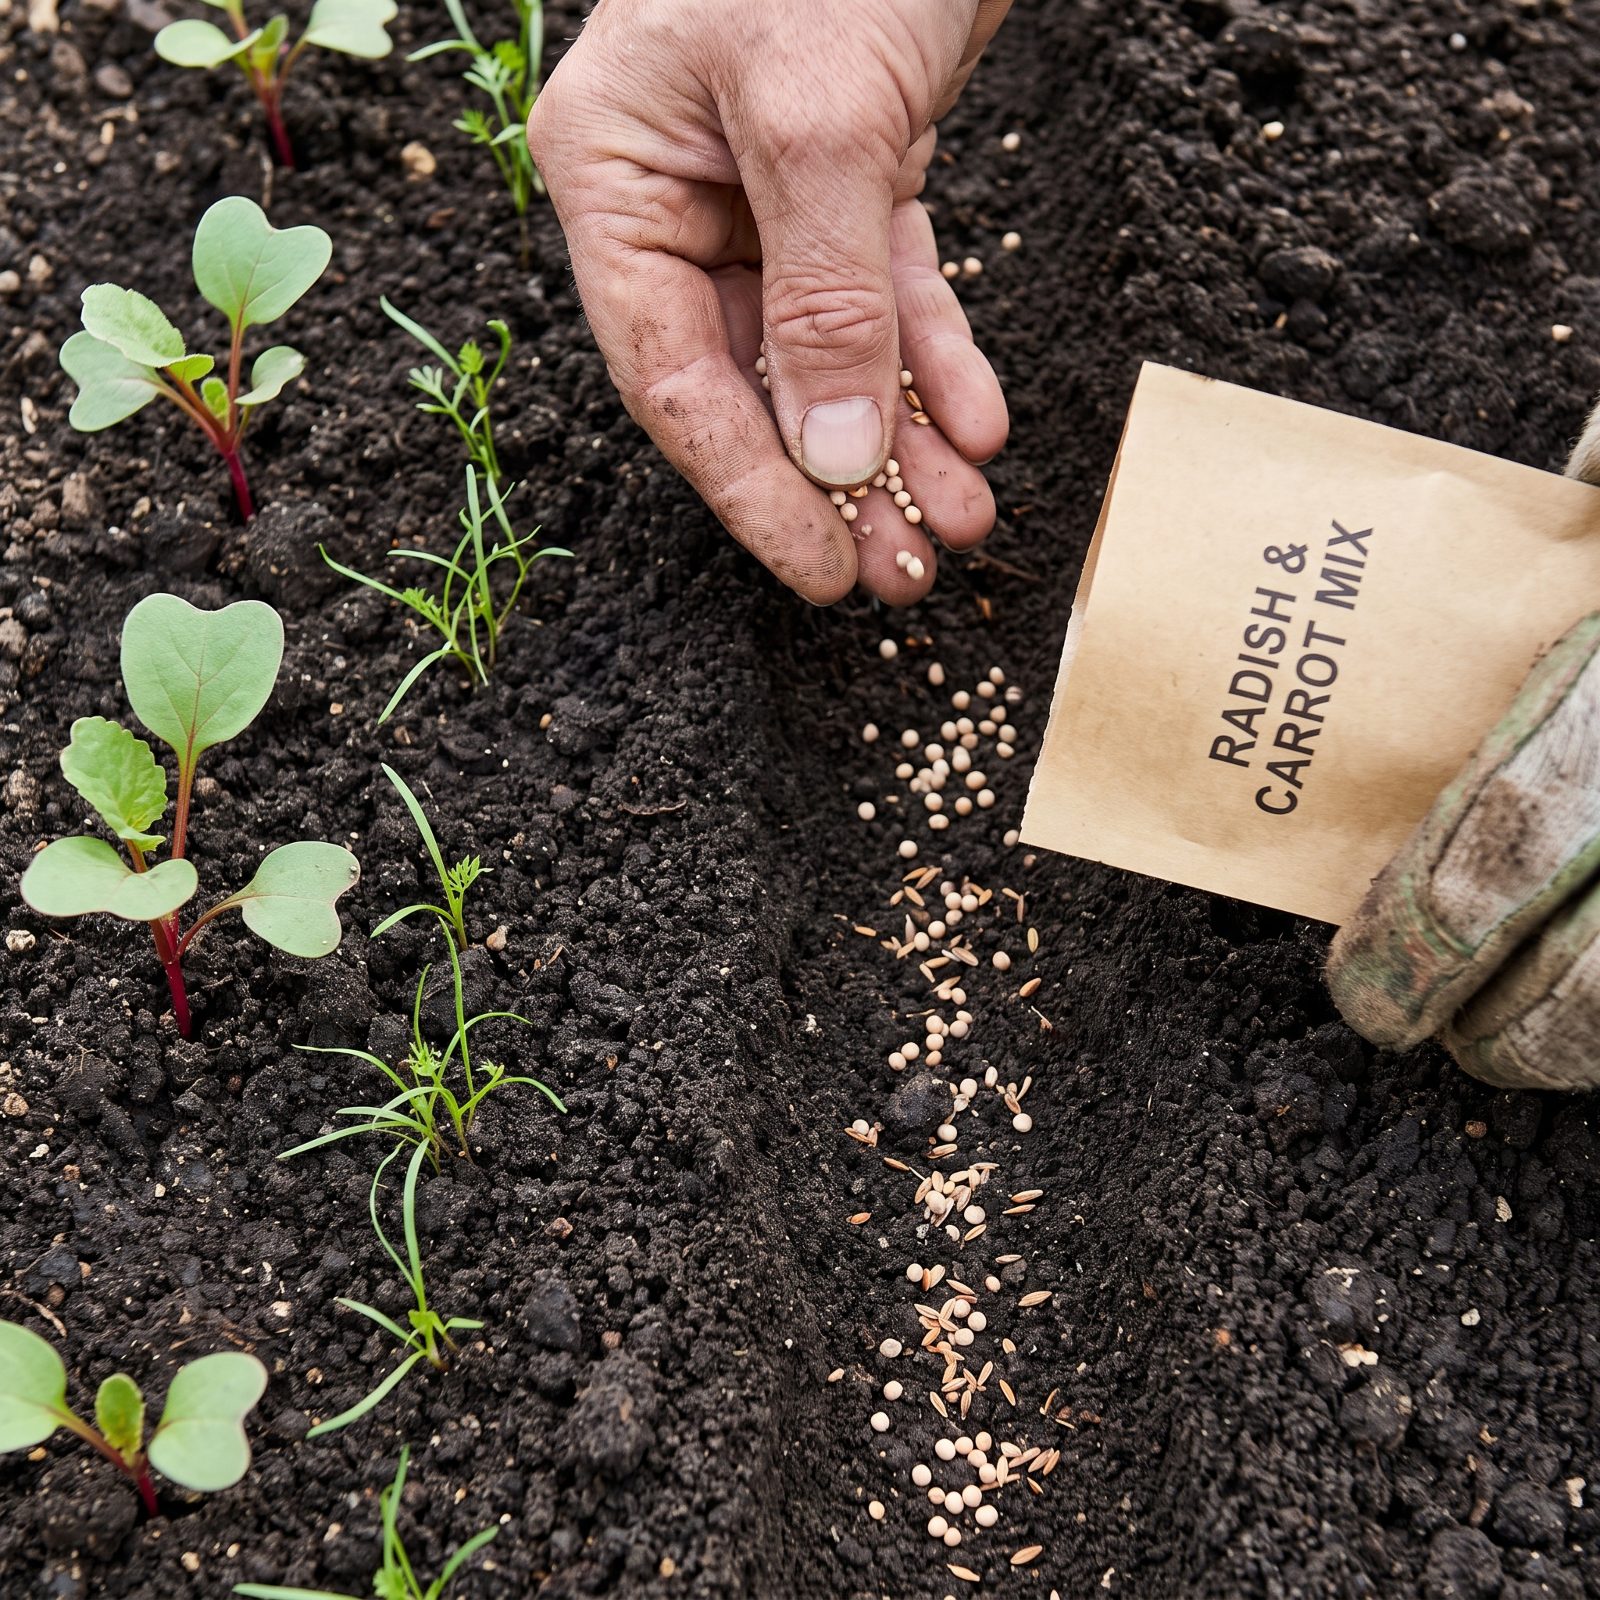
Carrots take two or three weeks to show, by which point you’ve forgotten where the row is and started hoeing it out. Radishes come up in days.
Mix a pinch of radish seed into your carrot seed before sowing. The radishes sprout fast and mark the line so you can weed with confidence. As a bonus, their stronger seedlings crack any crust that forms on the surface after rain — the exact thing that stops fussy carrot seeds from breaking through. Pull the radishes as they mature, and the carrots inherit the space.
30. Force Rhubarb Early by Covering Crowns With a Dark Pot
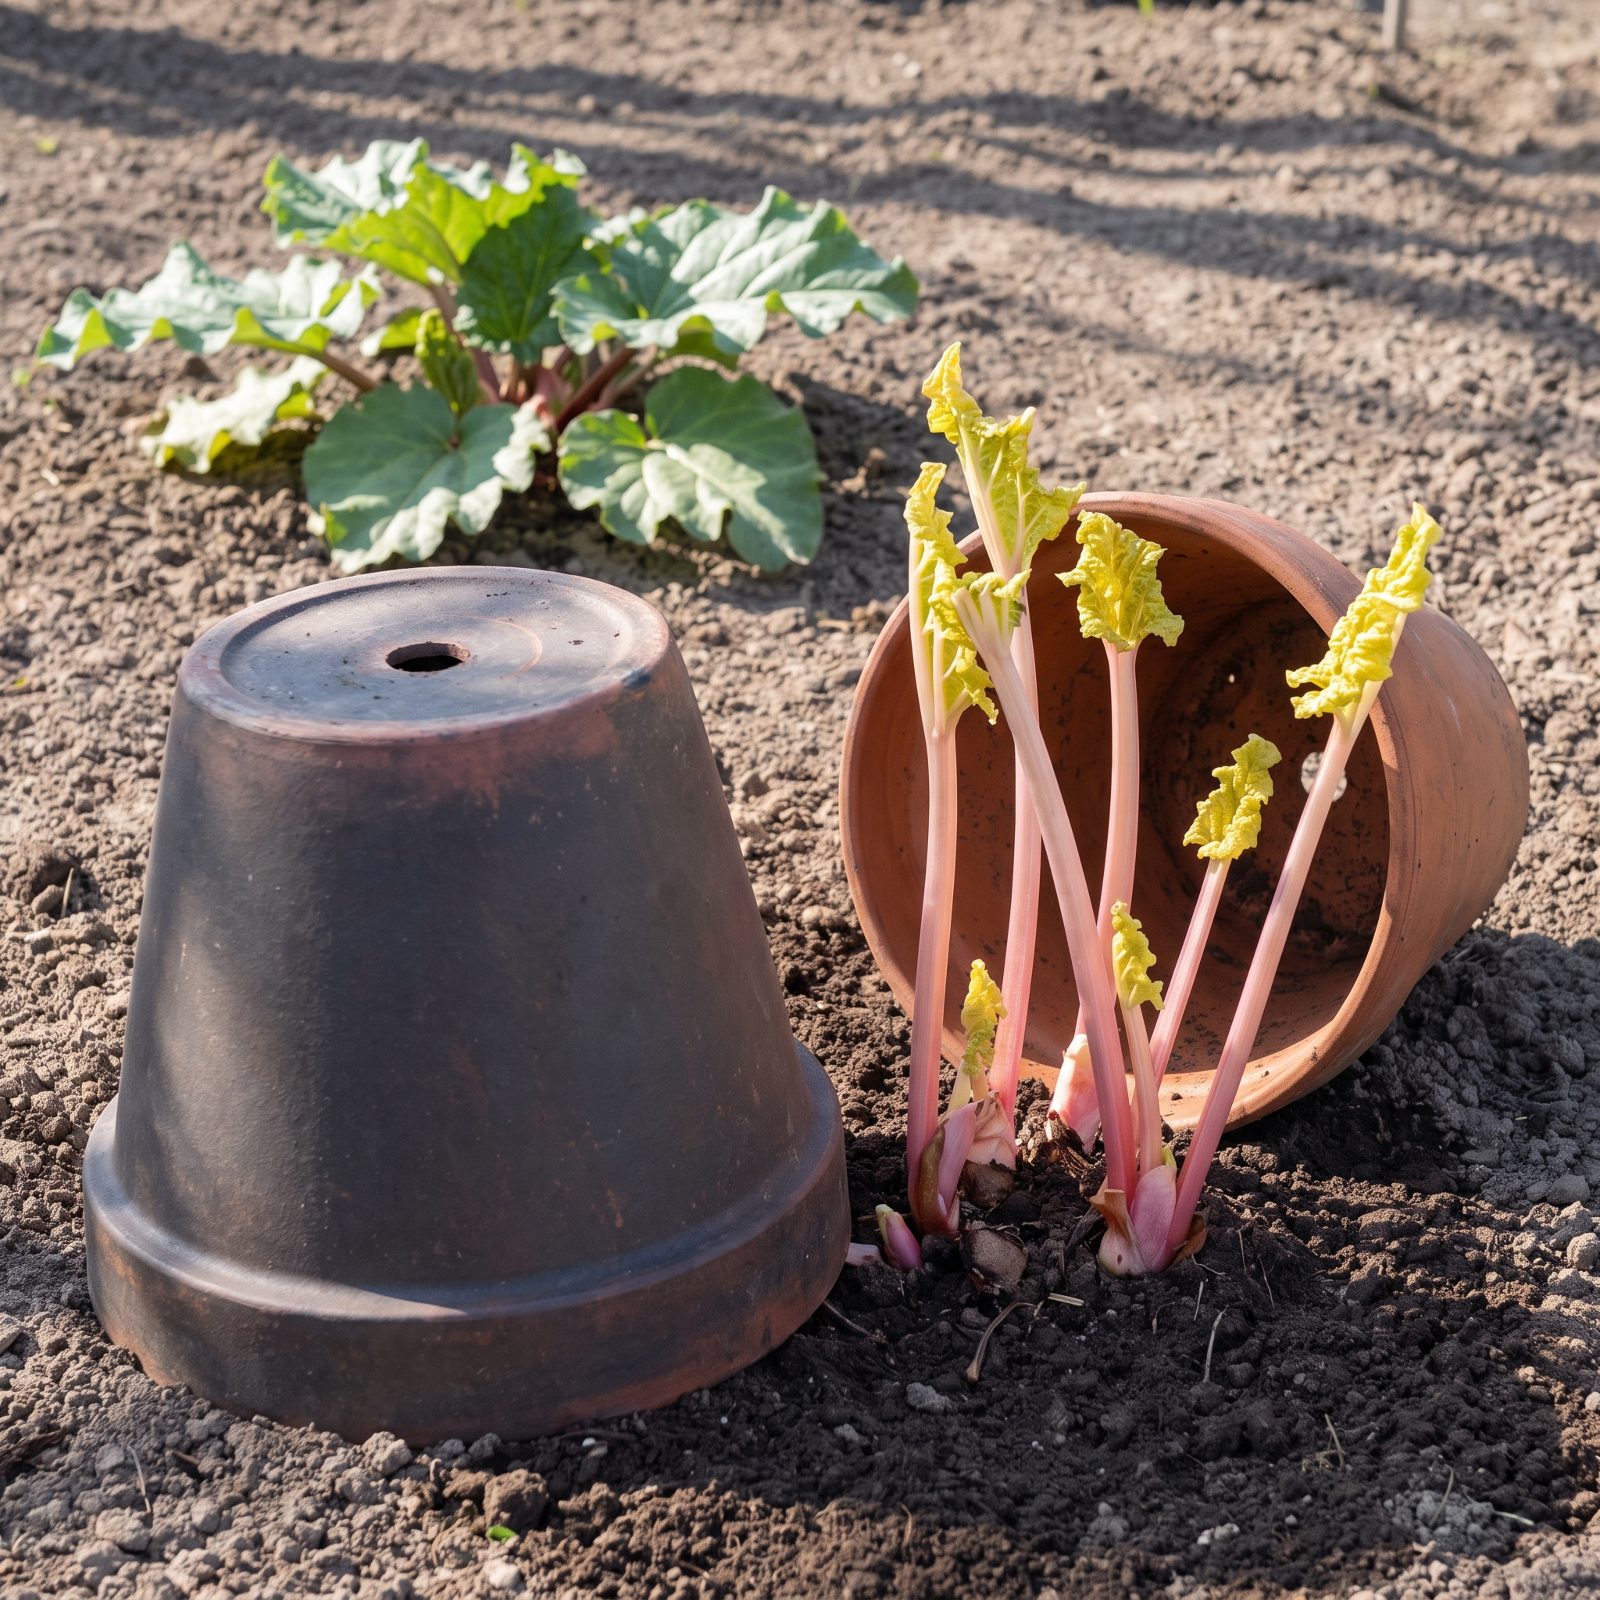
Cover a dormant rhubarb crown in late winter with a tall upturned pot or a dedicated forcing jar, and you’ll pull stems weeks ahead of everyone else. Blocking the light sends the plant reaching for where it thinks it should be, producing long, slender, pink stems far sweeter and more tender than the usual thick green ones.
One honest caveat. Forcing takes a lot out of the crown, so only force an established plant, never the same crown two years running, and let it recover afterward with a good feed. You’re borrowing against next season.
29. Flick Your Tomato Flowers at Midday to Shake the Pollen Loose
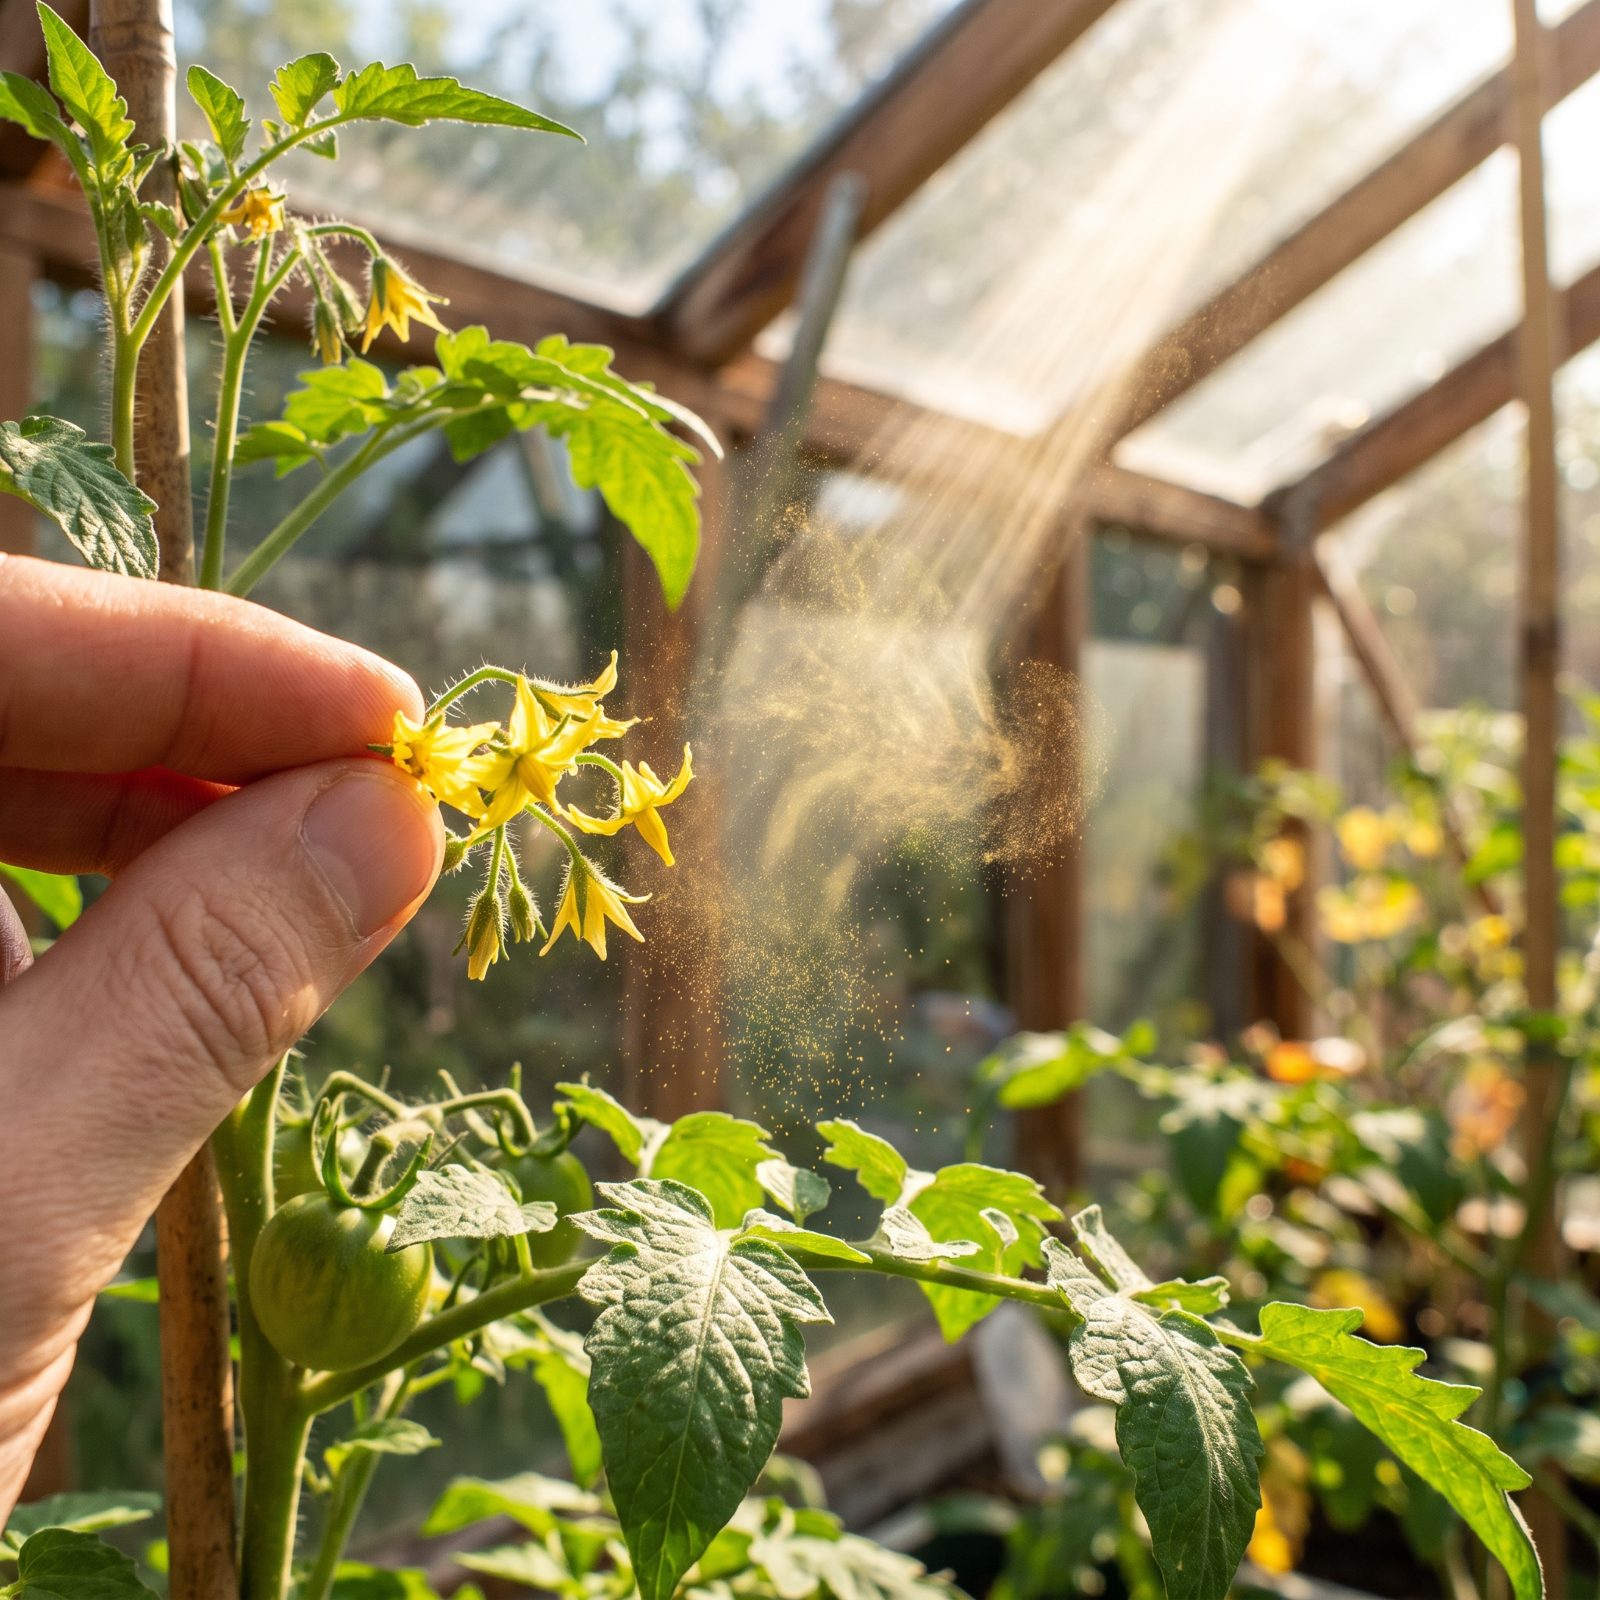
Tomatoes pollinate themselves, but the pollen needs a jolt to drop from the flower onto the stigma. Outdoors, wind and bumblebees handle it. Indoors — in a greenhouse or on a still patio — nothing does, so you end up with flowers that yellow and fall without ever setting fruit.
Give the clusters a gentle flick, or tap the main stem, around midday when the air is drier and the pollen loosest. A dry day, a quick shake, done. Costs nothing, and it’s the whole difference between a productive plant and a leafy one.
28. Inoculate Beans and Peas With the Right Rhizobium Before Sowing
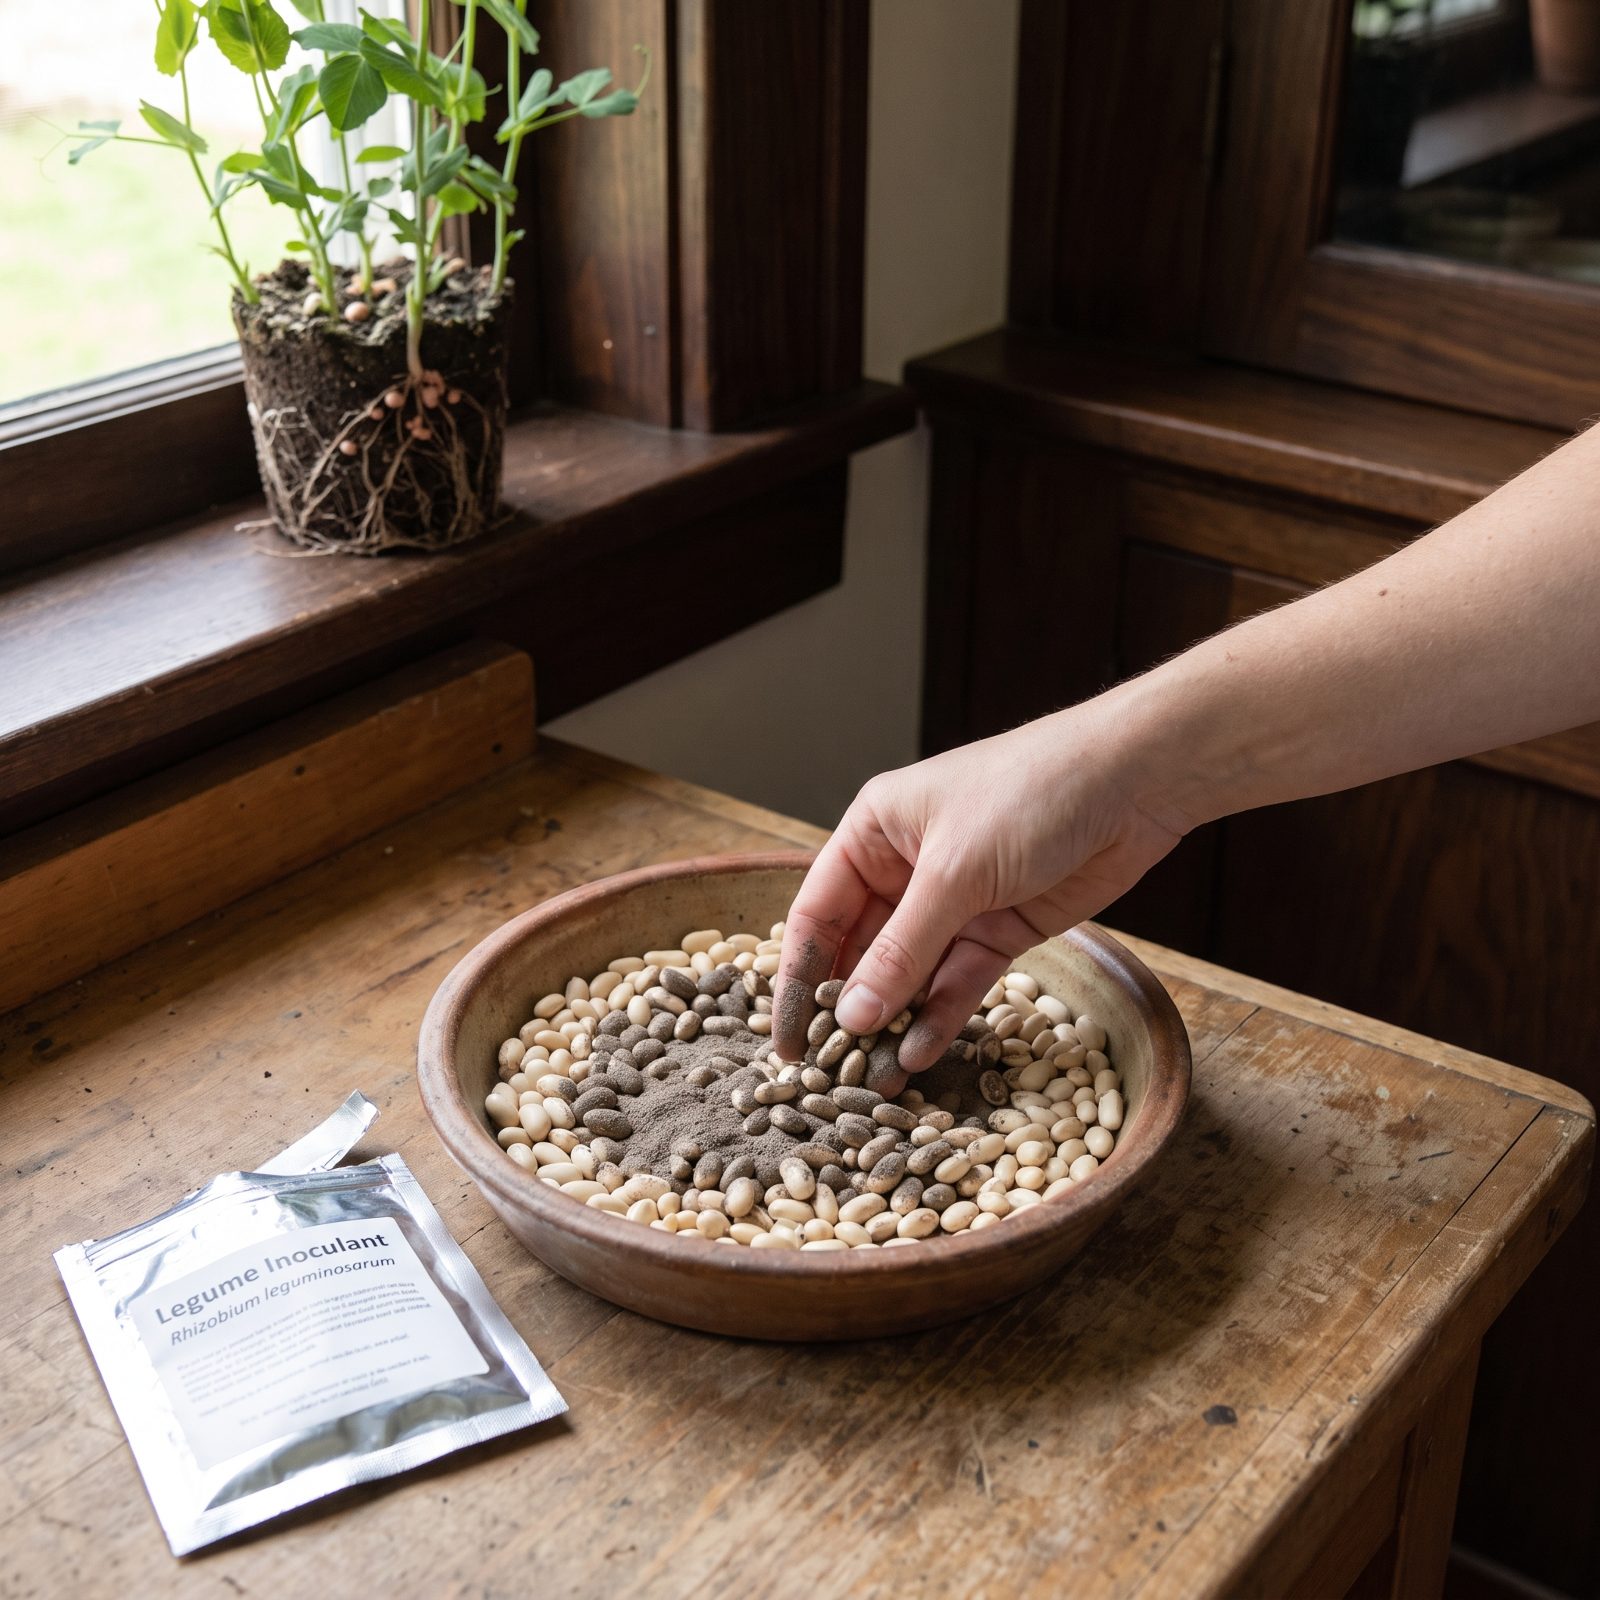
Legumes feed themselves nitrogen, but only with help. Beans and peas partner with soil bacteria called rhizobia that colonize their roots, form little pink nodules, and pull nitrogen straight out of the air. In garden soil that hasn’t grown legumes recently, the right strain may simply not be there.
Dusting the seeds with a matching inoculant powder before sowing introduces it. And here’s the catch nobody mentions: the strain is specific. Garden peas need a different inoculant than runner beans, which need a different one again from soybeans. Buy the one that names your crop, keep it cool and dry, and respect the expiry date — it’s living bacteria, and dead powder does nothing.
27. Start Seedlings in Soil Blocks That Air-Prune Their Own Roots
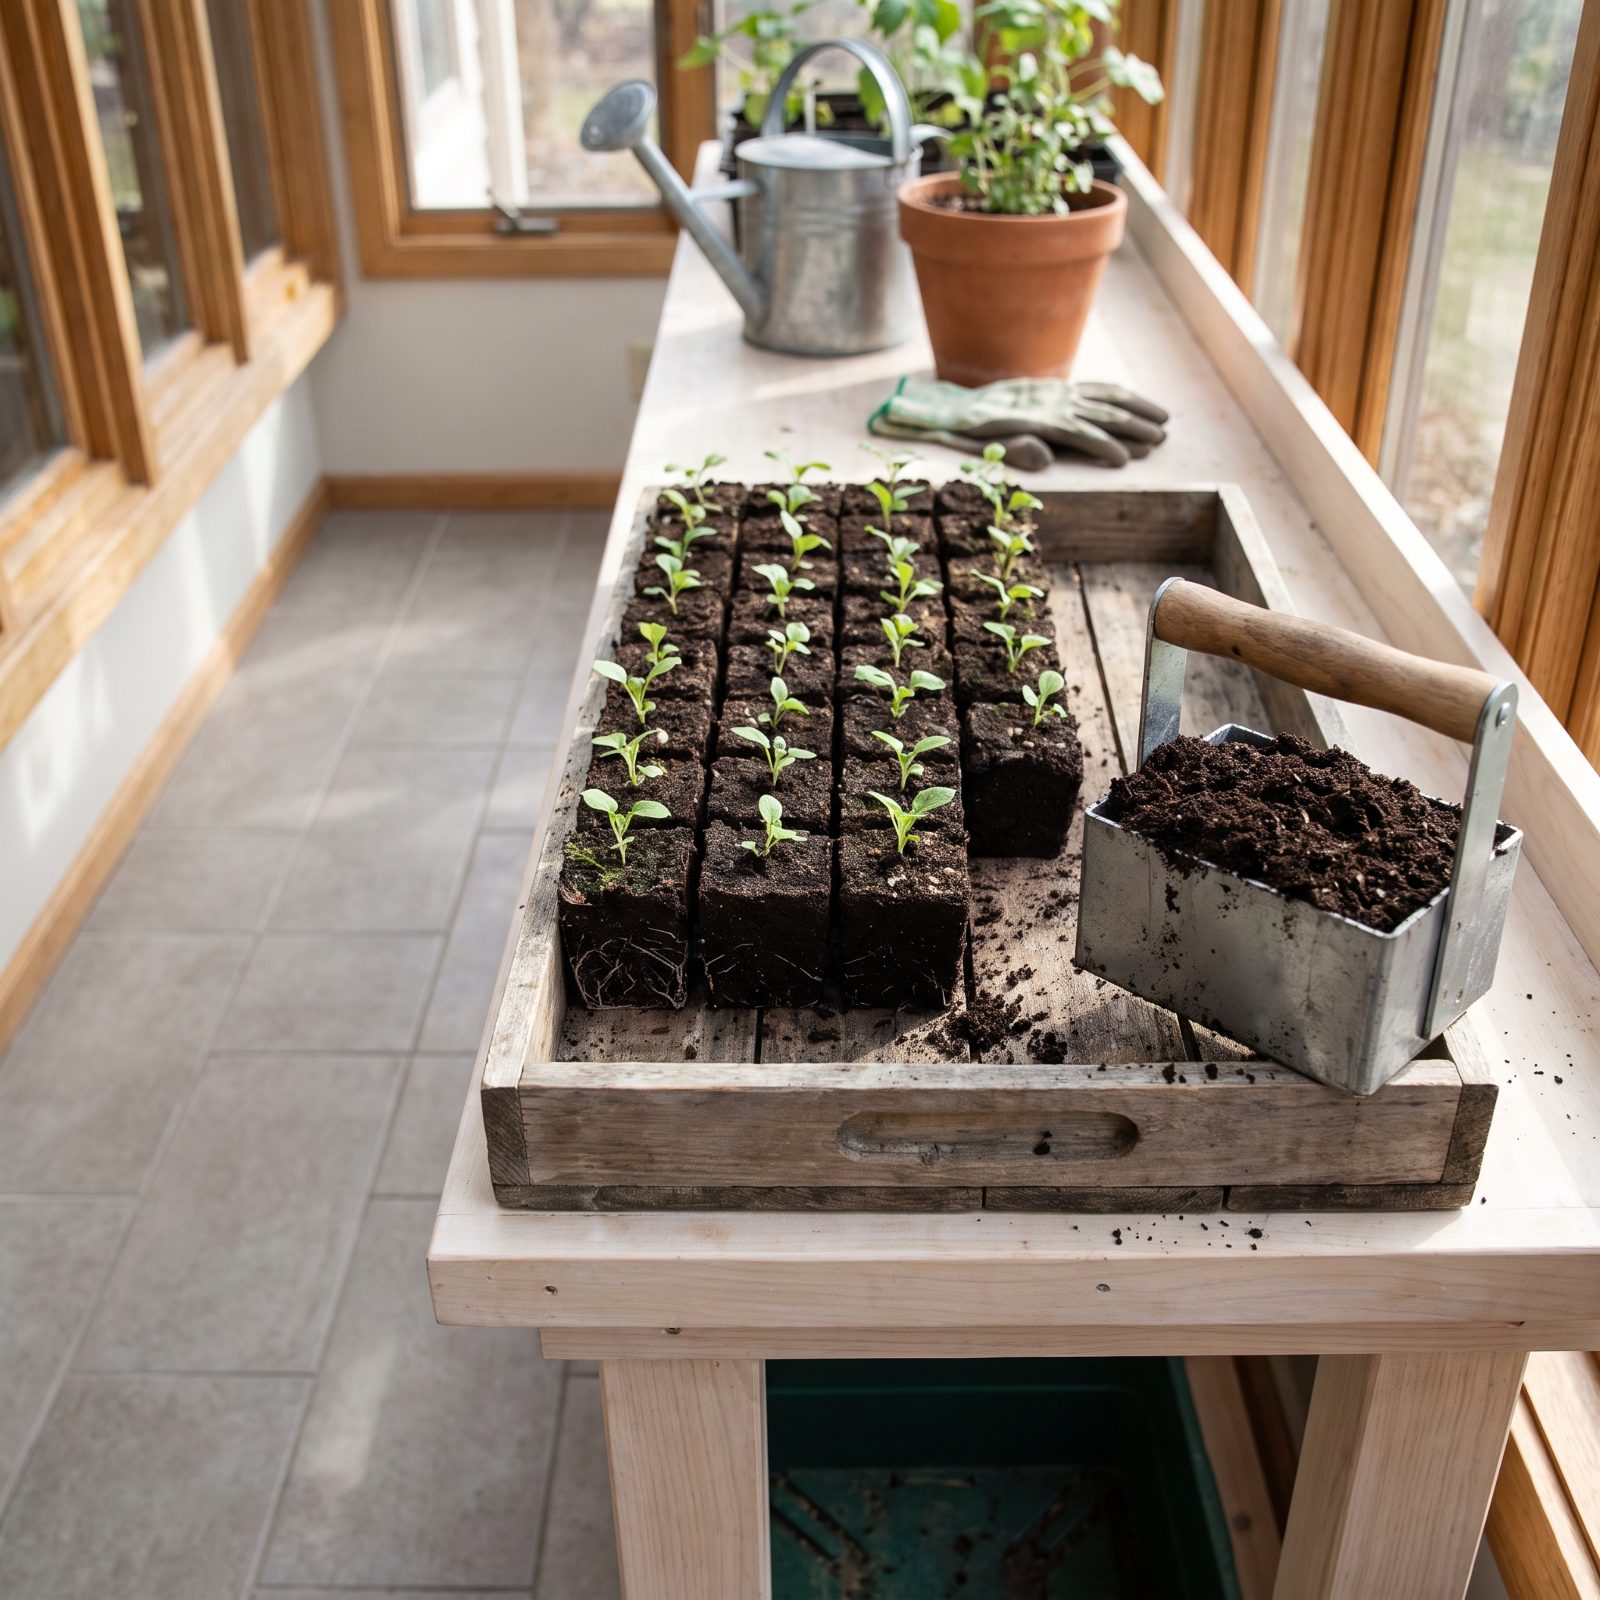
Skip the plastic cells entirely. A soil blocker presses damp seed-starting mix into free-standing cubes, each one its own little pot made of nothing but compost.
When a root reaches the edge and hits air, it stops and branches rather than circling the way it would inside a plastic cell. That’s air-pruning, and it hands you a dense fibrous root ball that transplants with almost no shock — no pot to wrestle it out of, no coiled roots to untangle. Fewer wasted plastic trays, too. The one downside? They dry out fast, so water from below and keep an eye on them.
26. Snip Spent Crops at Soil Level and Leave the Roots to Rot In
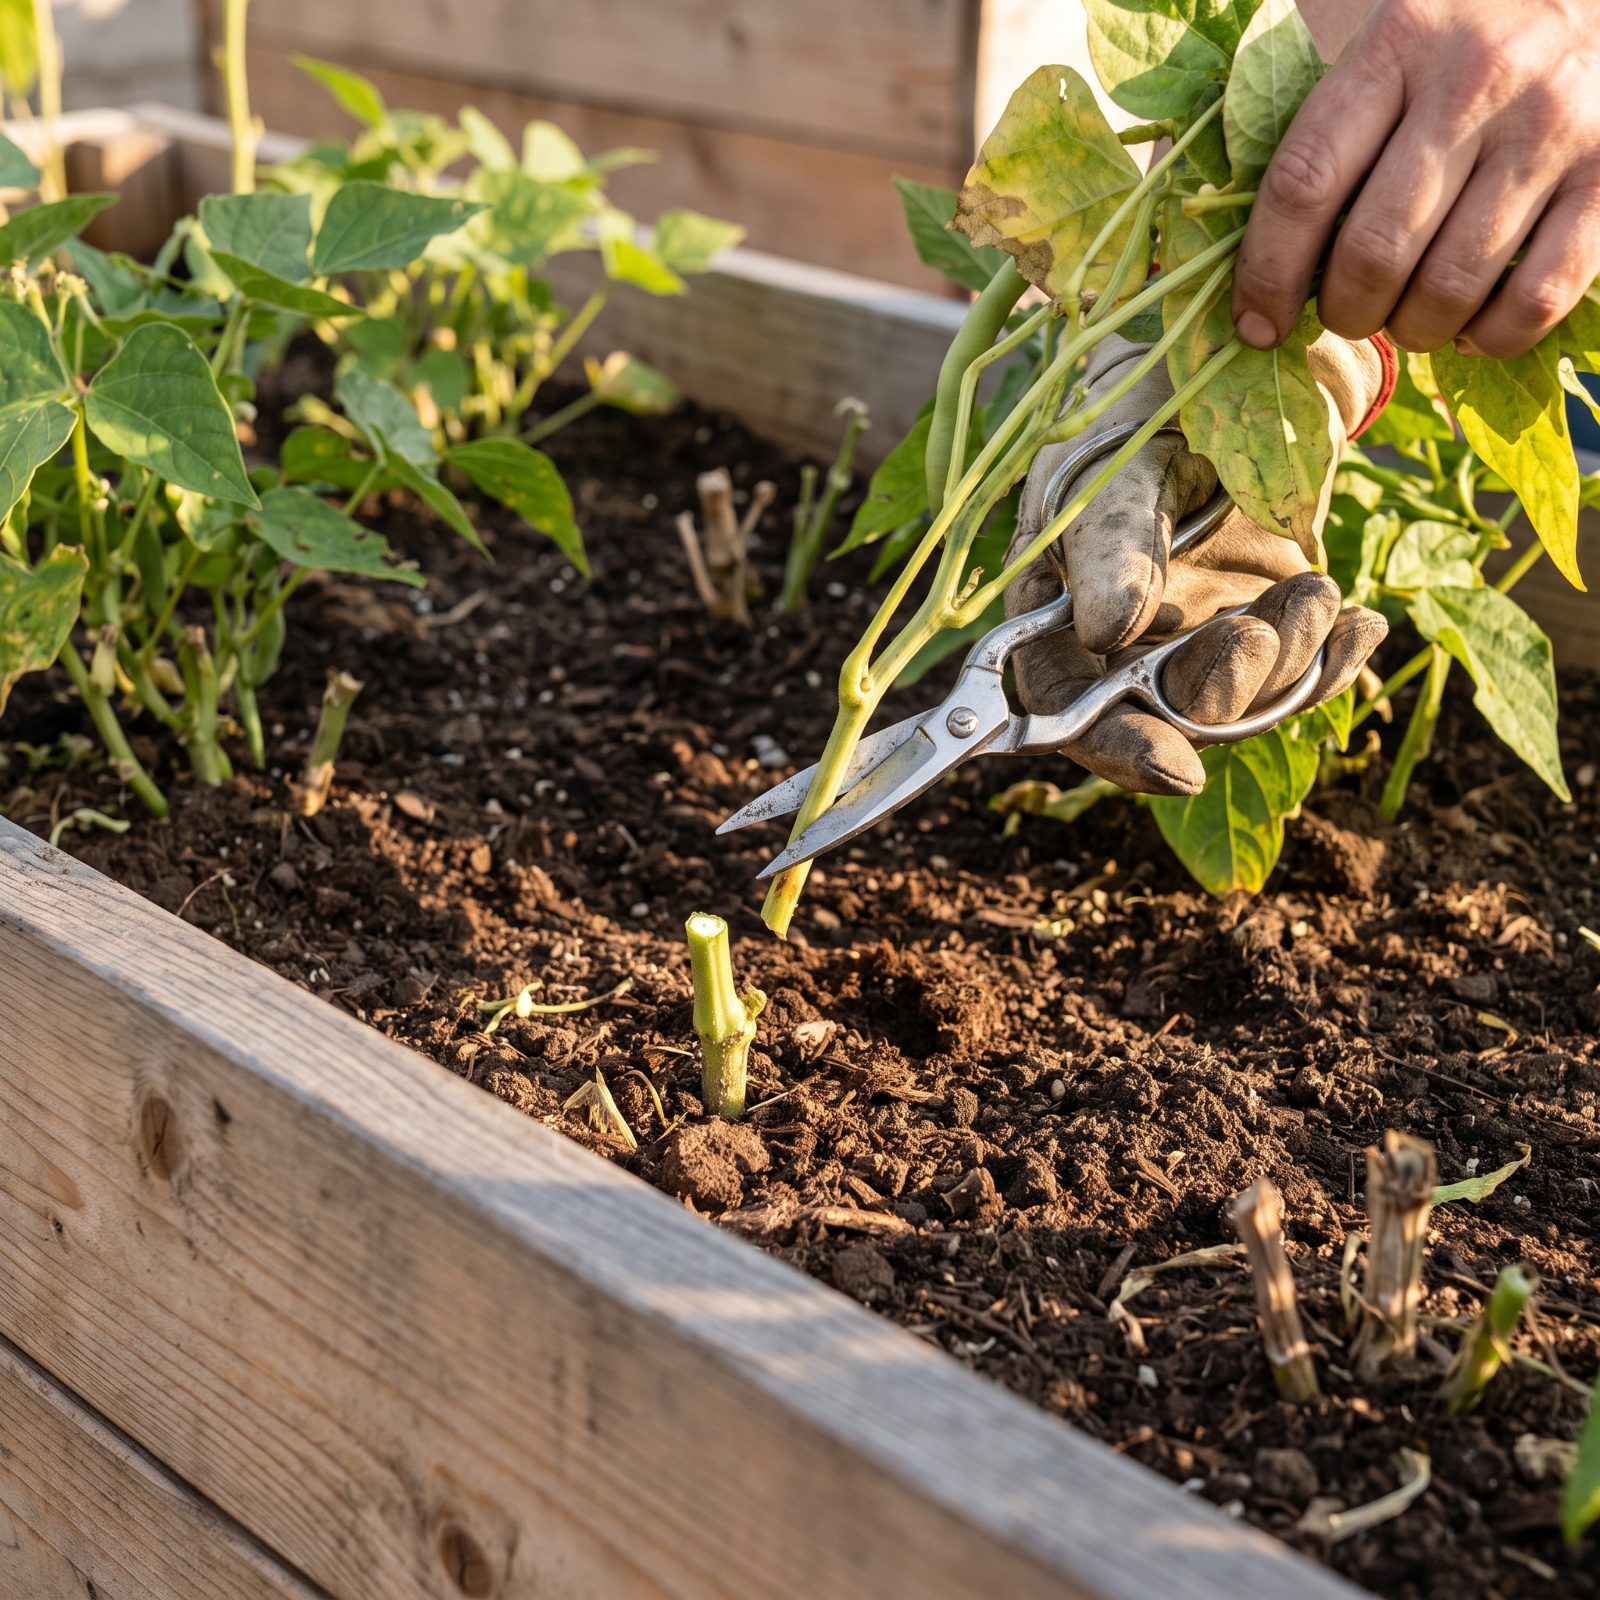
When a crop is finished, don’t yank it out. Cut the plant off at ground level with shears and leave the roots in the soil.
Pulling tears up the soil structure, disturbs the fungal networks and earthworm channels you’ve been building, and on legumes it tosses away all that nitrogen banked in the root nodules. Left alone, the roots decompose and feed the next crop, while the channels they leave behind handle drainage and air. It’s the lazy option that happens to be the better one — a combination that doesn’t come along often in the garden.
25. Leave Hollow Perennial Stems Standing Over Winter for Nesting Insects
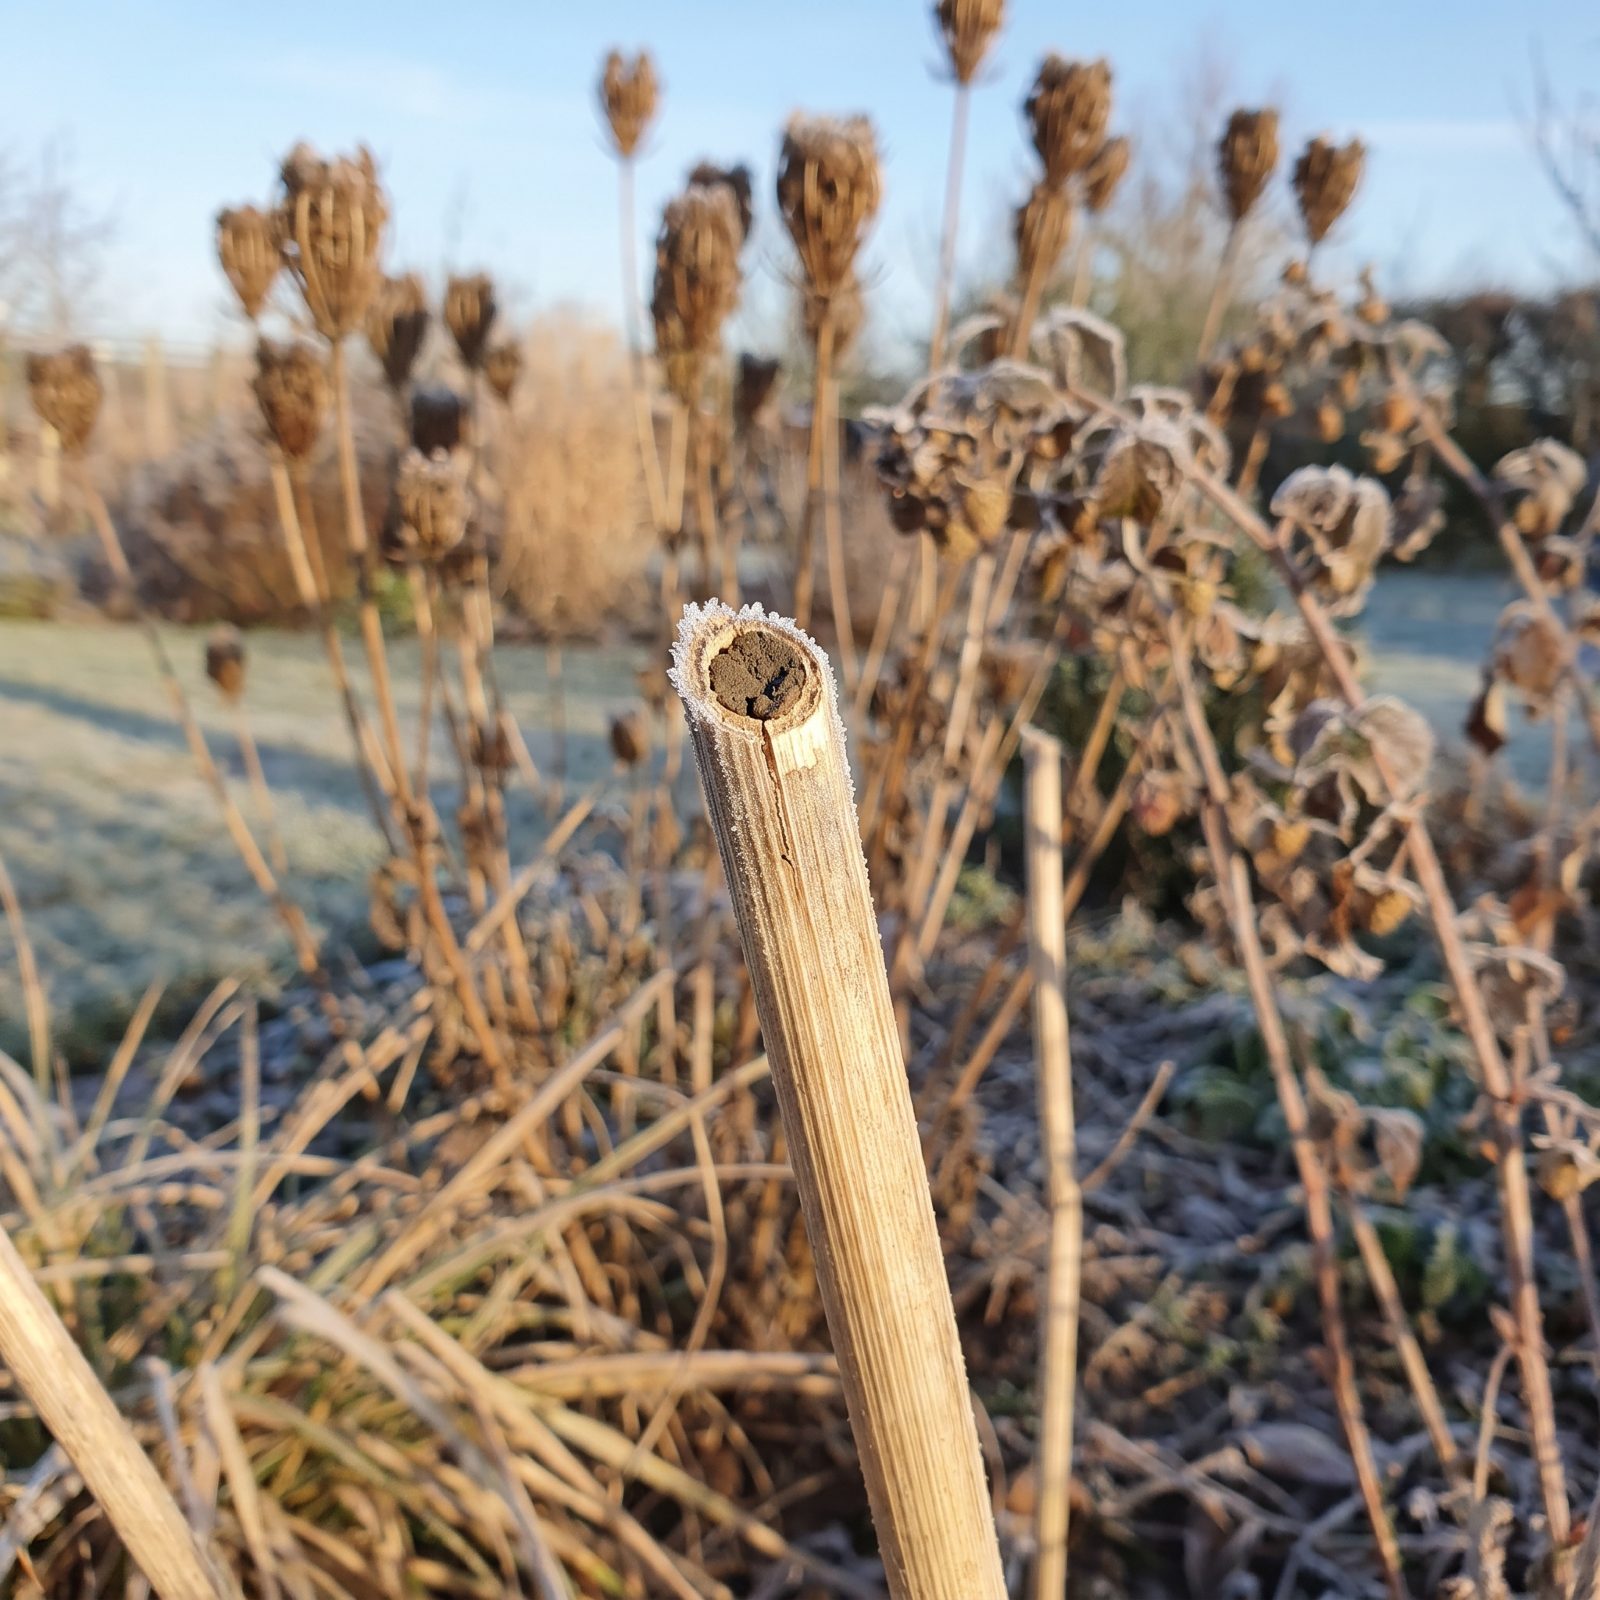
That urge to cut everything back for a tidy winter garden costs you more than you’d guess. Hollow and pithy stems — raspberry canes, fennel, teasel, coneflower — are prime nesting sites for solitary bees and the larvae of other useful insects.
Leave a good number standing through winter, roughly a foot or two tall, and you’re housing the very pollinators and pest-eaters you’ll want next season. The dried seed heads feed birds while you’re at it. Cut them down in late spring once things warm up, and even then, lay the cut stems in a shady corner so anything still inside can finish emerging. A messier garden is often a busier one.
24. Leave Flat Boards Overnight as Removable Slug Shelters
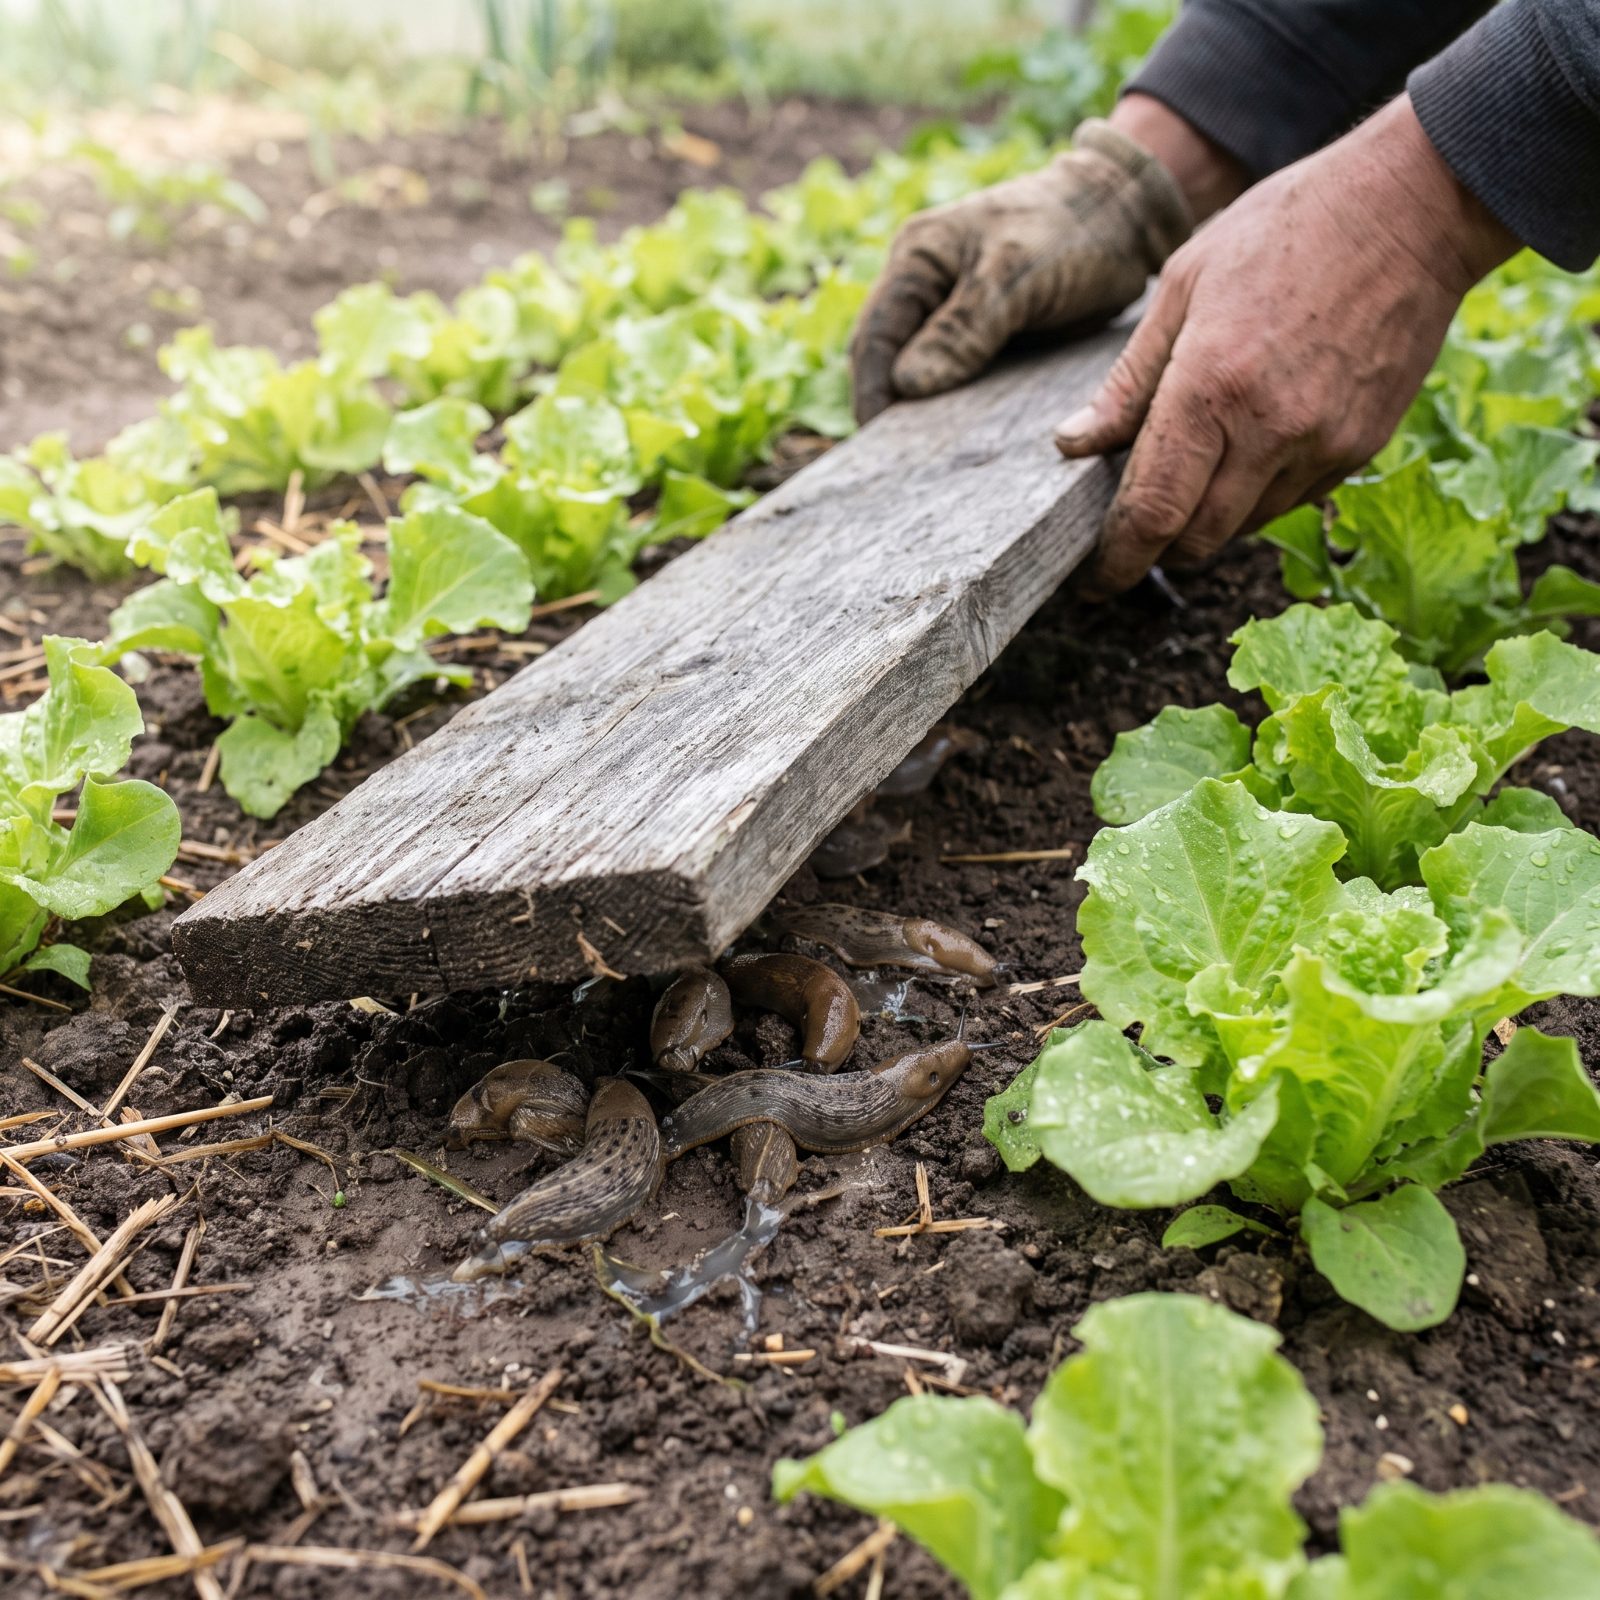
Slugs want cool and damp during the day, so give them exactly that and then turn it against them. A flat board, a shingle, a leftover piece of plywood laid on the soil at dusk becomes a shelter they can’t resist.
Flip it over mid-morning. They’ll be bunched on the underside, waiting to be scraped into a bucket. Do this for a week and the population drops hard — no bait, no beer traps going sour in the heat.
23. Trap Earwigs in Rolled Corrugated Cardboard Overnight
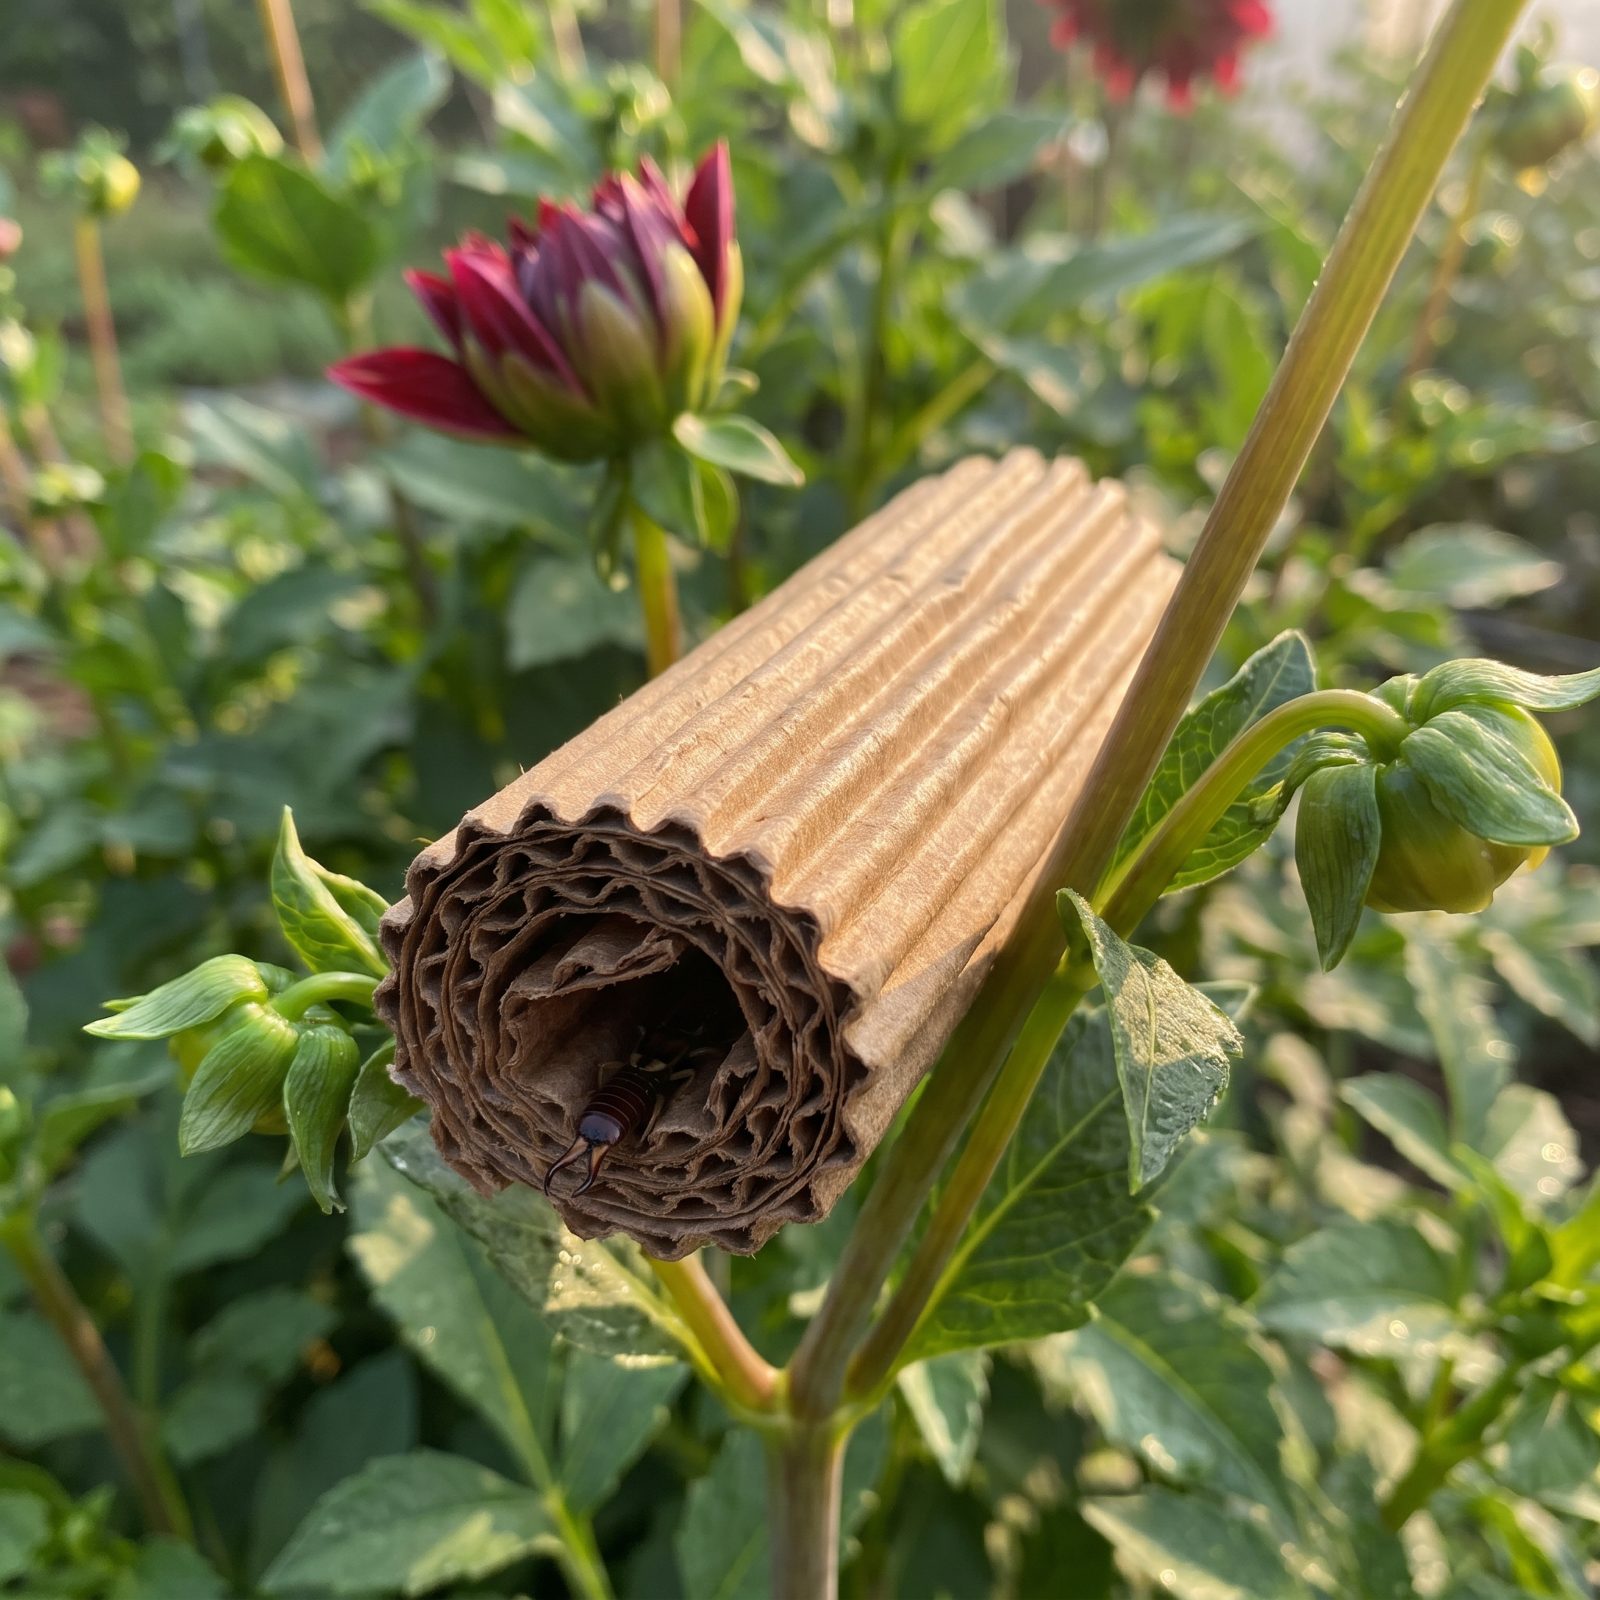
Earwigs chew ragged holes in dahlia petals and seedling leaves overnight, then vanish by dawn into any dark crevice they can find. The corrugation inside cardboard is practically built for them — rows of snug tunnels at exactly their preferred humidity.
Roll a strip, tuck it among the plants, collect it the next morning. Tap the lot into soapy water, or seal the roll in a bag and bin it. Honestly? It beats most sprays, and it costs nothing but a scrap you were going to recycle anyway.
22. Vacuum Dense Clusters of Garden Pests With a Handheld Vacuum
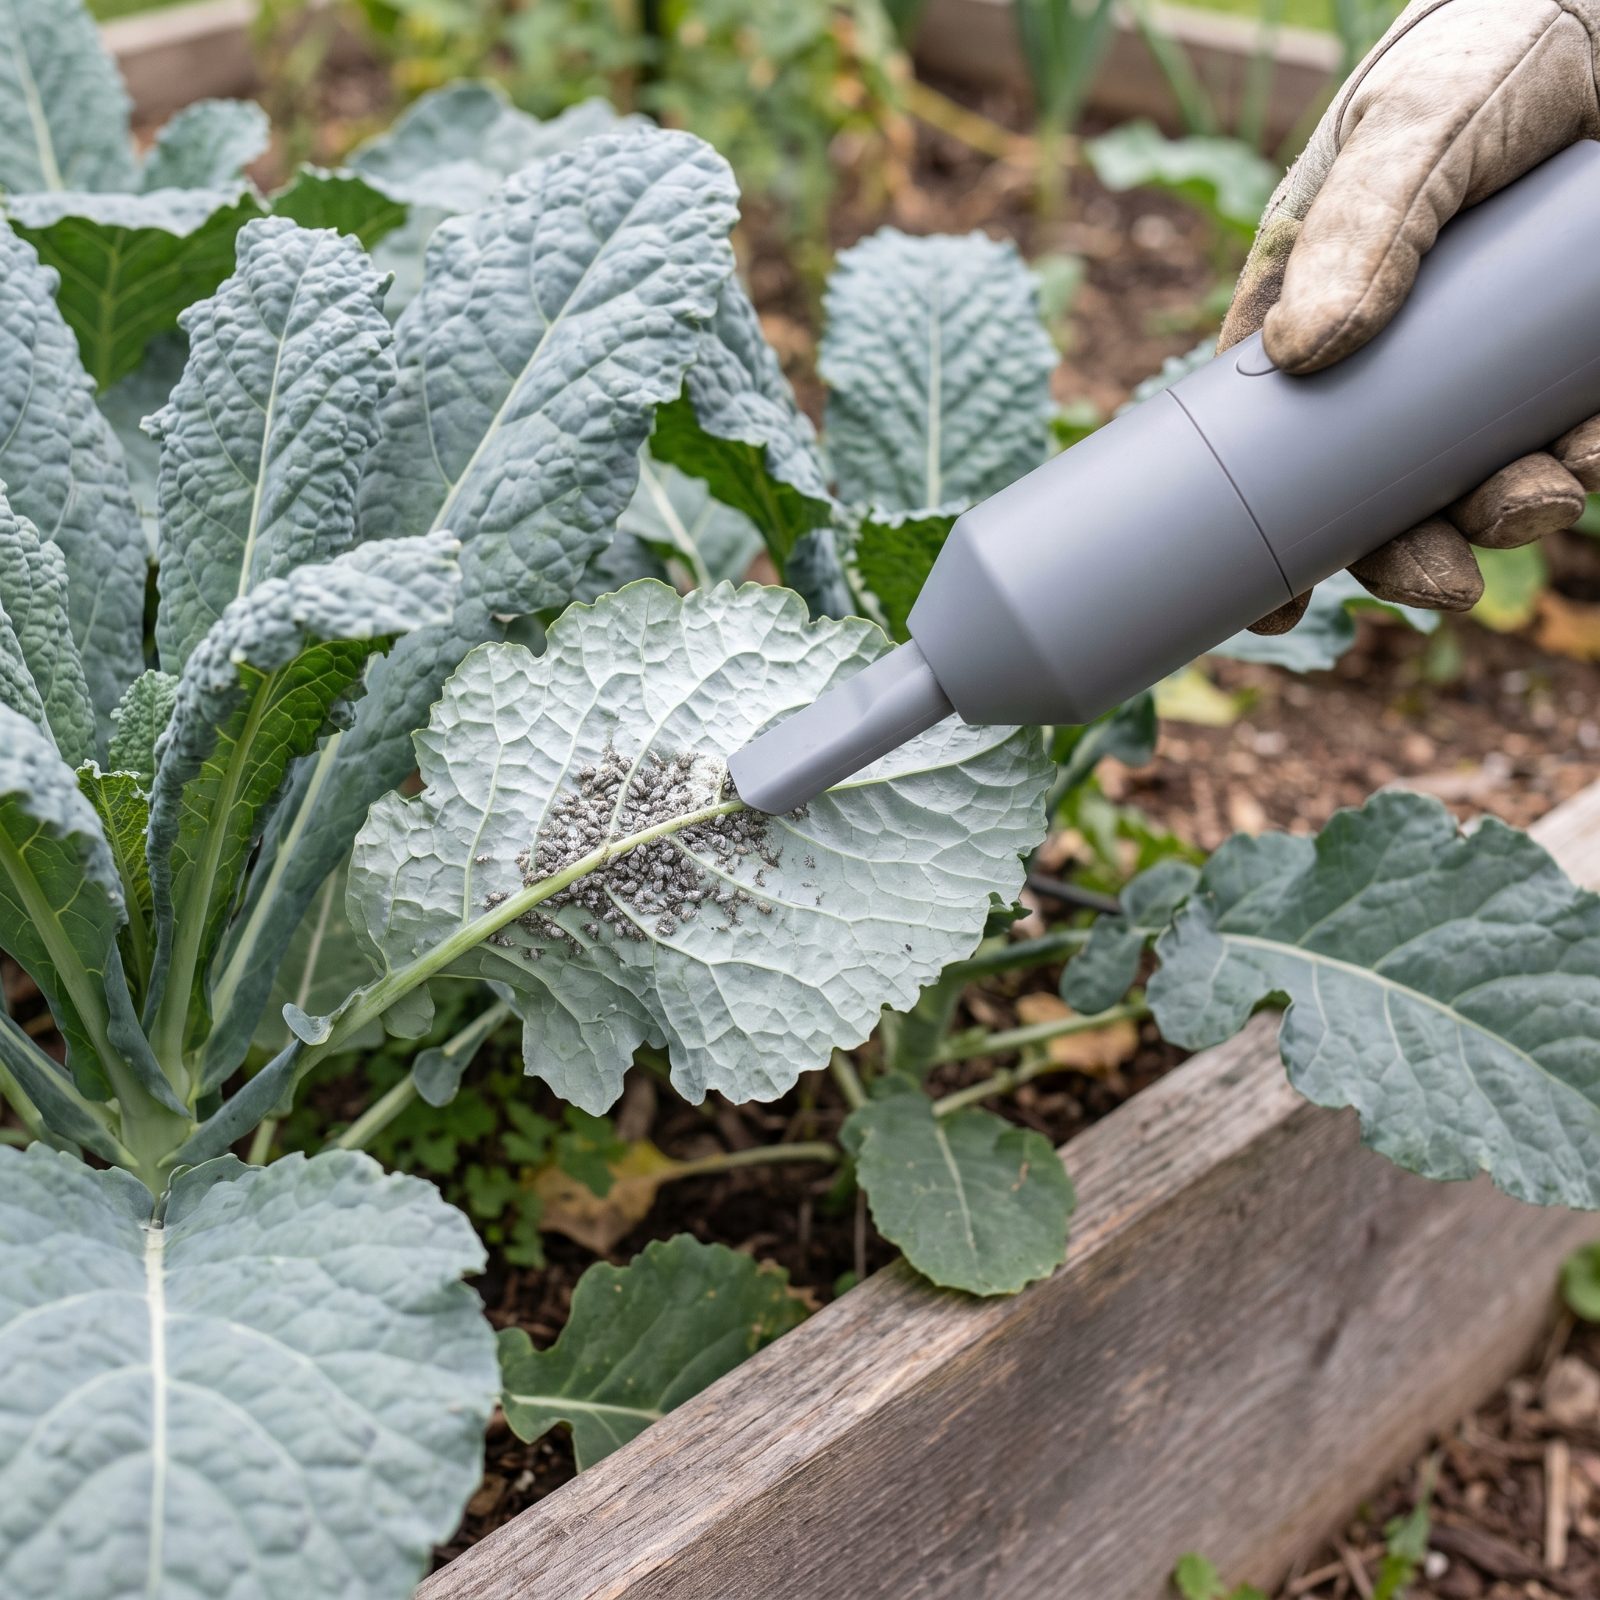
It sounds absurd until you try it. A cheap handheld vacuum pulls aphids, squash bugs, even harlequin bugs off leaves in seconds, with no chemicals anywhere near your food.
Go gentle so you don’t shred the foliage. Aim for the obvious colonies — the gray aphid mats on kale undersides, the clustered squash bug adults on the stems. Then empty the canister into a bag of soapy water and seal it before they regroup. Calm mornings are best, when the bugs are sluggish and slow to scatter.
21. Coat Vulnerable Leaves With a Fine Layer of Kaolin Clay
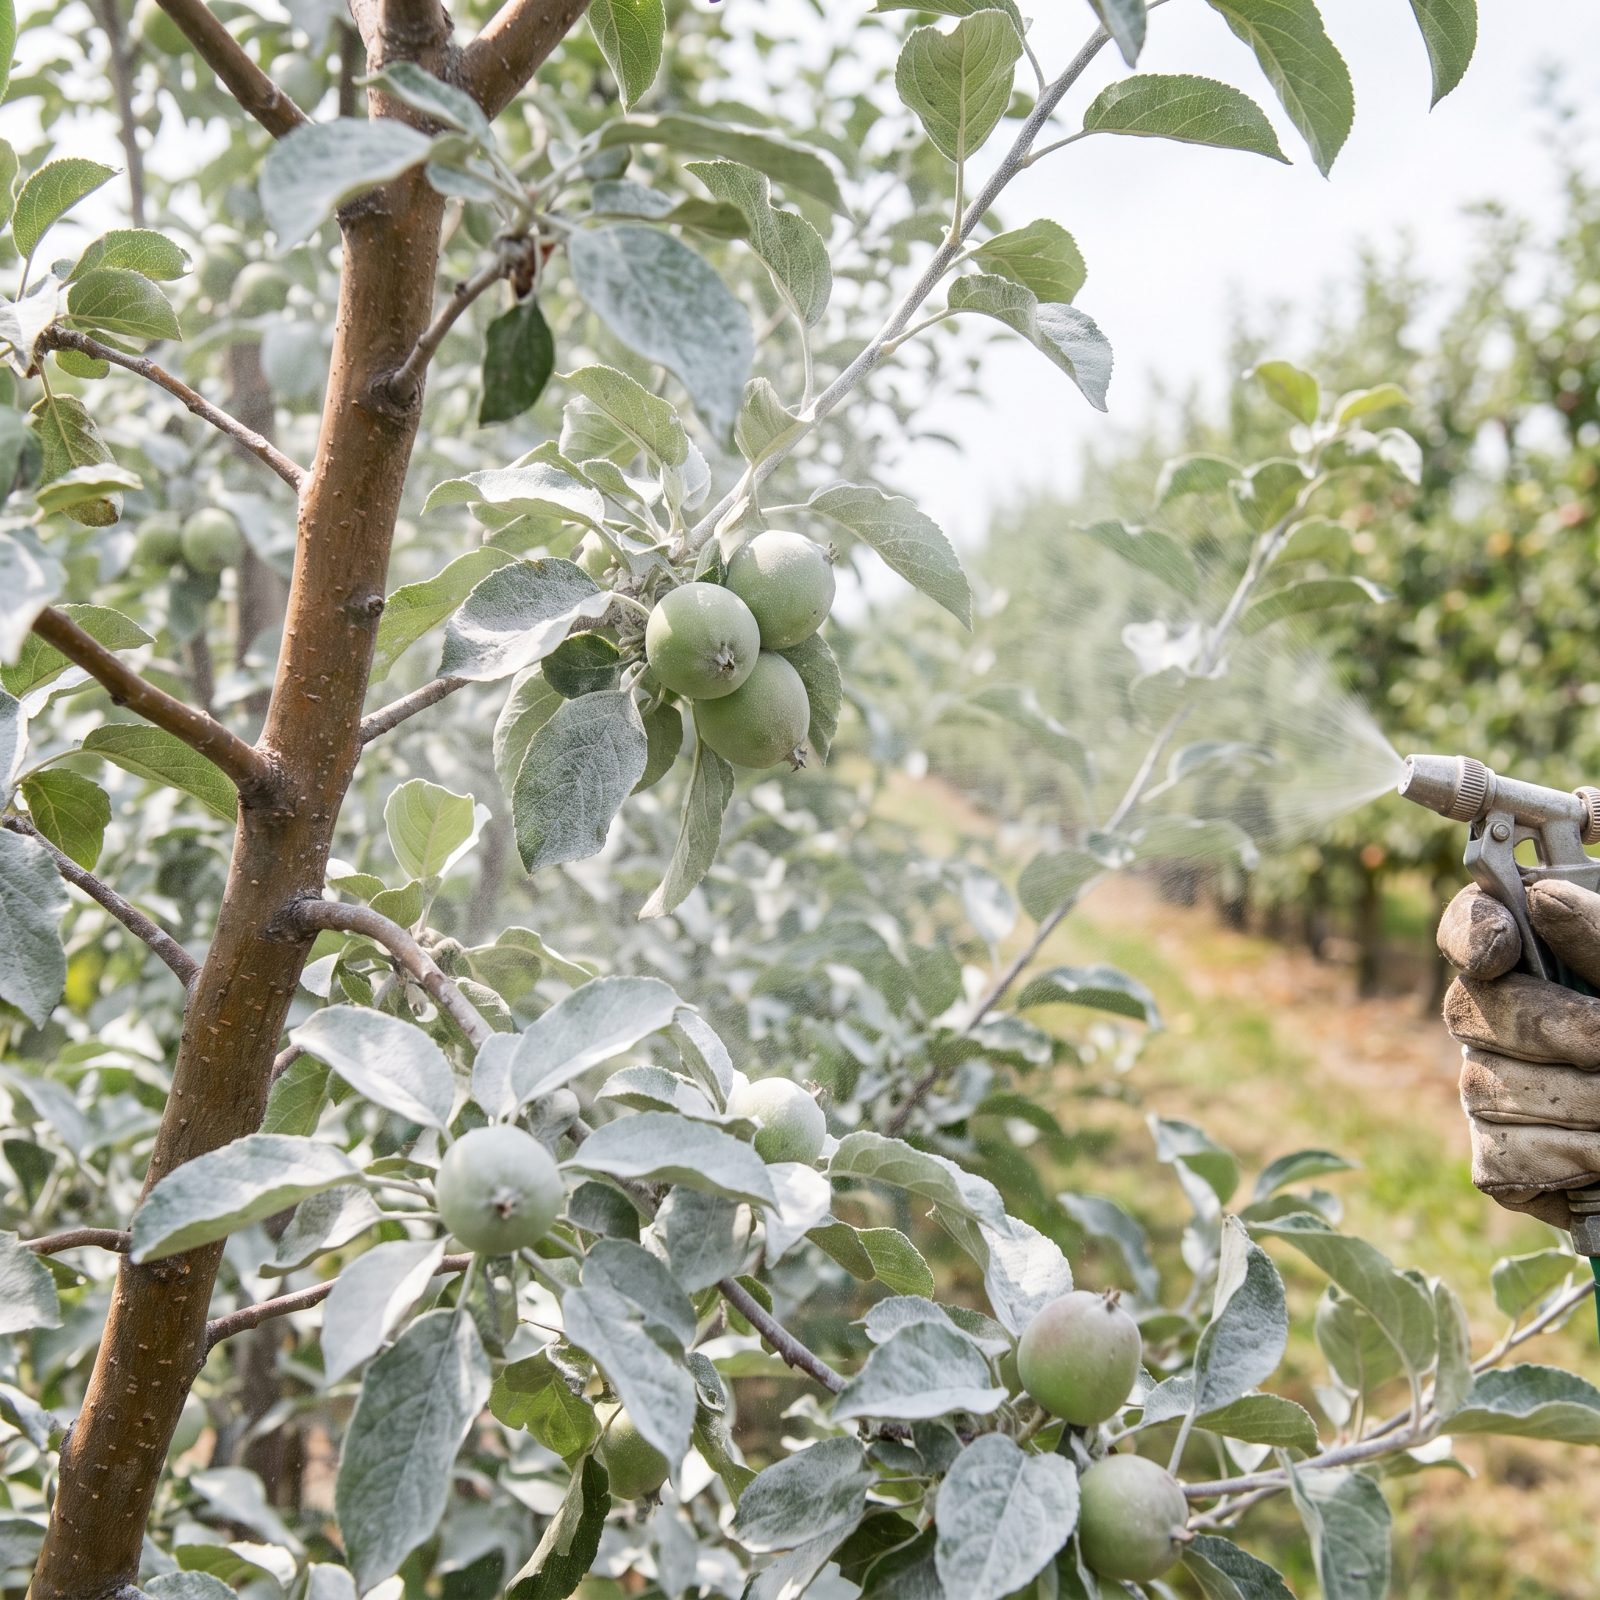
Kaolin clay is a soft, powdery mineral that mixes with water into a thin milky spray. Coat the leaves and fruit, and the whole plant takes on a ghostly chalk-white cast.
Bugs hate it. The gritty film irritates them, scrambles their landing instincts, and makes the surface a lousy place to lay eggs. Orchardists lean on it against plum curculio and apple maggot, and it doubles as a sunscreen, bouncing brutal afternoon heat off the fruit skin. Reapply after heavy rain. One thing worth saying for it over a lot of options — it rinses clean off your produce with a quick splash of water.
20. Wrap Squash Stem Bases to Block Vine Borer Eggs
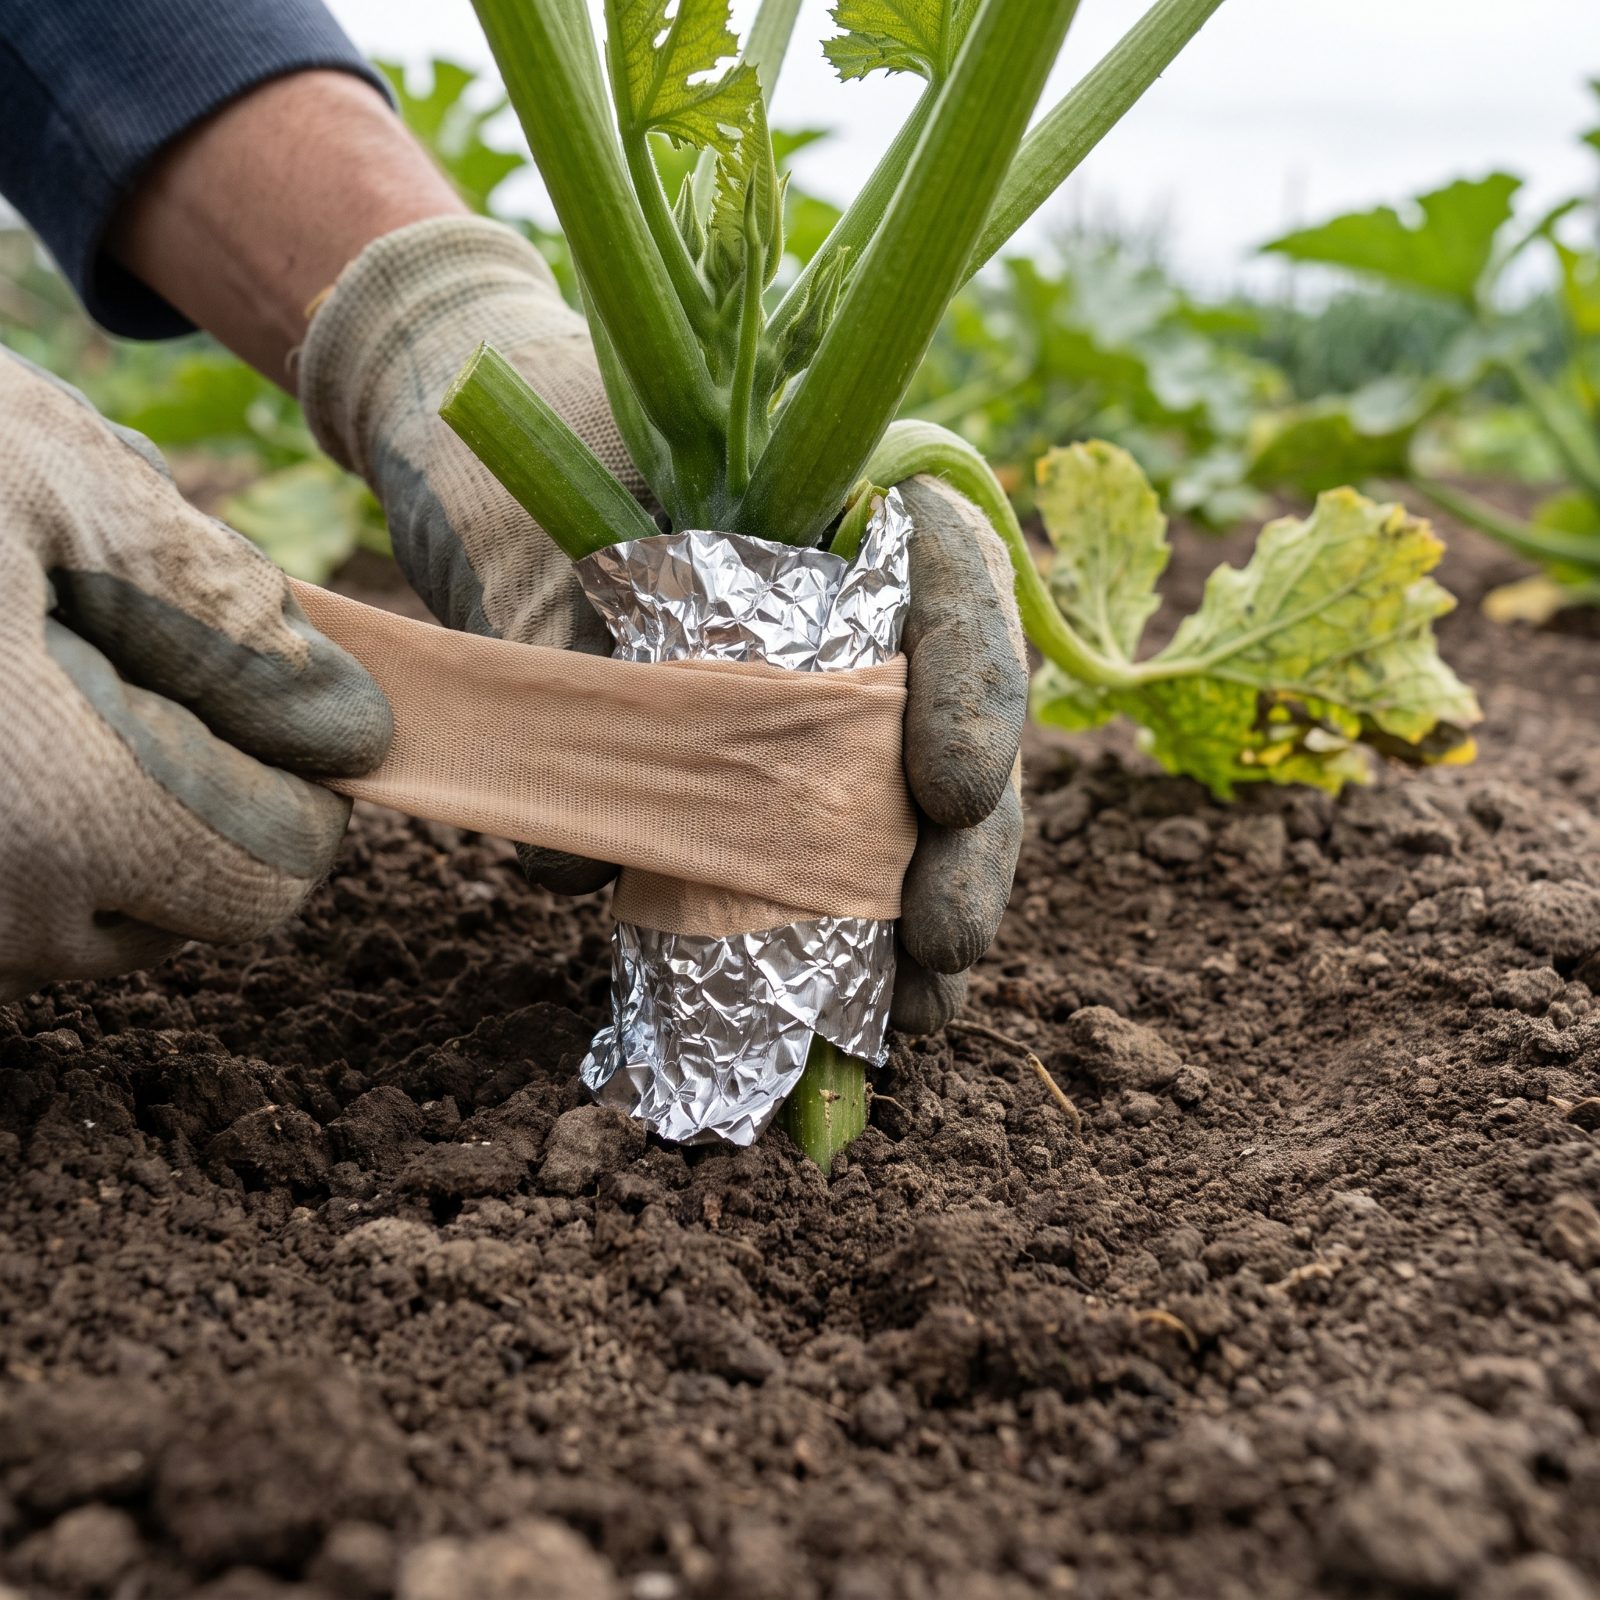
The squash vine borer is a quiet assassin. A clearwing moth lays eggs at the base of the stem, the larvae tunnel inside, and one day your thriving zucchini just collapses with no warning.
Wrap the lower few inches of stem with strips of old pantyhose, or a collar of foil at the soil line. The moth can’t reach bare stem to lay. Do it early, before the vines sprawl — because once a larva is inside, there’s almost nothing left but to slice the stem open and dig it out with a pocketknife.
19. Support Developing Melons in Slings Made From Fabric Scraps
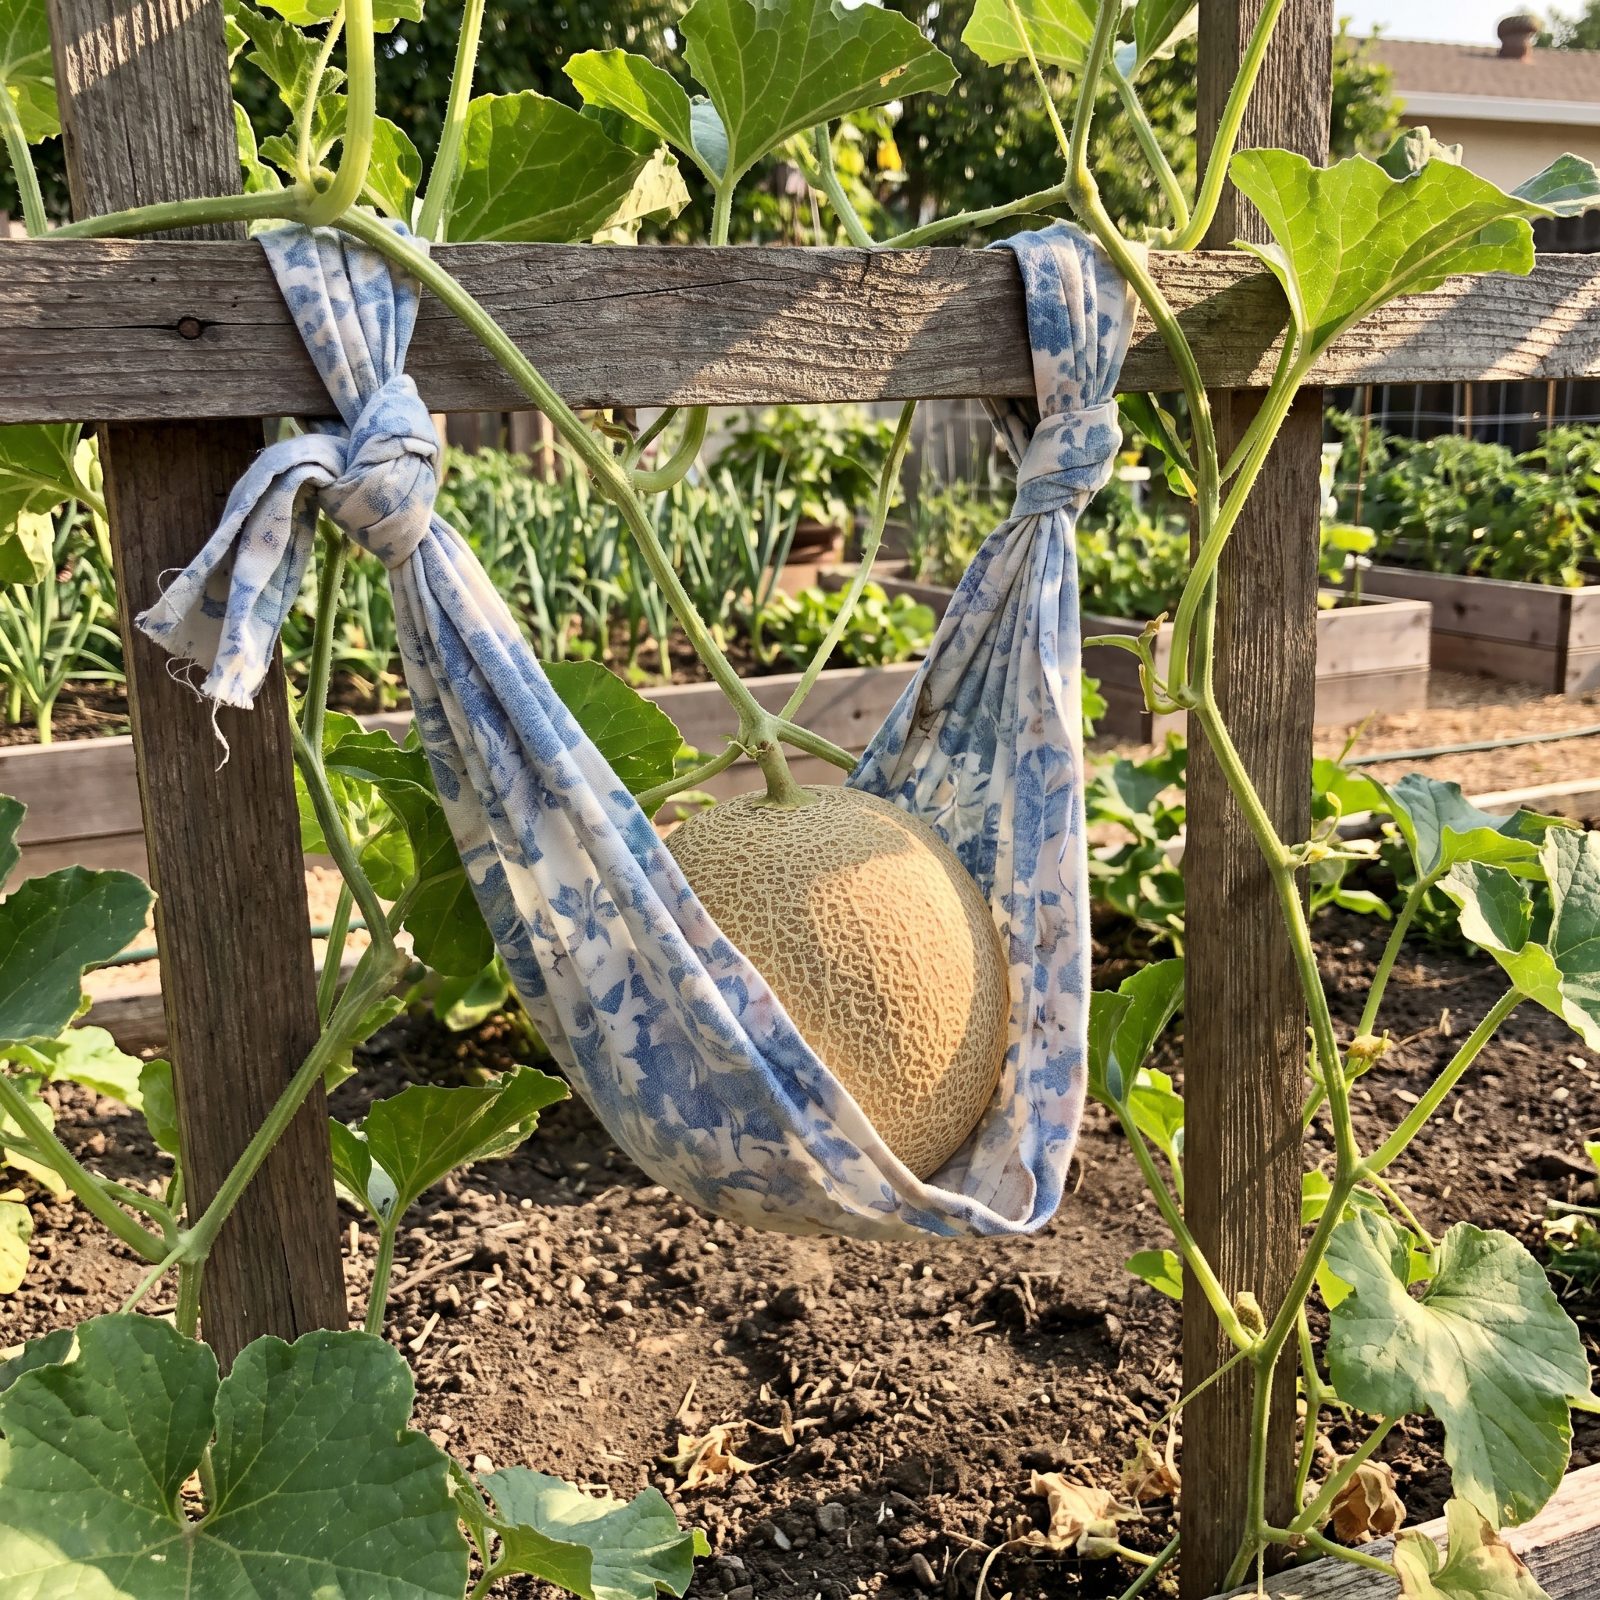
Grow melons up a trellis and you save ground space. Then physics intervenes: a ripening cantaloupe gets heavy enough to snap its own stem and drop.
Cradle each fruit in a sling tied to the support. Old t-shirts, pantyhose, strips of worn bedsheet, mesh produce bags — all of it works. The sling takes the load off the stem and lets the fruit keep ripening in the air, catching light and dodging the ground pests that find lounging melons.
Use breathable fabric so moisture doesn’t collect against the rind, and leave a little slack. That melon is going to grow.
18. Rest Squash and Pumpkins on Tiles to Prevent Ground Rot
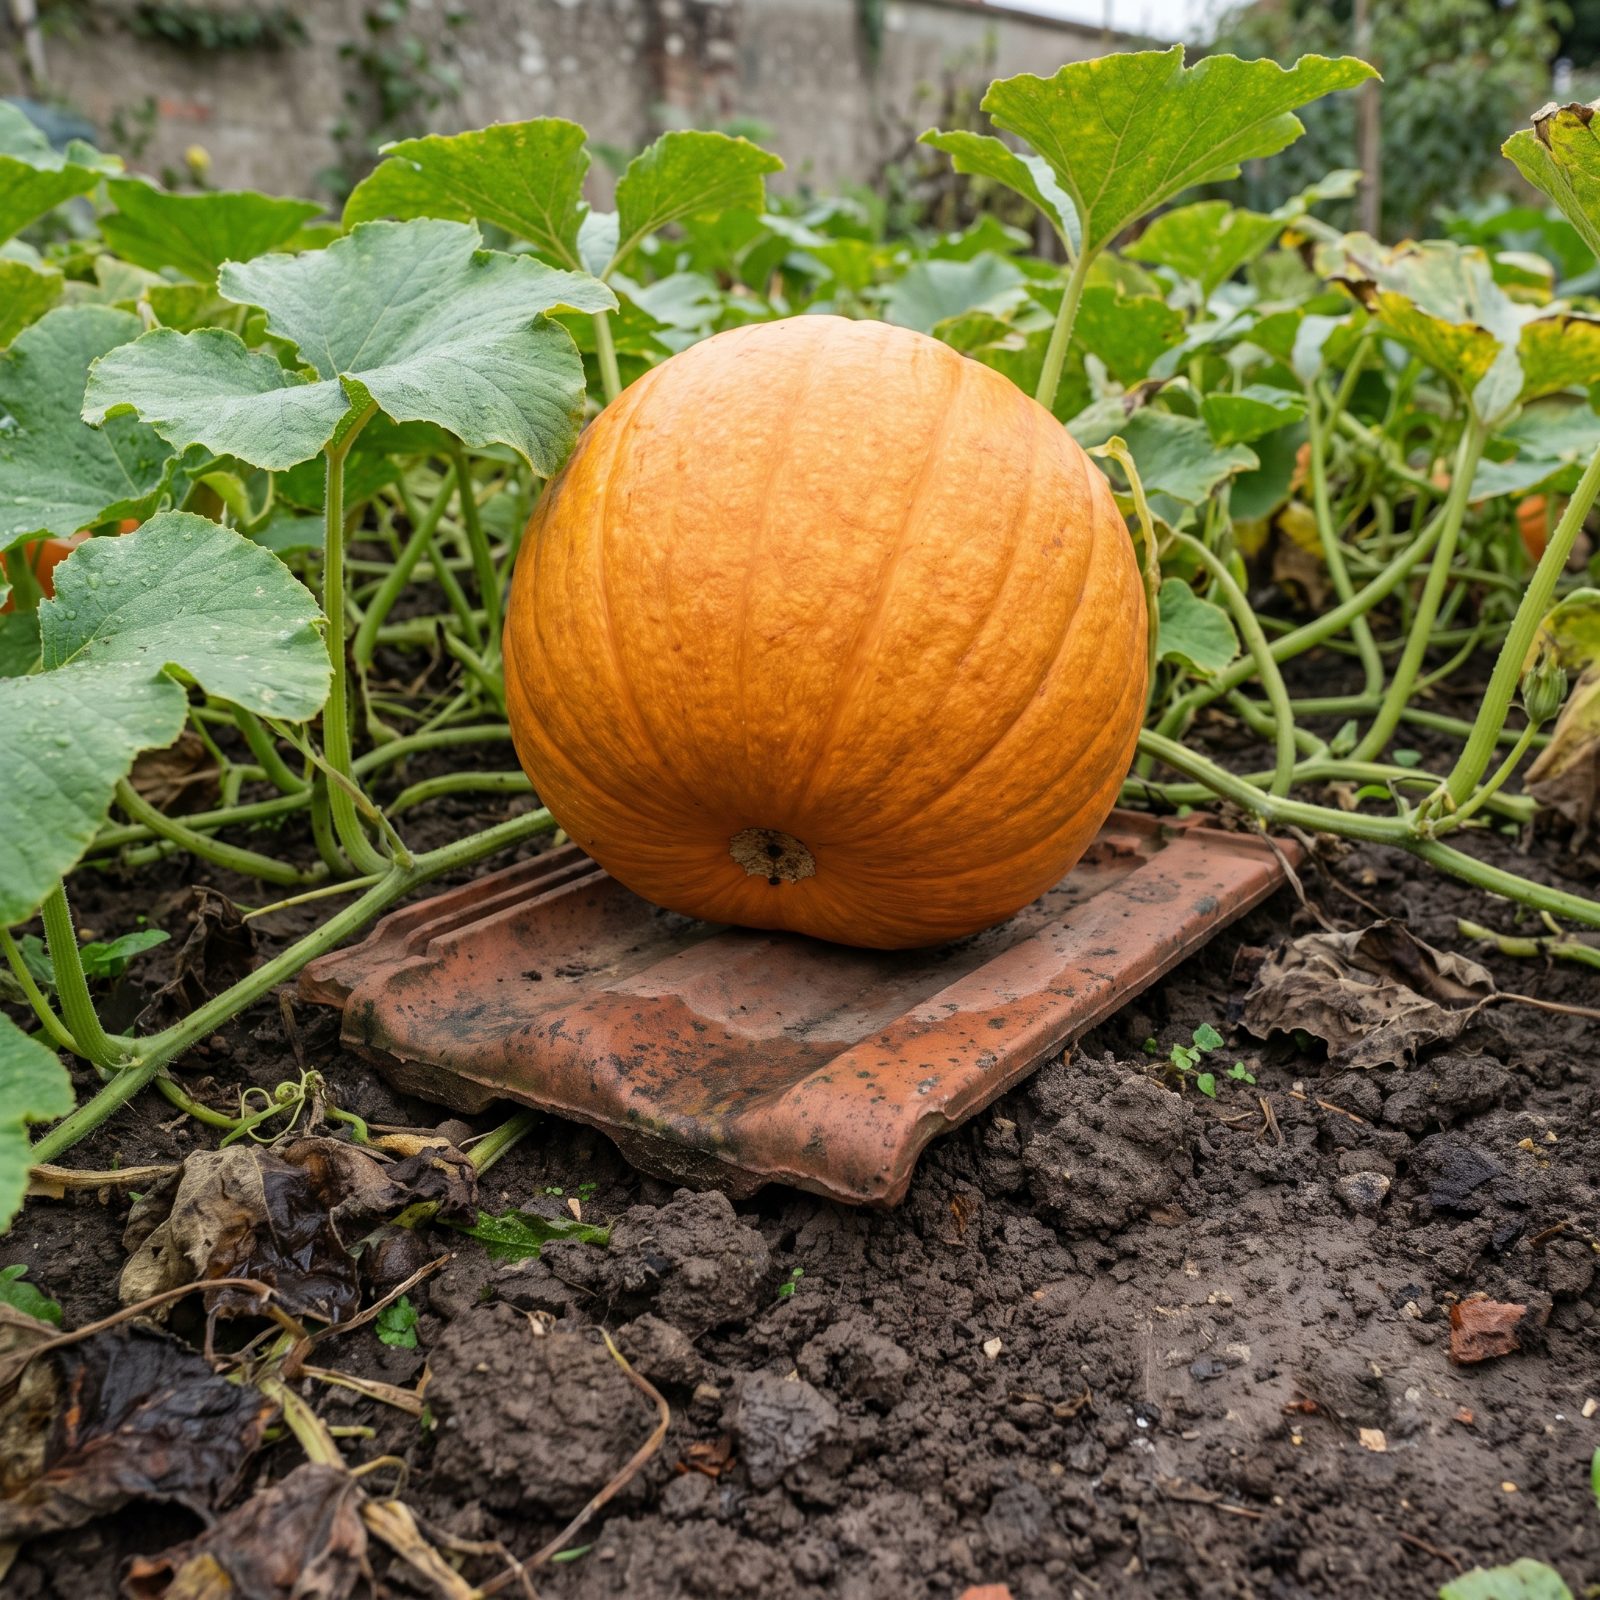
A pumpkin sitting straight on wet soil develops a soft rotten patch underneath, right where it meets the ground. You won’t spot it until harvest, and by then half the fruit is mush.
Slide a flat object underneath once the fruit sets — a terracotta tile, a flat stone, an upturned saucer, a scrap of untreated board. It lifts the skin off the damp, improves airflow, and warms the underside on sunny days. Tiles shine here because they shed water and hold a little warmth into the evening. Simple, free if you’ve got scraps lying around, and it rescues the fruit you babied all summer.
17. Surround Tender Plants With Water-Filled Jugs for Thermal Mass
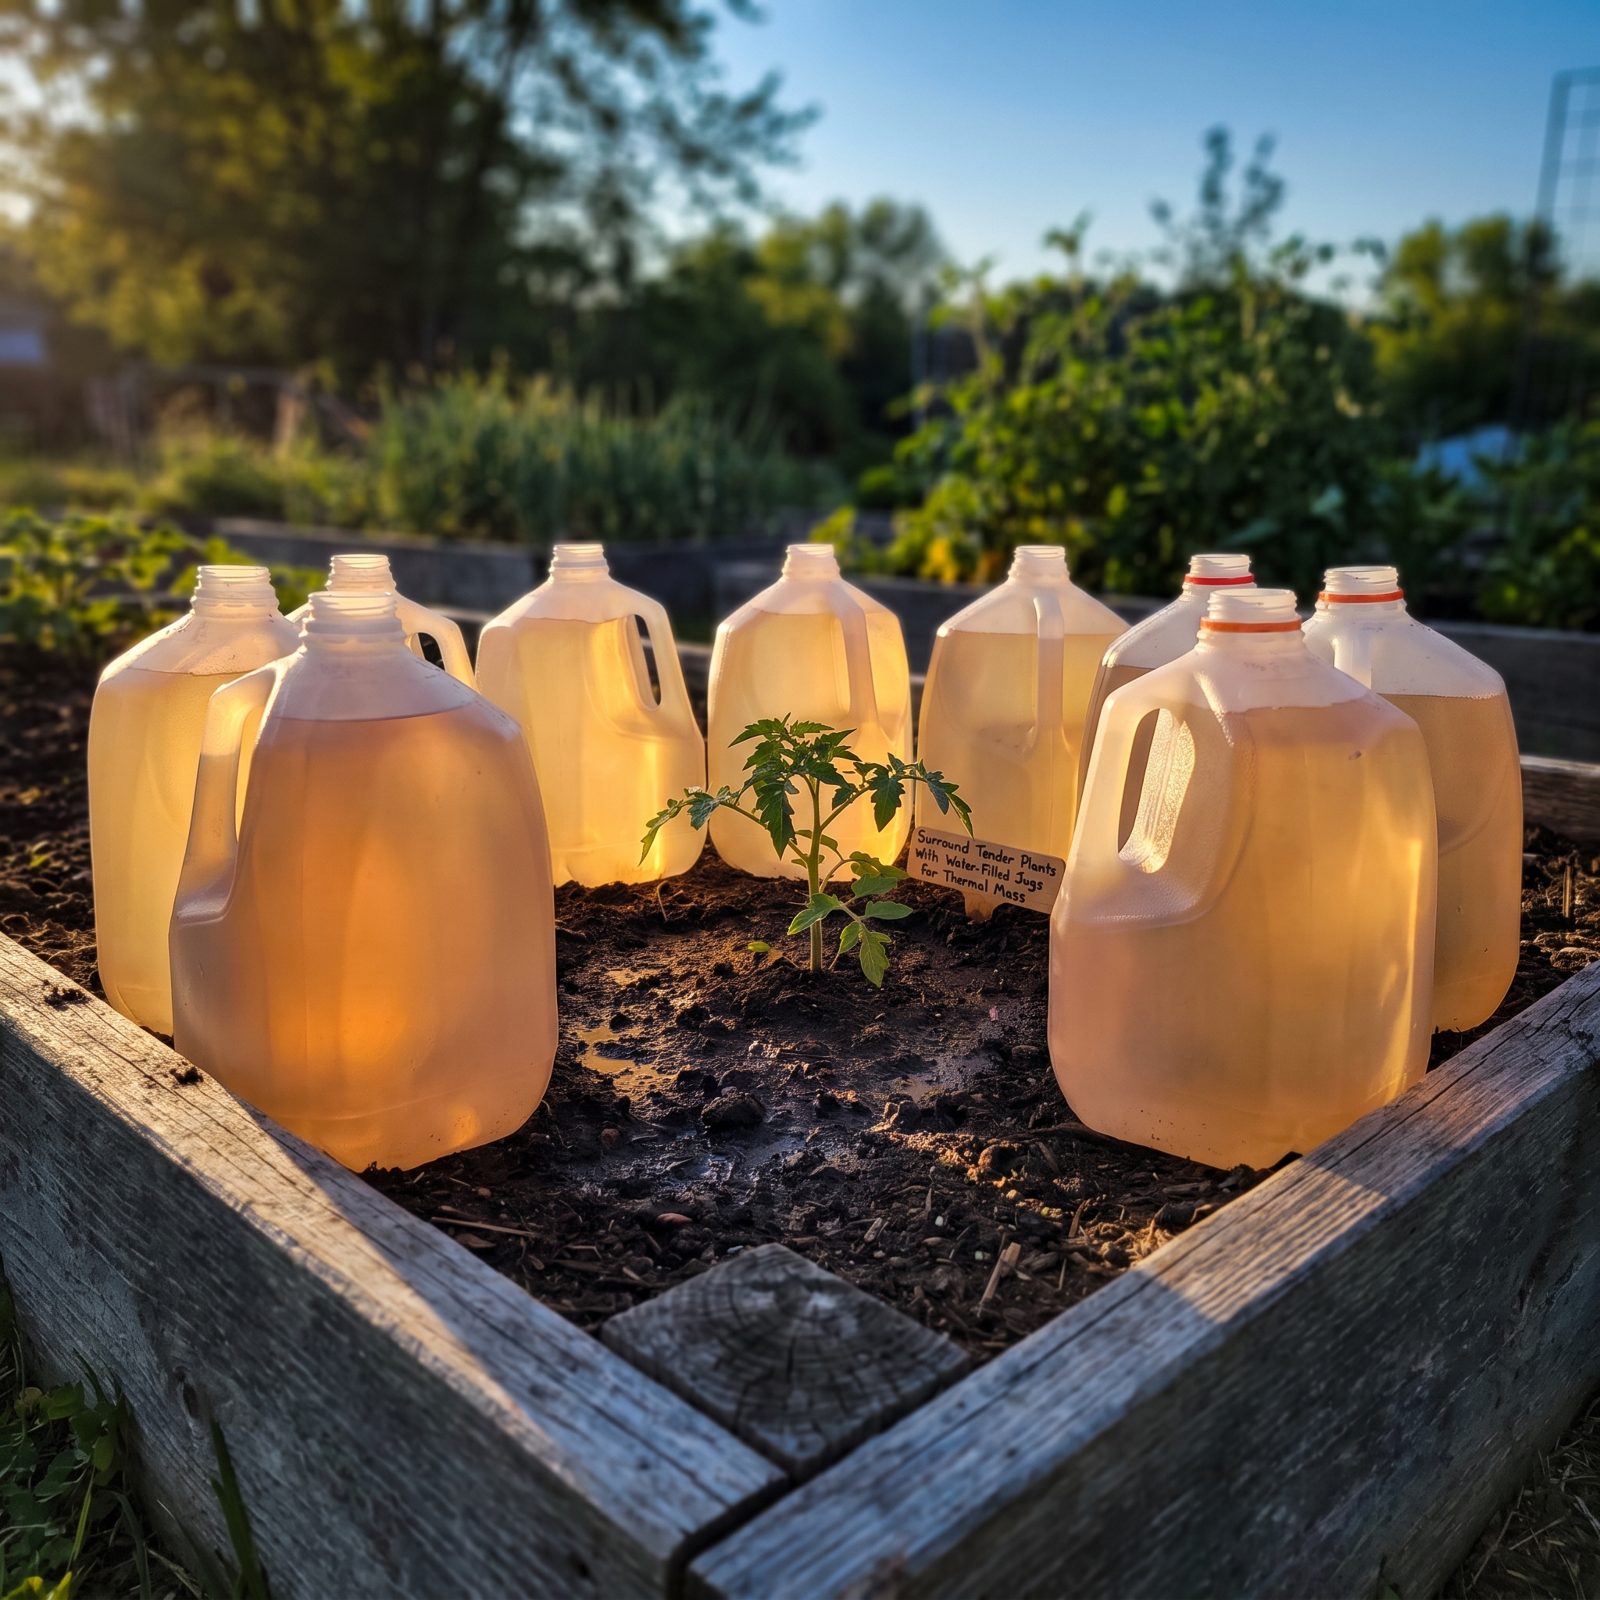
Water holds heat better than almost anything else in your garden. It soaks up warmth all day and lets it go slowly after dark, buffering the plants beside it against a cold snap.
Ring a tender seedling with gallon jugs of water in early spring, and you push back frost on those borderline nights — the ones that arrive right after you planted out a week too soon. Dark-colored jugs absorb more sun. It’s the same trick as those old walls-of-water tomato tents, just cheaper and reusable.
16. Shade Only the Western Side of Heat-Stressed Plants
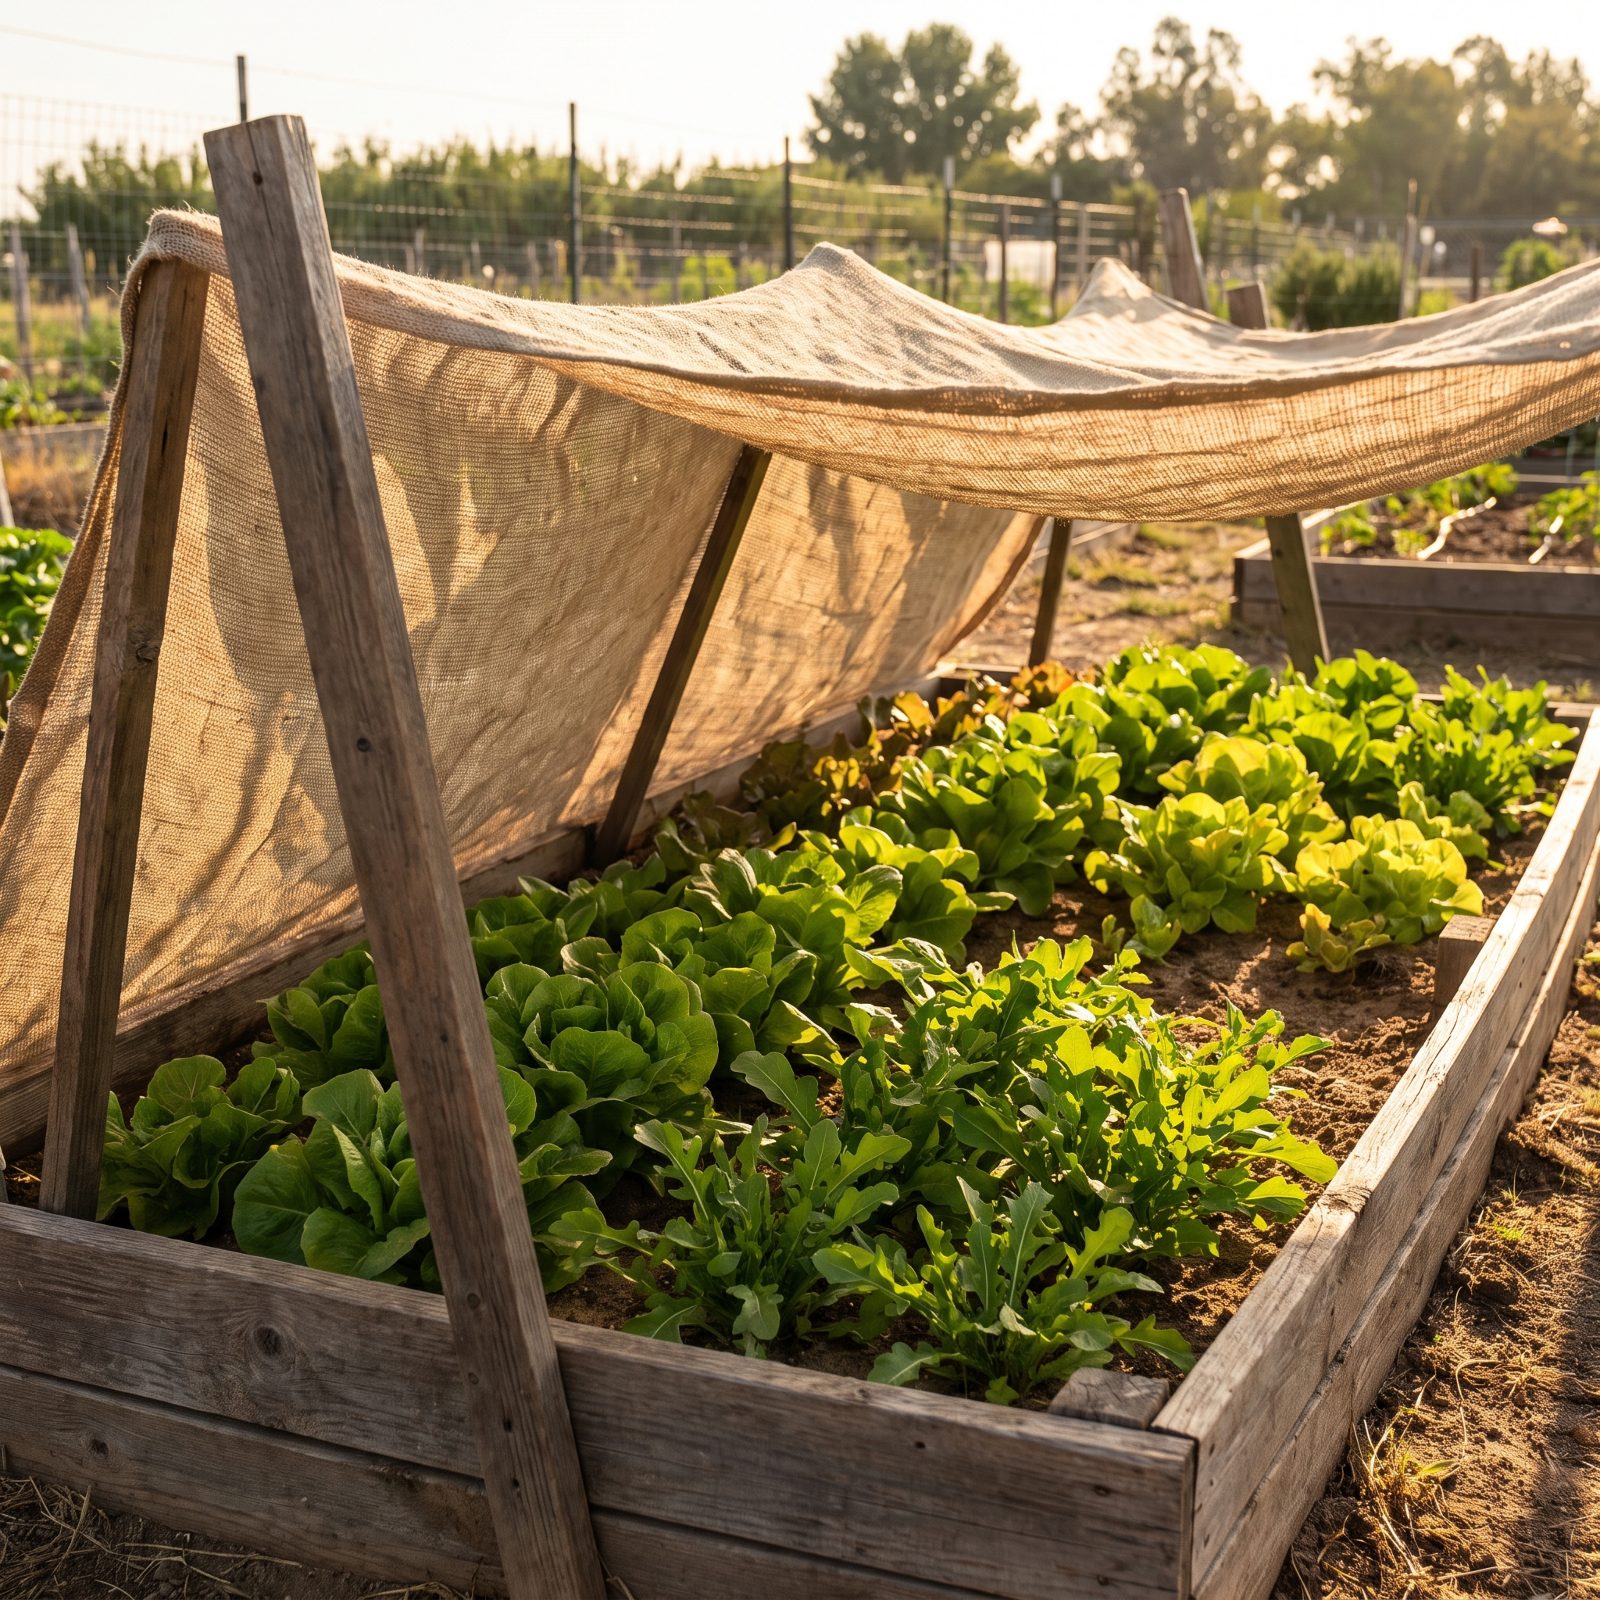
Most people drape shade cloth straight over a wilting plant, which blocks the gentle morning light the plant actually wants. The real villain is the west-facing afternoon sun — it shows up when the day is already at peak heat and bakes everything it touches.
Block just that side. A panel of shade cloth, a propped board, even a taller plant parked to the west gives relief through the worst hours while letting morning and midday light sail through. Your lettuce stops bolting, your peppers stop scalding, and you use a fraction of the material.
15. Sow Peas When Forsythia Blooms Instead of Trusting the Calendar
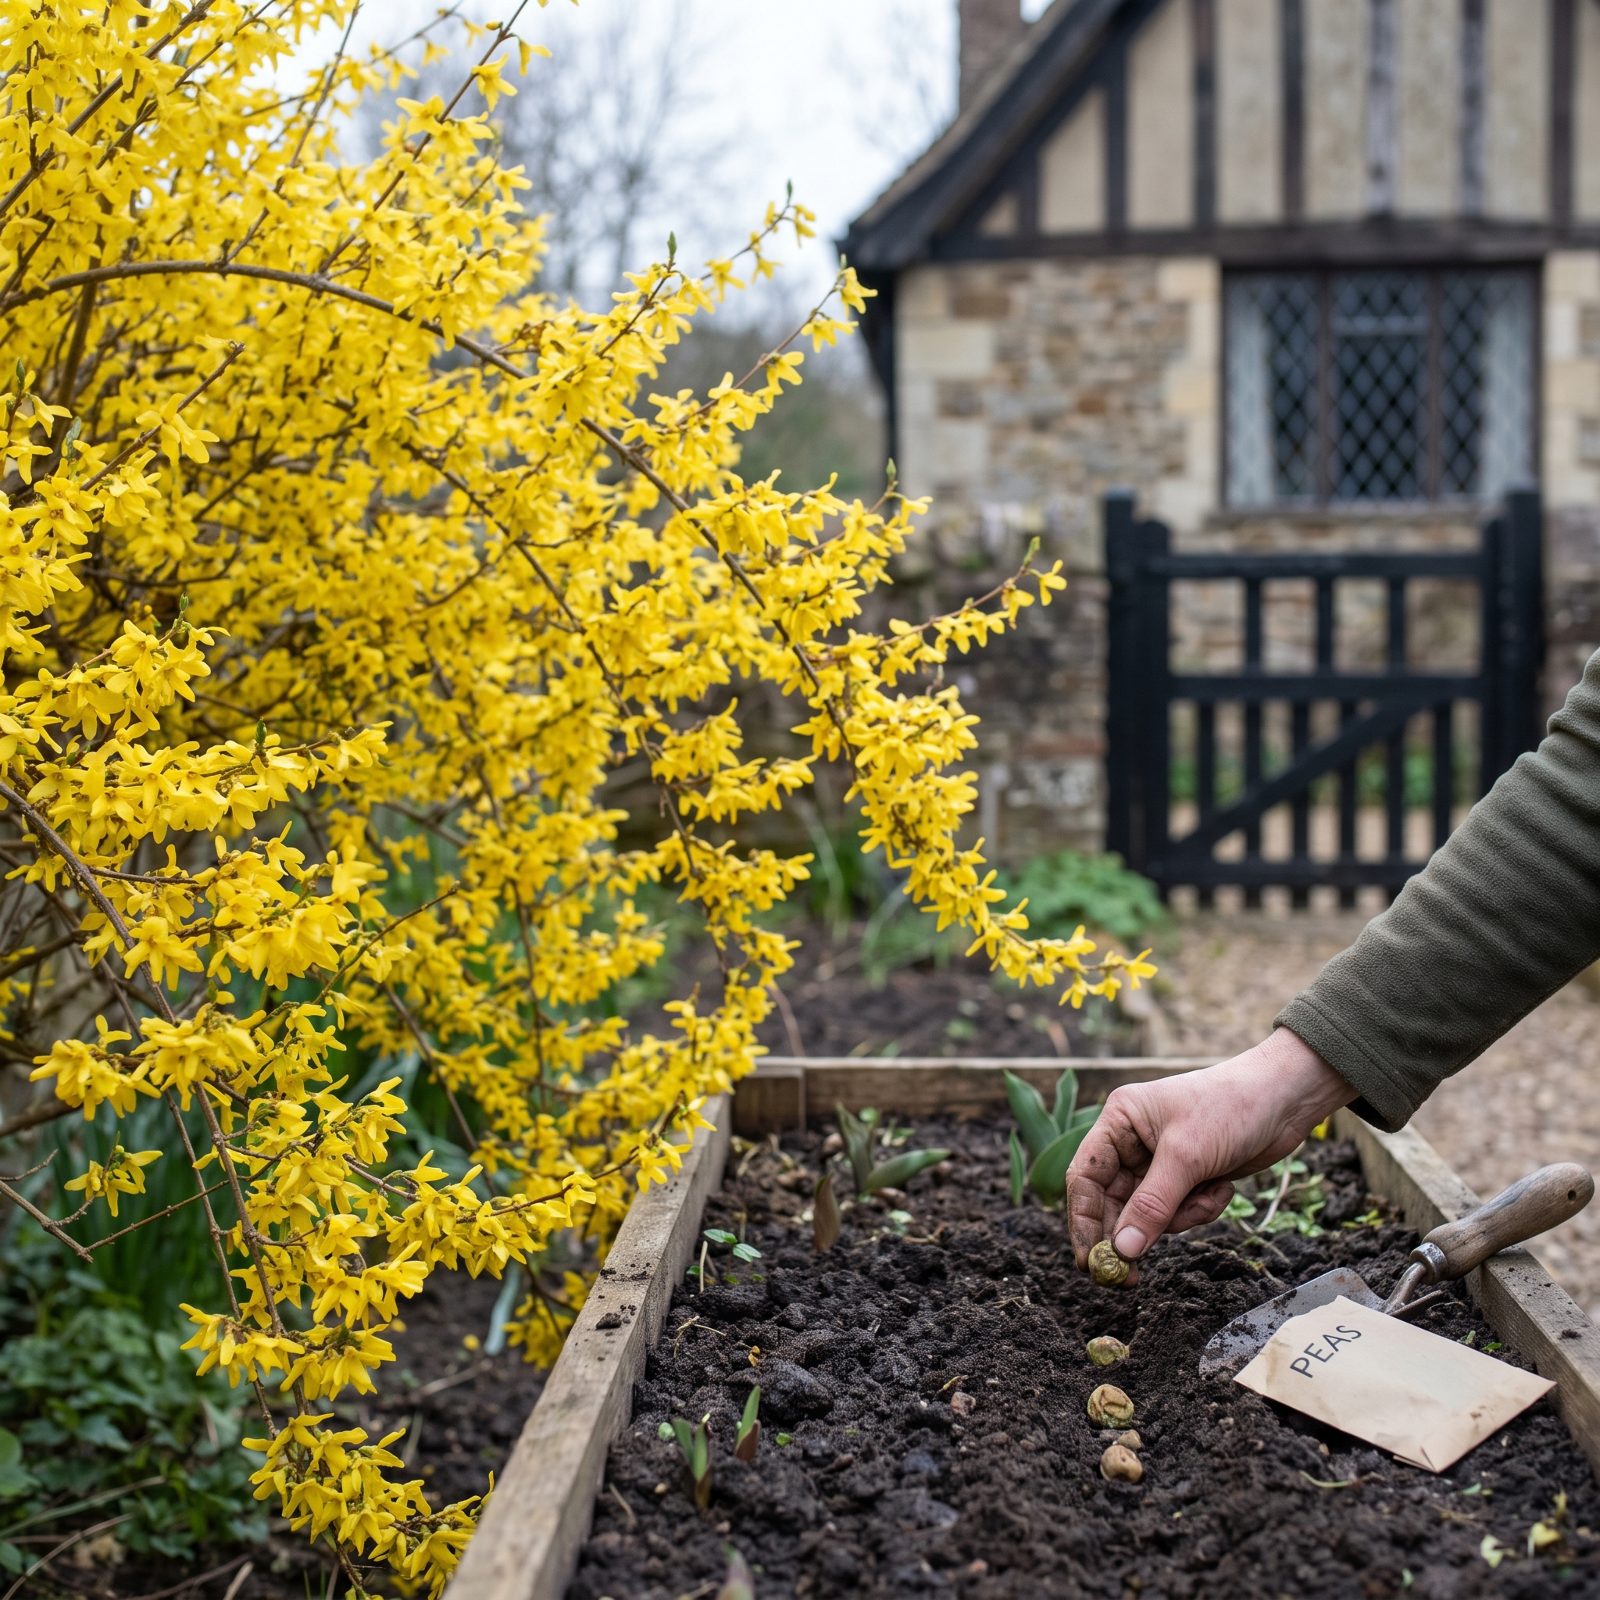
The calendar lies. “Sow peas in early April” means nothing when April runs three weeks warmer in one town than the next, or warmer this year than last.
The plants around you keep better time. When forsythia erupts in yellow, the soil has warmed enough for peas to germinate instead of rotting in cold, wet ground. This is phenology — reading the living signals rather than a date printed on a packet. Lilac leafing out, dandelions flowering, oak leaves the size of a squirrel’s ear. Old growers watched all of it.
The forsythia doesn’t care what month it is. It responds to what the soil and air are actually doing, which is exactly the information your seeds need.
14. Read Persistent Weeds as Clues to Compaction and Drainage
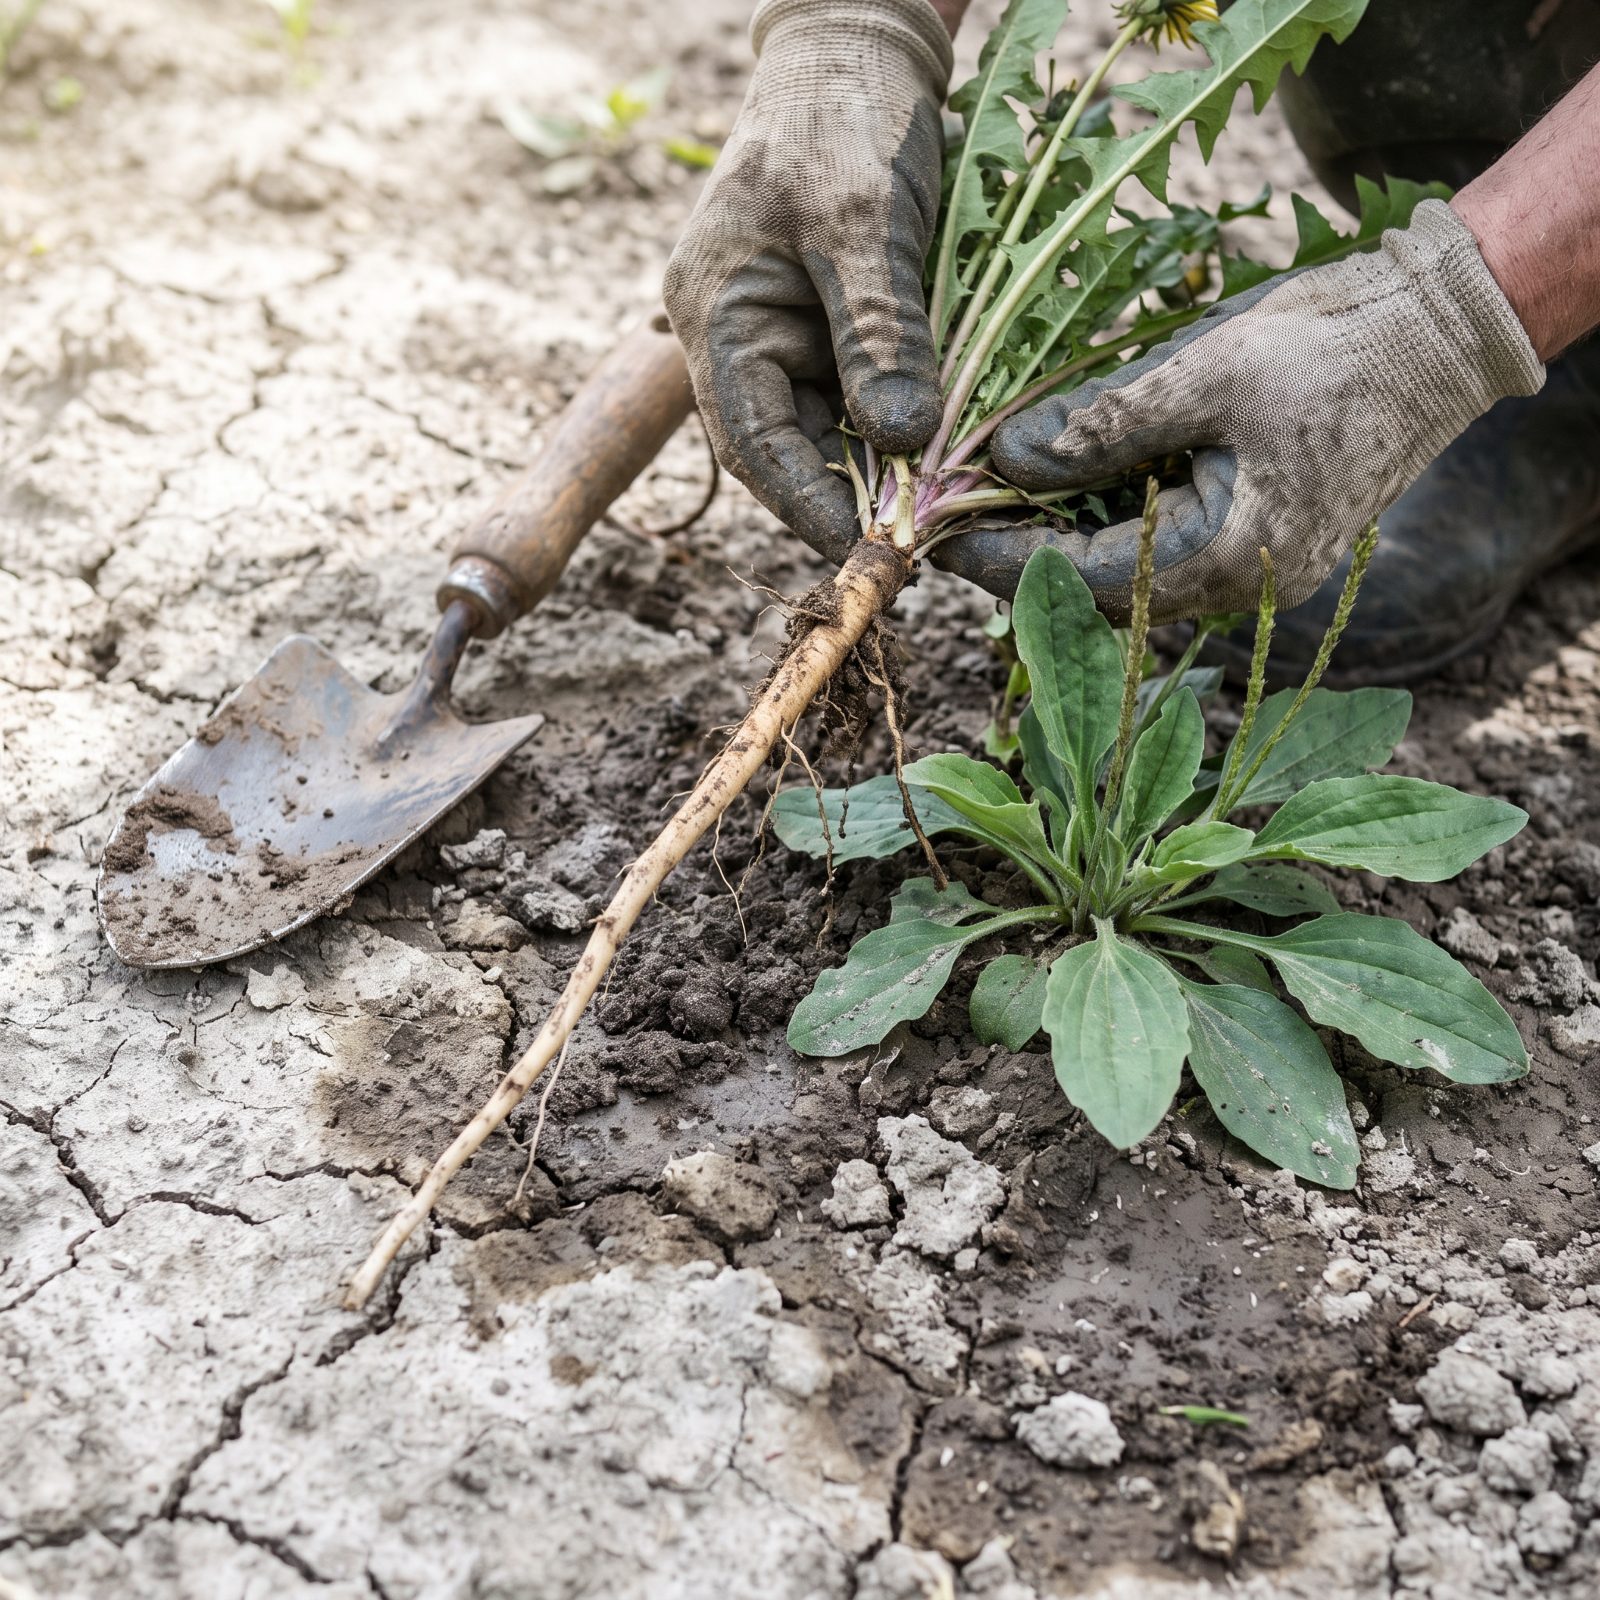
Weeds are the ground filling out a questionnaire you never handed it. Broadleaf plantain and prostrate knotweed love packed, airless earth, so where they colonize, a shovel hits resistance a few inches down. Dandelions with monster taproots often mean a hardpan they’re trying to punch through.
Horsetail, rushes, or stubborn moss point the other way, toward soil that stays wet too long. Before you reach for anything, read the stand of weeds like a map. It tells you where to fork in compost, where to add grit, and where the drainage needs real work.
13. Winter-Sow Hardy Seeds in Ventilated Milk Jugs
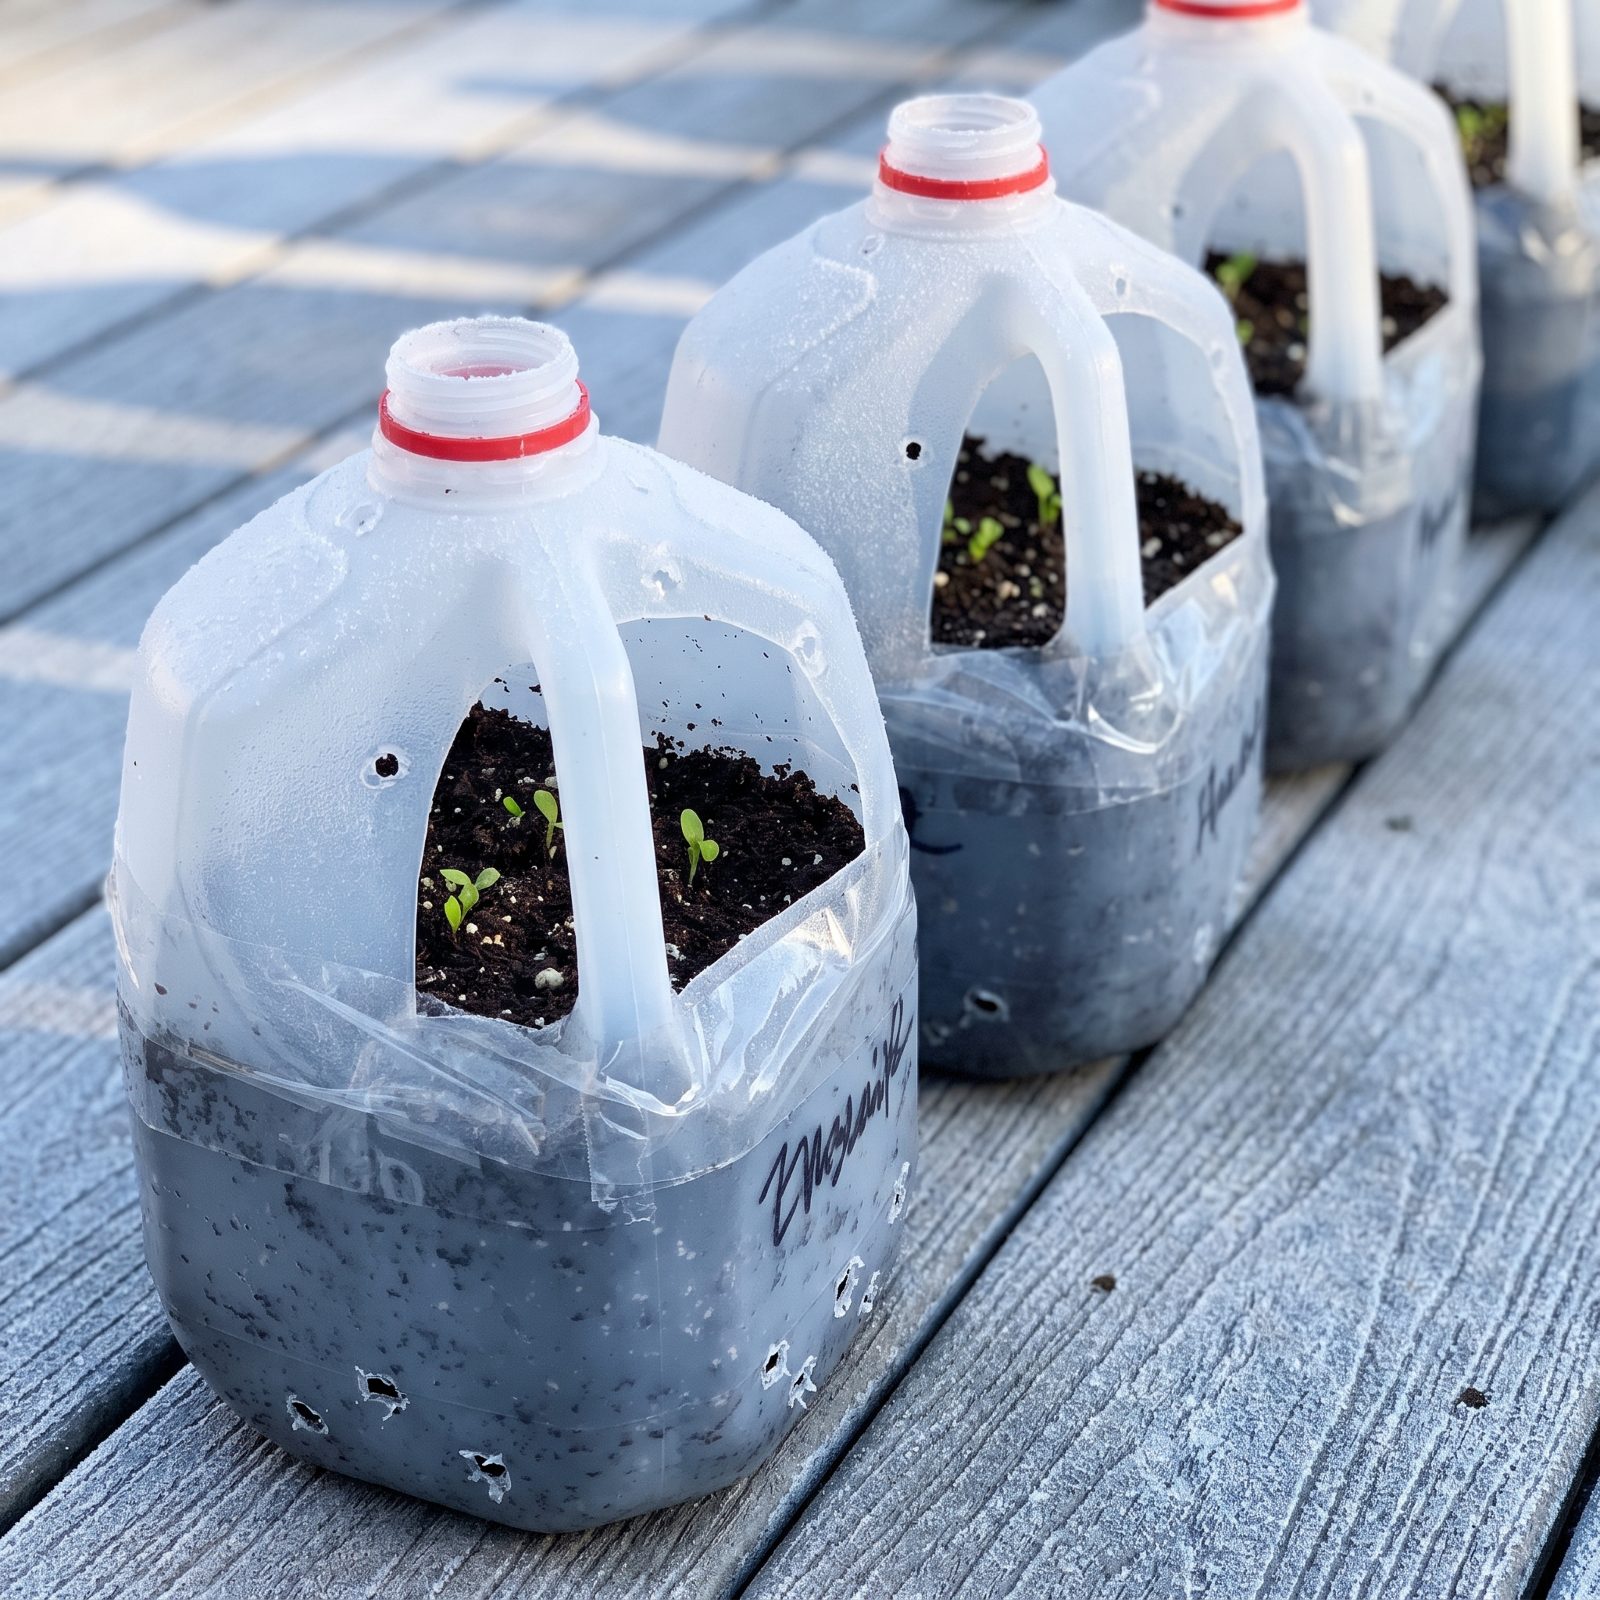
Seeds that need cold do better outside than babied on a windowsill. A cut milk jug becomes a mini cold frame. Cut it around the middle but leave a hinge, fill the base with moist potting mix, sow your hardy seeds, tape it shut, and ditch the cap for ventilation. Then set it outside in winter and forget about it.
The jug catches snow and thaw cycles, which is exactly the stratification many native perennials, poppies, and brassicas want. Seedlings come up stocky and already acclimated, so you skip the frantic hardening-off in spring. It looks faintly ridiculous lined up on the deck. Works better than almost anyone expects, though.
12. Scratch Hard Seed Coats With Sandpaper Before Sowing
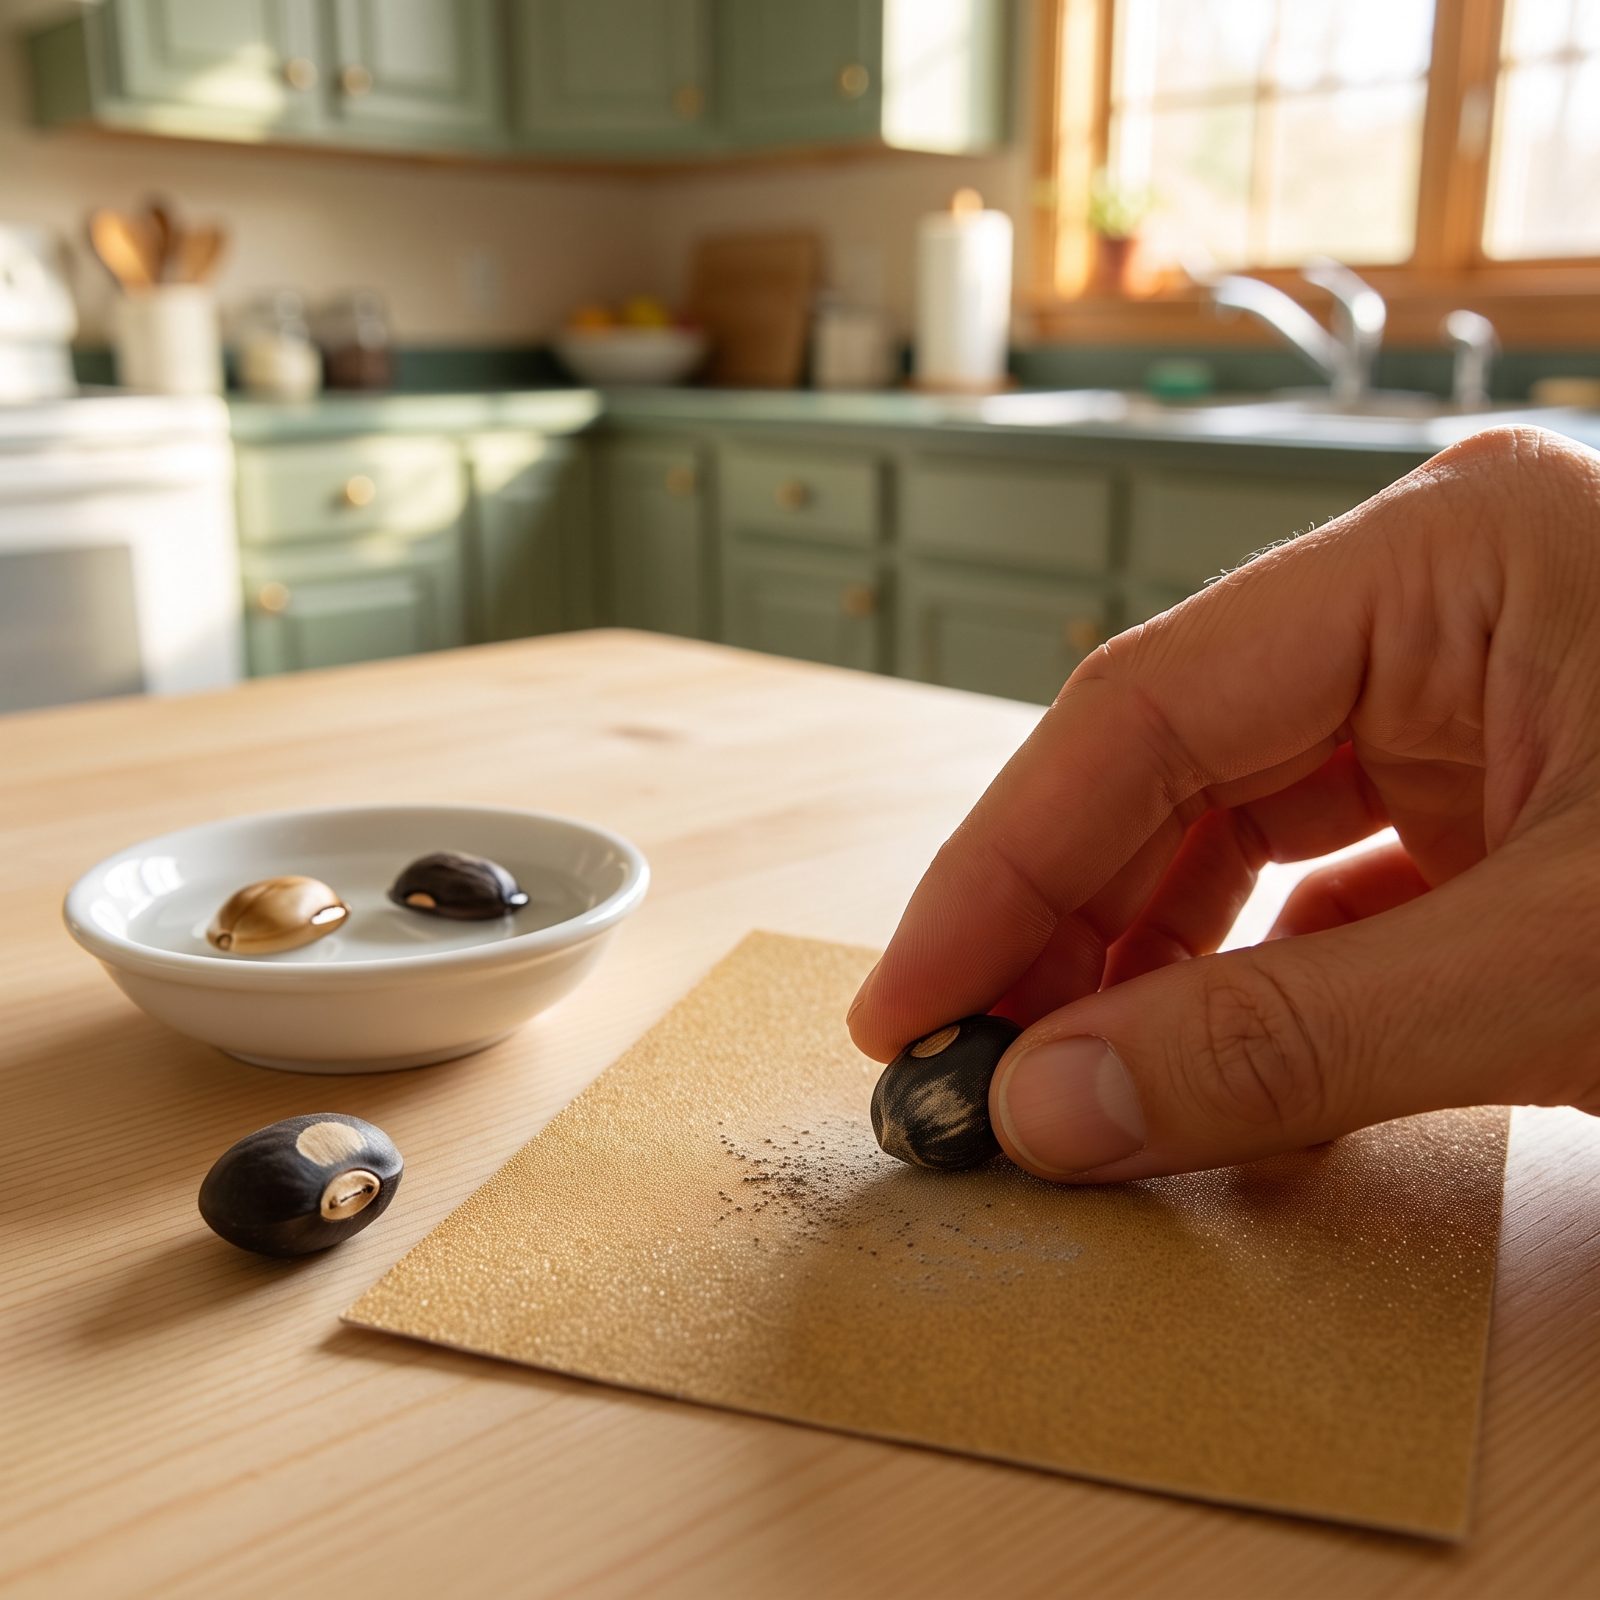
Some seeds wear armor. Morning glory, sweet pea, nasturtium, lupine — their coats are built to survive years in the soil, which is great for the plant and maddening for you. Water can’t get in, so they sit and sulk.
A quick rub on medium-grit sandpaper, or one nick with a knife, breaks the seal. The coat doesn’t need to come off. Scuff a spot until you see the lighter layer underneath, soak overnight, and watch them swell while the untreated ones stay stubbornly hard.
11. Lay Leggy Tomato Seedlings Sideways in Planting Trenches
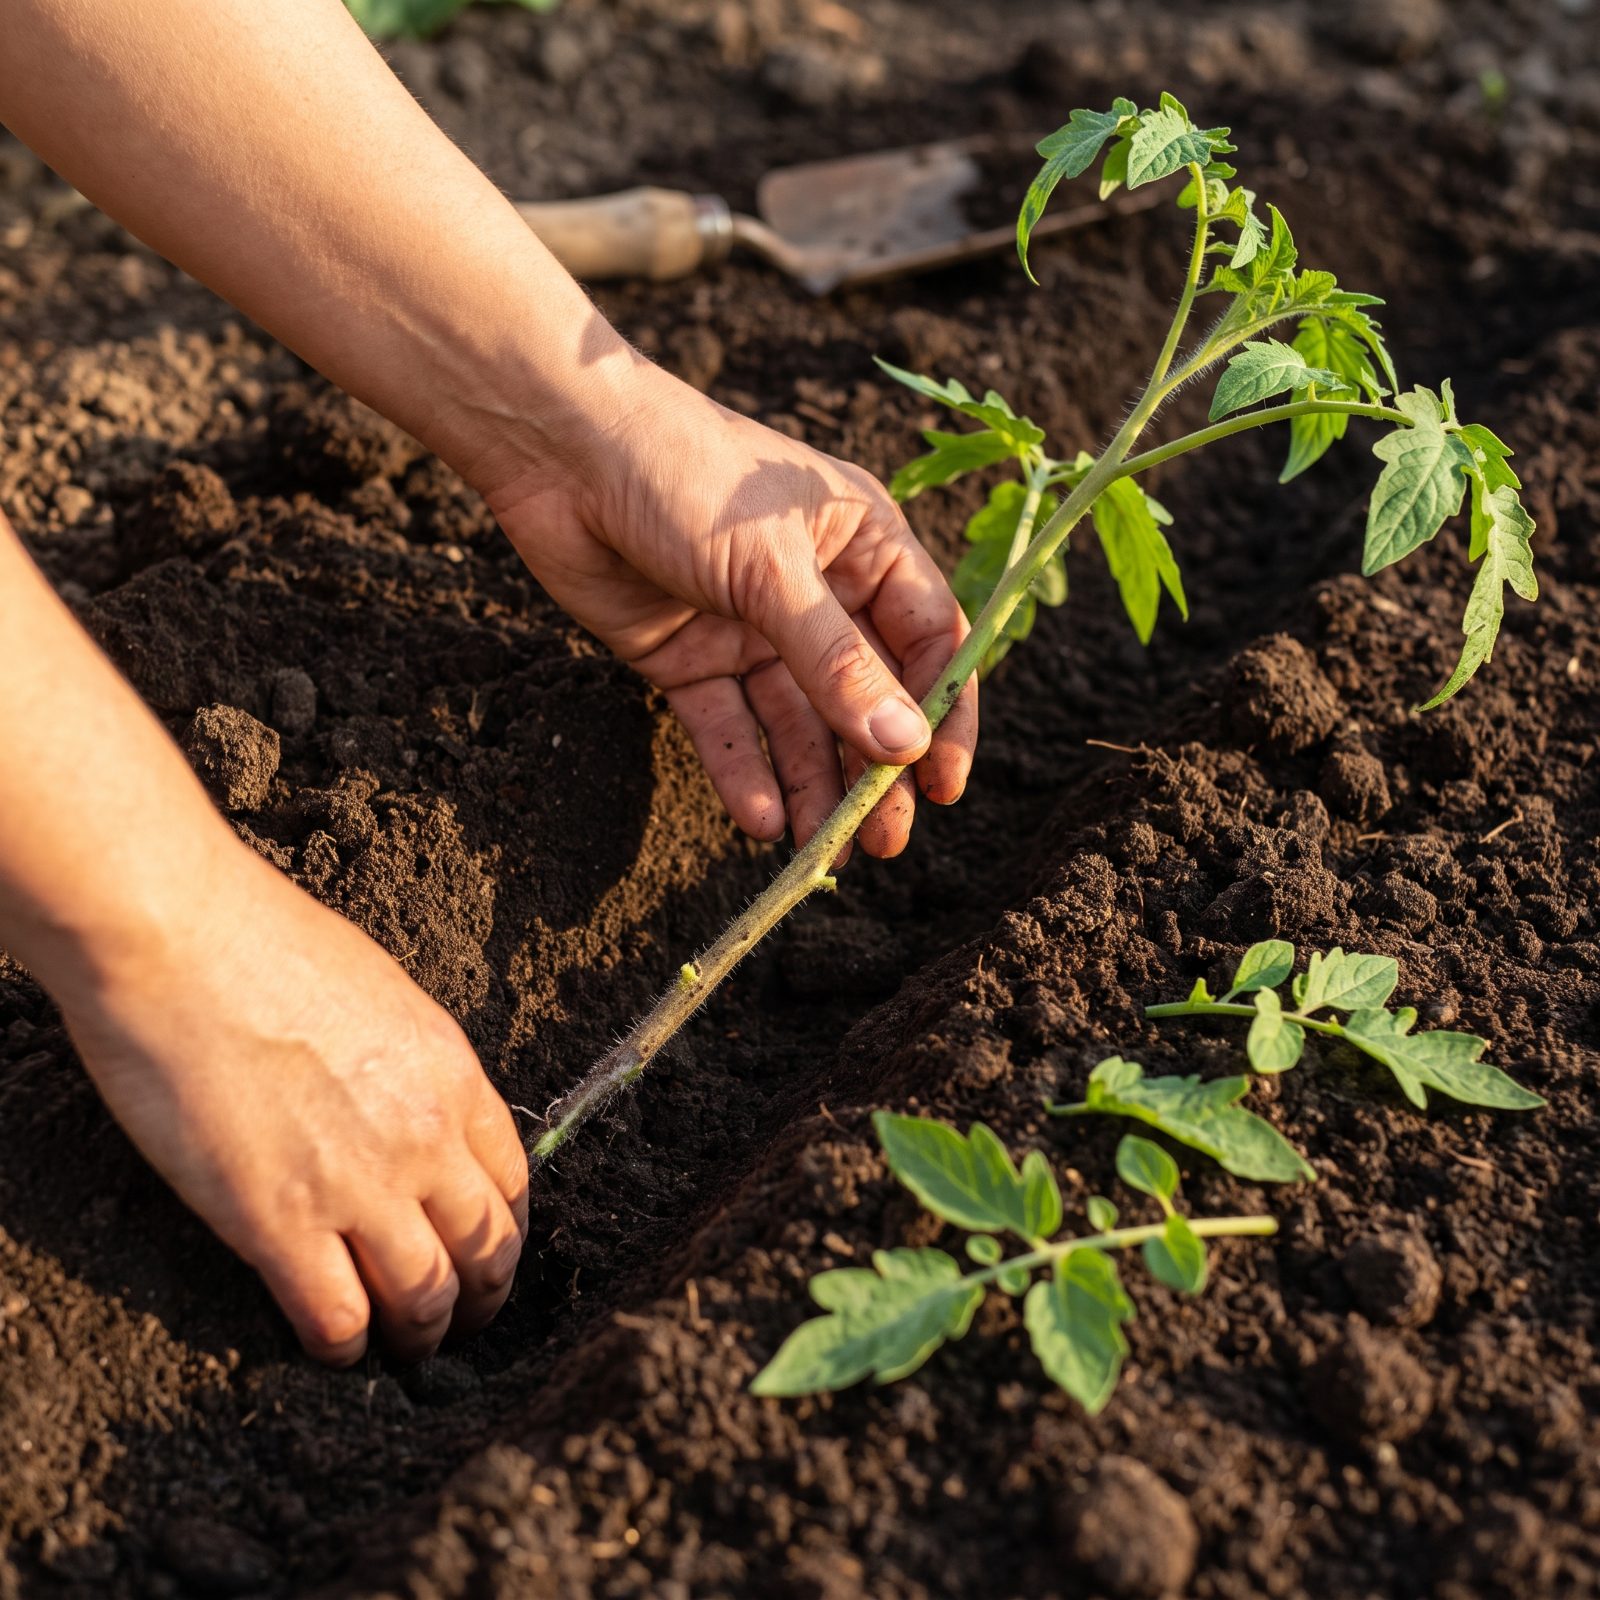
A tomato stem is secretly a root system waiting for an excuse. Those tiny hairs along the stem will turn into roots anywhere they touch soil, so when a seedling gets tall and spindly on the windowsill, don’t apologize for it. Use it.
Strip the lower leaves, dig a shallow trench rather than a deep hole, and lay the plant on its side with just the top rosette poking up. The buried length roots out along its whole stem, giving you a drought-tougher plant with a bigger anchor, and the tip rights itself toward the sun within a day or two. Leggy seedlings, it turns out, are an advantage nobody told you about.
10. Chit Seed Potatoes Upright in Egg Cartons
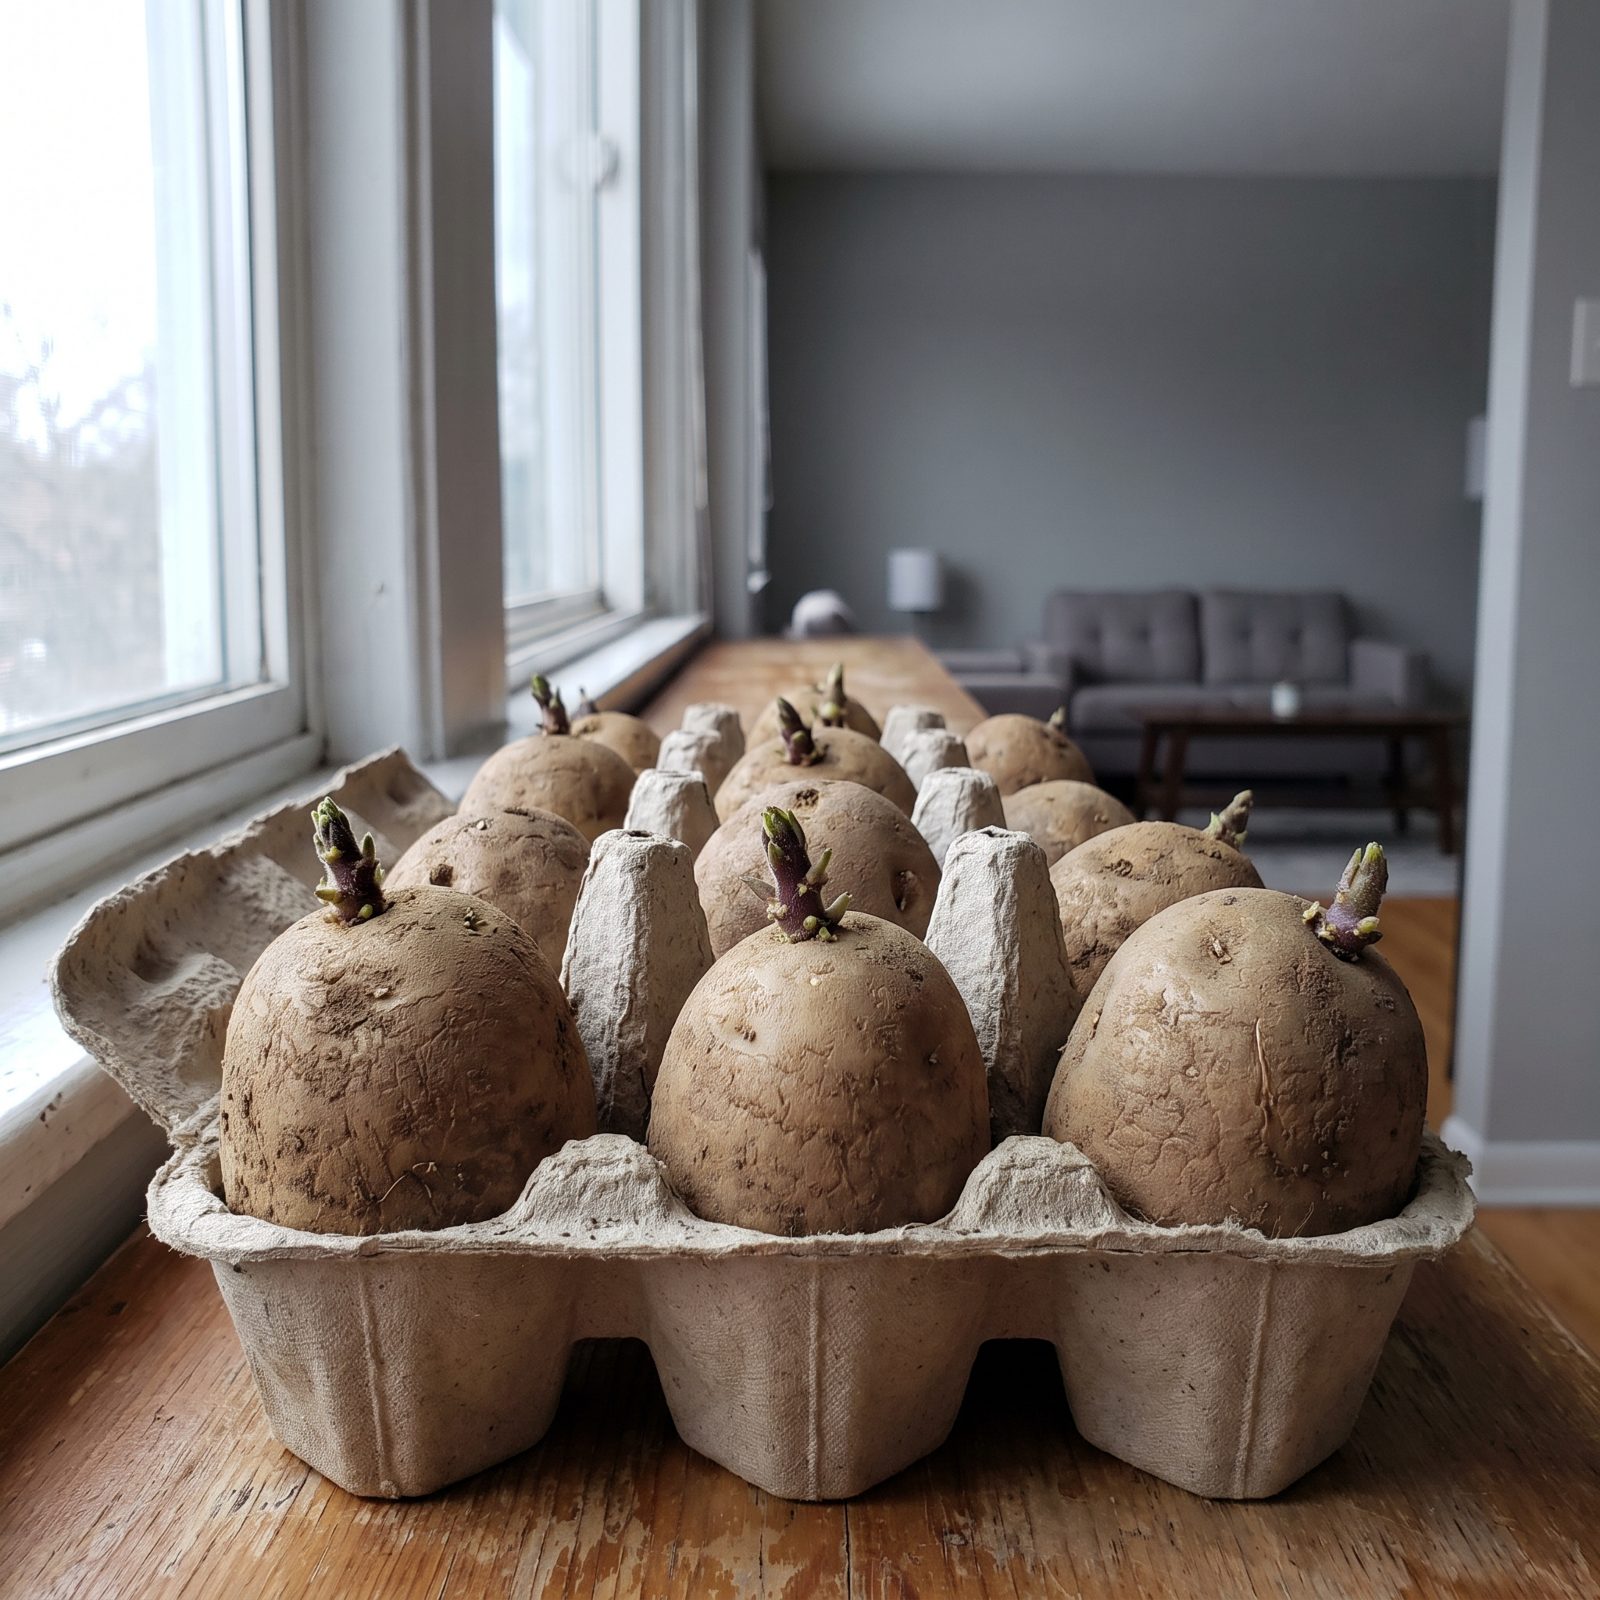
Stand seed potatoes up in an egg carton, eyes pointing to the ceiling, and park them somewhere cool and bright. Within a few weeks they’ll push short, stocky green sprouts. That’s chitting, and it buys you a head start of a week or two once they hit the ground.
The light matters. Sprouts grown in the dark come out long, white, and fragile — the kind that snap off the moment you plant them. Light keeps them squat and tough. First earlies benefit most, while maincrop potatoes barely care, so don’t lose sleep over those.
9. Multi-Sow Compatible Vegetables in Single Modules
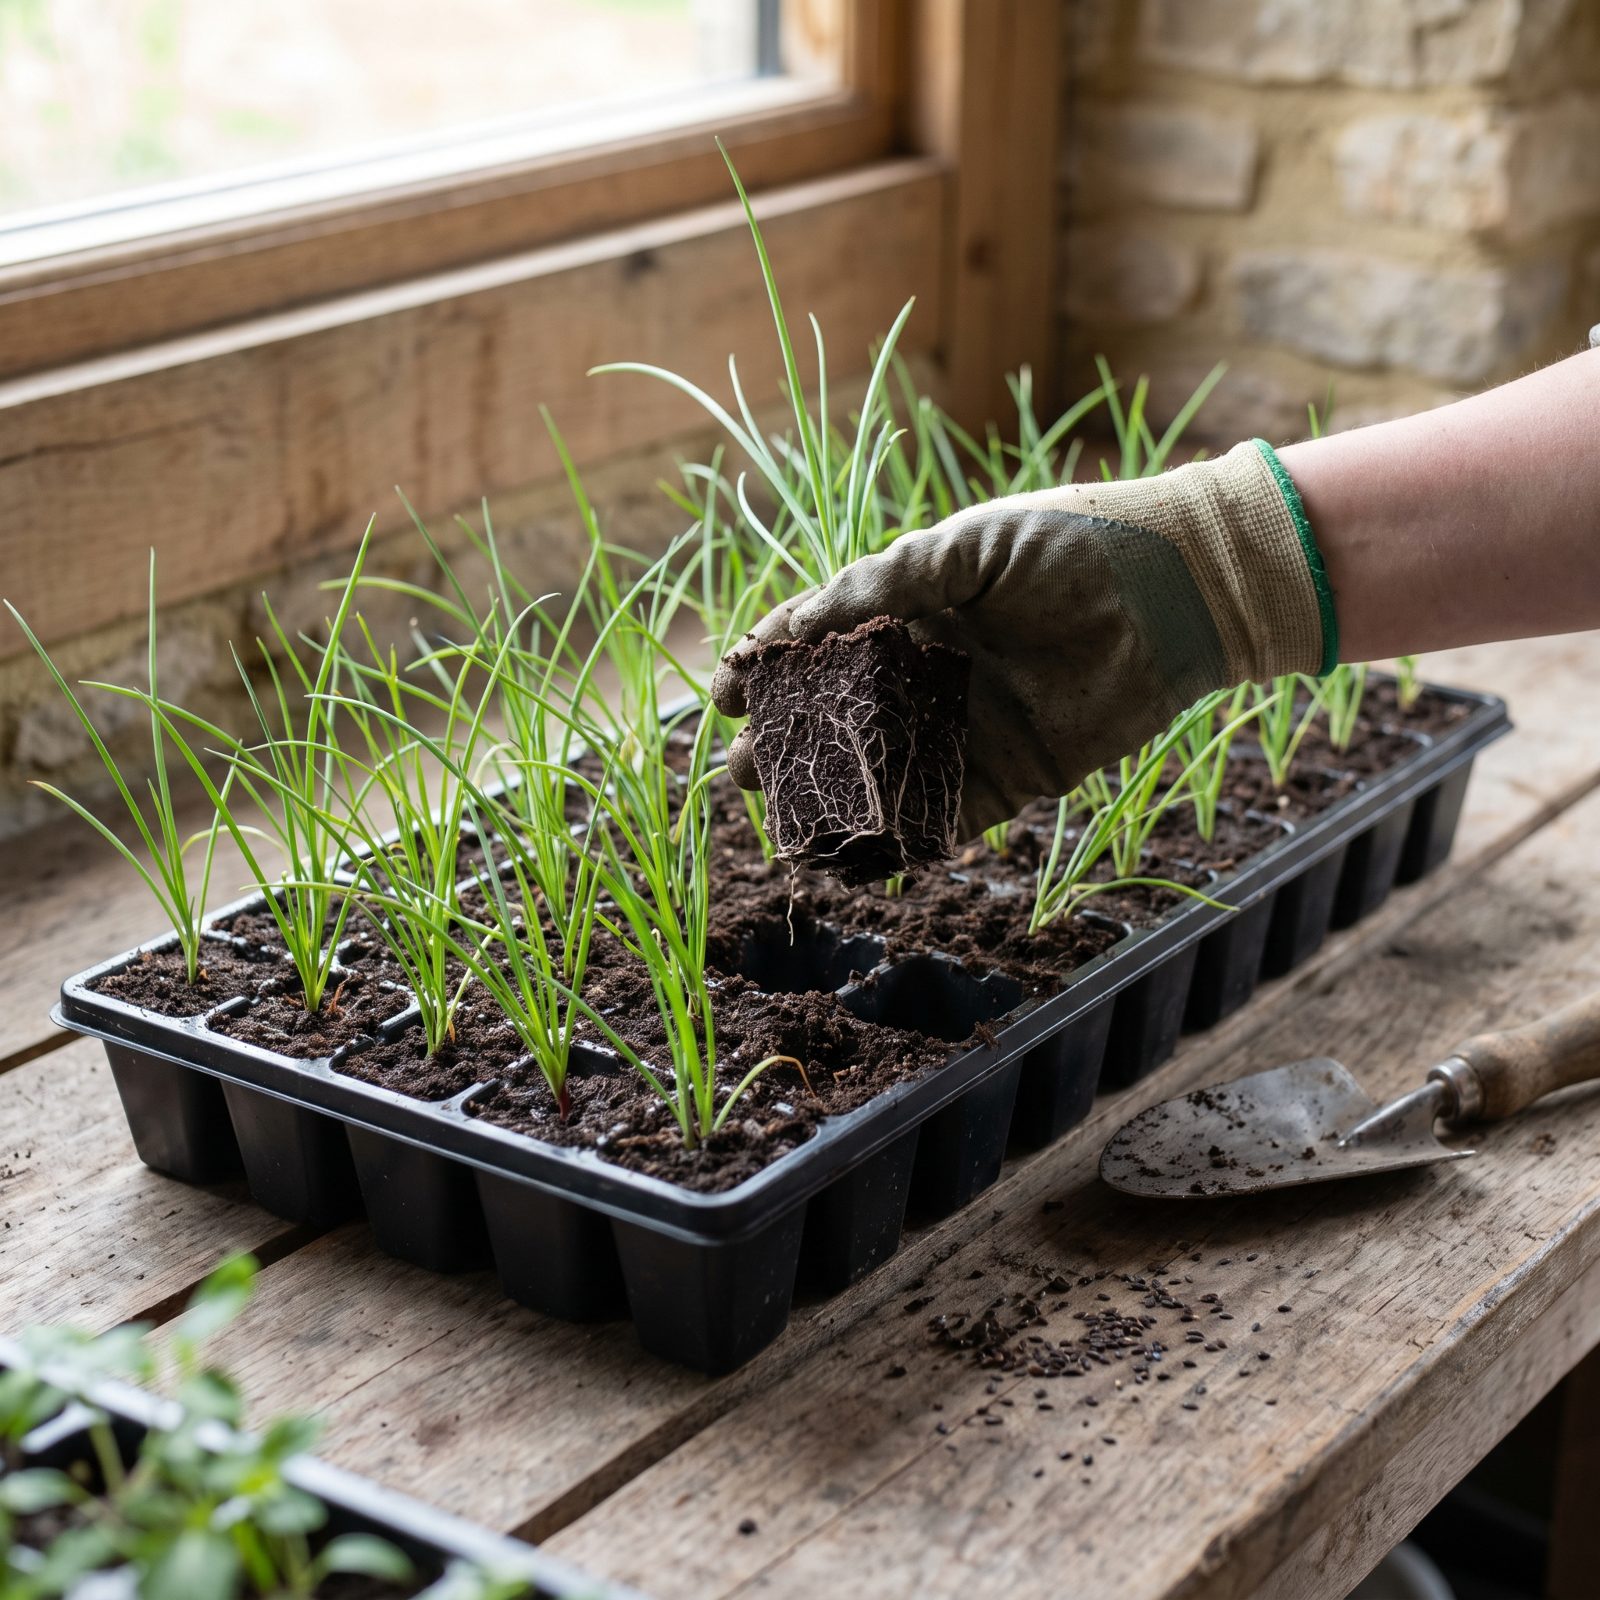
One hole, several plants, no thinning drama. Sow four or five beetroot or onion seeds in a single module, grow the clump as one unit, and plant the whole thing out together. The seedlings gently shoulder each other apart as they swell, and you harvest a handful from each station.
It works beautifully for beets, onions, leeks, radishes, and bulbing fennel. Saves compost, saves space under lights, and spares you the tedious business of thinning a long row and tossing half your babies on the heap.
8. Fold Cauliflower Leaves Over Developing White Heads
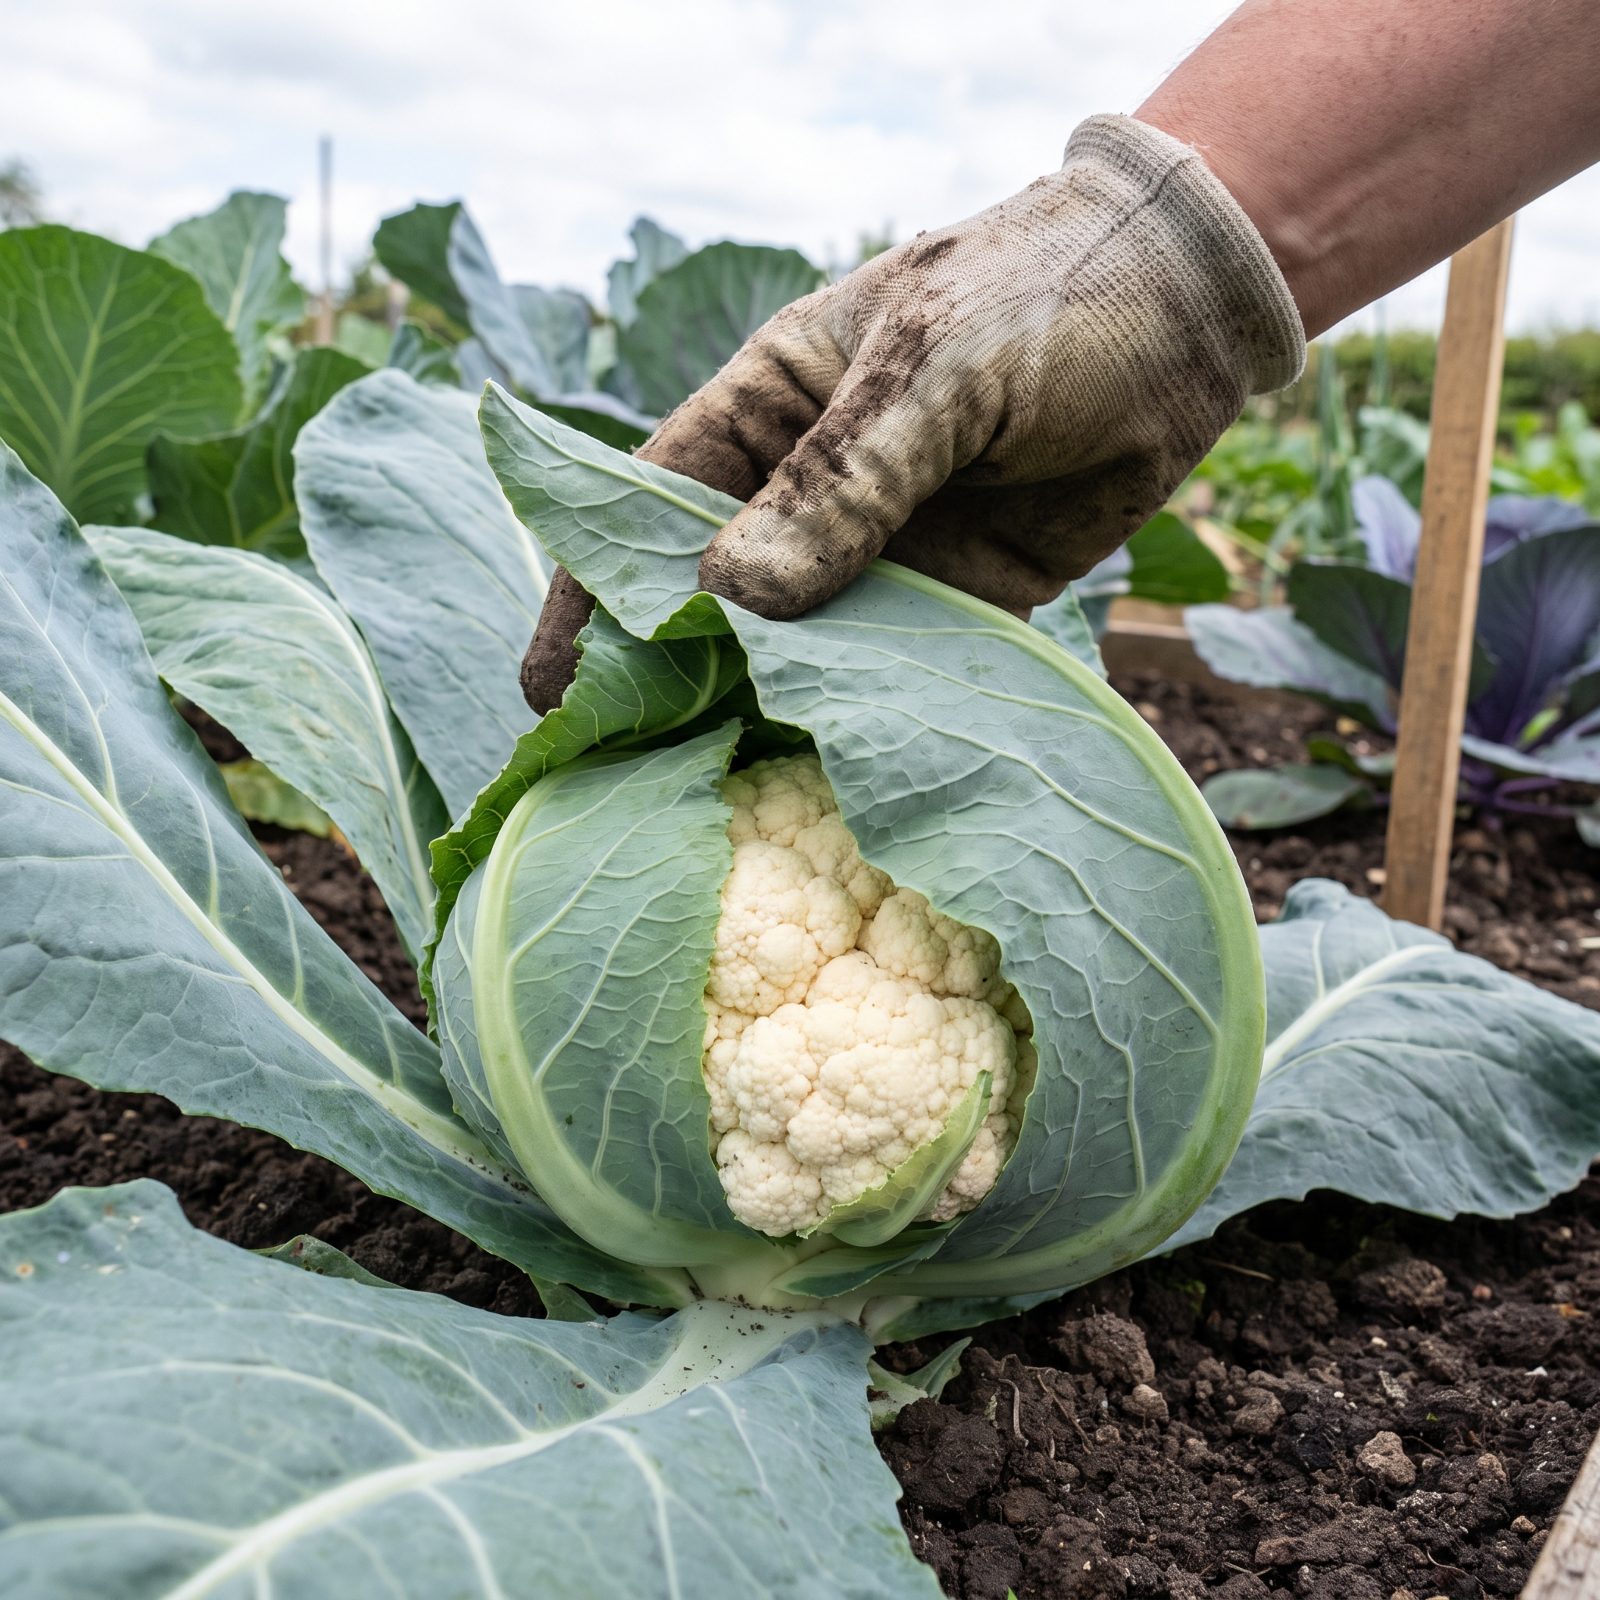
Sun turns a cauliflower head yellow and grainy. The fix is almost comically low-tech: once the curd reaches egg size, snap or fold a few of the big outer leaves over the top to shade it. Some gardeners tuck them, some tie them loosely with twine or a soft band.
Shaded this way, the head stays pale, dense, and sweet — the whole reason you grew it. Check under the leaves every few days once it’s sizing up. A cauliflower goes from perfect to open and ricey faster than you’d like, and it never warns you first.
7. Pollinate Squash Blossoms by Hand With a Small Brush
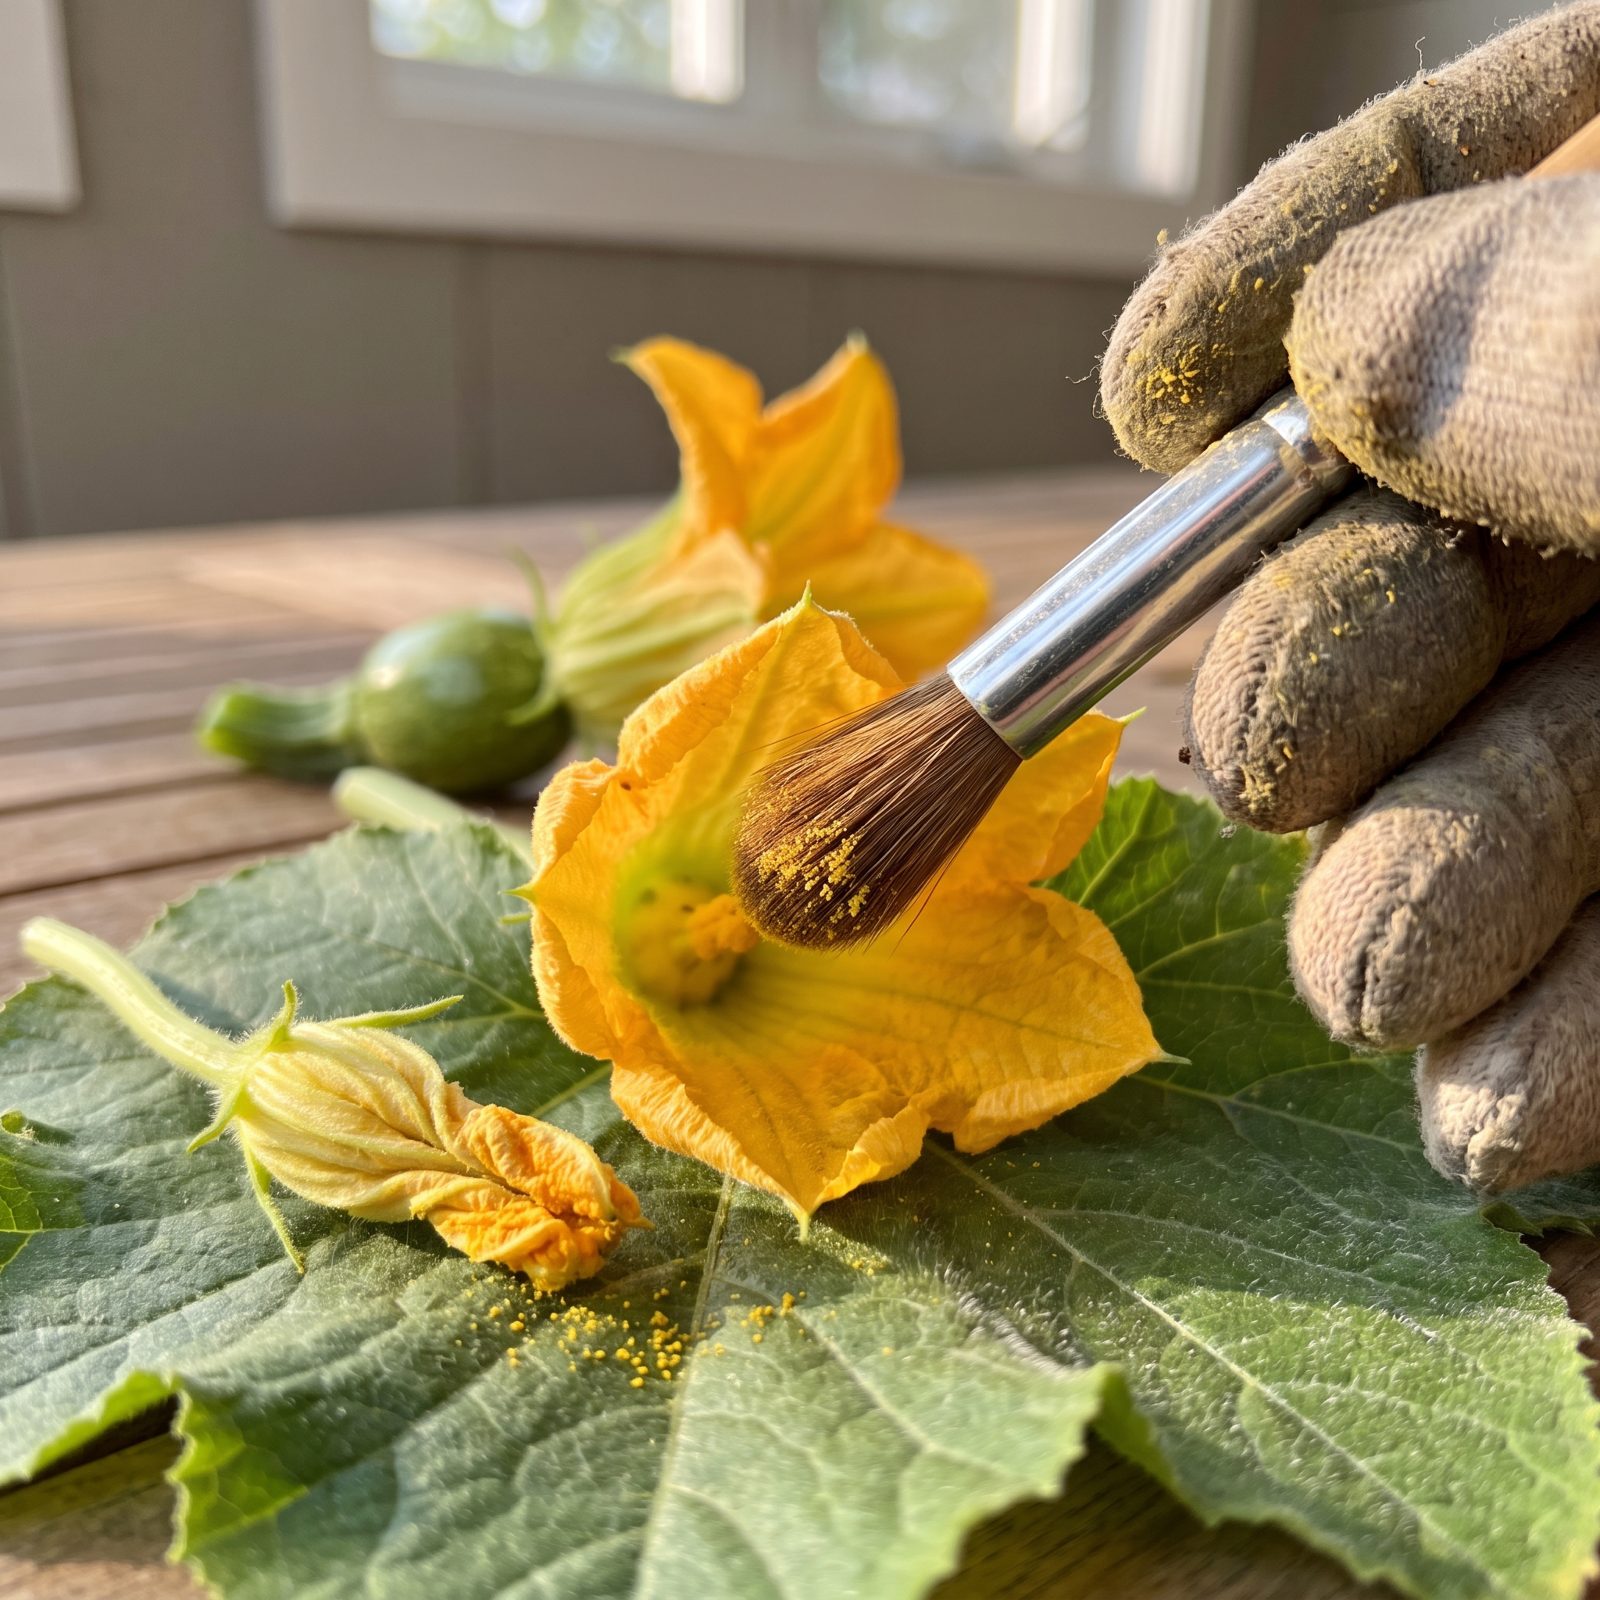
You’ve grown a thriving squash plant covered in flowers and gotten nothing but tiny fruits that yellow and rot off. That’s failed pollination, usually from too few bees around in the cool early morning when squash flowers open.
Take it into your own hands. The male flowers stand on thin plain stems; the females sit above a baby squash. Dab a small brush in the male’s pollen and brush it onto the center of the female — or just pluck a male, peel its petals, and rub it in directly.
6. Thin Young Tree Fruit Until Clusters No Longer Touch
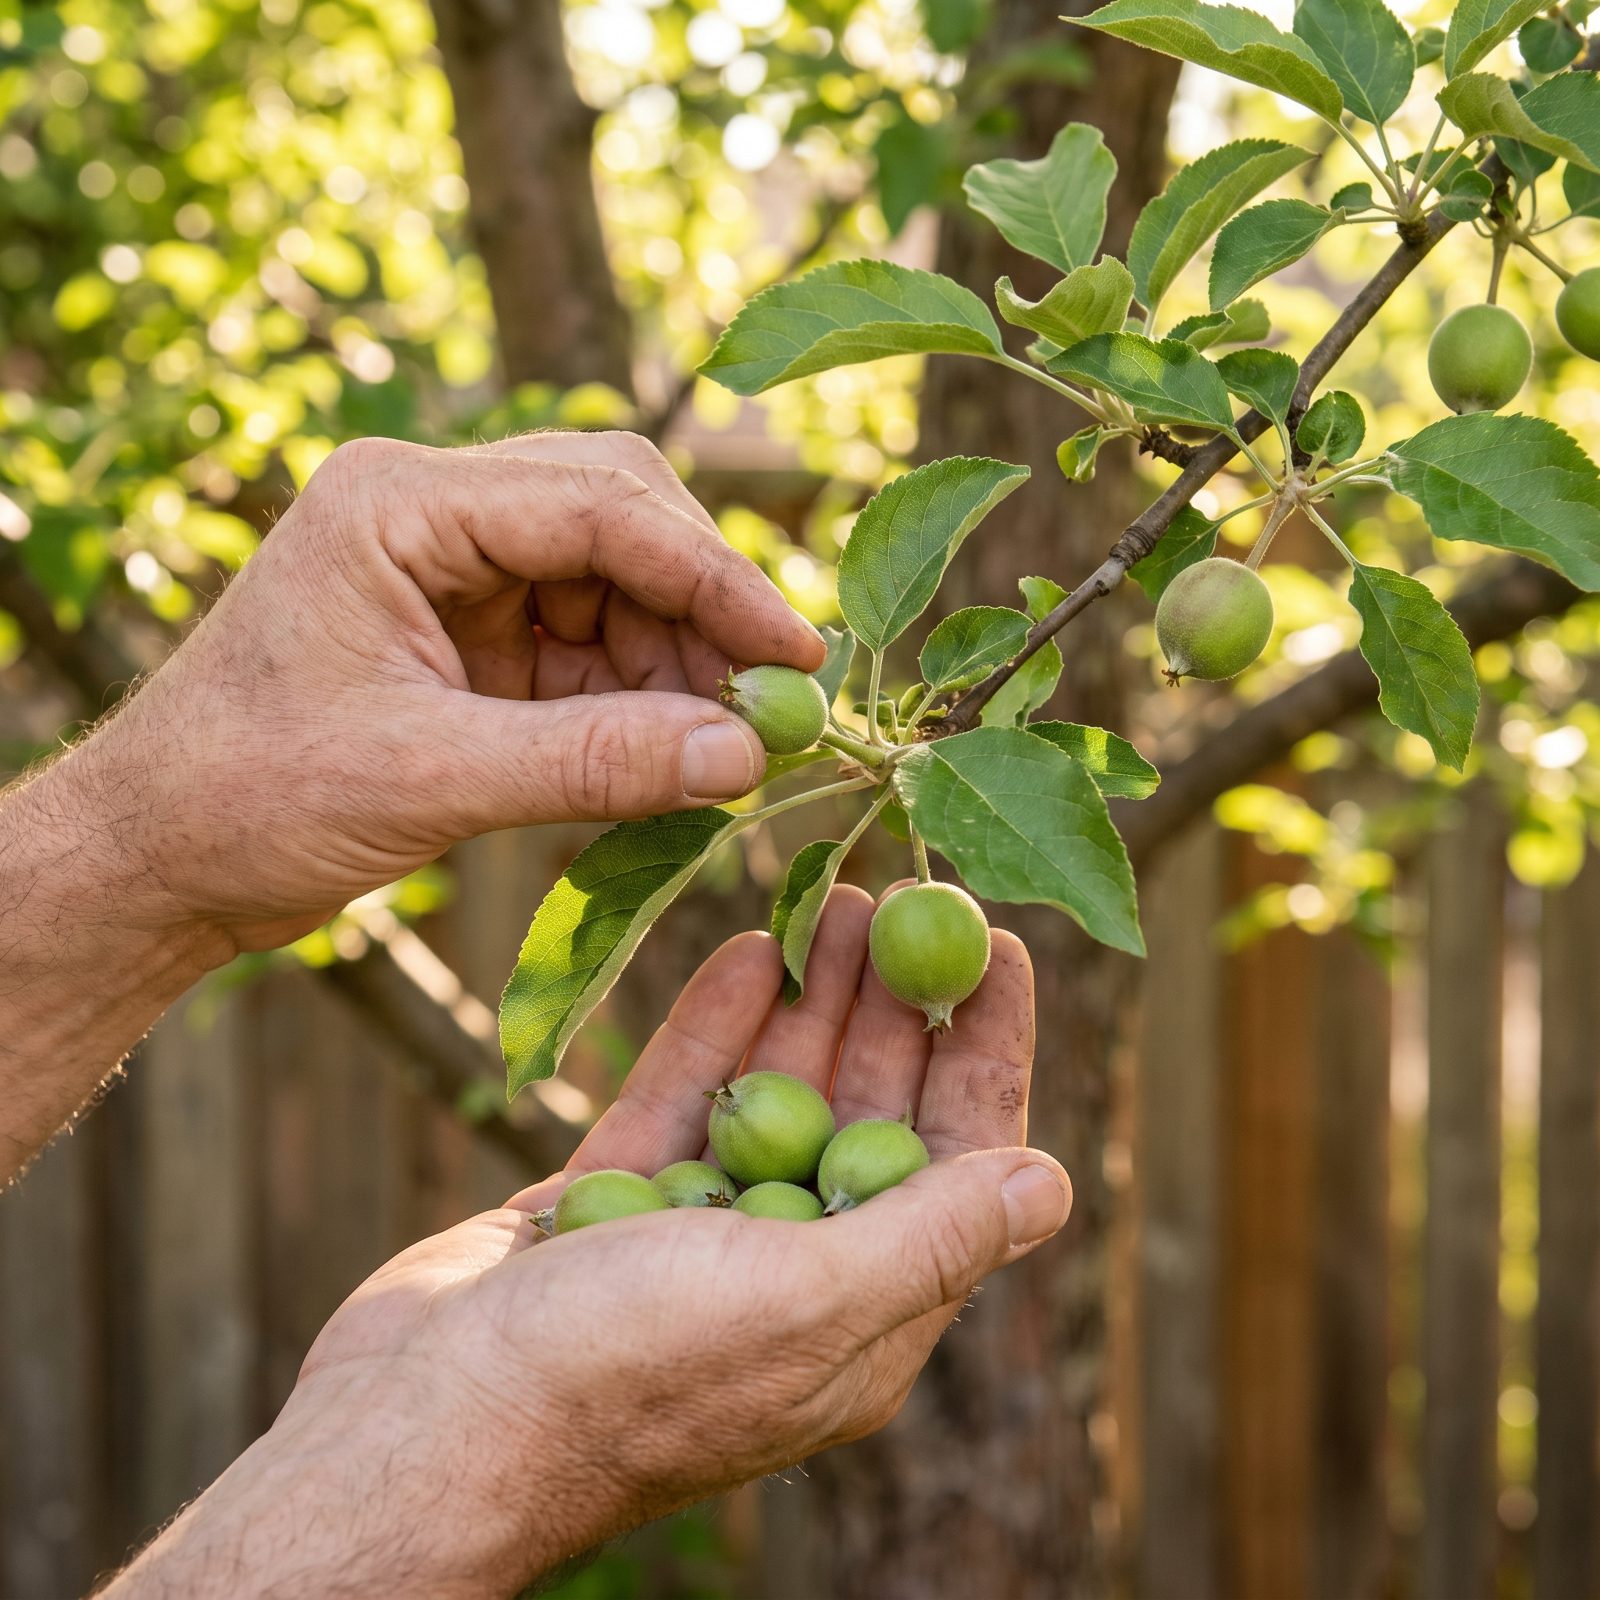
A tree loaded with baby fruit looks like a win. It’s usually the opposite. Overloaded branches give you a mob of small, bland, disease-prone fruit, and they often snap under the weight of their own ambition.
Thin while the fruitlets are small, right after the natural June drop. Go through each cluster and pinch out the runts and the touching ones until the keepers have breathing room, roughly a hand’s width apart on apples and pears. Fewer fruit, bigger and sweeter, with air moving between them so rot and scab have a harder time of it. It feels wasteful. Your fall harvest will thank you.
5. Use Comfrey Leaves as a Nutrient-Rich Surface Mulch
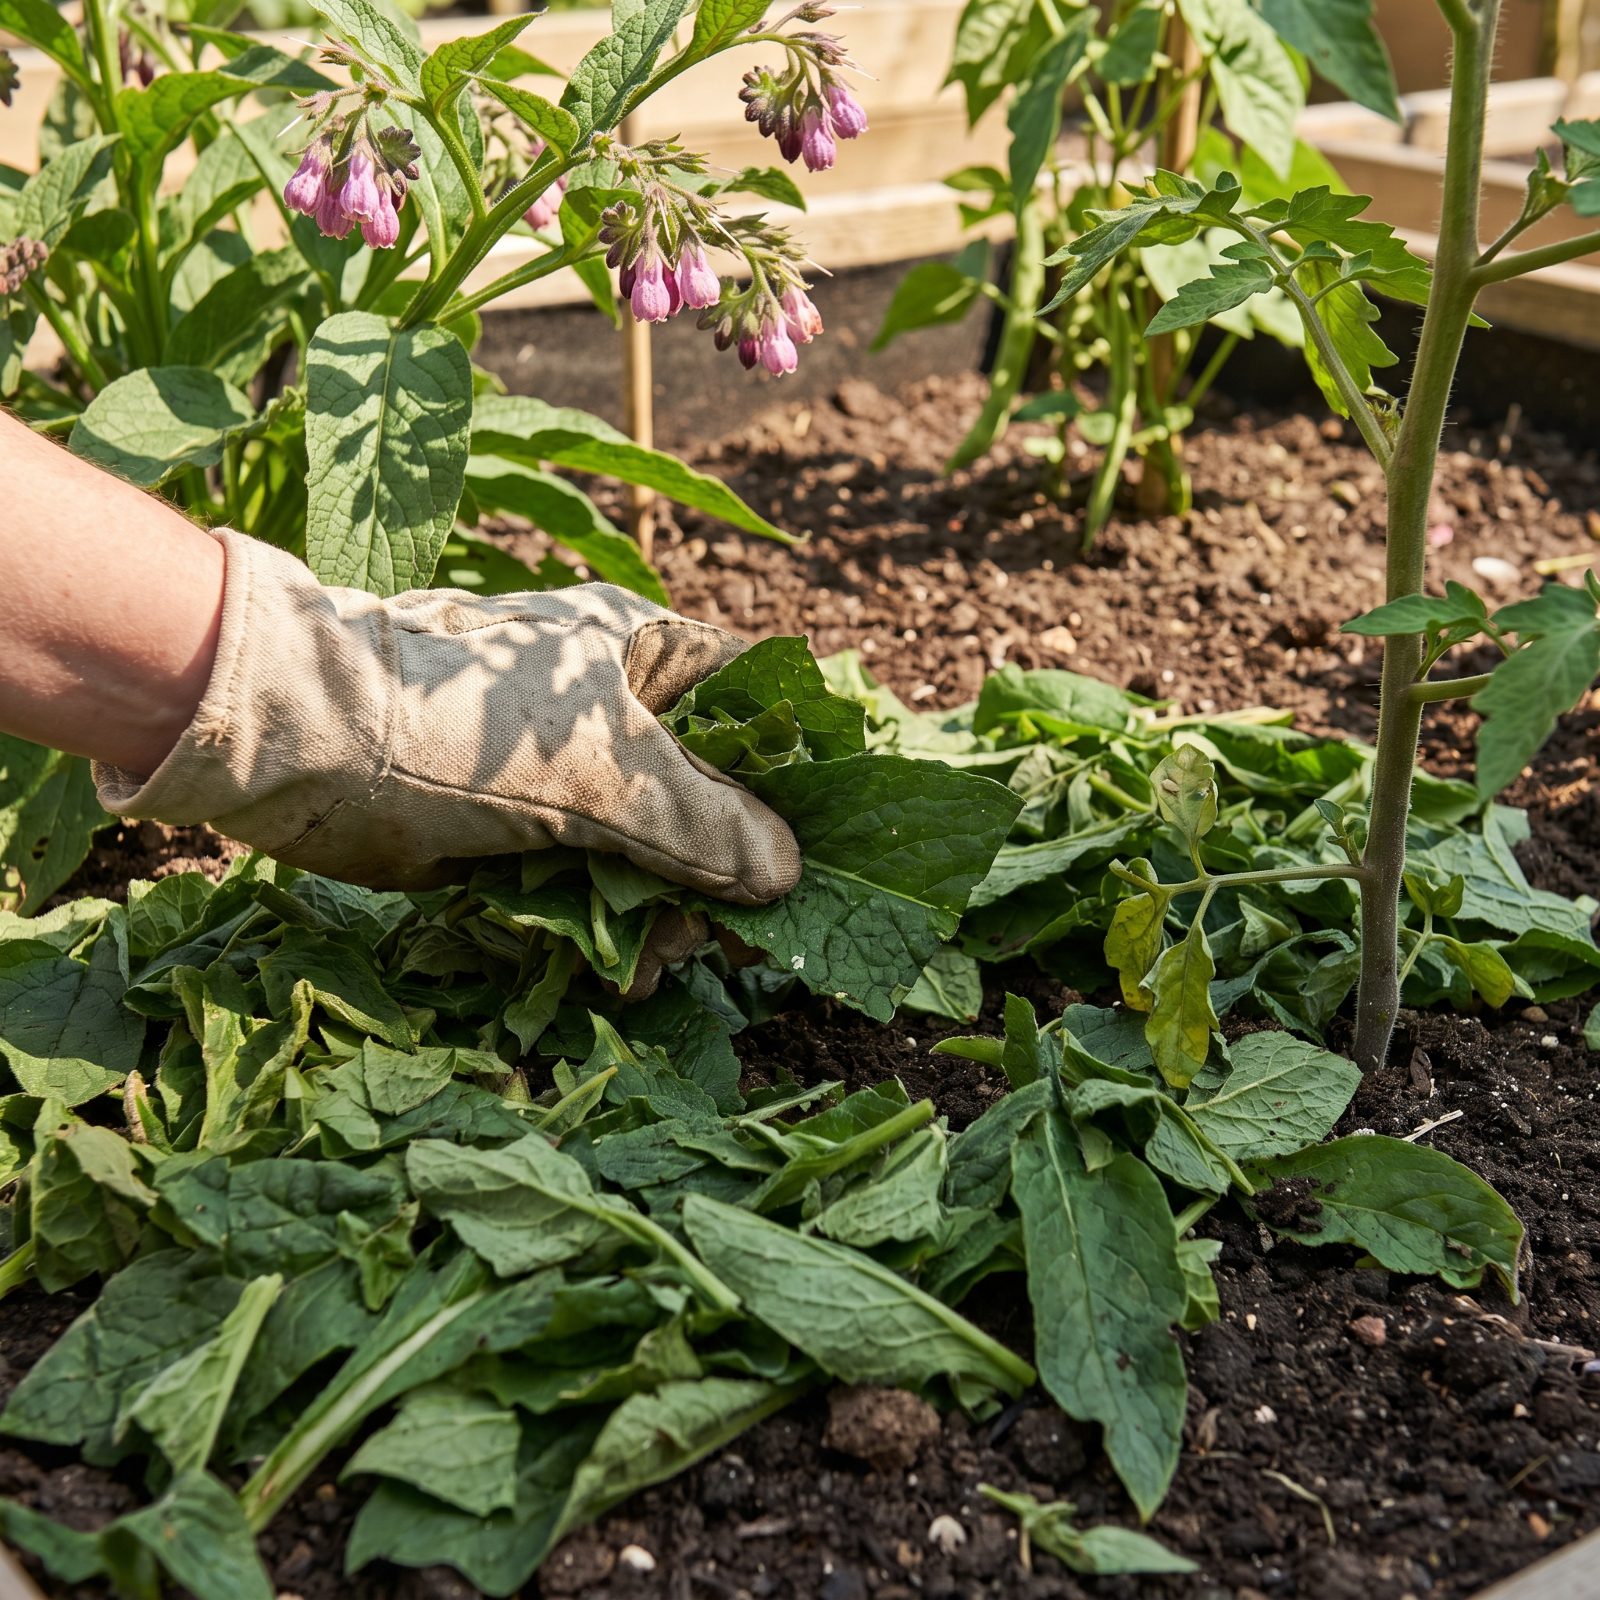
Comfrey is a mining operation disguised as a plant. Its deep roots pull potassium, nitrogen, and other nutrients up from well below where your vegetables can reach, and it stashes the lot in those big floppy leaves.
Cut the leaves a few times a season and lay them straight on the soil around hungry feeders like tomatoes, squash, and beans. They wilt, break down fast, and feed the bed as they go, no composting step required. One clump of the sterile ‘Bocking 14’ variety will hand you armloads all summer and, crucially, won’t seed itself into every corner of the garden.
4. Rinse and Mulch With Seaweed Gathered Where It’s Allowed
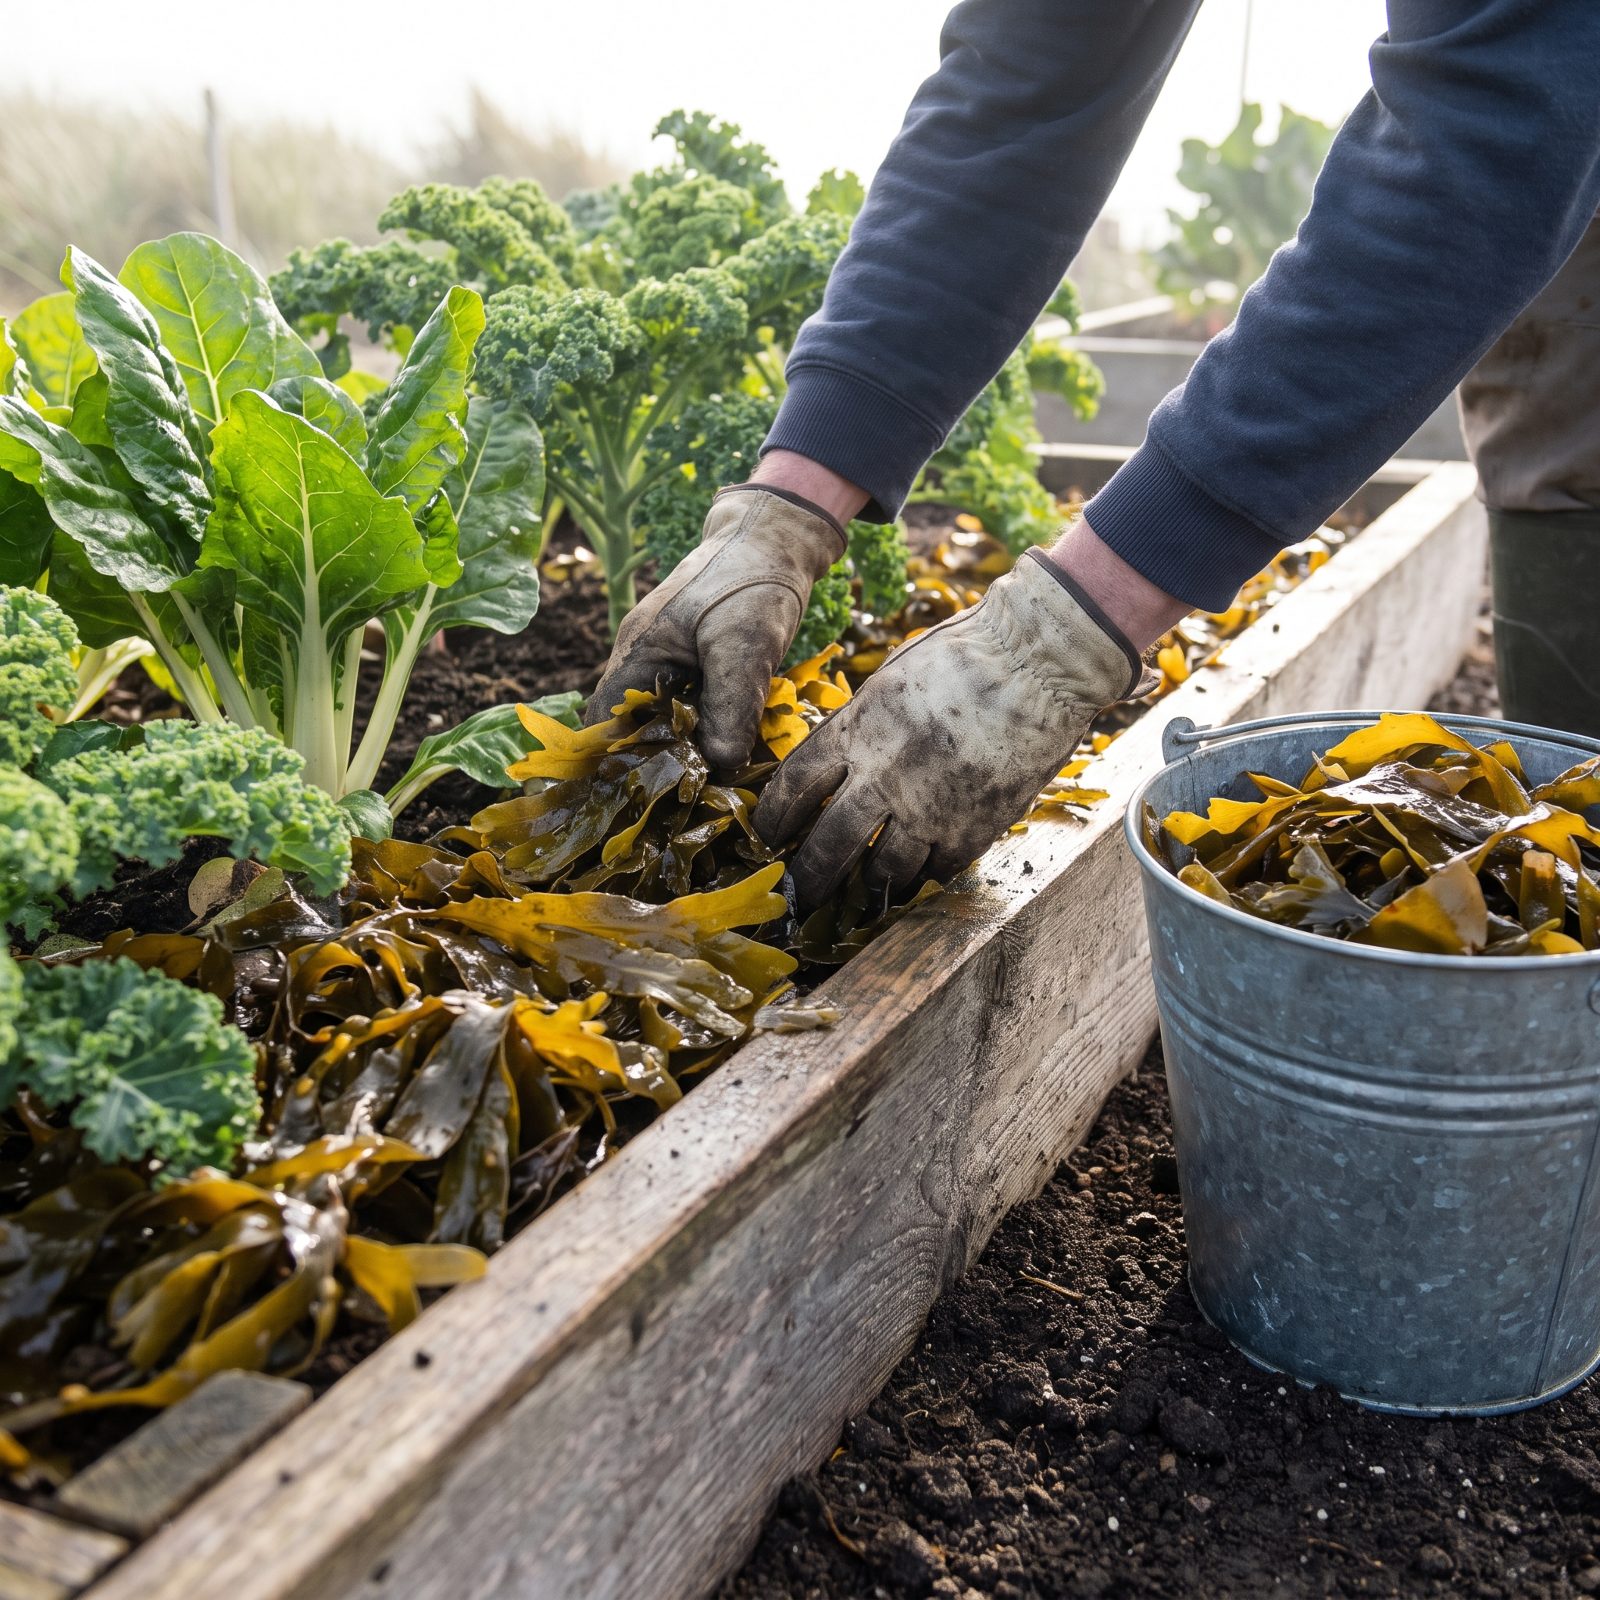
Seaweed is a quietly good mulch and a genuinely useful soil feed, loaded with potassium and trace minerals that most garden beds run short on. The catch is the salt. Lay it down straight off the beach and you’ll scorch roots and leave a crust nothing wants to grow through. Rinse it with a hose, or spread it out in the rain for a day, and most of the salt washes away.
Collection rules matter here, more than people expect. Many coastlines protect wrack as habitat, and gathering is restricted or flat-out banned in some parks and reserves — so check your state and local rules before you fill a bucket. Where it’s permitted, take what’s loose above the tideline. Leave the rest.
3. Lift Your Containers Before Watering to Feel How Dry They Are
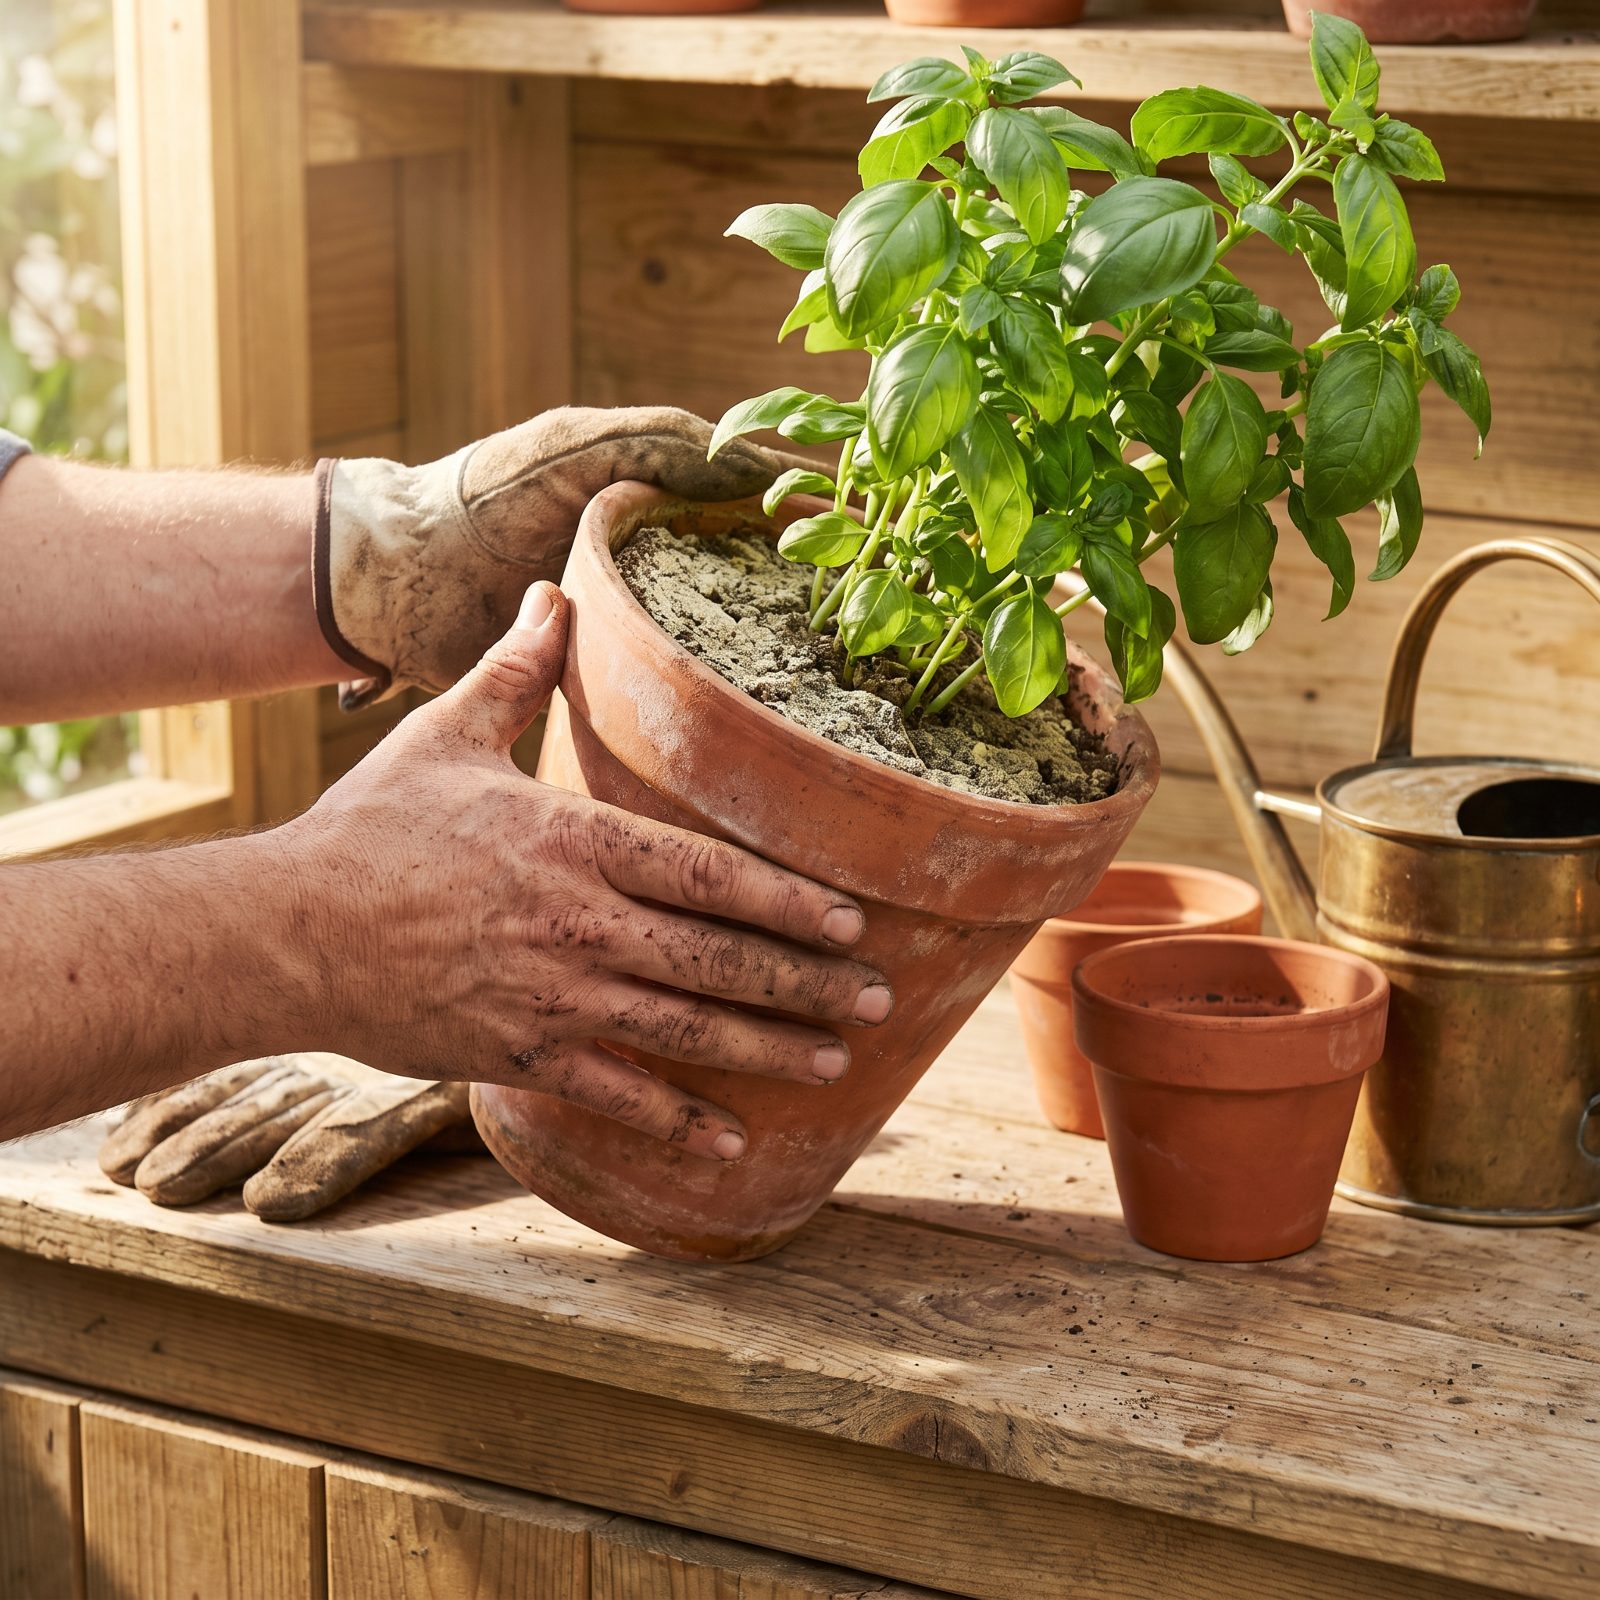
Finger-in-the-soil only tells you about the top inch. The weight of the whole pot tells you about the root zone, which is the part that actually matters. Lift one that’s heavy with water and it feels like a small sack of flour; lift a dry one and it feels almost suspiciously hollow, like something’s gone missing.
Do it a few times right after watering and again two days later. Your hands learn the difference fast — no moisture meter, no guesswork, no drowning a plant that was already damp an inch down. Overwatering kills more container plants than drought ever does, and this is the cheapest fix going.
2. Ring Each Seedling Stem With a Cardboard Cutworm Collar
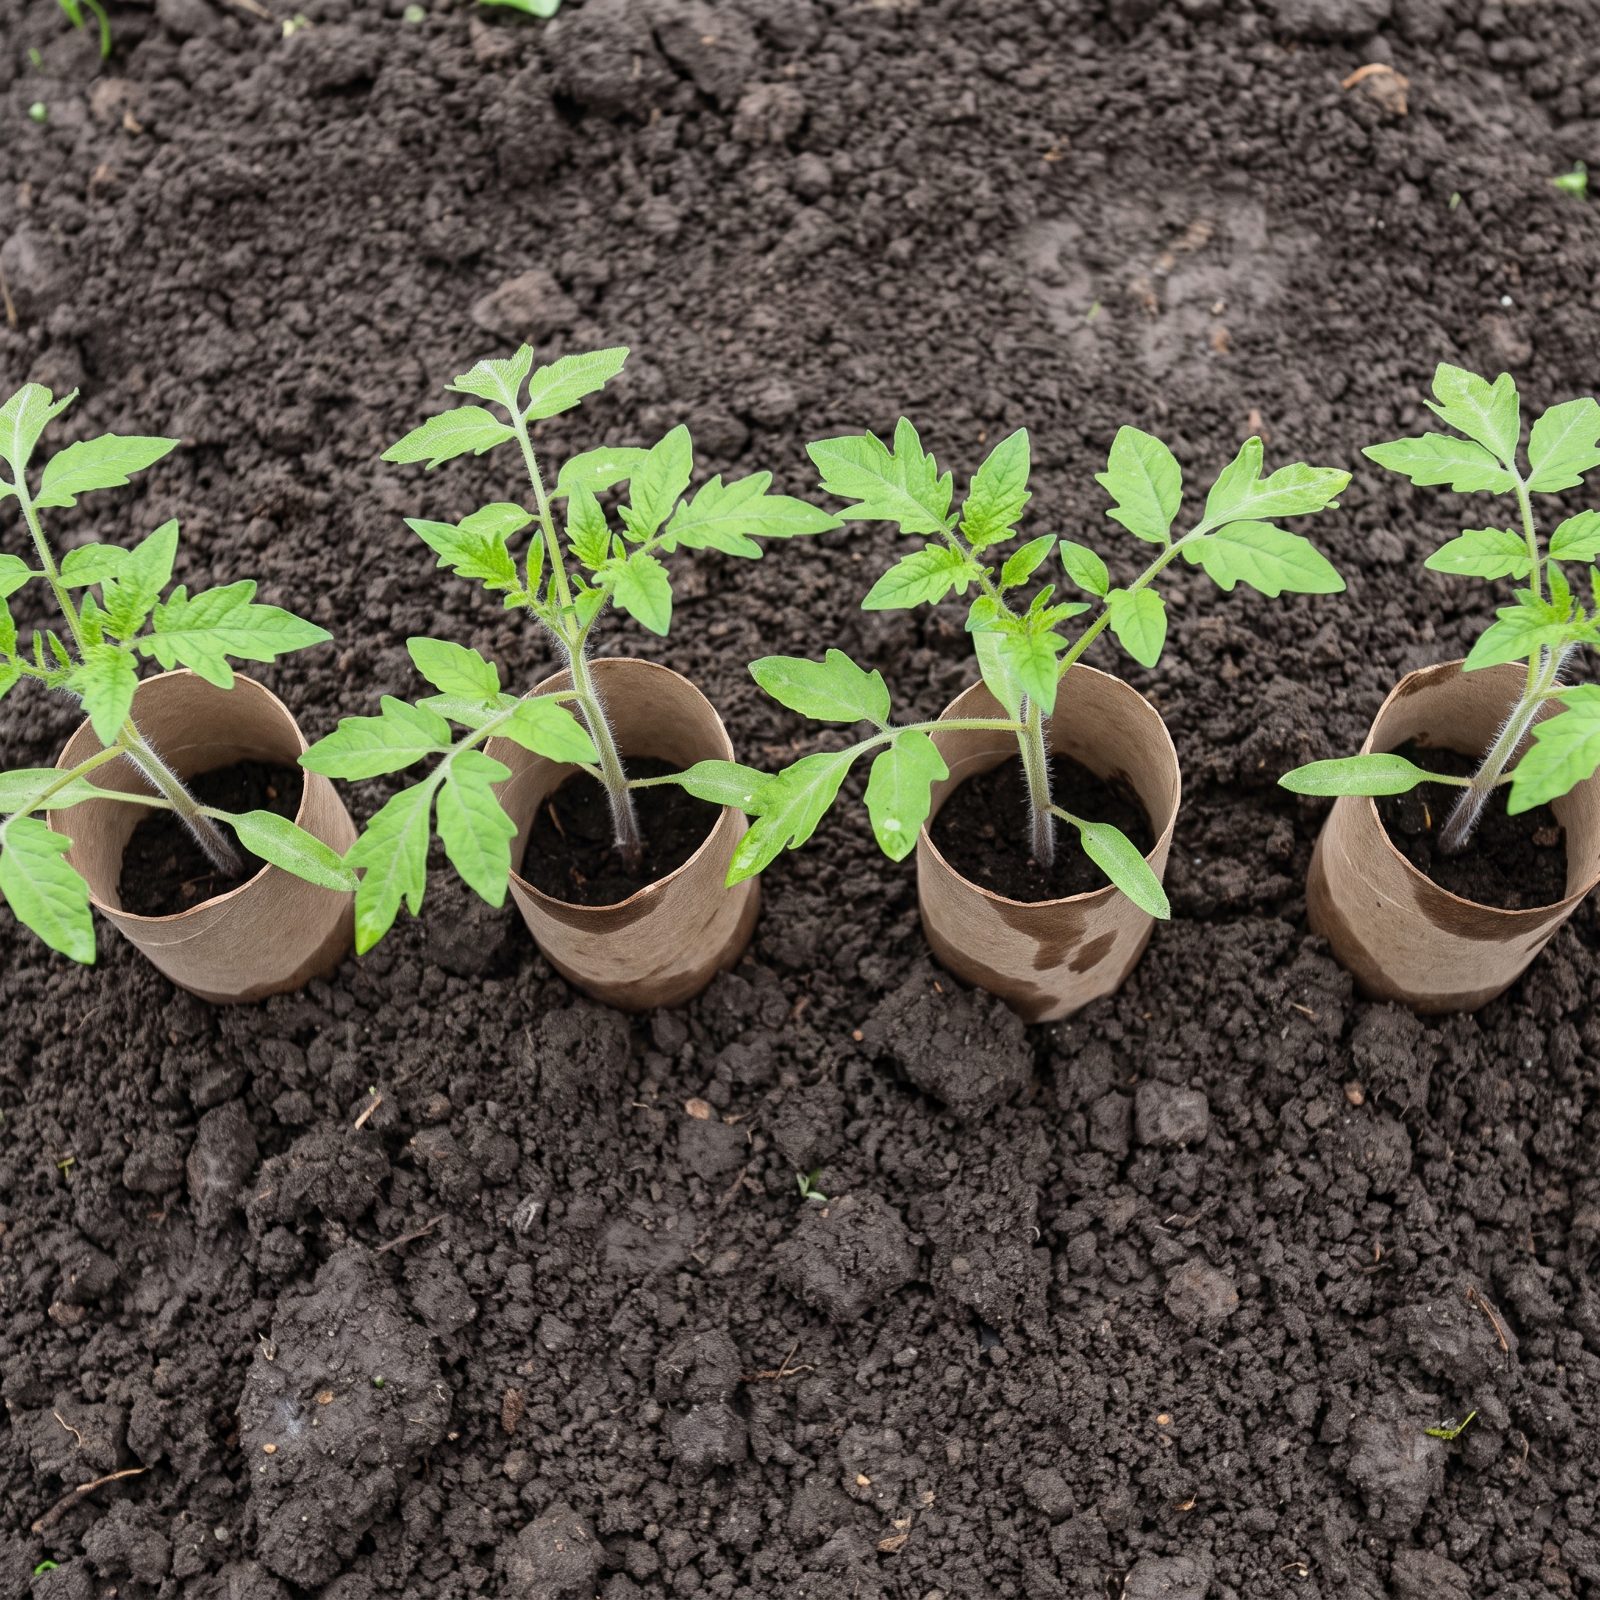
Cutworms do their damage at night, at ground level, and you rarely catch them in the act. You just find a seedling felled at the base like a tiny tree, stem chewed clean through. Maddening. A collar stops it cold — push a short ring of cardboard, a cut toilet-roll tube works perfectly, an inch or so into the soil around each stem the day you transplant.
The grub can’t climb over and won’t bother tunneling around. Within a few weeks the cardboard softens and breaks down, right about when the stem toughens up and stops being a target.
A free tube saves the seedling you spent six weeks raising from seed.
1. Slip Fine Mesh Bags Over Young Fruit Before the Pests Show Up
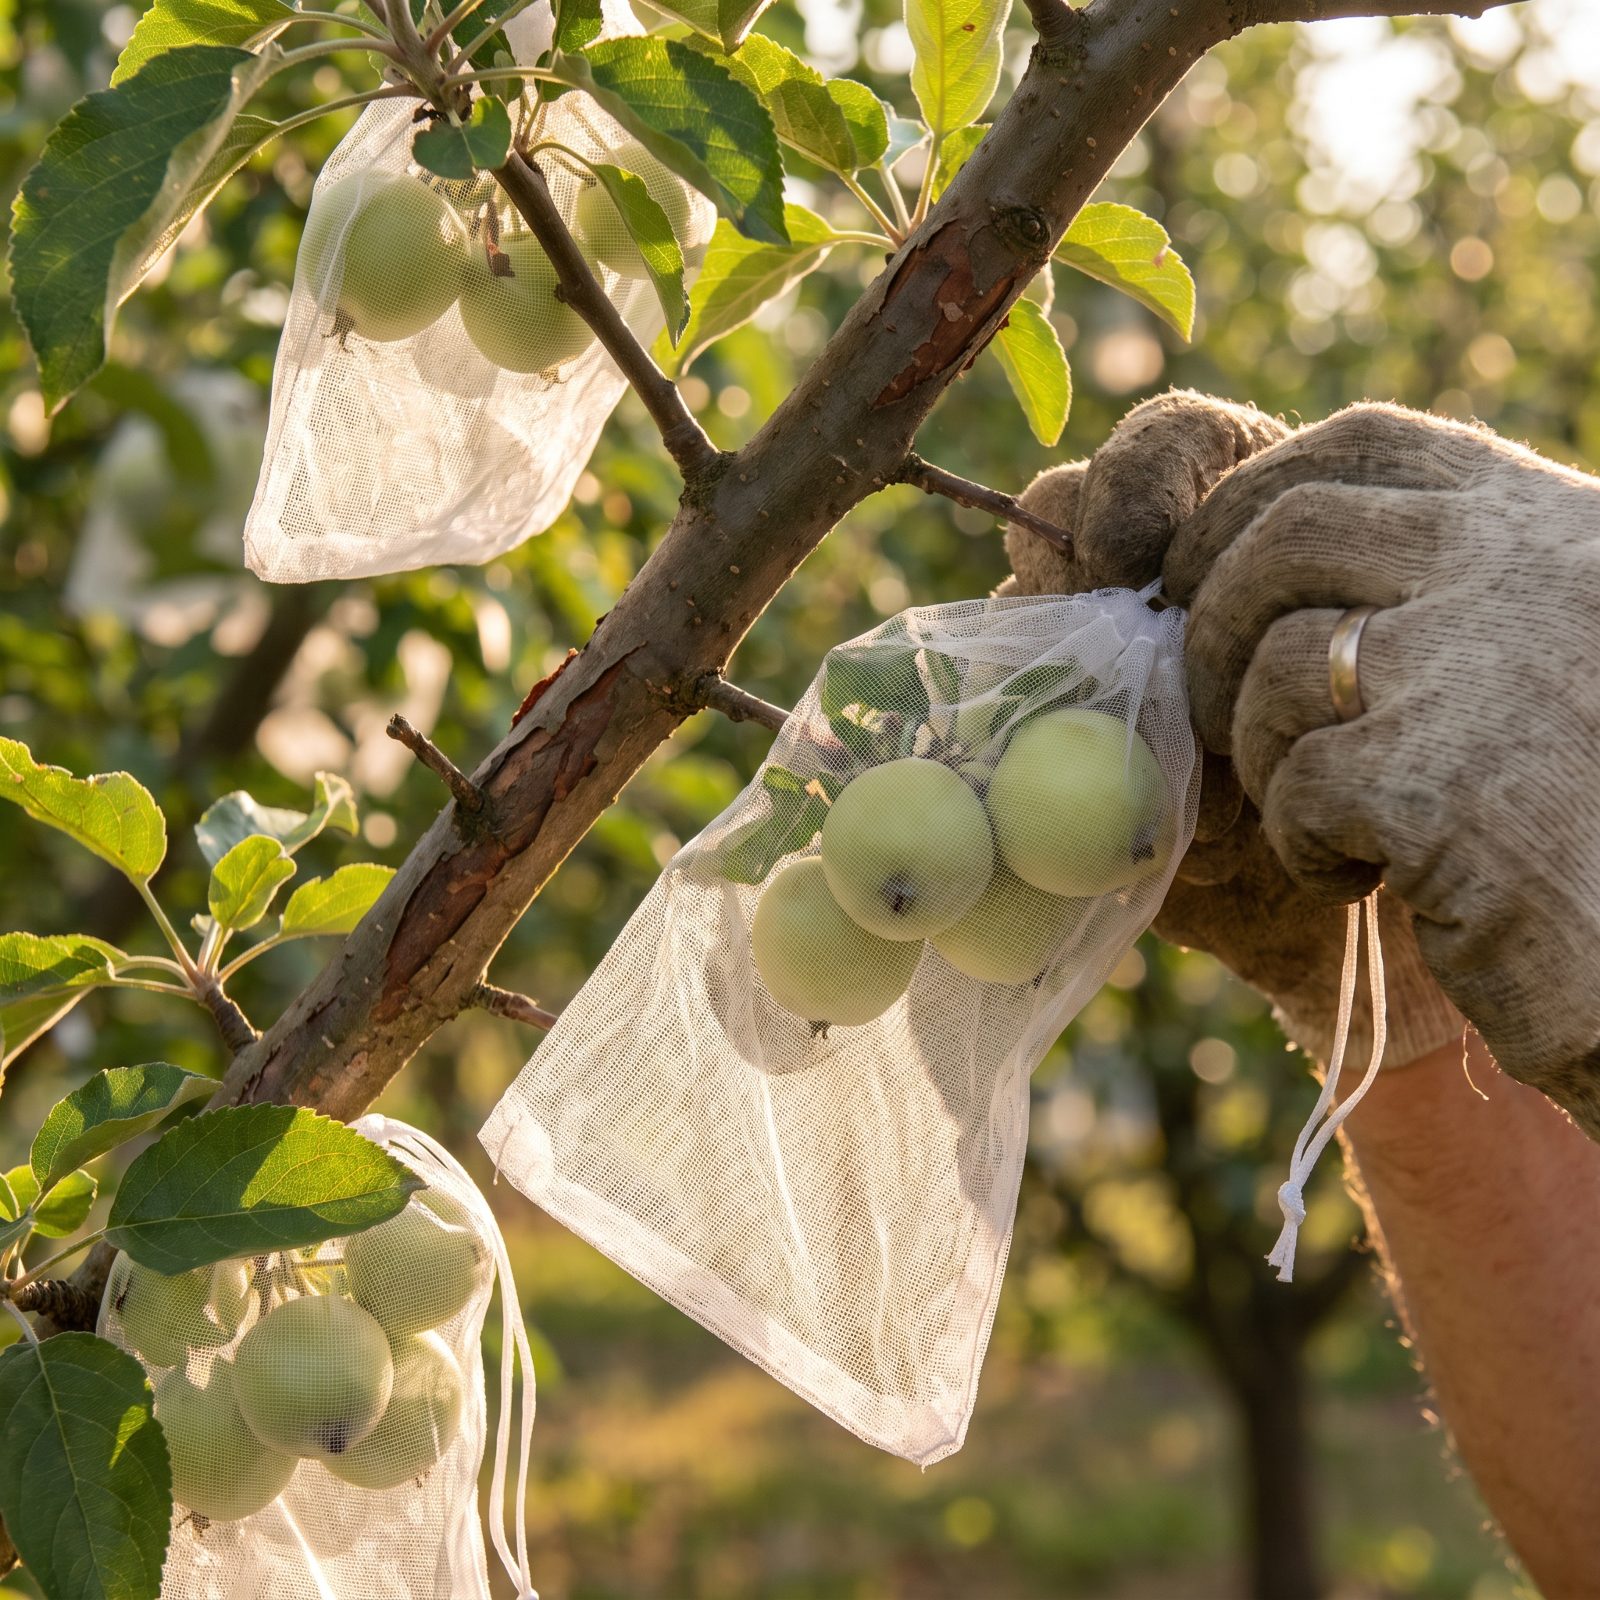
Timing is everything with fruit bags, and most people blow it. The bag has to go on while the fruit is still small and before codling moth, apple maggot, or fruit fly have laid their eggs. Wait until you see damage and congratulations — you’ve sealed the problem inside with it.
Fine mesh or organza drawstring bags let light, air, and water through while shutting insects out, and they’re reusable season after season, so the upfront cost shrinks fast.
One honest caveat. On trees that need insect pollination, bag only after the blossom has set fruit, never over open flowers. Seal the bees out too early and you’ll end up with a spotless, pest-free tree carrying absolutely nothing.