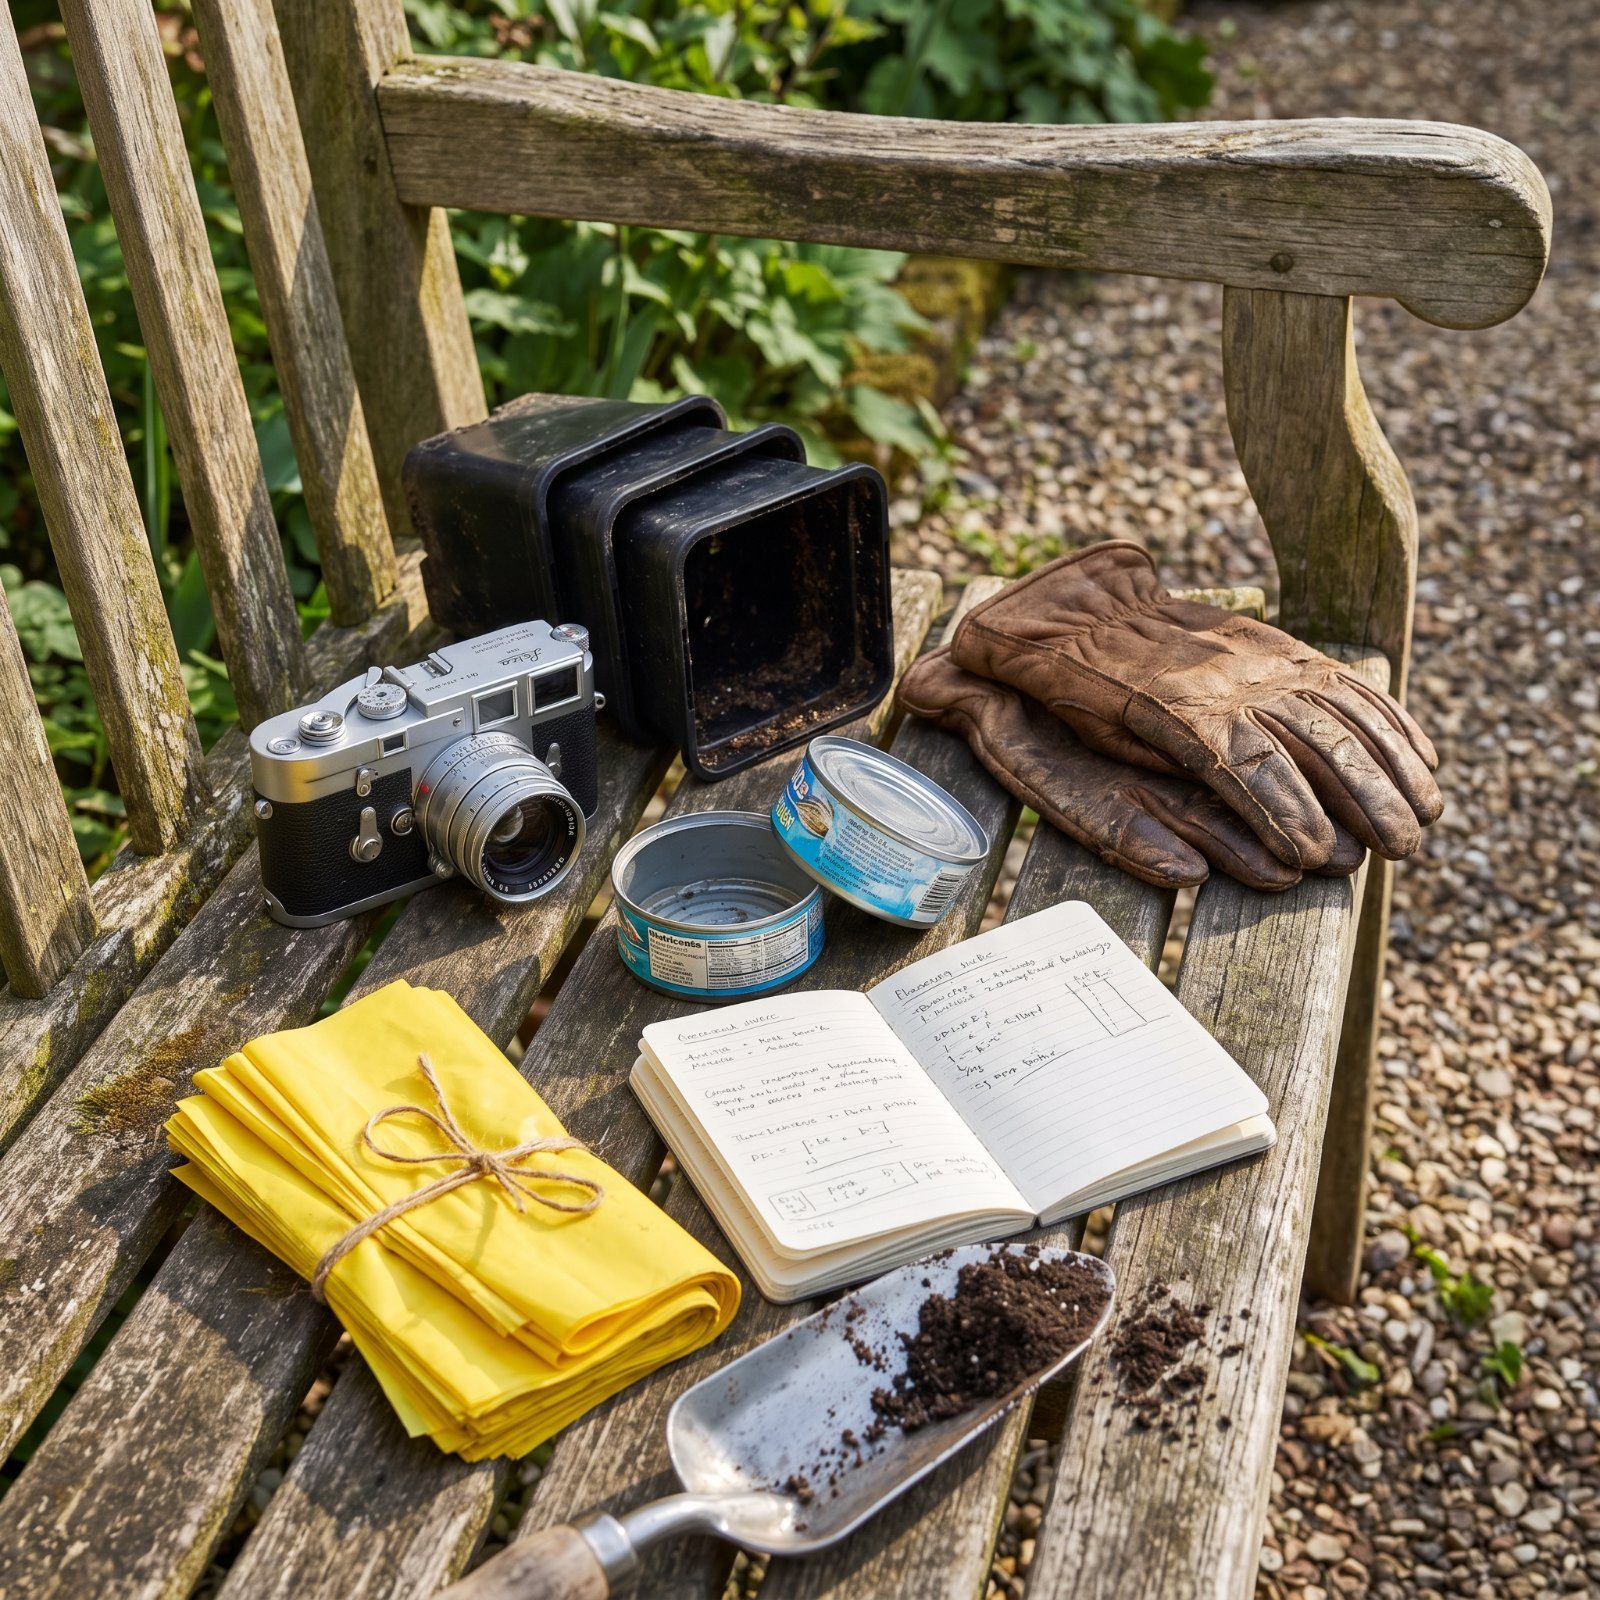
The best gardeners carry a camera and a stack of empty tuna cans. Not out of sentiment, but because both reveal things you’ll never catch standing in a bed on a sunny afternoon. A yard can look fine in person and fall apart on film, or drink unevenly while you assume the sprinklers have it handled. These aren’t the habits you’ll find in a beginner guide. They’re the quiet fixes people pick up after a few seasons of guessing wrong — the stuff that separates a yard that photographs well from one that just scrapes by. Steal them.
Please note that some of the images in this article were created with the assistance of AI.
44. Photograph the Yard in Black and White to Expose Weak Contrast
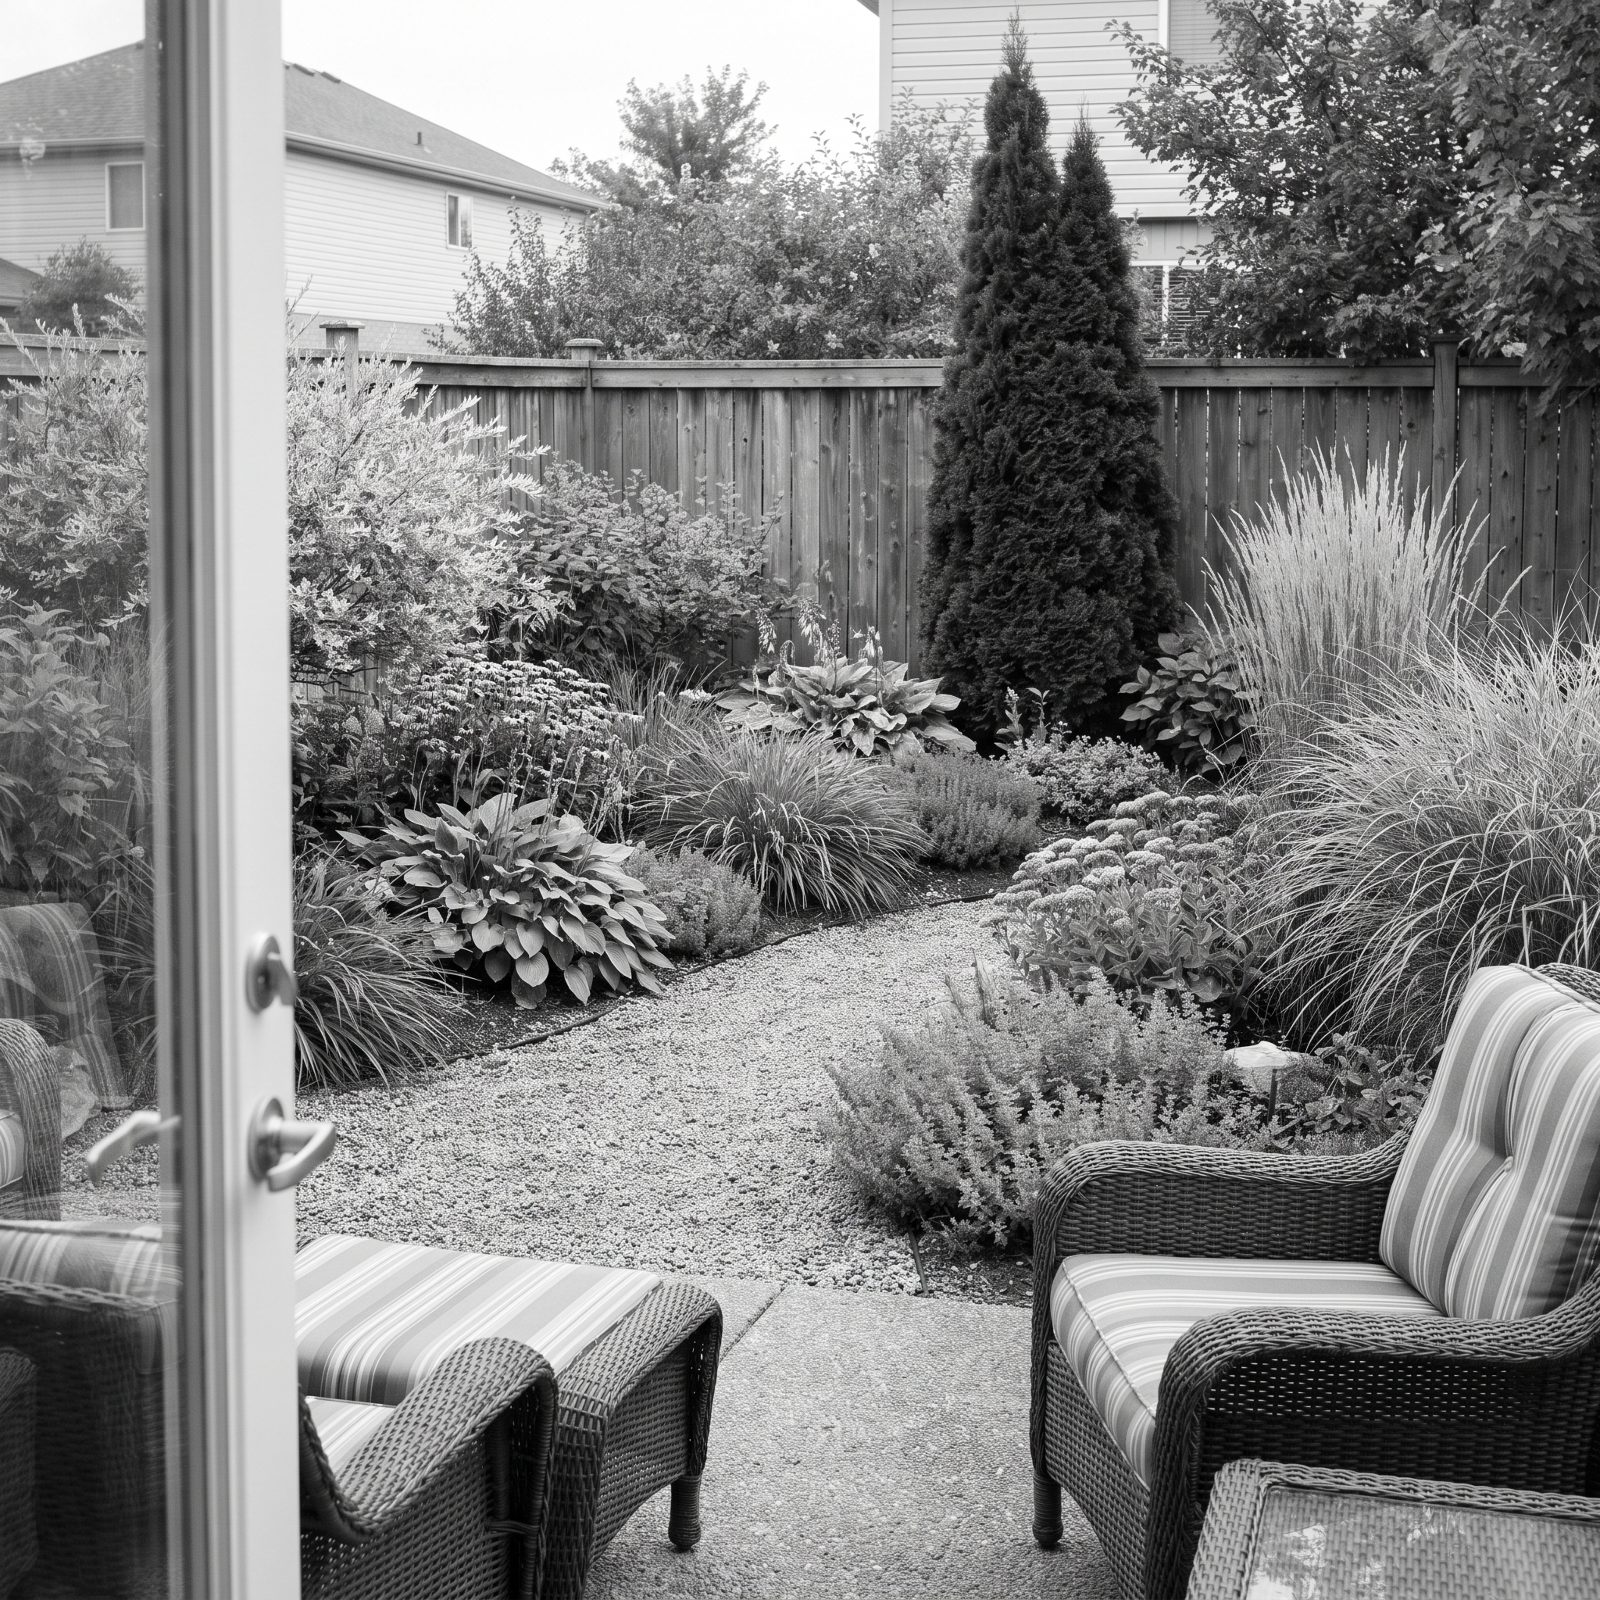
Color lies. It tricks your eye into reading structure where there’s really just a wash of green. Strip the color out and the truth shows up fast.
Shoot your beds on your phone, then flip the image to black and white and study the tone. One flat gray across the whole frame means your planting has no bones. A good bed shows range — near-black evergreens, mid-gray mounds, a few pale silvery accents scattered through. Contrast is what your eye registers as ‘designed’ long before it clocks a single flower.
43. Set Empty Nursery Pots in Beds to Test a Shrub’s Mature Scale
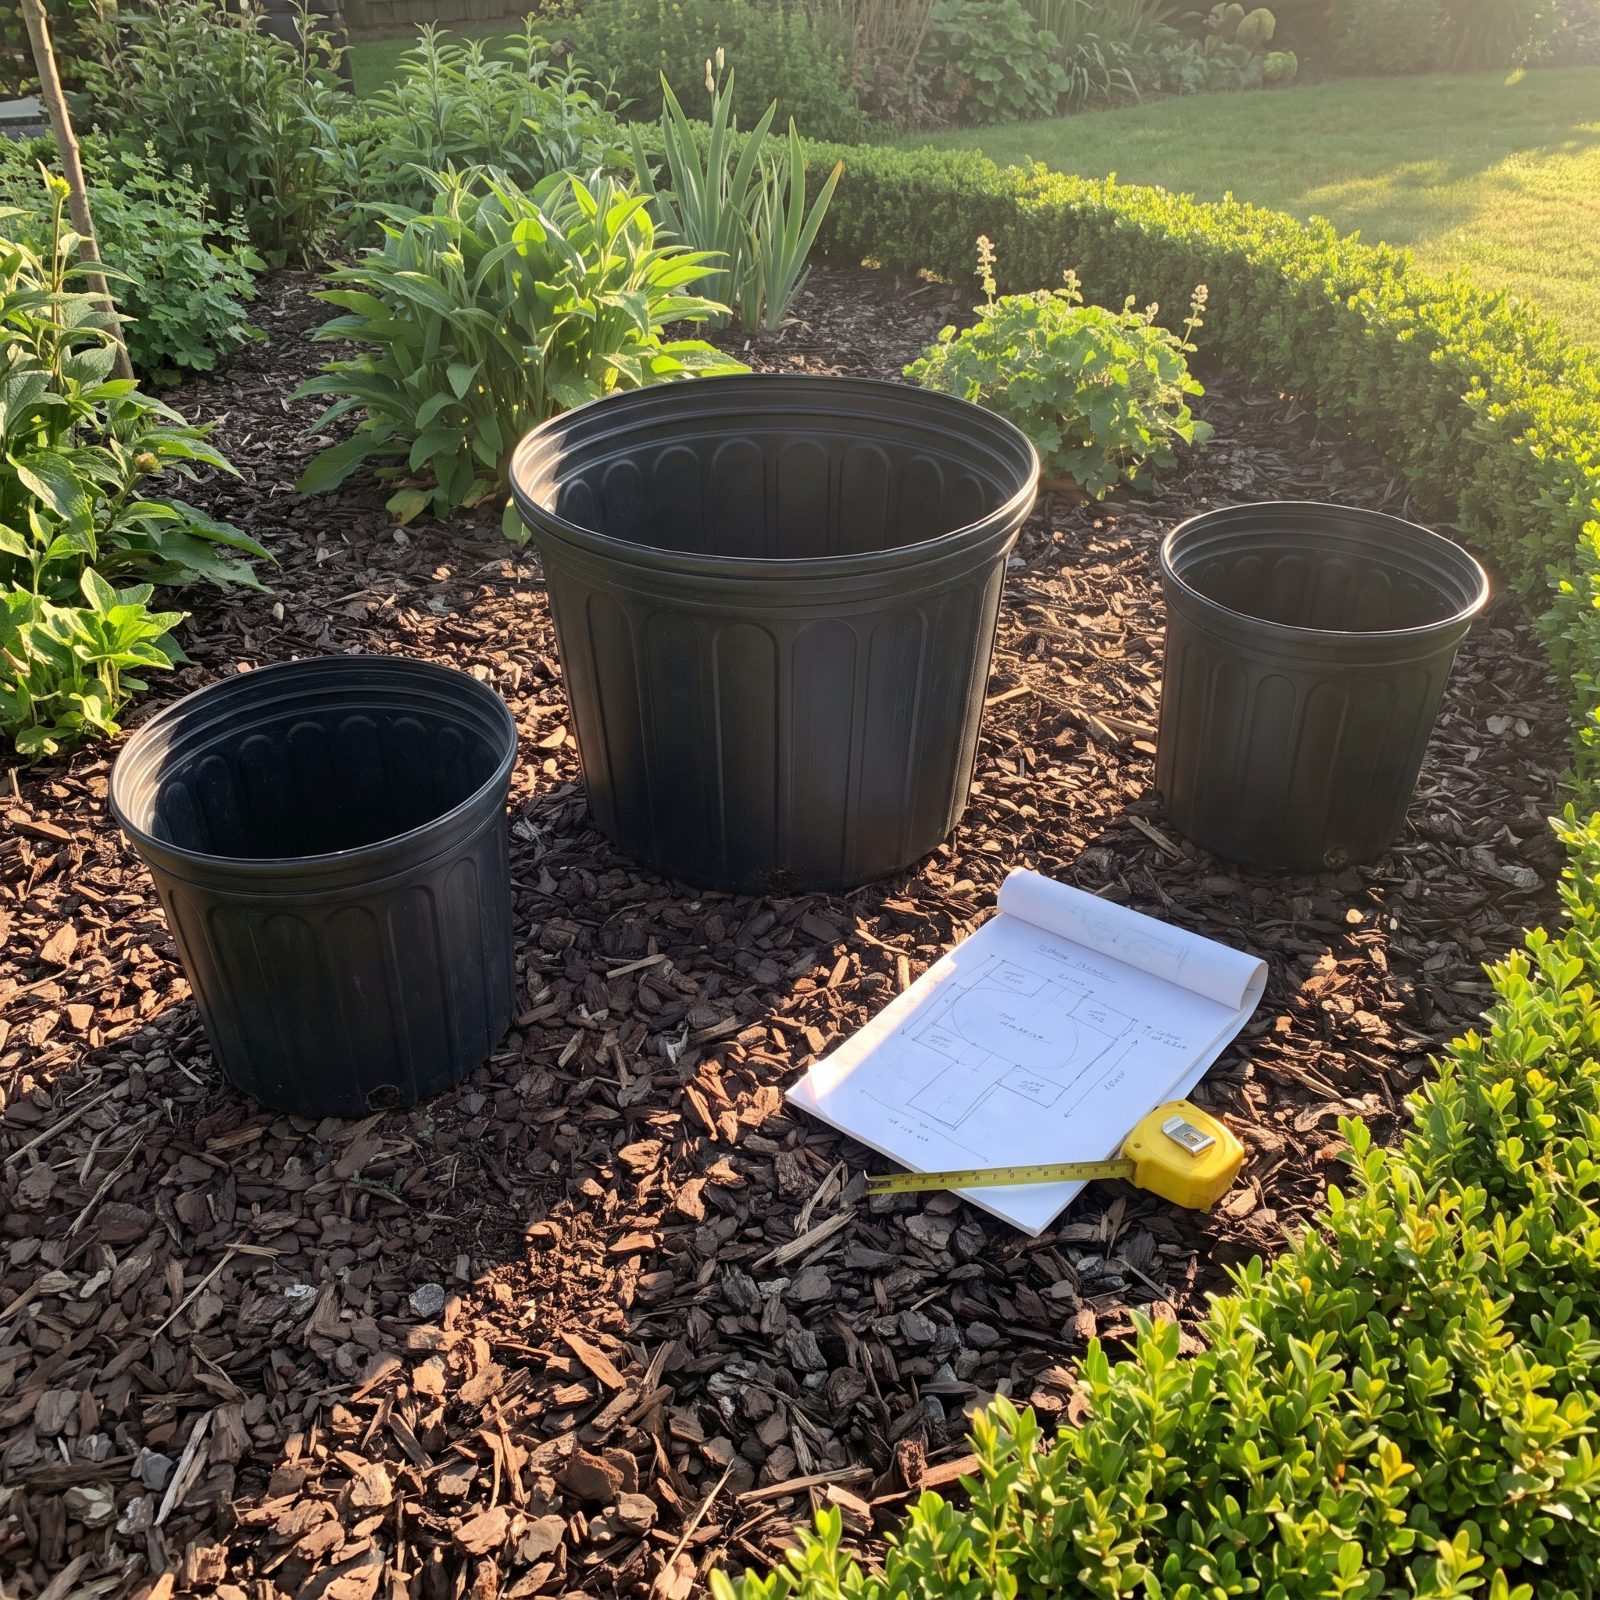
A gallon pot in the nursery looks tiny. Three years later that same shrub is eating your walkway. The gap between what you buy and what you get is where most spacing mistakes live.
Before planting, set empty pots roughly the width of each mature plant where it’ll go, then stand back and look from the patio, the drive, the window. You’ll spot the two that are crammed together and the one that’ll swallow the path in about four seconds. Rearranging plastic costs nothing. Digging out a mature viburnum costs a Saturday and your dignity.
42. Walk the Yard During Heavy Rain to Find Hidden Drainage Problems

Nobody wants to be out there. That’s exactly why it works.
A downpour writes the drainage map for you — where water pools, where it races, where a downspout is quietly carving a trench through your mulch. None of this shows up on a dry day, and no soil test will catch it. So throw on a coat and walk the whole yard mid-storm. The low spots where water sits are the plants you’ll lose to root rot by August. Fix the grade, or pick plants that don’t mind wet feet. Either way, the rain is the only teacher here.
41. Place Tuna Cans Under Sprinklers to Measure Water Distribution
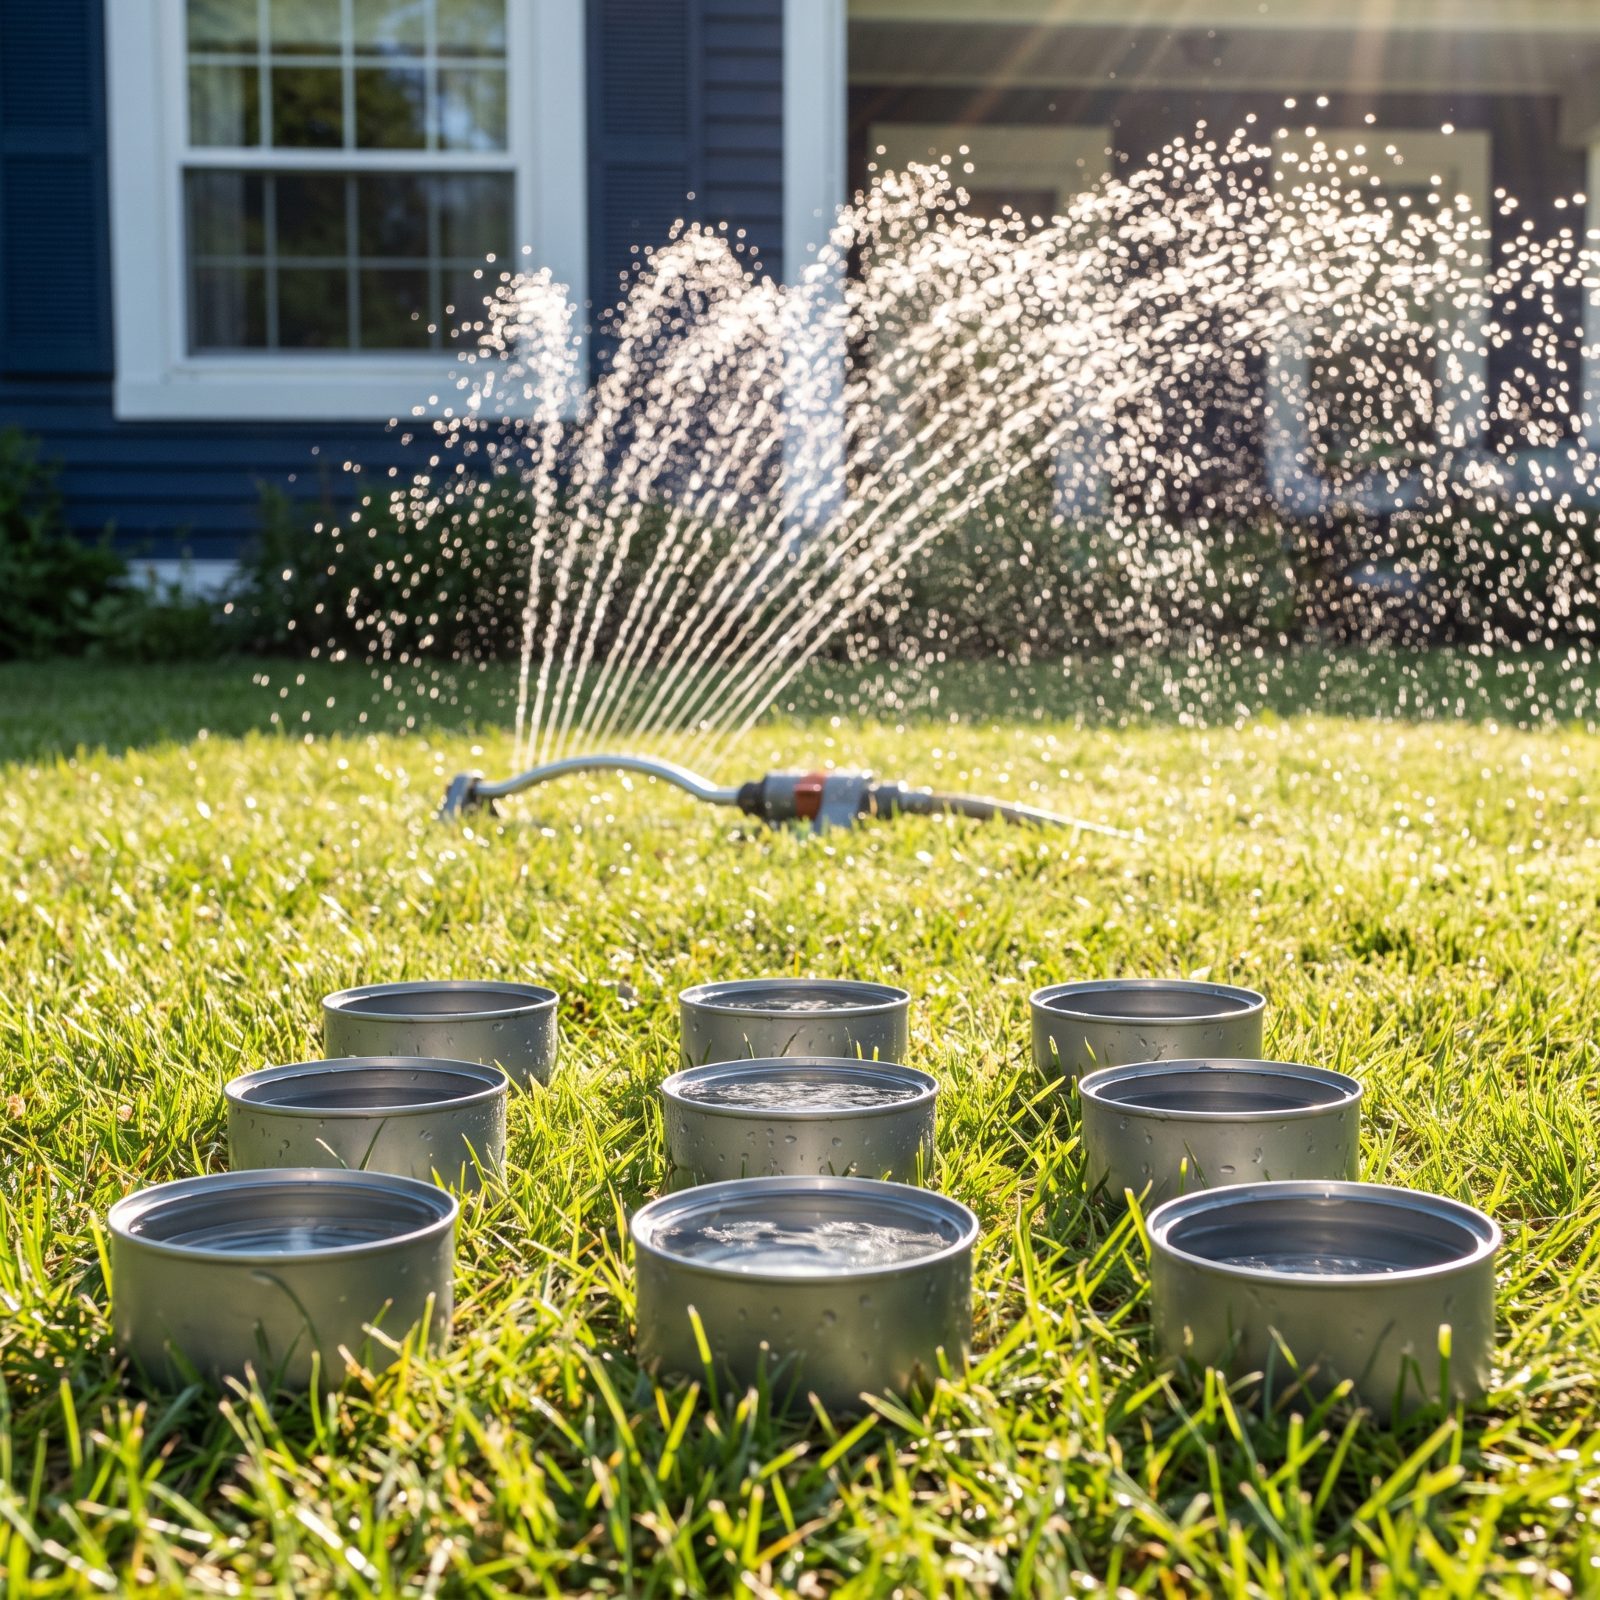
Sprinklers almost never water evenly. One zone gets a soaking, another gets a mist, and you’d never know until the dry patch turns up.
Old irrigation pros fix this with a handful of cans. Scatter clean tuna cans — or any shallow, straight-sided tins — across the zone, run the system a quarter hour, then compare the levels. Wildly different depths mean your coverage is a mess, which is exactly why one corner browns while another stays lush. Adjust the heads or the run times until the cans fill evenly. Cheap, fast, and it kills the guesswork for good.
40. Bury Empty Nursery Pots as Sockets for Instant Seasonal Plant Swaps
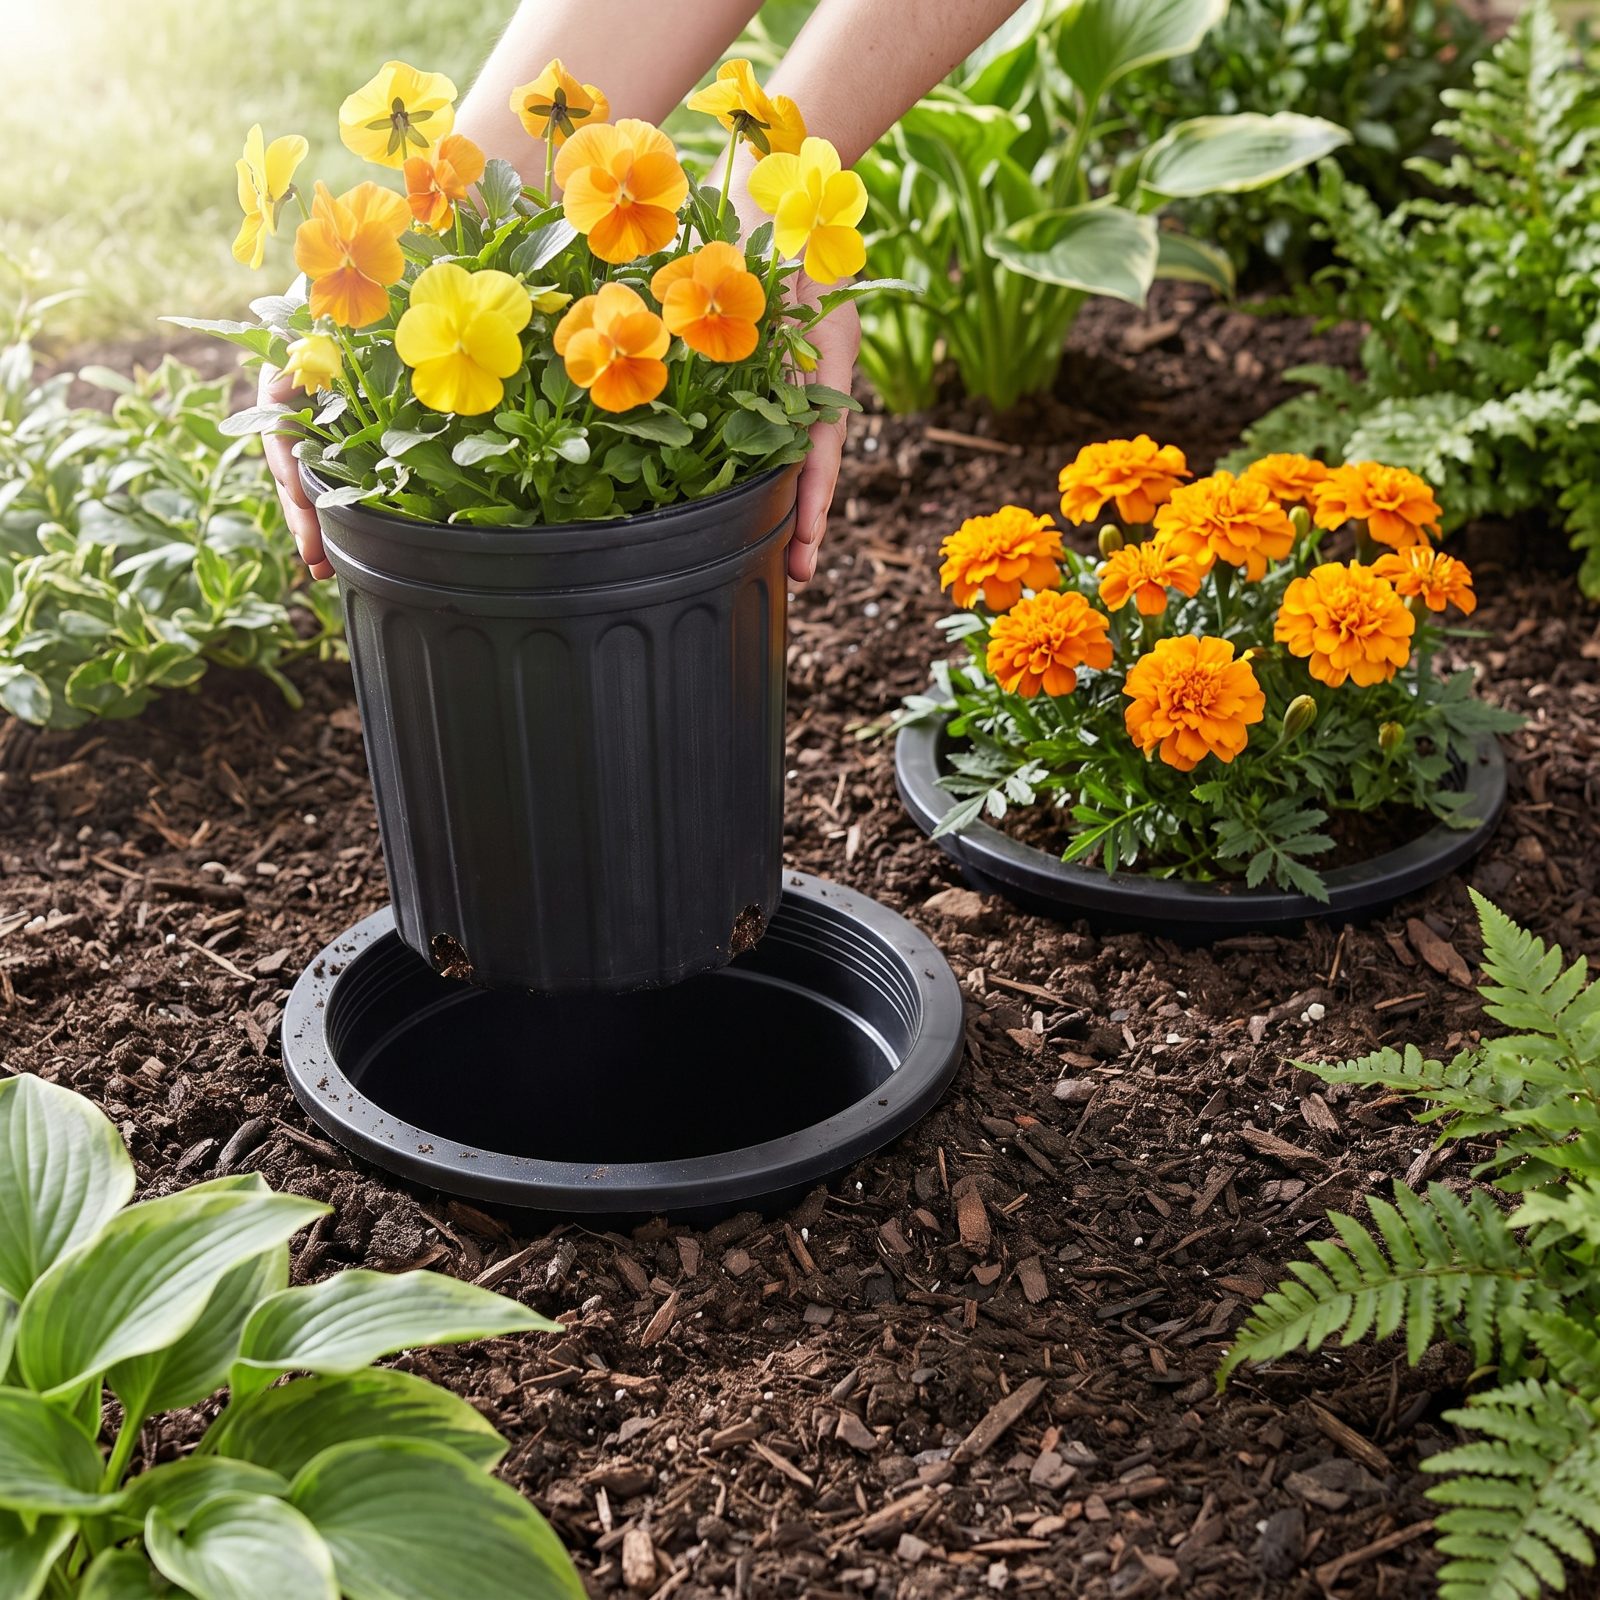
The lesser-known cousin of the pot-in-pot method, and arguably the smarter one for beds.
Sink an empty nursery pot into the soil as a permanent sleeve, flush with the surface. Drop a matching potted plant inside and it reads as planted. When it fades, lift it out and slot in the next performer. Tulips give way to annuals, annuals give way to mums — no digging, no disturbed roots, no raw gap in the border.
The catch is matching pot sizes exactly so the inner one seats cleanly. Set a few of these at your front beds and you can rotate color all season in under a minute per socket.
39. Mark Hourly Shadow Lines Before Choosing Plants for a Difficult Bed
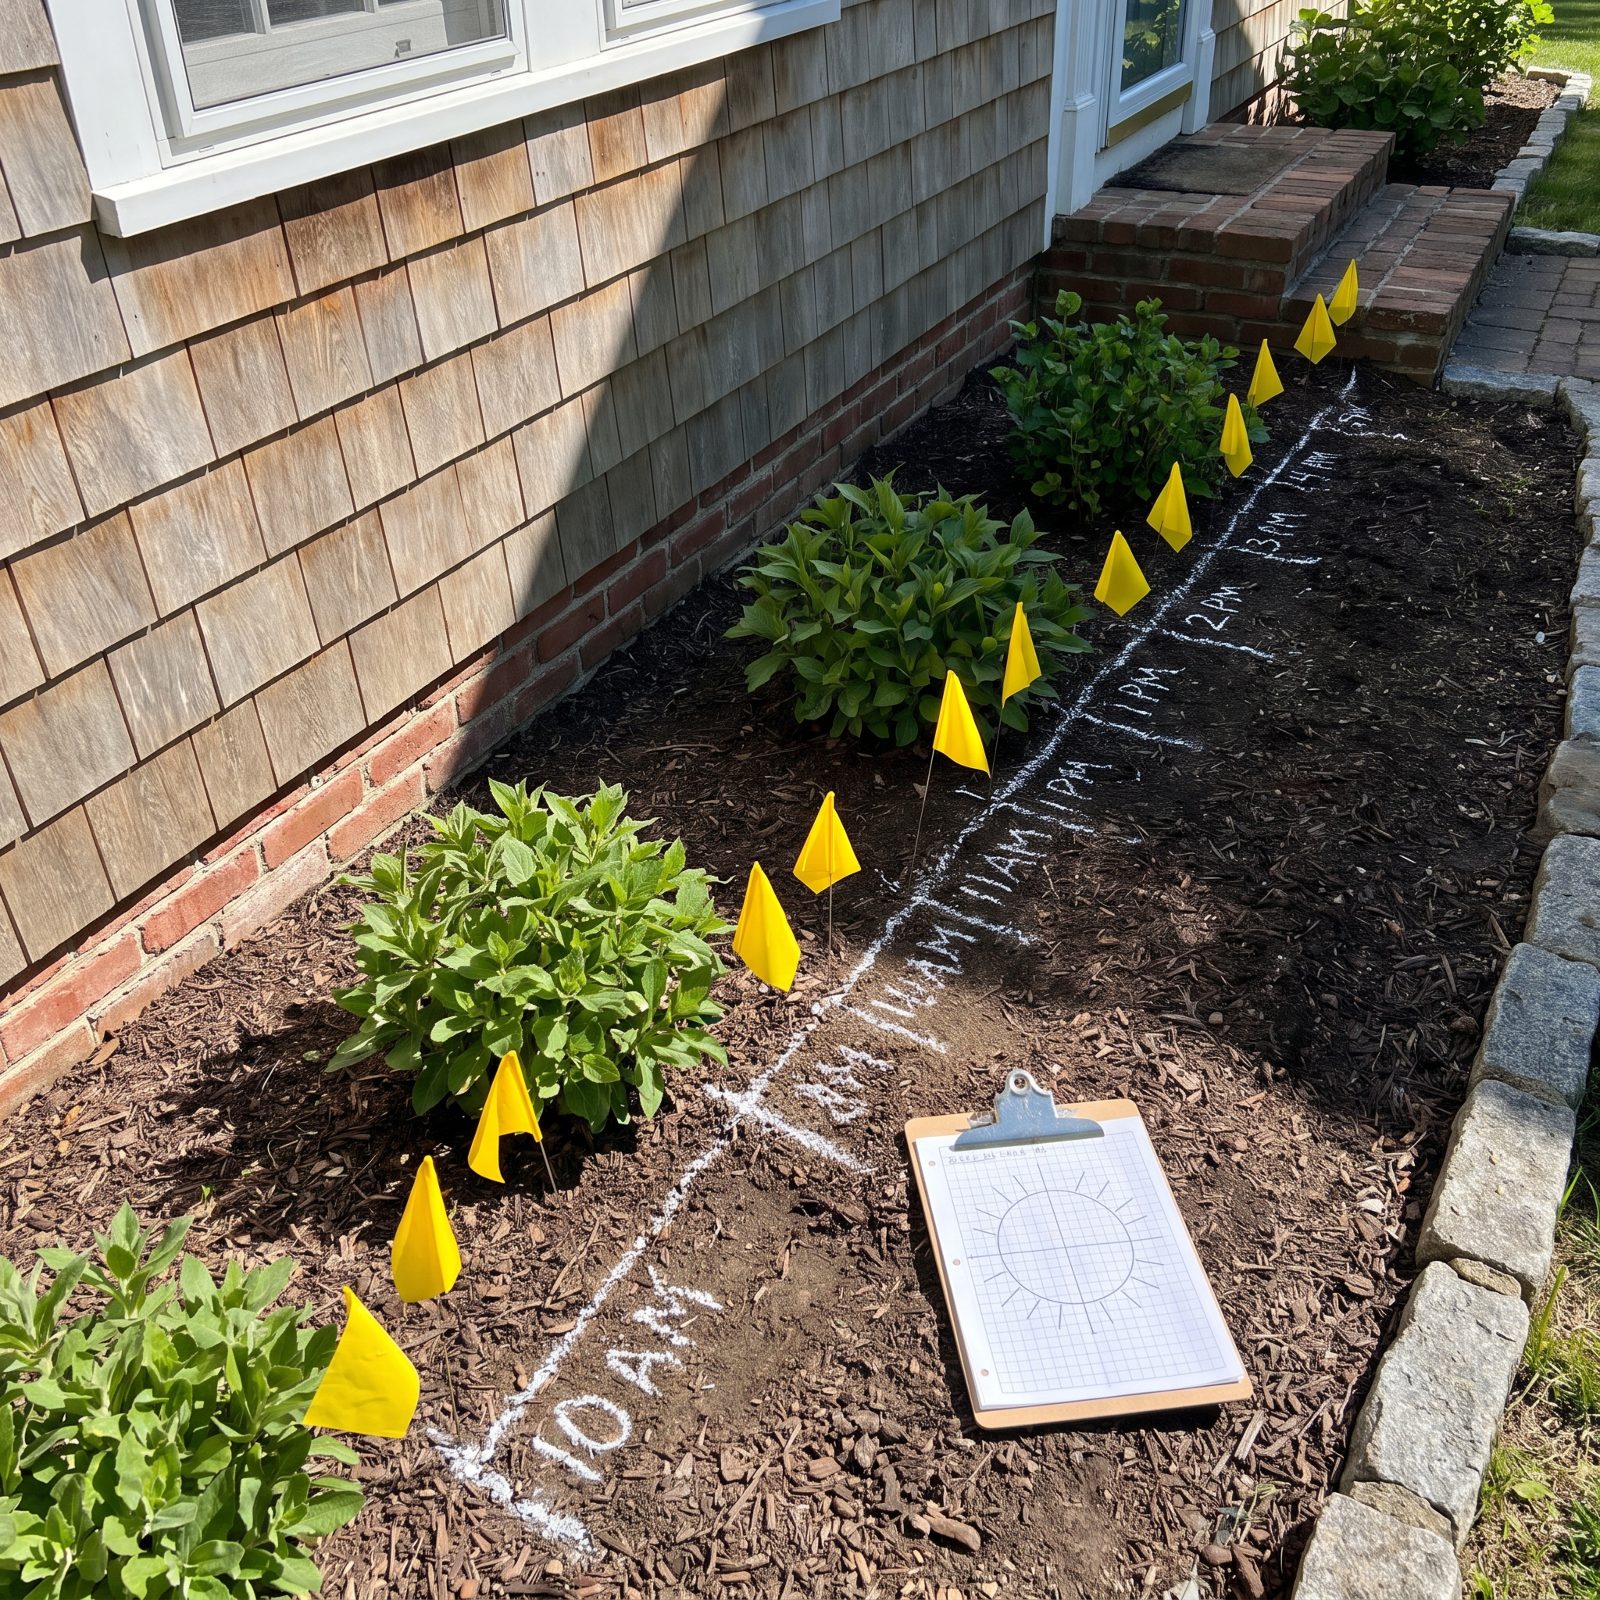
‘Part shade’ is the vaguest phrase in gardening. Two hours of morning sun and six hours of brutal afternoon both technically count, and they’ll kill completely different plants.
For a bed that keeps defeating you, track it. On a clear day, chalk one straight line down the bed, label it by the hour, and stake a row of flags alongside it, then check back each hour and note which stretches sit in sun and which in shade. By evening you’ve got a real map of where the sun actually lands, and for how long. Morning sun is gentle. Afternoon sun scorches. Knowing which half of the day your bed gets changes everything about what survives there.
38. Judge Every Major Planting From the Most-Used Indoor Windows
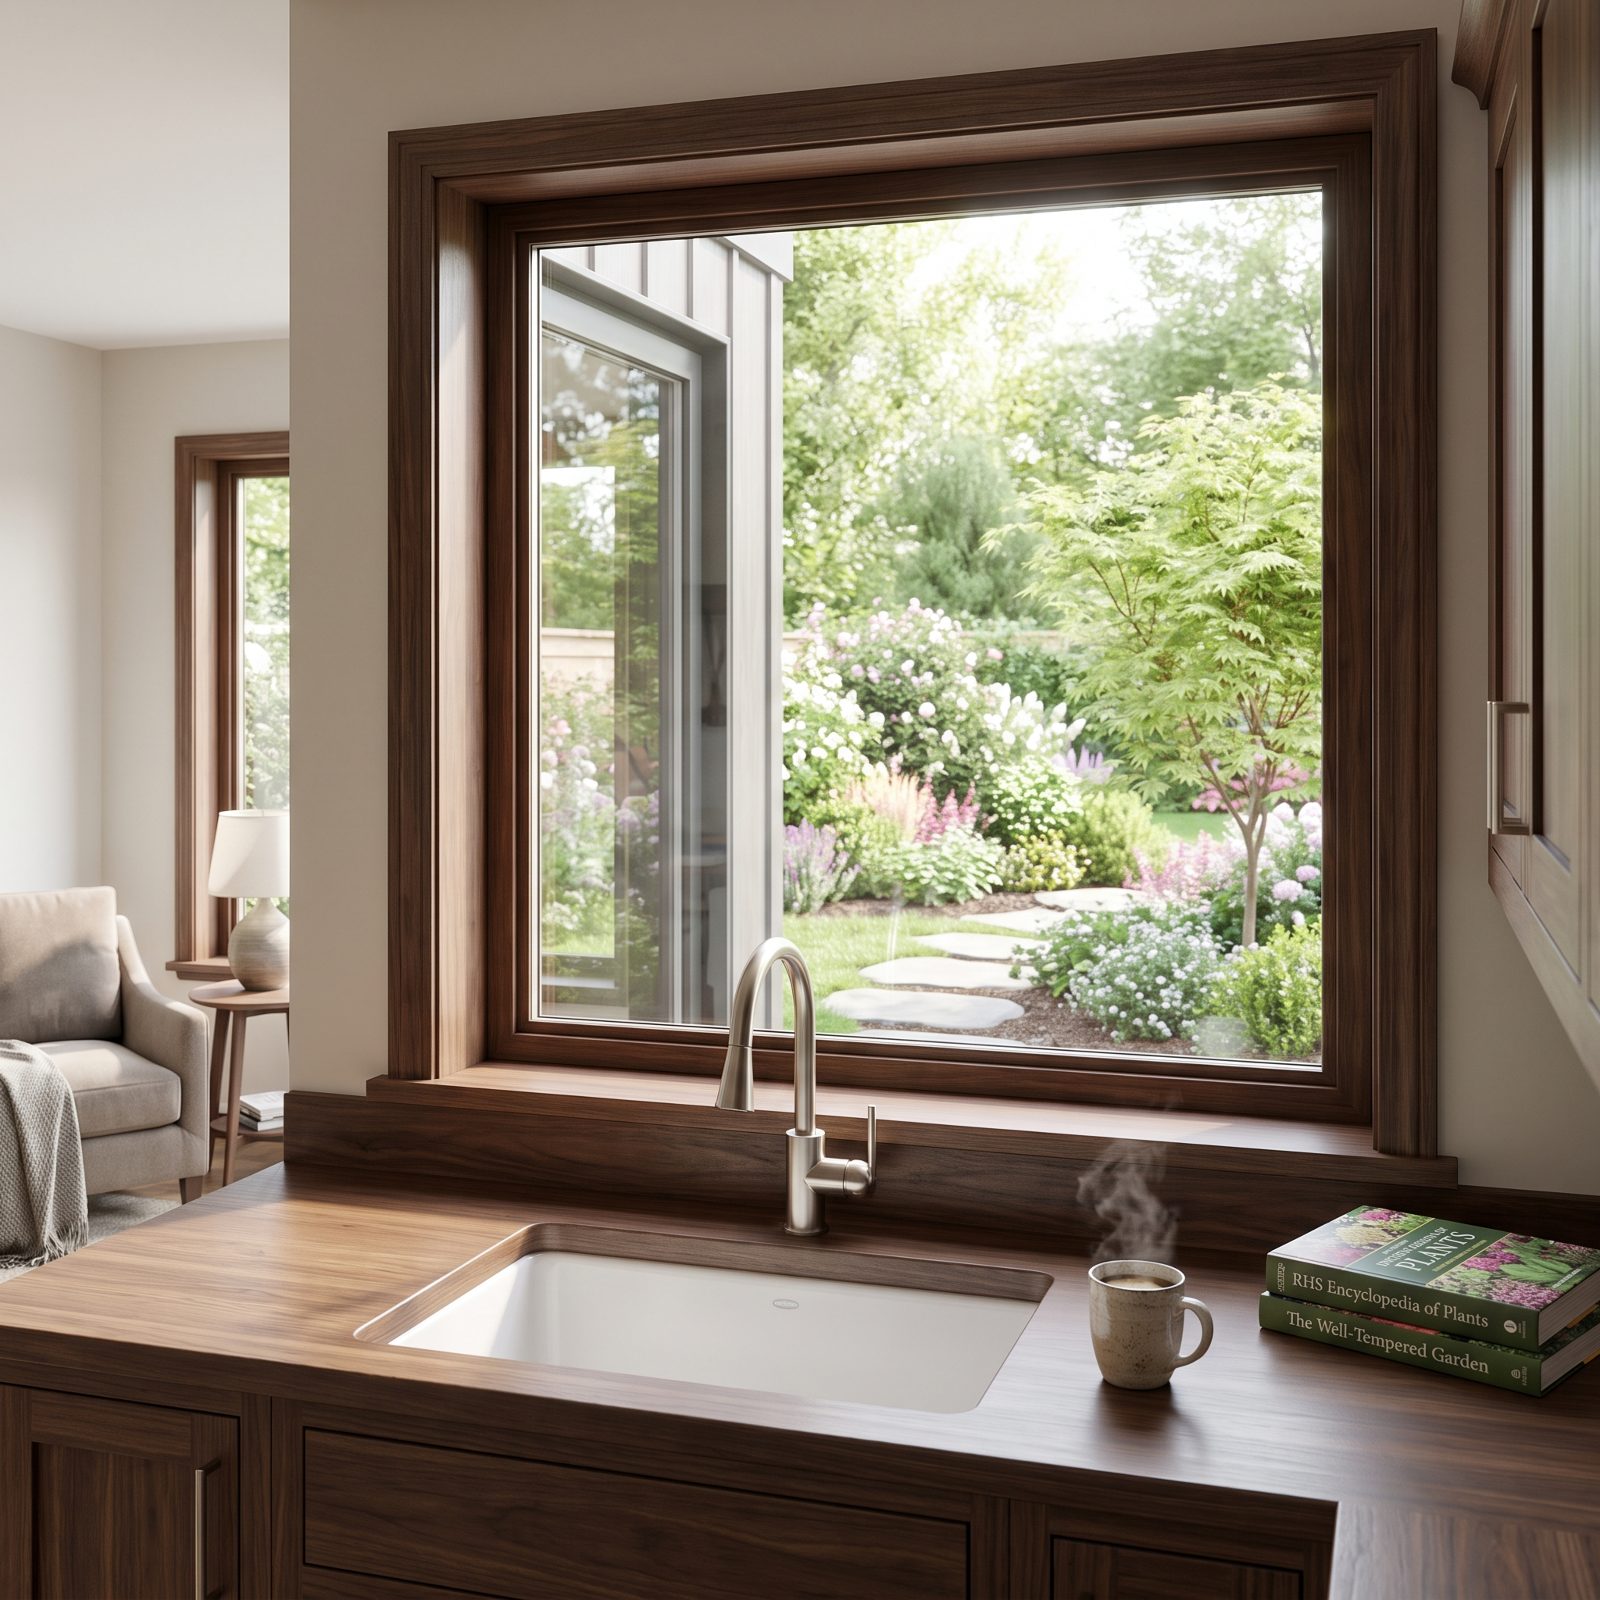
You spend far more hours looking at your garden through glass than standing in it. The kitchen sink, the desk, the spot where you drink your coffee — that’s your real vantage point.
So design from there. Before committing a shrub or a focal plant, go stand at those windows and check the sightline. The gorgeous specimen you planted to be admired from the patio might be a dull green blob from the one window you use forty times a day. Frame your best plants for the view you actually live with.
37. Photograph the Yard at Dusk to Identify Empty-Looking Areas
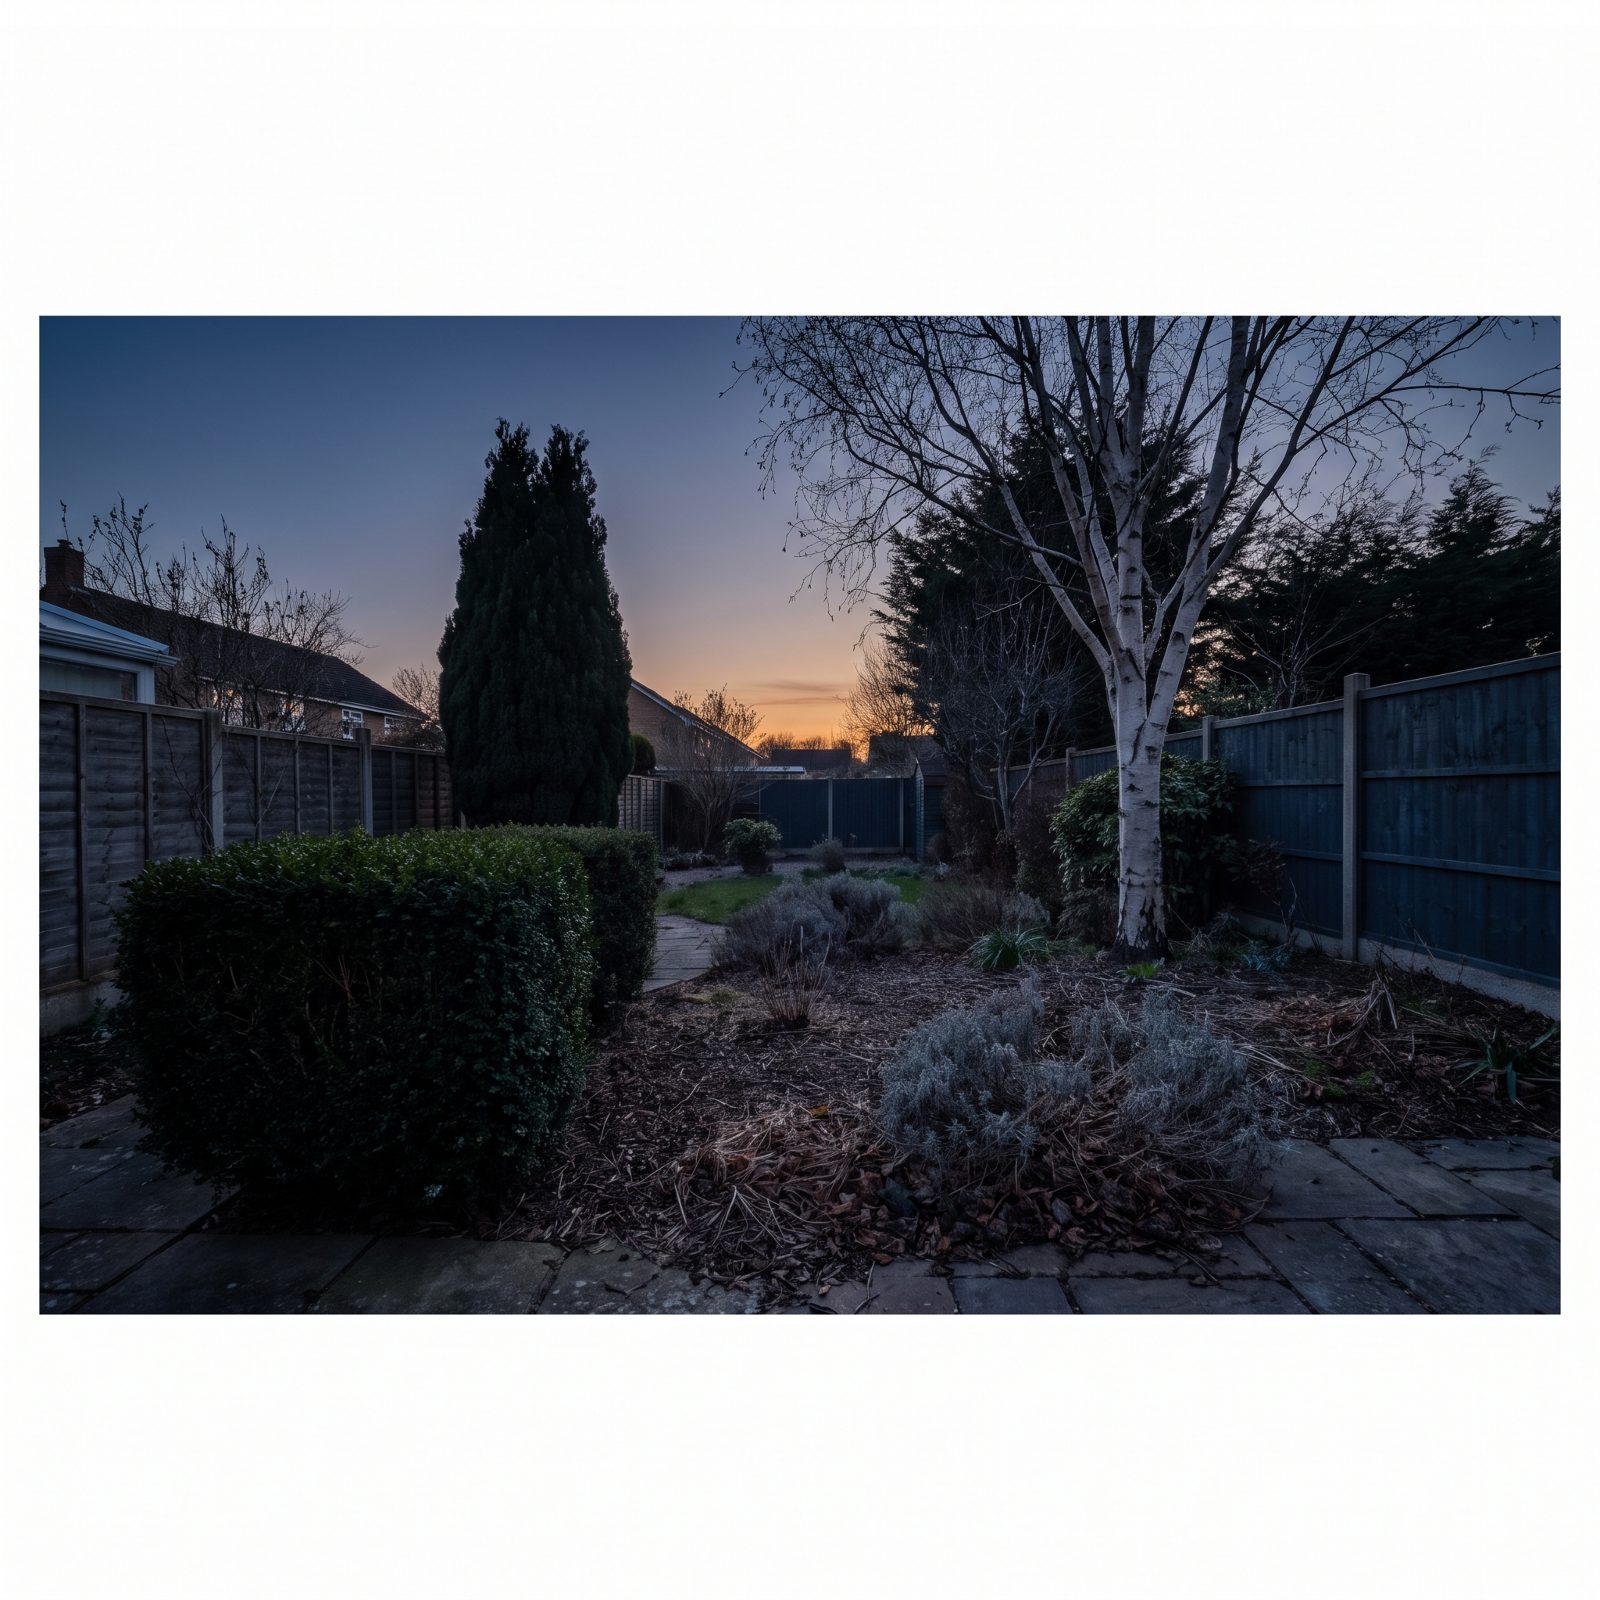
At dusk, color disappears before form does. Flowers fade to gray while the strong shapes hold, and suddenly you can see which parts of the yard were carrying their weight on bloom alone.
Snap a few photos as the light goes. The spots that read as black holes have no structure — nothing with presence once the petals check out. Those are the areas begging for an evergreen, a shrub with good bones, or something pale that catches the half-light. A yard that works at dusk works at any hour.
36. Tag Flowering Shrubs During Bloom So They Are Pruned at the Right Time
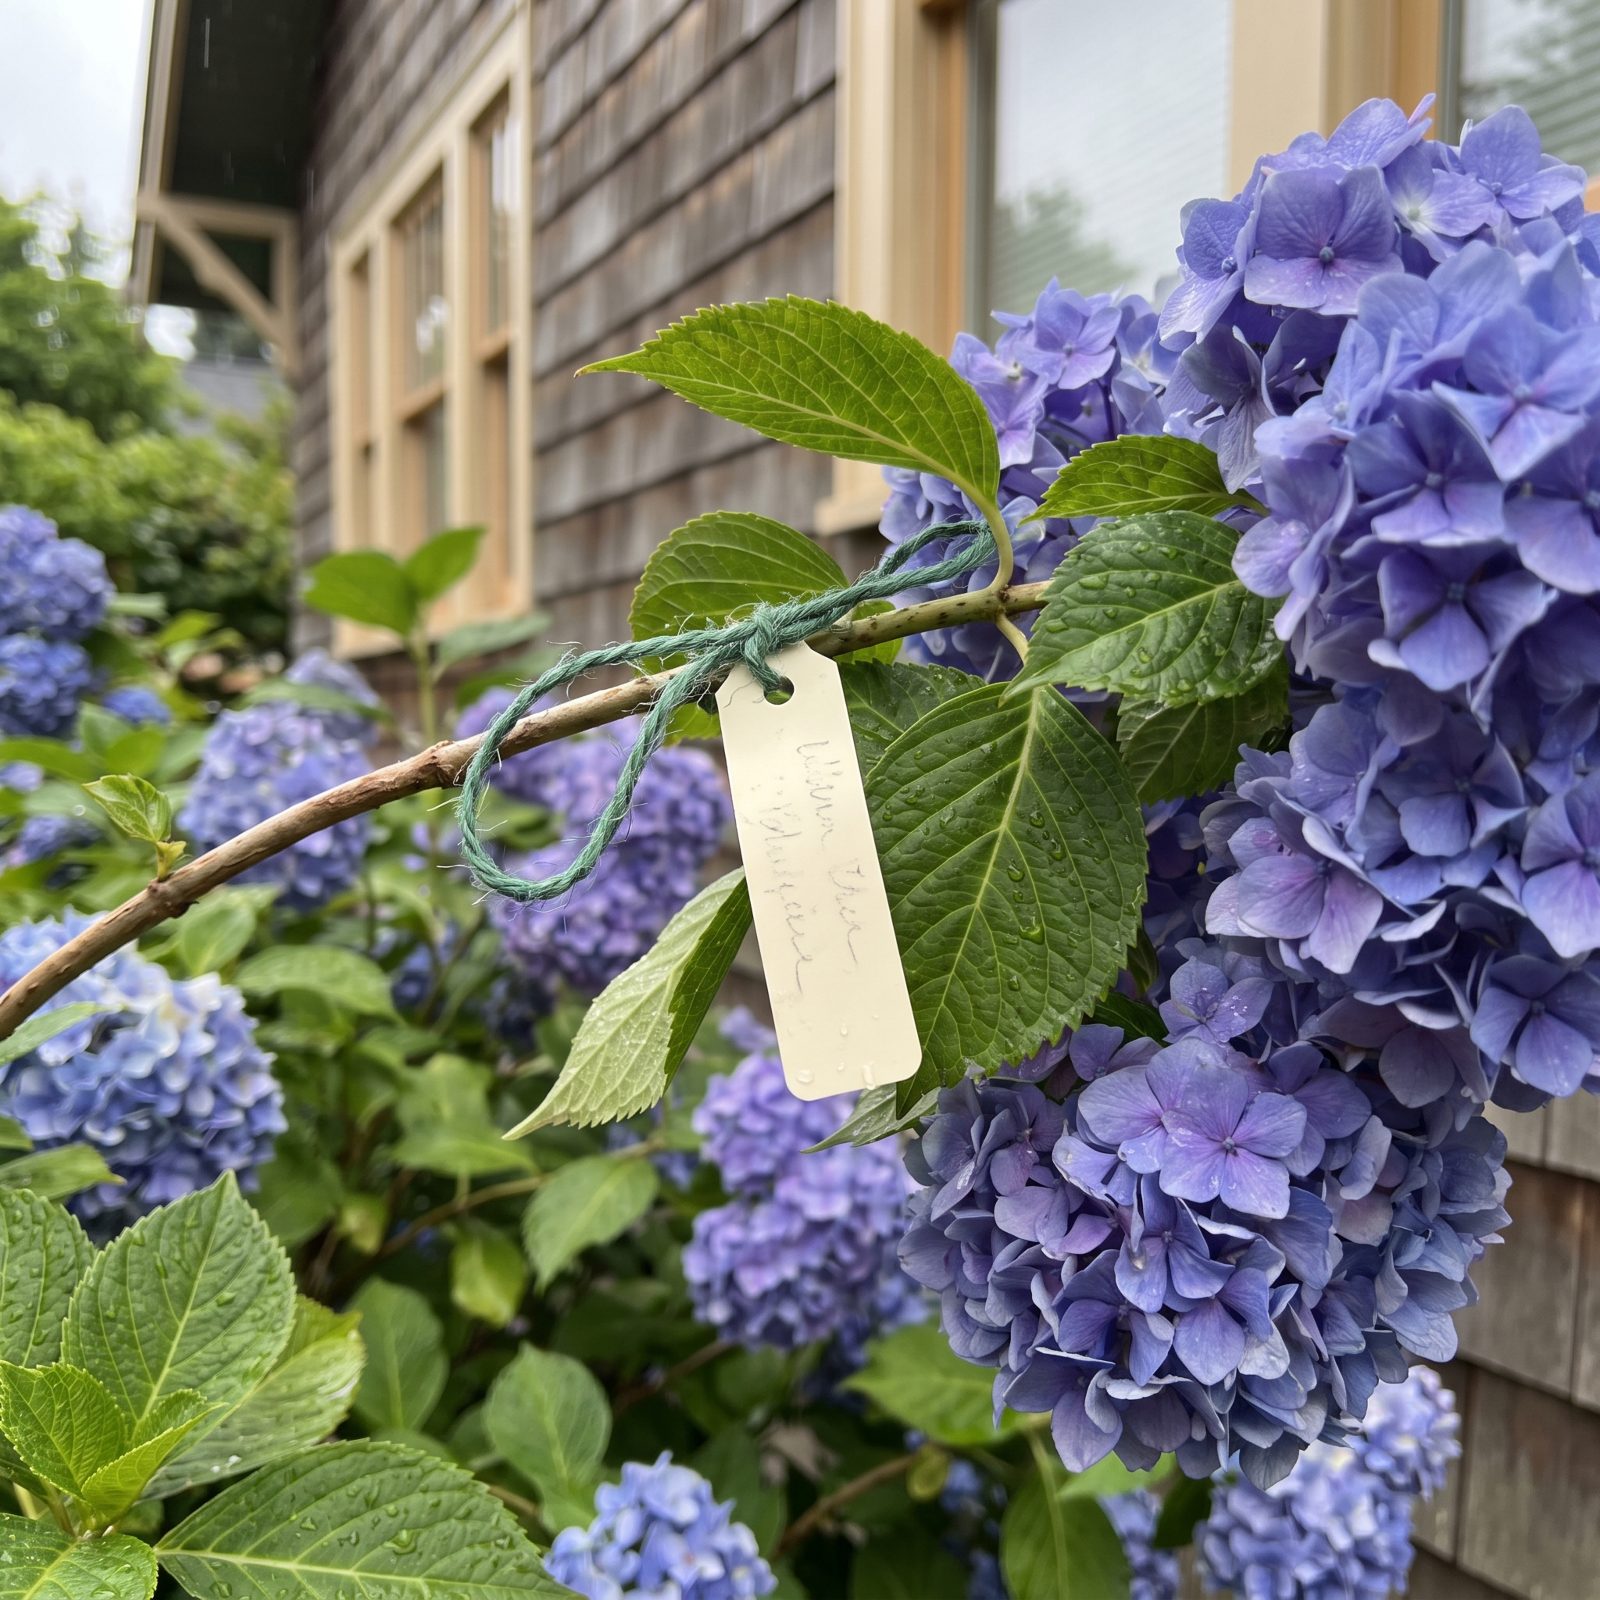
The most common pruning disaster of all: cutting a spring bloomer in late winter and wiping out the entire year’s flowers. People do it with lilacs and hydrangeas constantly, usually because by pruning season they’ve forgotten which shrub flowers when.
Fix it while it’s blooming. Tie a tag on the shrub the moment it flowers and note whether it’s blooming on old wood or new. Months later, when you’re standing there with pruners and zero memory, the tag tells you exactly when and how hard to cut. Old-wood bloomers get pruned right after flowering. Get that one rule right and you’ll never lose a season of blooms again.
35. Use a Holding Bed for Divisions Awaiting Permanent Homes
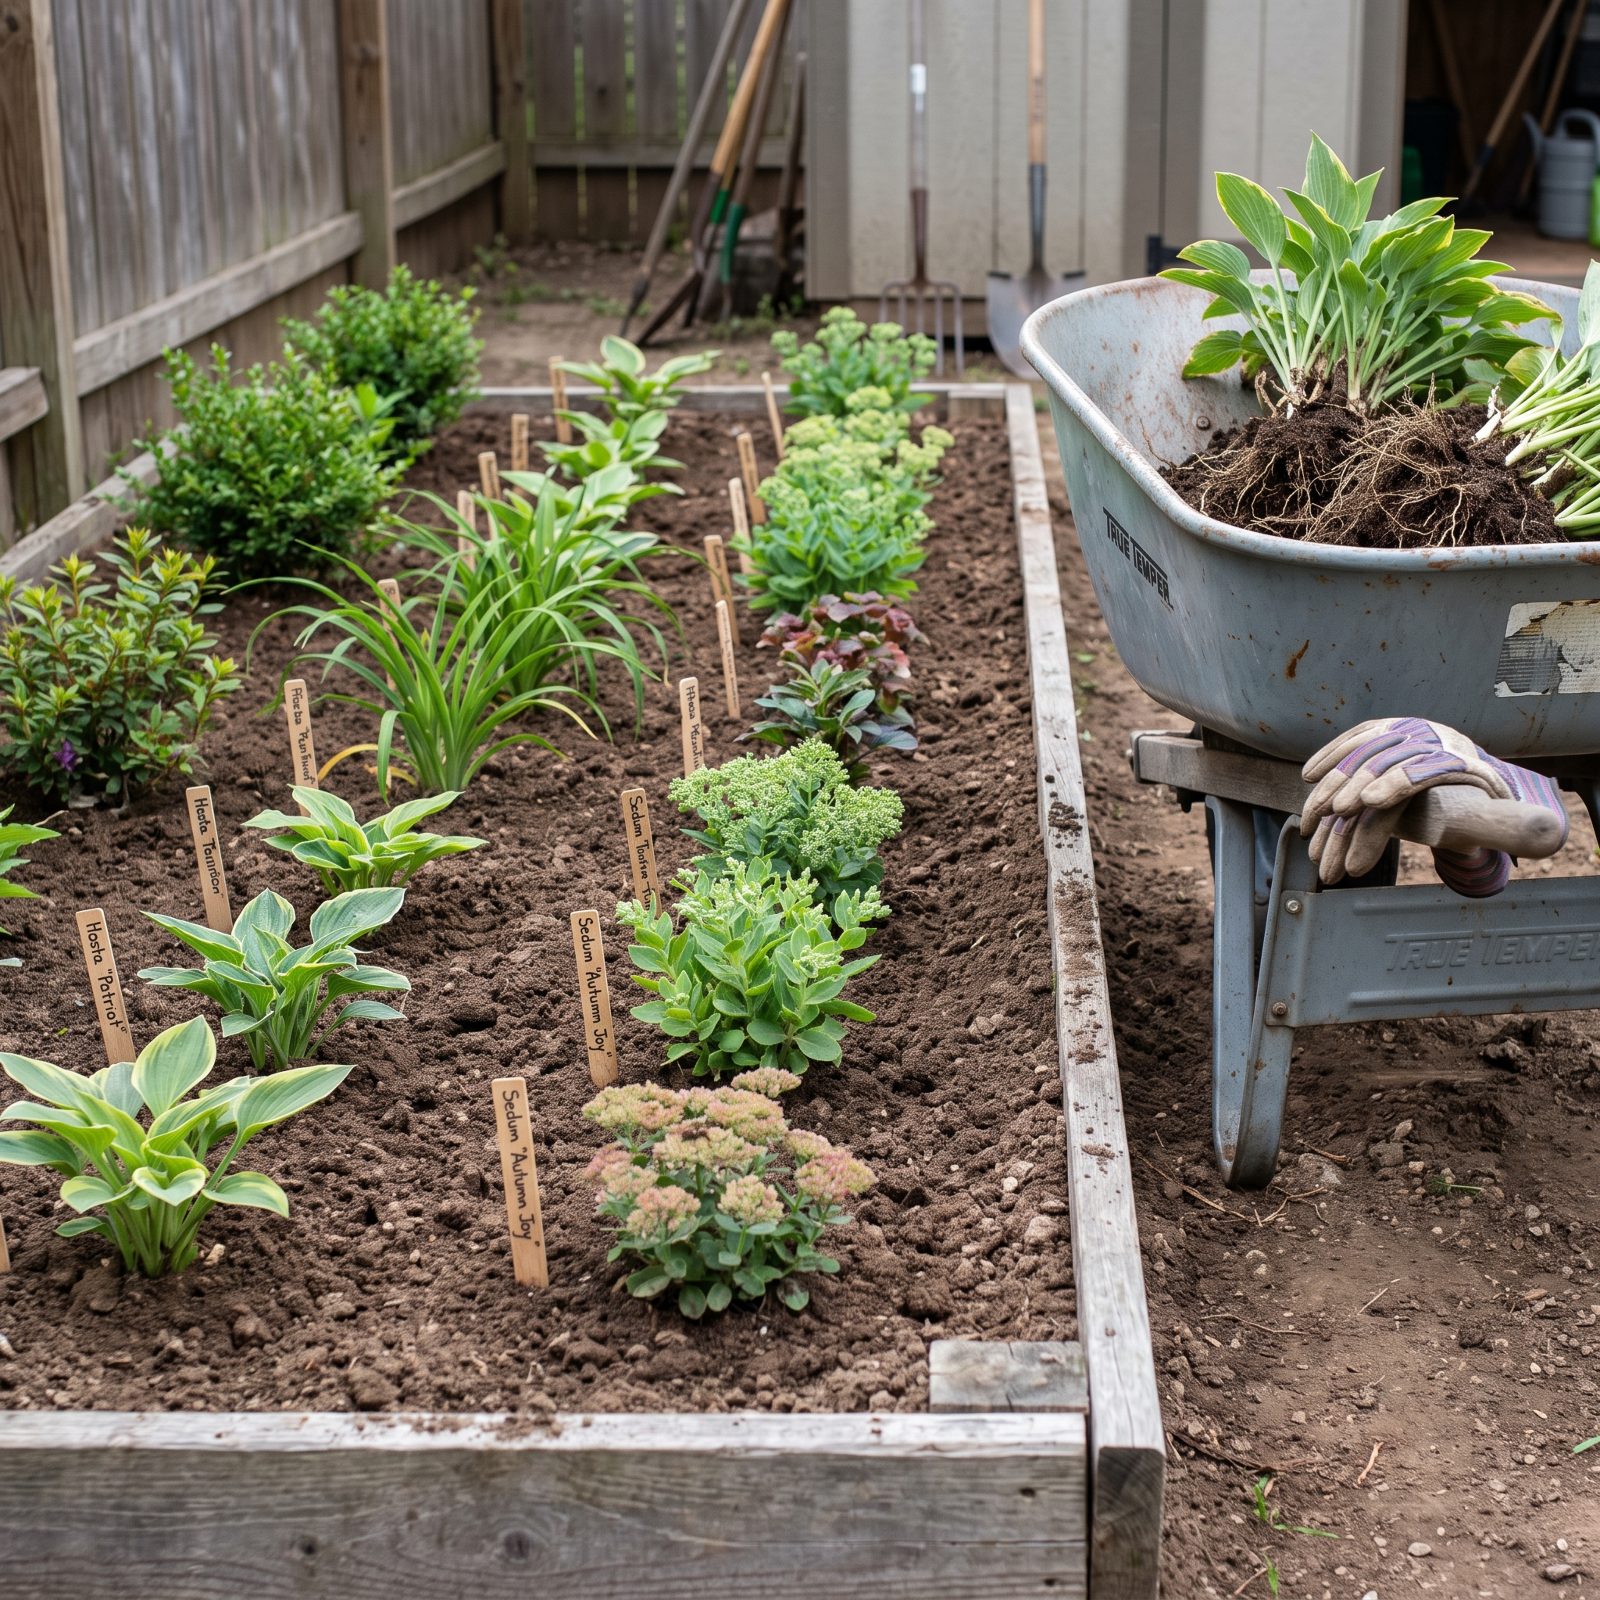
Divide a hosta and you’ve got six plants and homes for maybe two. The rest tend to die in a bucket by the shed while you dither.
So keep a holding bed — a small, out-of-sight patch of decent soil where orphan divisions, impulse buys, and rescued plants wait until you know where they belong. They stay alive, they put on size, and you get to shop your own garden when a gap finally opens up. No more jamming something into the wrong spot just to get it in the ground.
Experienced gardeners treat this patch like a pantry. Good decisions get to wait for the right moment instead of being forced on a Tuesday evening.
34. Keep Spare Matching Mulch Stashed for Midseason Touch-Ups
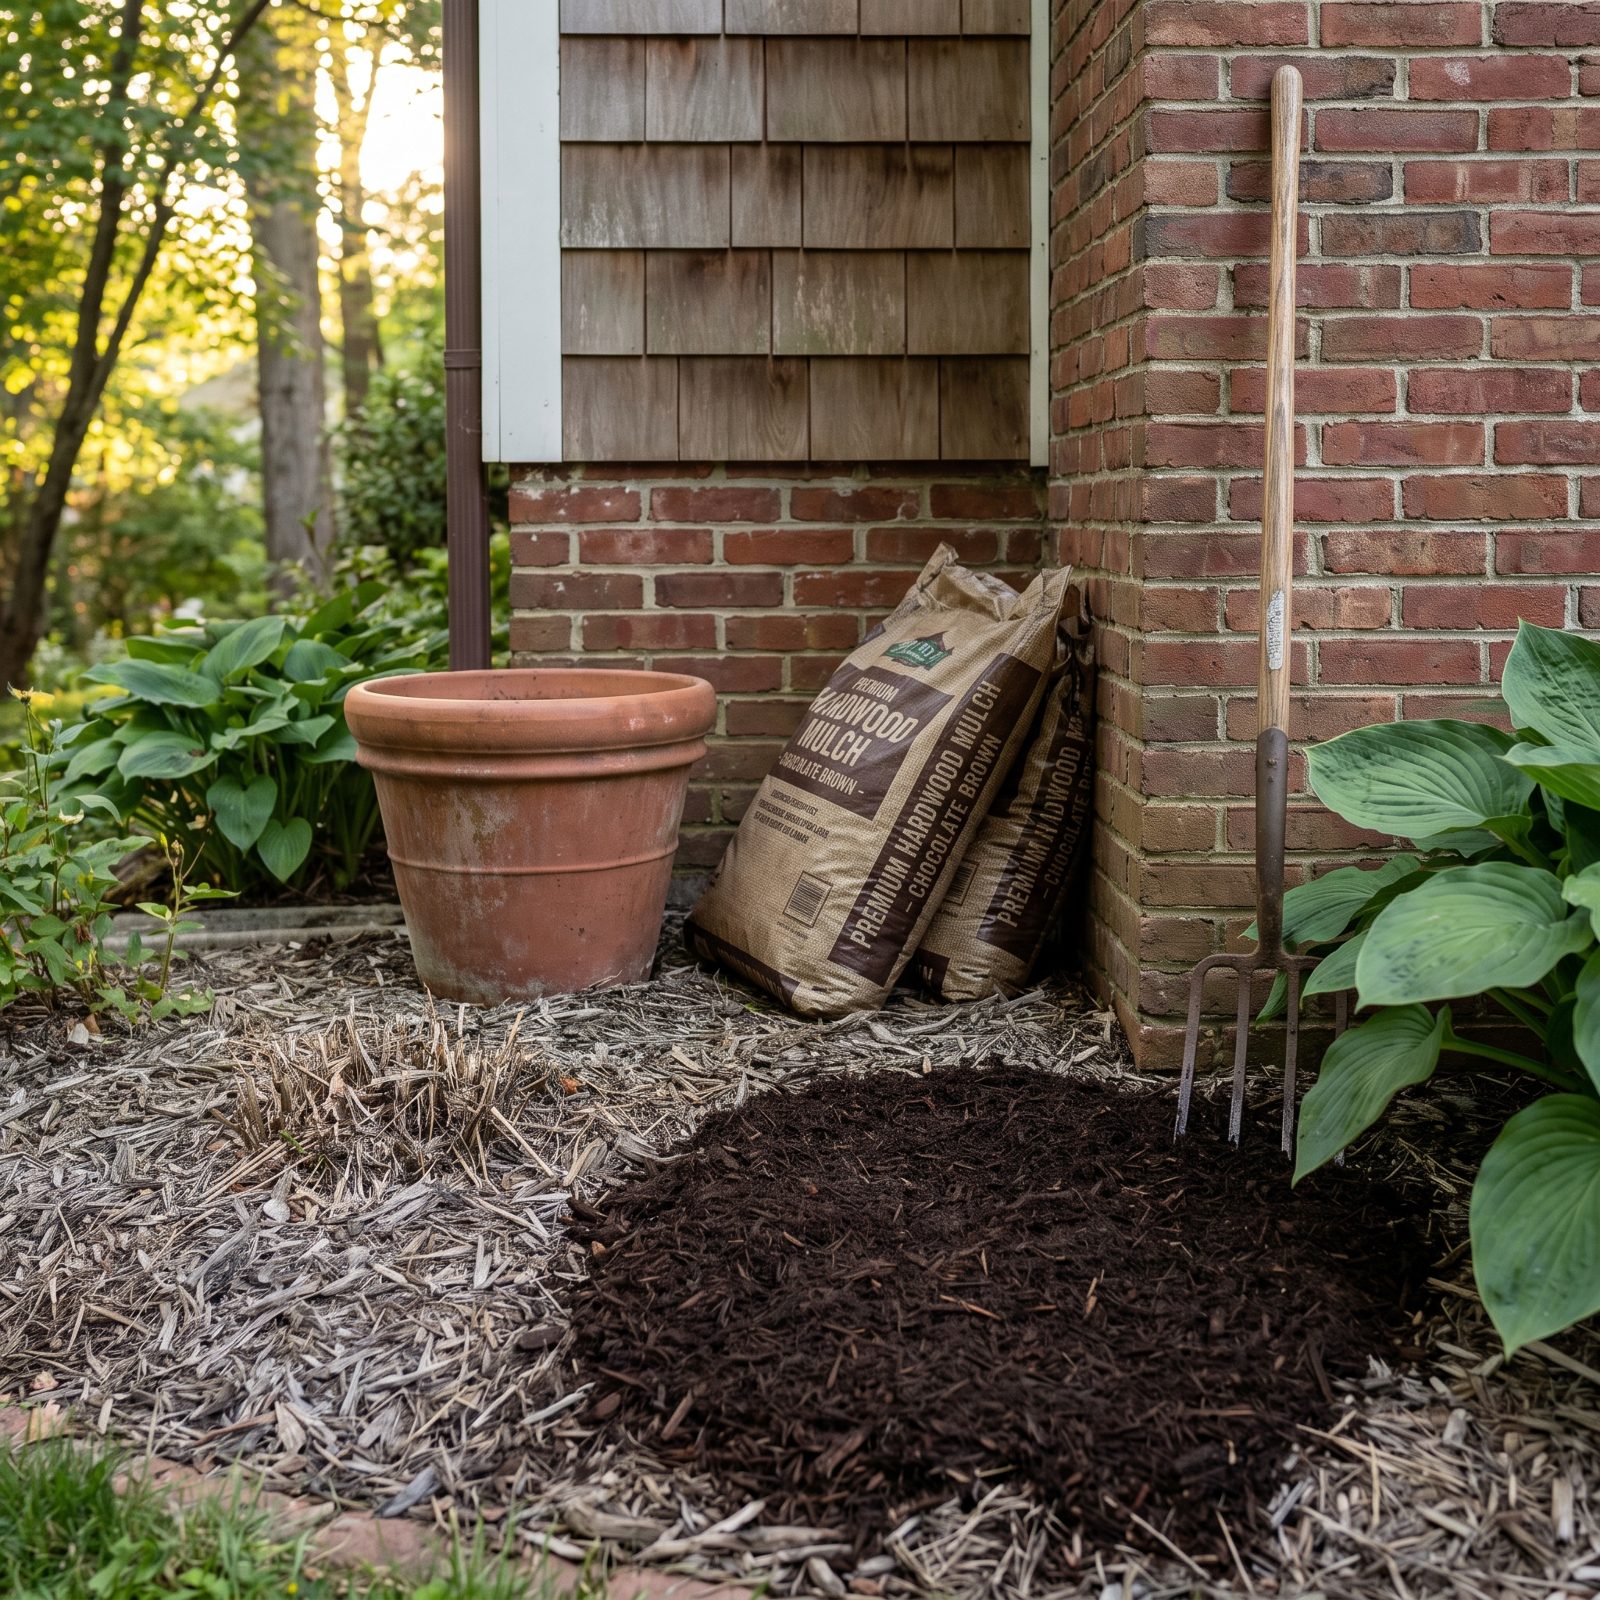
Mulch fades. By July that handsome dark brown has gone the color of a paper bag left in the sun, and the whole bed looks tired even when the plants are thriving. Here’s the fix nobody mentions: buy one extra bag of the exact same mulch when you lay the first batch, and stash it somewhere dry.
A thin scatter over the faded patches, right at the base of the plants where eyes land first, resets the entire bed in about ten minutes. You don’t re-mulch everything. Just the spots that read as worn.
33. Test Deep Container Moisture With a Wooden Chopstick
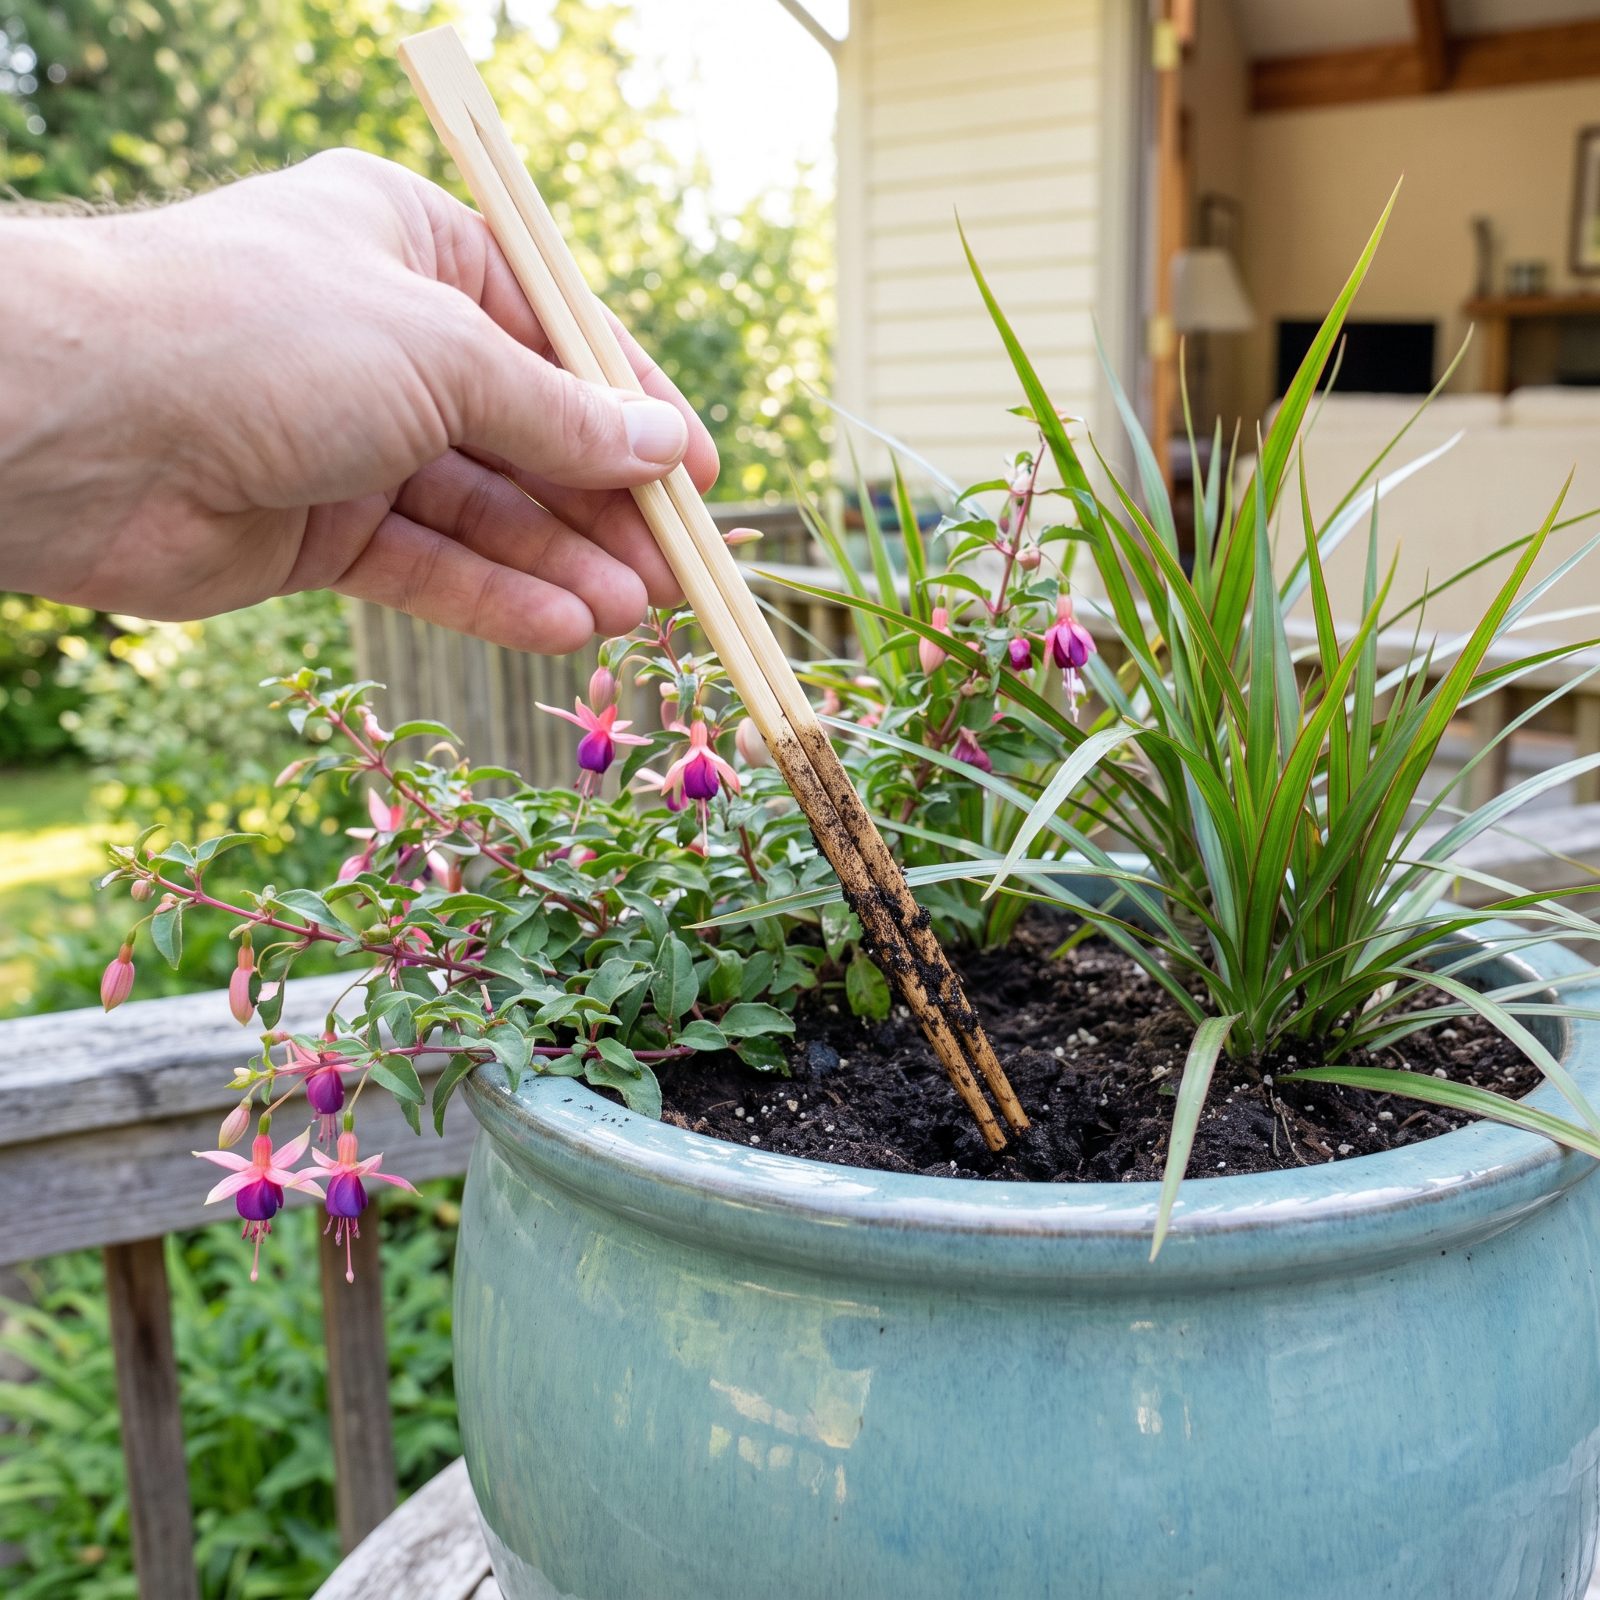
Finger-testing the top inch of a big pot tells you almost nothing. The surface dries out fast while the root ball six inches down stays soggy, and soggy down there is exactly where root rot starts.
A plain wooden chopstick, pushed to the bottom and pulled back out, reads the whole column at once. Dry and clean? Water. Dark and clingy at the base? Wait. Same logic as a cake tester, just for dirt.
32. Sweep Mulch Off Plant Crowns With an Old Paintbrush
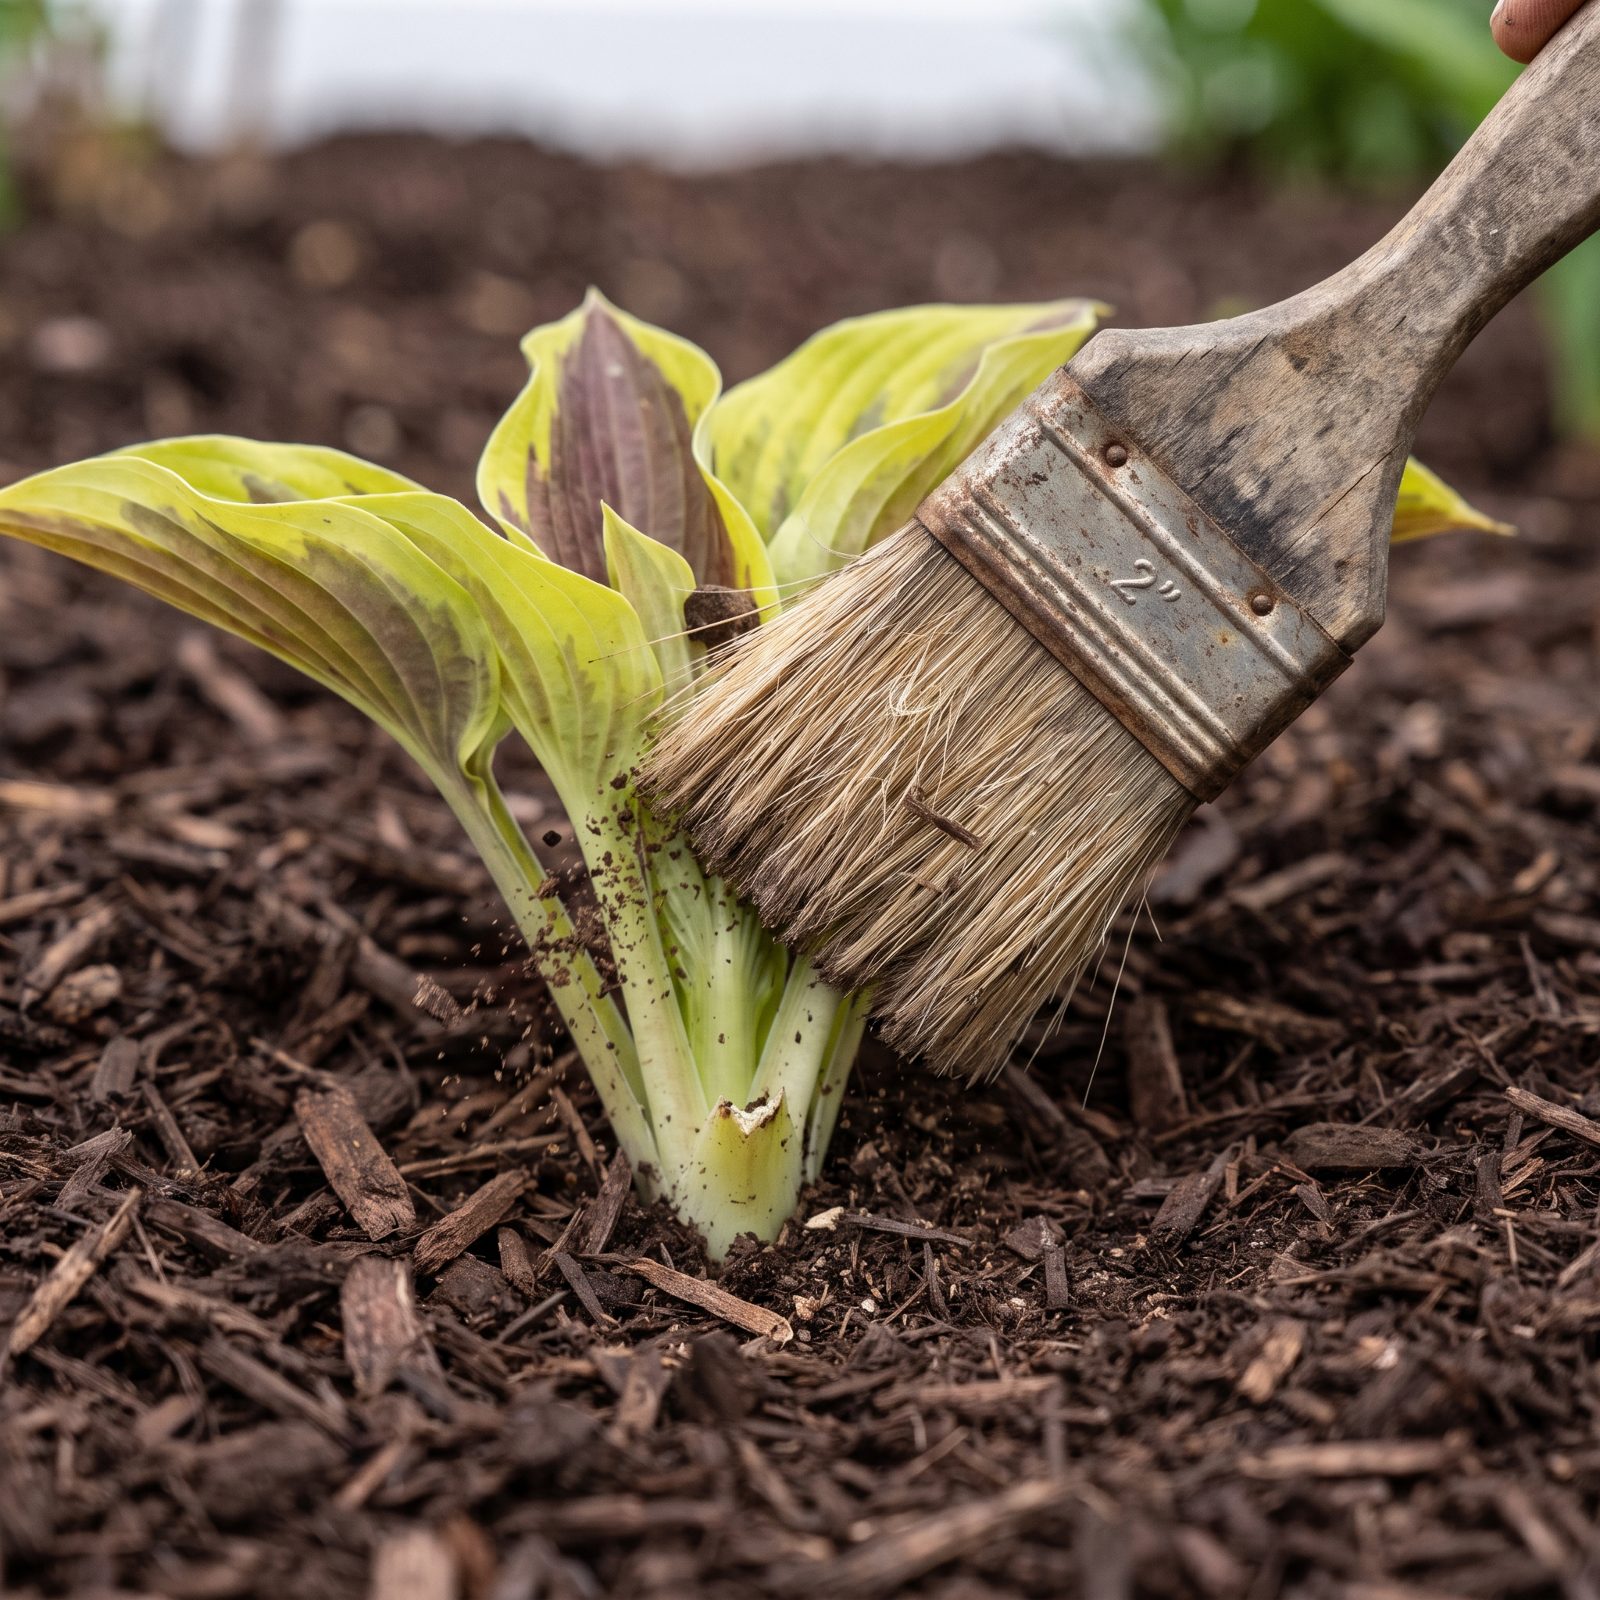
Mulch piled against a stem looks finished from a distance. Up close, it traps moisture against the crown and quietly rots the plant from its center out. Most people pull it back with a glove and smear soil all over the leaves in the process.
A dry paintbrush, the stiff old one you retired from trim work, flicks mulch off the crown without bruising new shoots or dragging dirt around. Seconds per plant. And it keeps that neat ring of bare soil right where the base needs air to breathe.
31. Prop Floppy Flowers With Nearly Invisible Twiggy Prunings
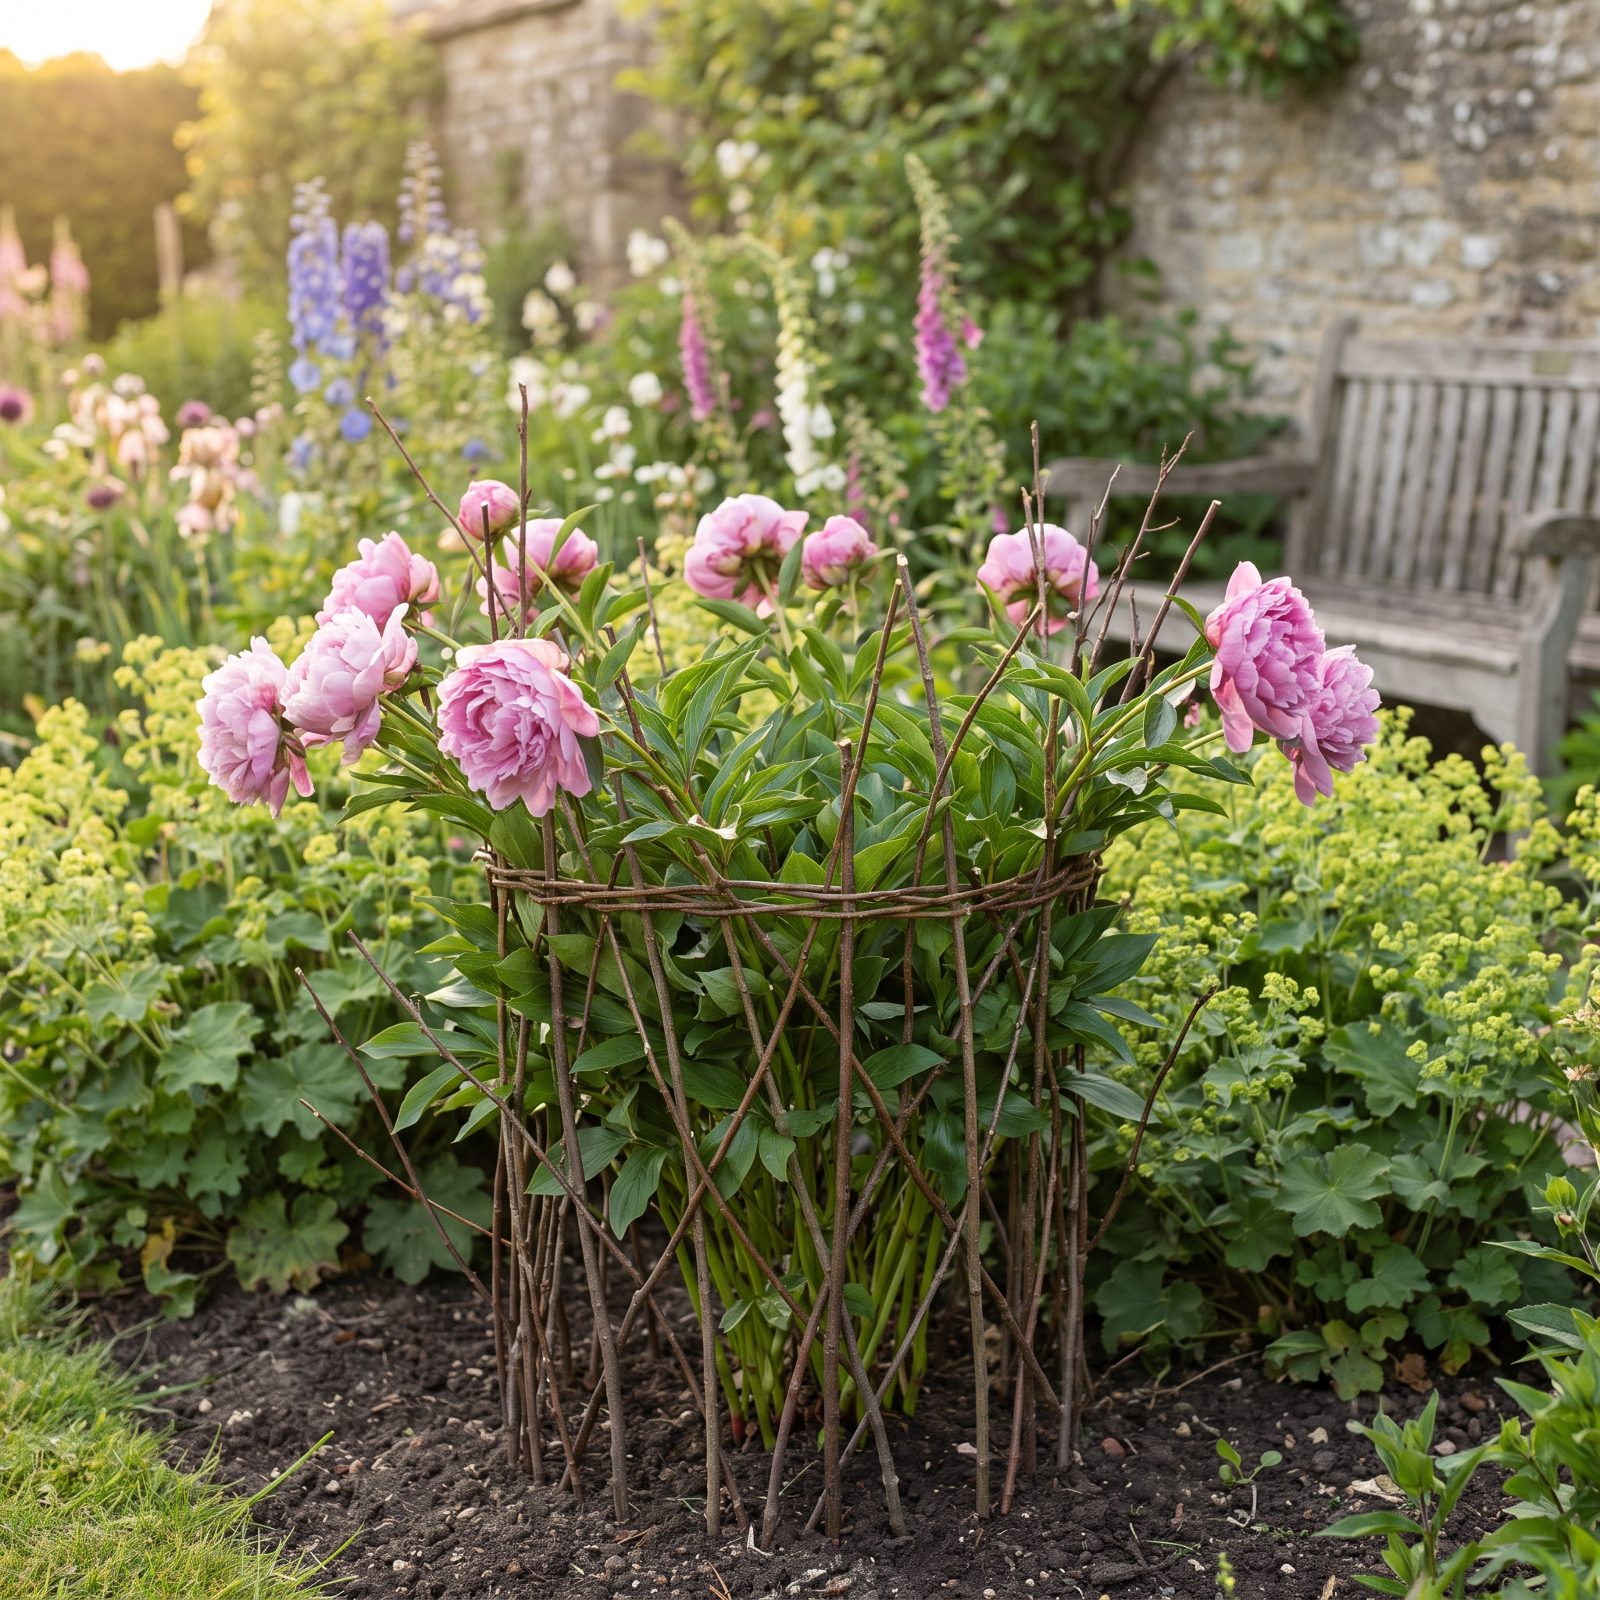
Those green metal grow-through rings and bamboo stakes announce themselves from across the yard. They broadcast one message: this plant needed help.
Long, slender prunings from spring shrub work do the same job and look like they belong in the garden. Push a ring of twiggy, branched rods into the soil around a floppy perennial while it’s still short, angling some so they cross, then weave a few pliable lengths horizontally around them like a basket band, and the stems grow up through the cage. By bloom time the foliage fills the top of the woven cage, and the twiggy cage all but disappears from view.
30. Top-Dress Beds Right Before Steady Rain Is Forecast
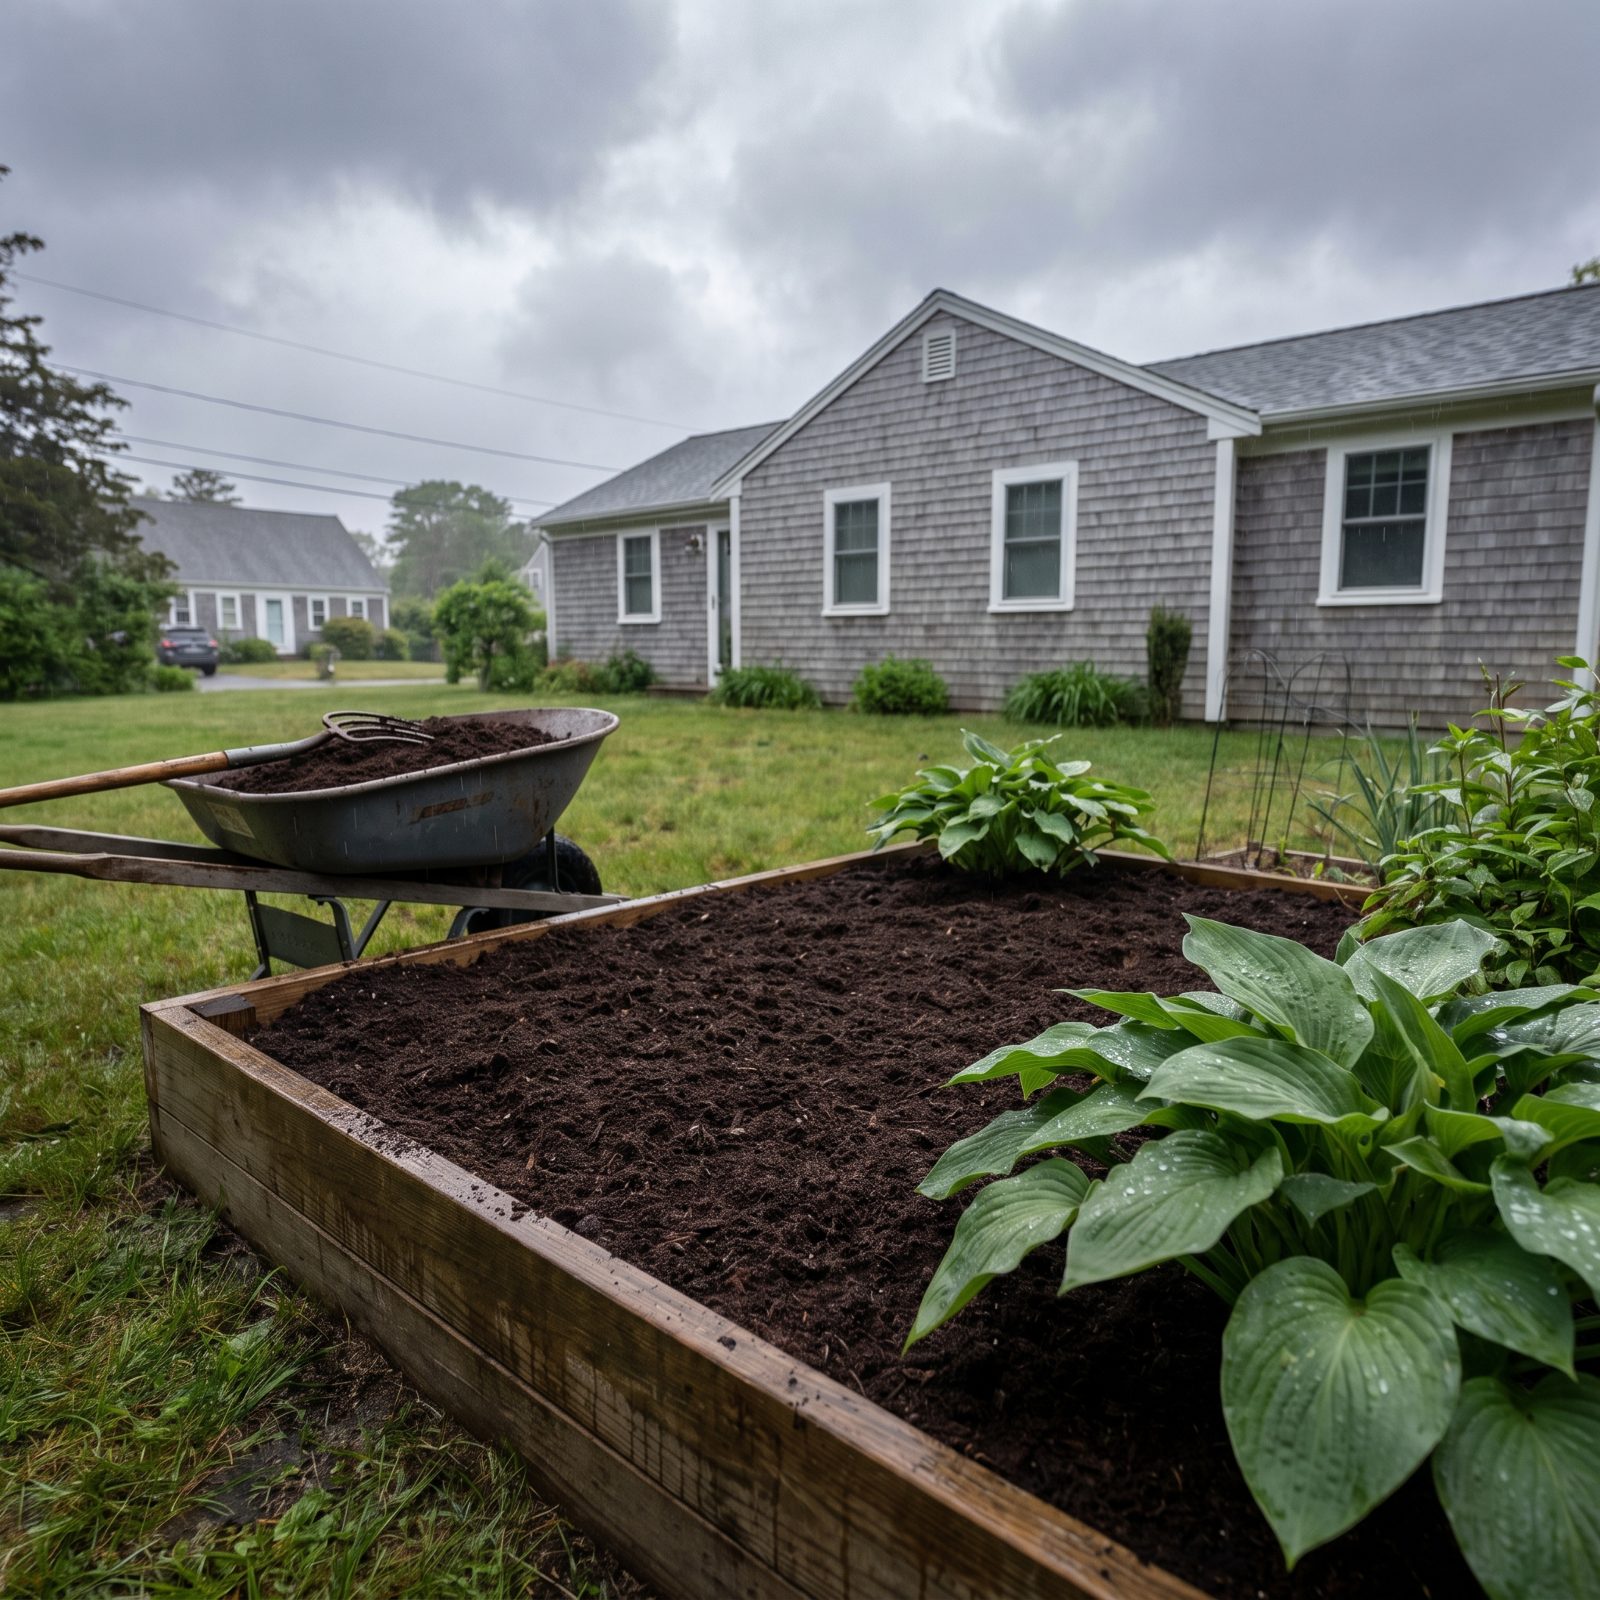
Spread compost or fresh mulch on a dry, sunny day and half the benefit just sits on top doing nothing until you remember to water it in — which, let’s be honest, you won’t. Spread it the afternoon before a slow, steady rain is forecast, and the weather does the work for free.
Rain carries the nutrients down into the root zone, settles the mulch so it stops blowing around, and knits the new layer into the old one overnight. Watch the forecast, not the calendar.
29. Leave Deliberate Gaps Where Late-Emerging Perennials Sleep
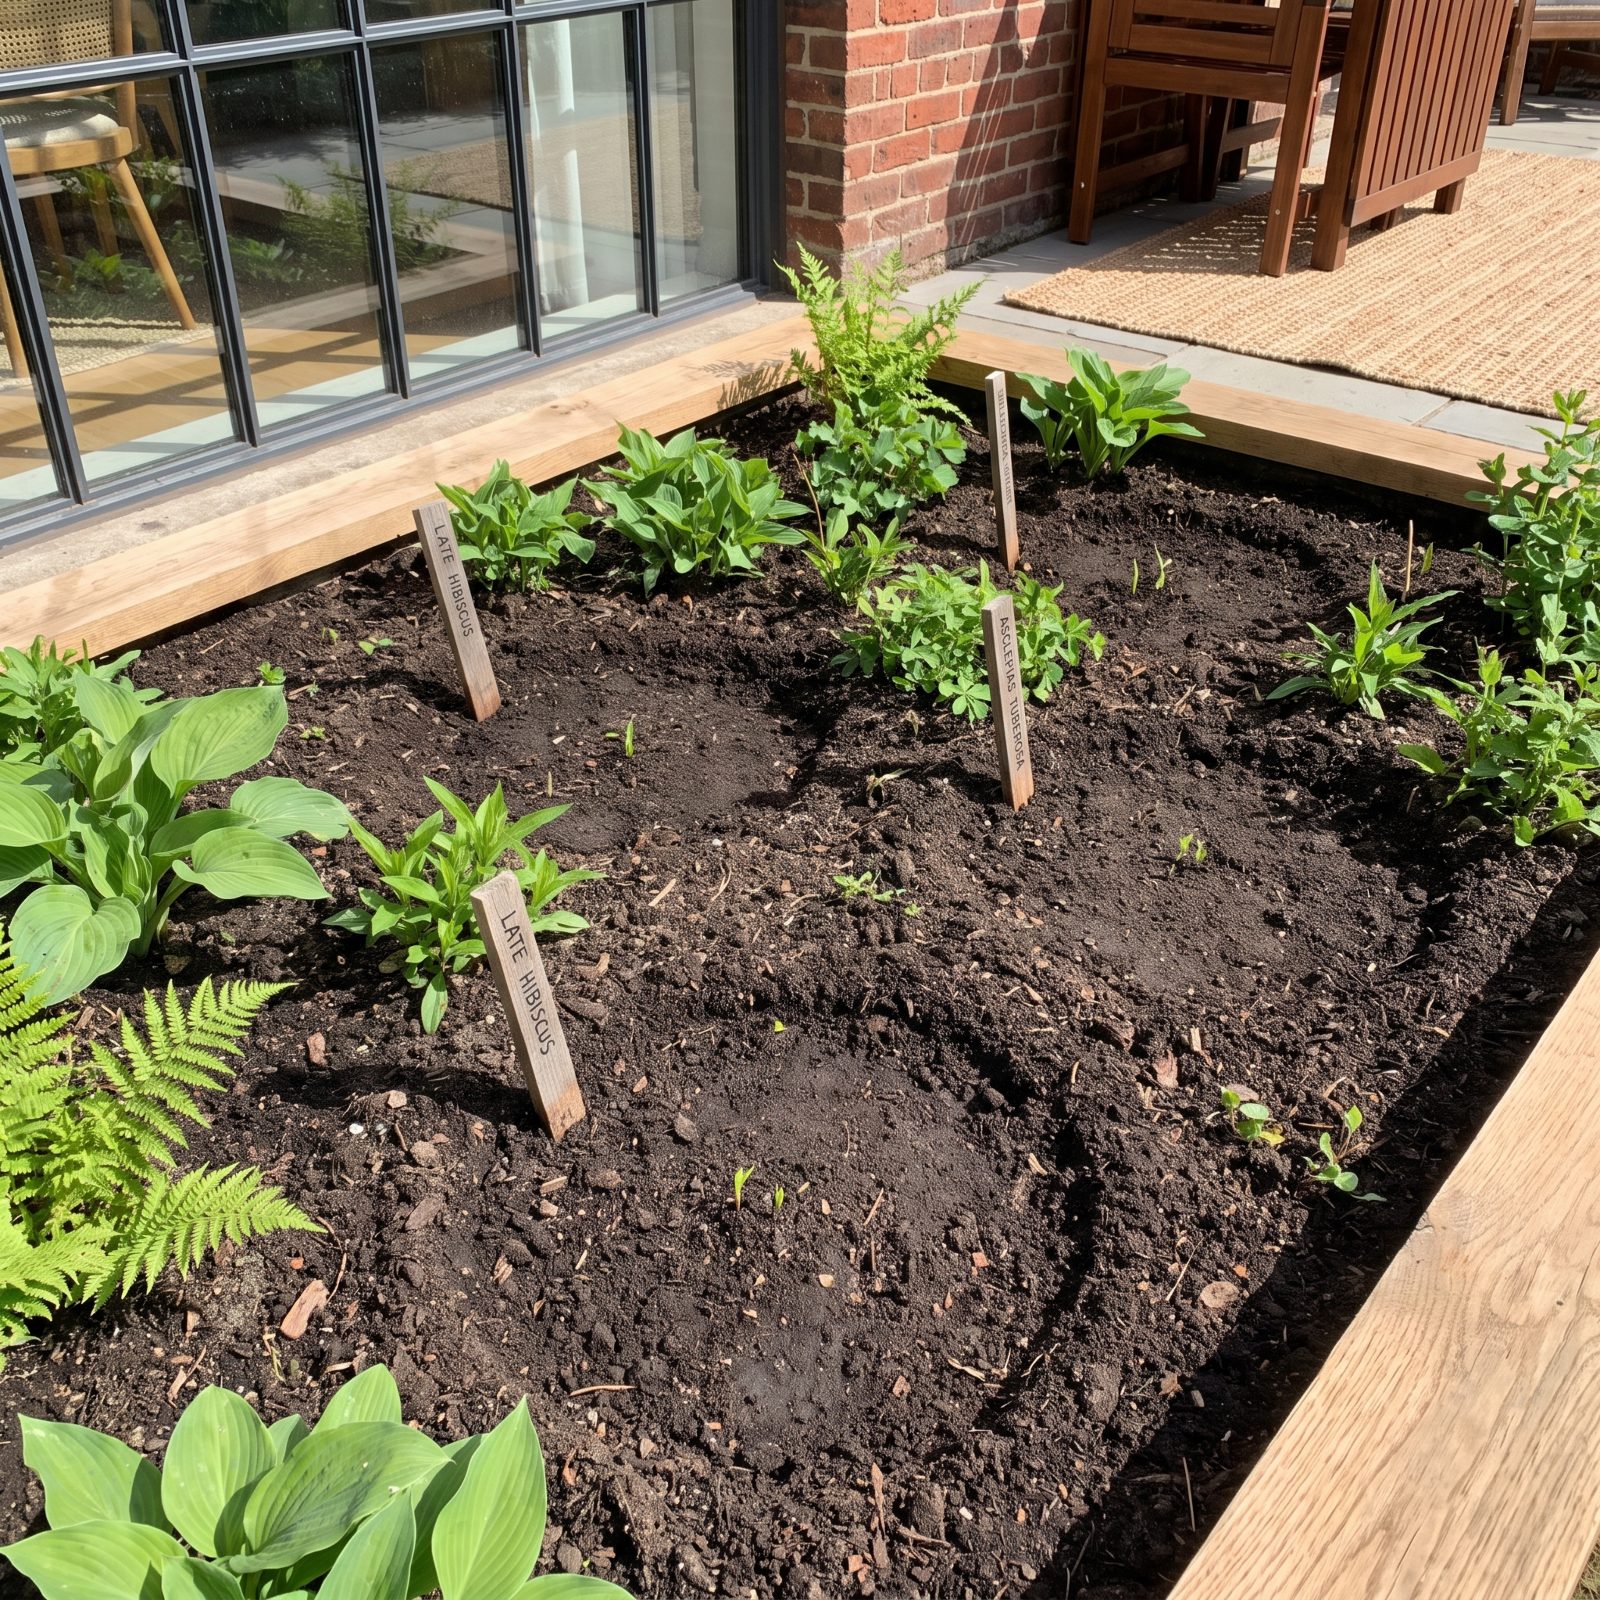
Hardy hibiscus, balloon flower, butterfly weed and a handful of others wake up late — sometimes not until well into May. So every spring somebody digs into that “empty” patch, decides the plant died over winter, and plants something new right on top of it.
Experienced hands mark those spots and leave them be. A short label, a ring of stones, whatever reminds you the gap is occupied.
The reward comes a few weeks later when the sleeper erupts, right-sized and in the right place, instead of wrestling for room with an impulse buy from the garden center.
28. Hide Seasonal Bare Spots With Fast Annuals in Tuck-In Pots
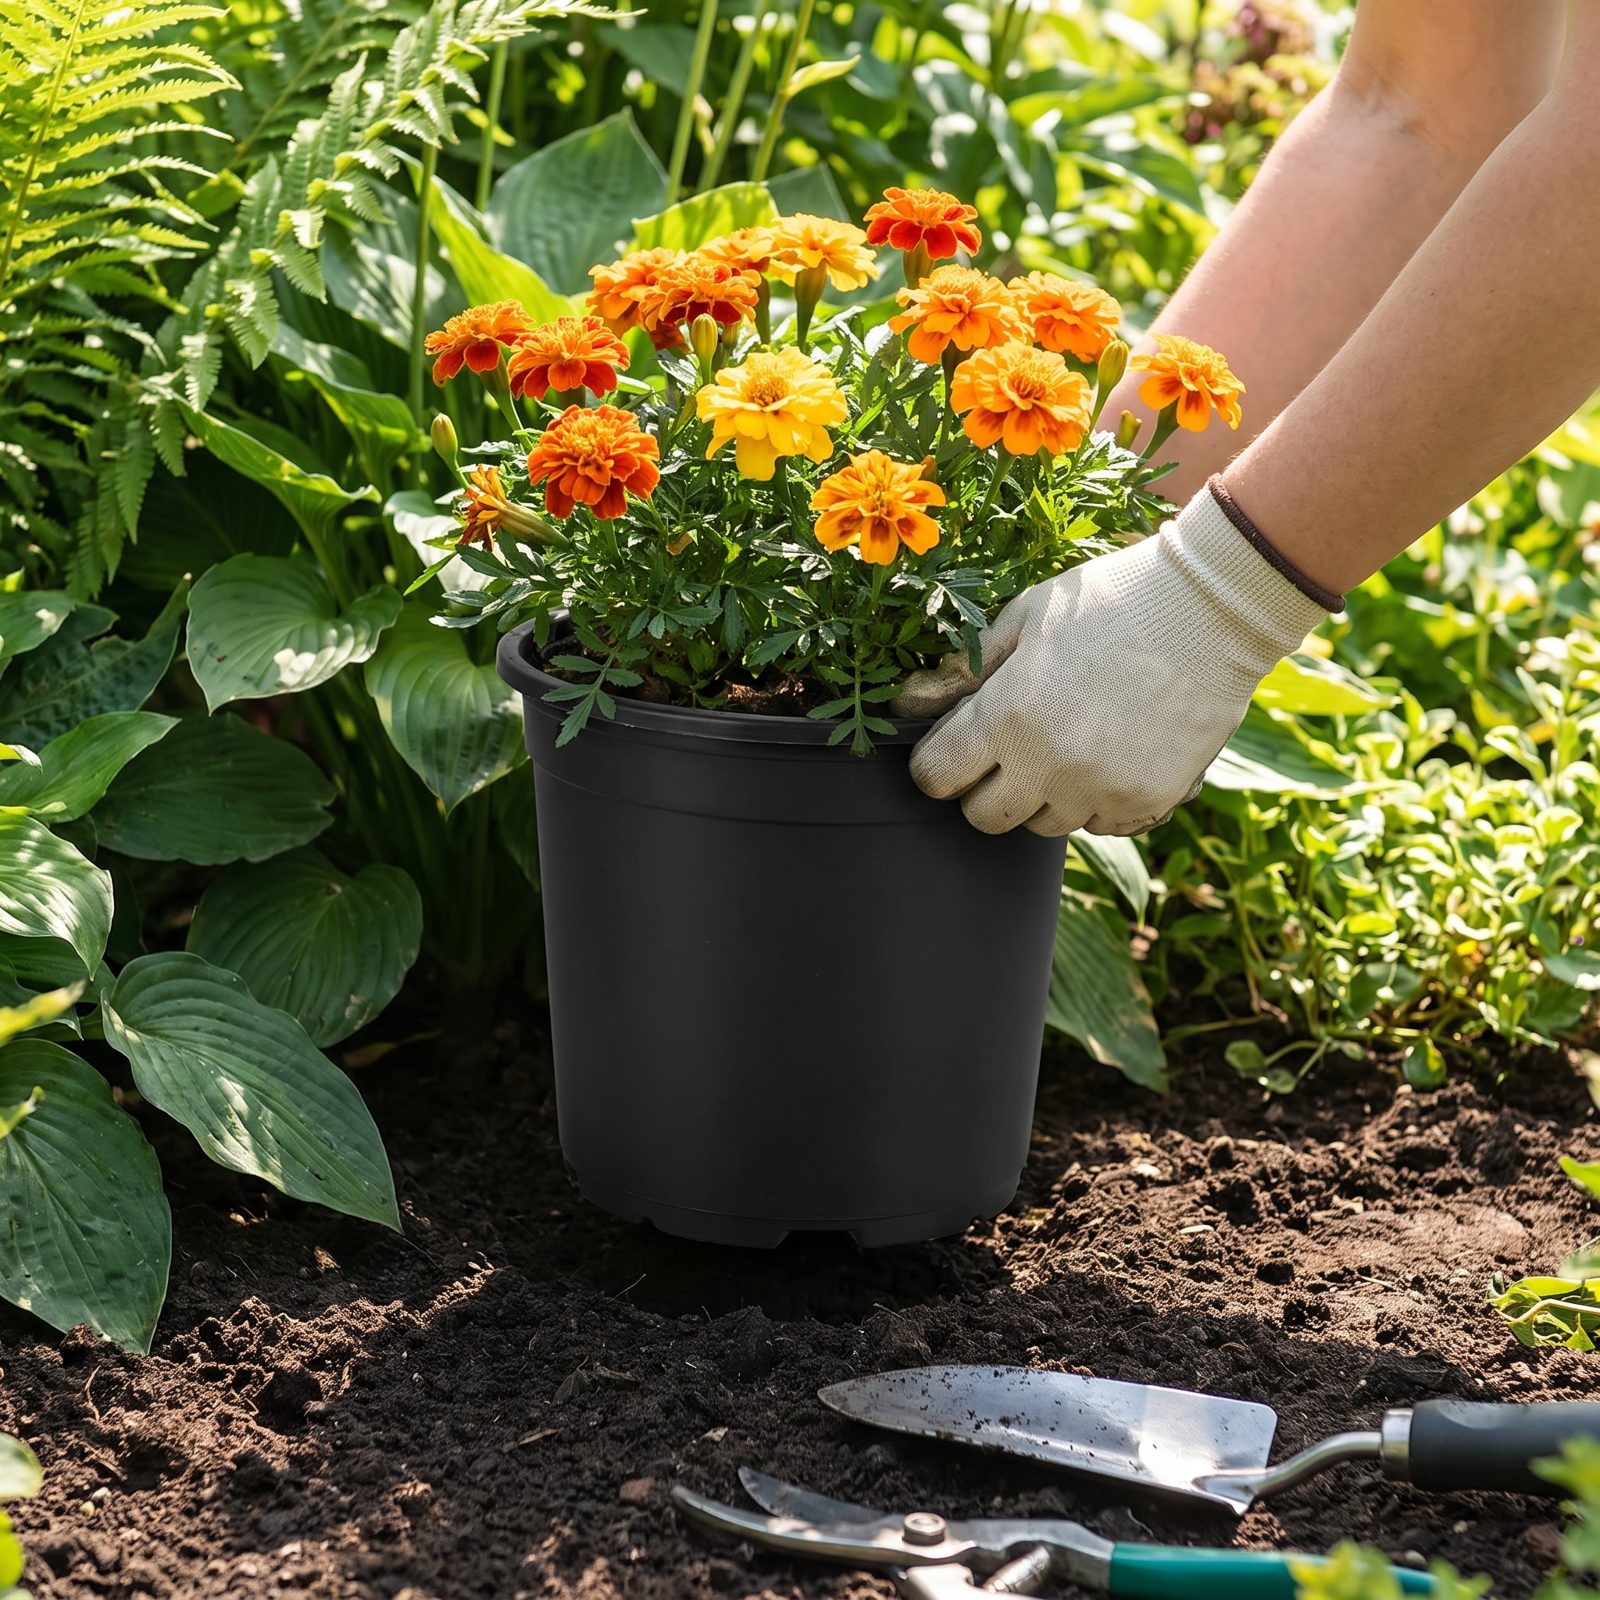
A bed looks half-finished when a spring bulb dies back and leaves a hole, or when a perennial finishes blooming early and sulks. Don’t plant something permanent in a panic.
Grow quick annuals — marigolds, zinnias, cosmos — in cheap nursery pots off to the side. When a gap opens, drop the whole pot into the space and tuck foliage over the rim. Color appears exactly where you need it, no transplant shock, and the pot lifts right back out when the perennial recovers.
27. Set Stepping Stones Along the Path the Lawn Already Shows You
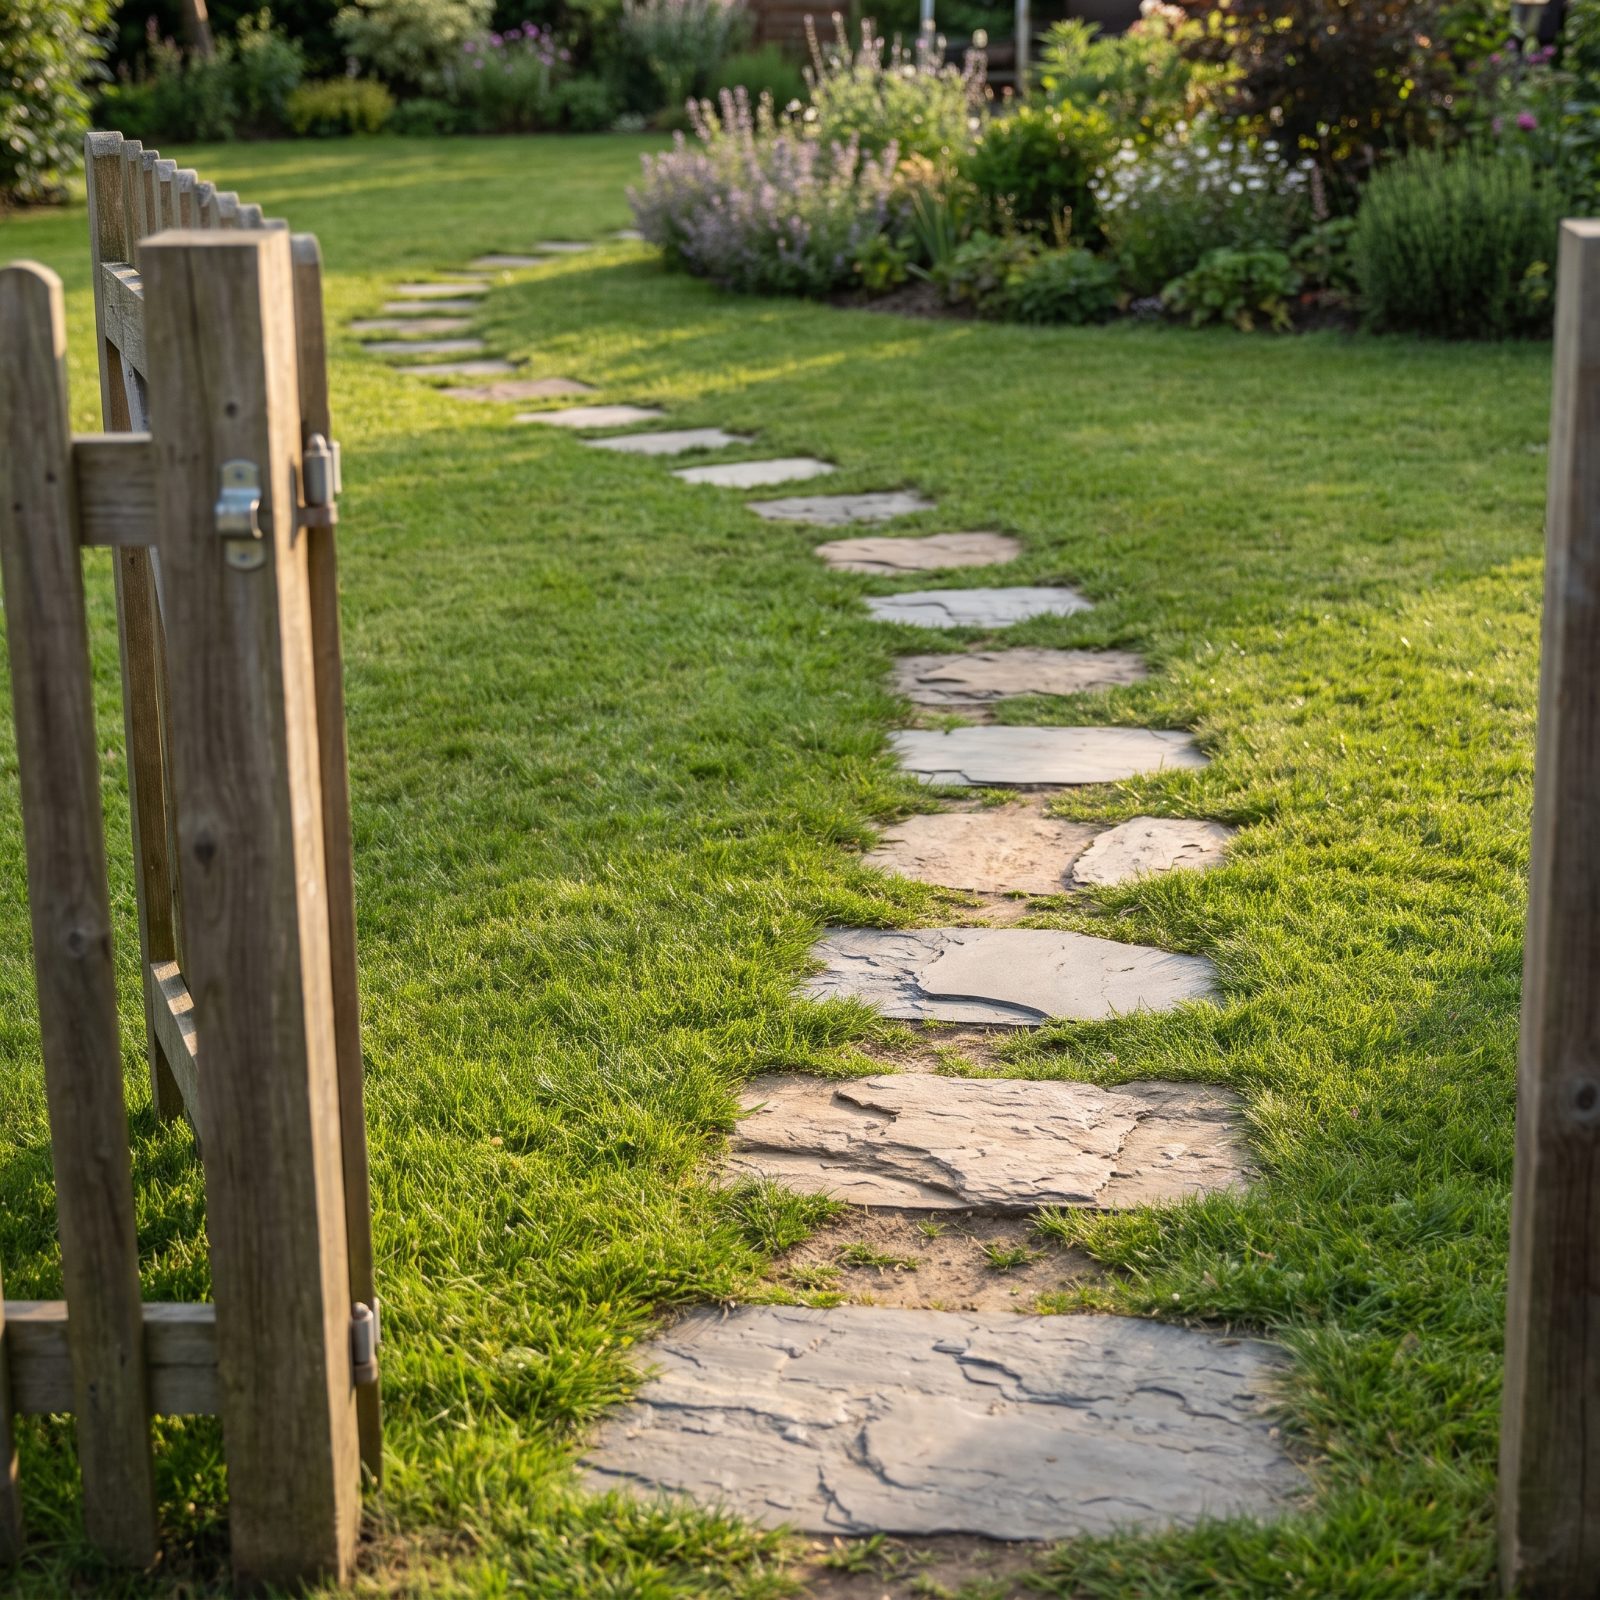
Your lawn tells you where people walk, if you bother to watch it. That thin brown streak from the back door to the compost pile, the bald patch cutting the corner of the bed — those are honest data, written in dead grass.
Rather than fight the worn track or reseed it over and over in a losing battle, set stepping stones right along it. Sink them flush so the mower rides straight over. You stop killing grass that was never going to survive anyway, and the path reads as intentional instead of accidental.
26. Sink a Flat Paver Under the Outdoor Faucet to Kill the Mud Patch
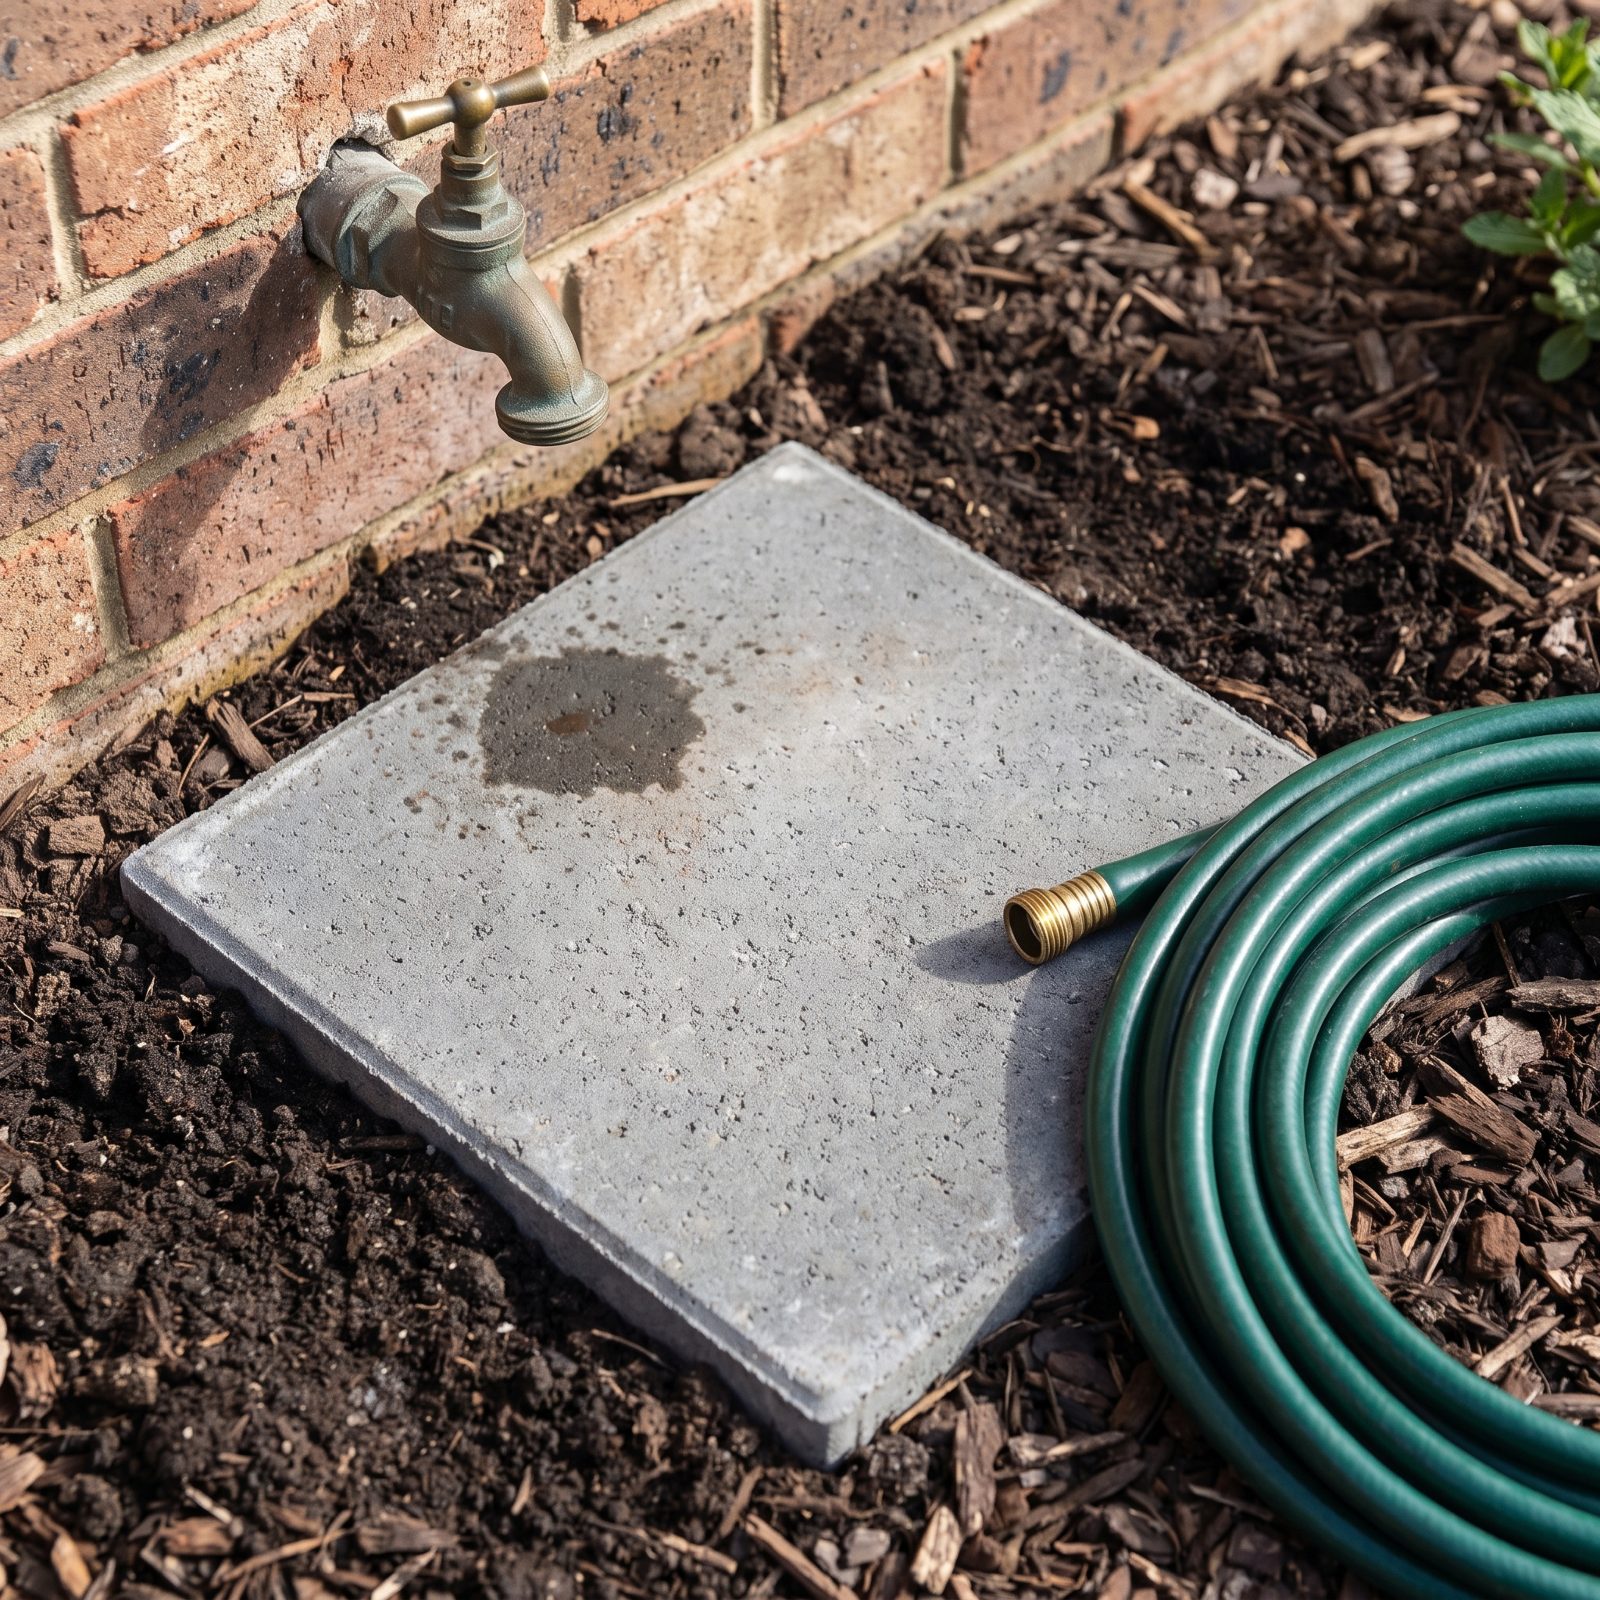
Under every outdoor spigot there’s a perpetual mud pit. Every fill of the watering can splashes, every disconnect drips, and the ground never, ever dries. You track it onto the patio and coil the hose down into the slop.
One flat paver, sunk level with the soil under the faucet, ends it. Splashes hit stone and run off instead of churning dirt into soup. A tiny fix — and you only realize how much it bugged you once it stops.
25. Lift Big Containers on Pot Feet to Stop Stains and Rot
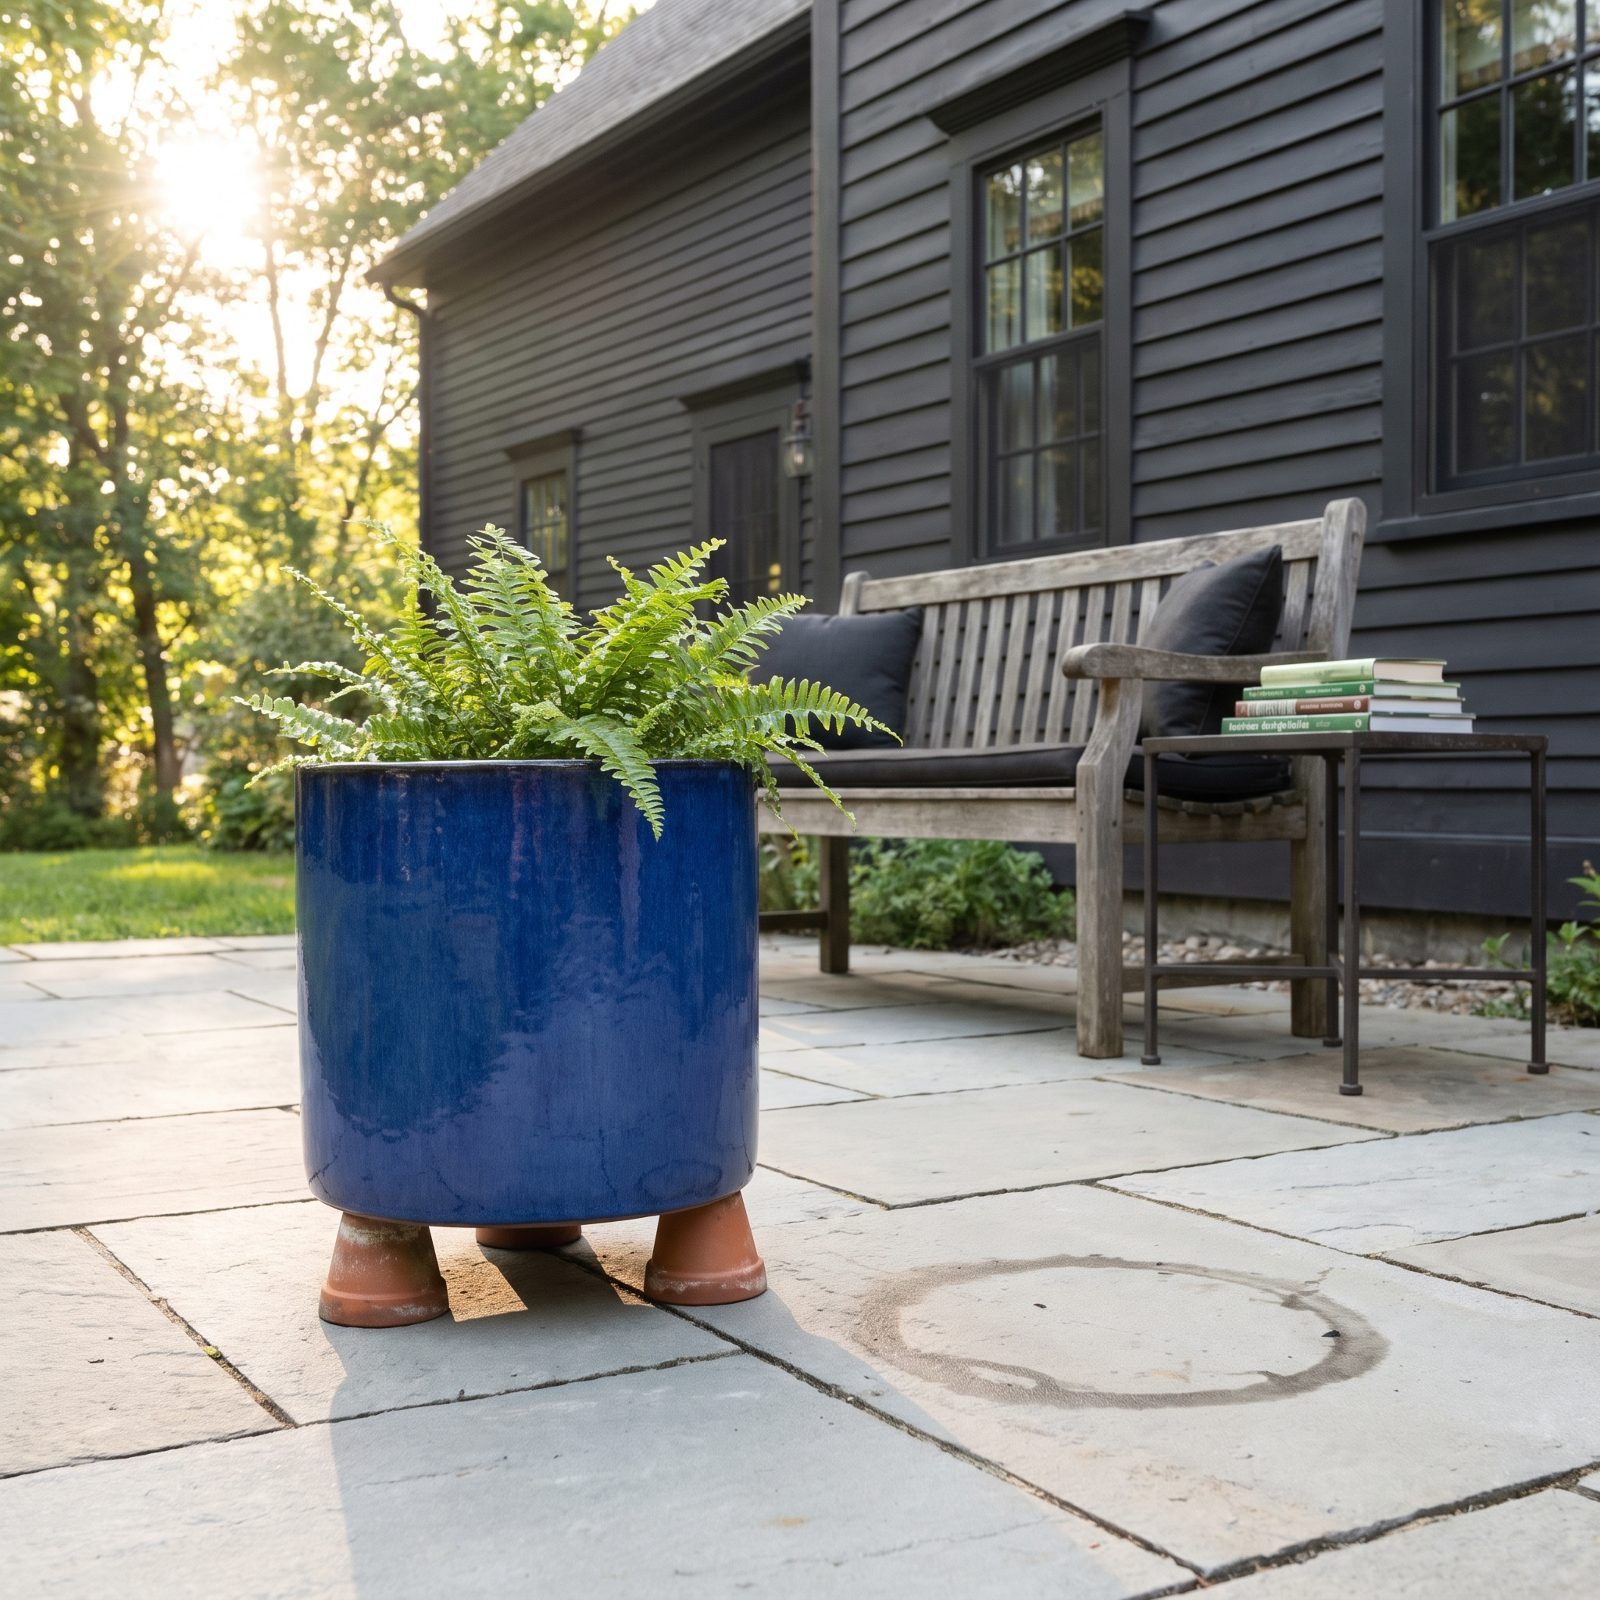
A heavy pot sitting flat on a patio does two quiet kinds of damage. It traps a disc of constant moisture that stains stone and rots wood decking underneath, and it lets the drainage hole suction itself shut against the surface, so water backs up and slowly drowns the roots.
Three small pot feet — or honestly, a few flat stones — lift the base a finger’s width. Air moves, water drains, the stain never forms. The feet cost a few dollars and save a deck board worth a great deal more.
24. Rotate Containers a Quarter-Turn Every Week for Even Growth
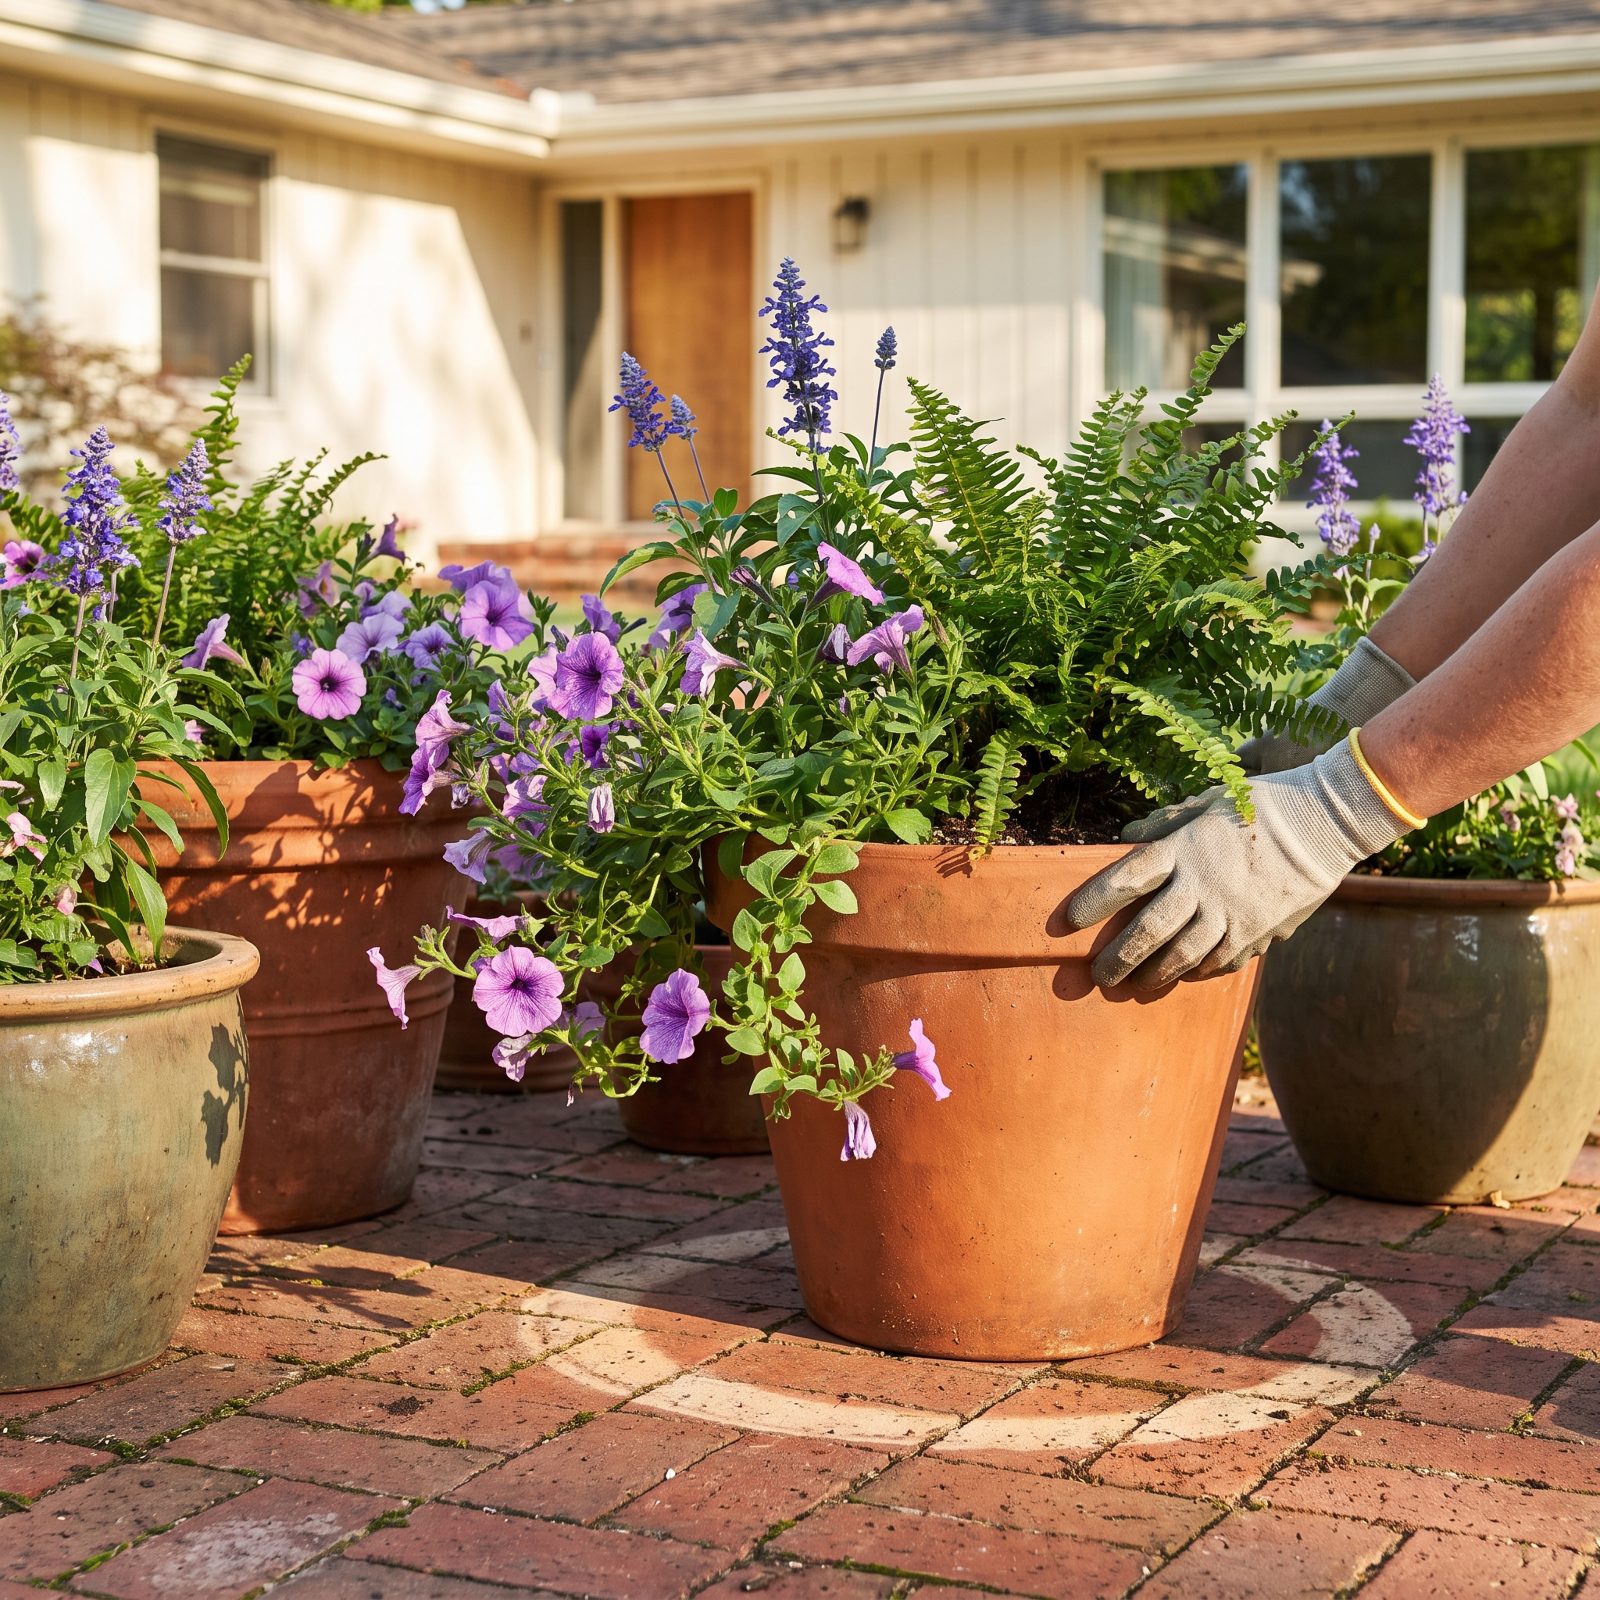
Plants lean. They can’t help it. A pot sitting still against a fence grows thick on the sunny face and thin and leggy on the shaded back, until the whole thing looks like it’s trying to flee.
Here’s what experienced growers do: give each pot a quarter-turn once a week. The shaded side rotates into light, evens out, and the plant fills in on all sides instead of flinging itself at the sun.
Thirty seconds per pot. Do it the same day you water so it doesn’t slip your mind, and you’ll end up with containers that look full from every angle, not just the one facing the window.
23. Group Containers by Thirst, Not by Flower Color
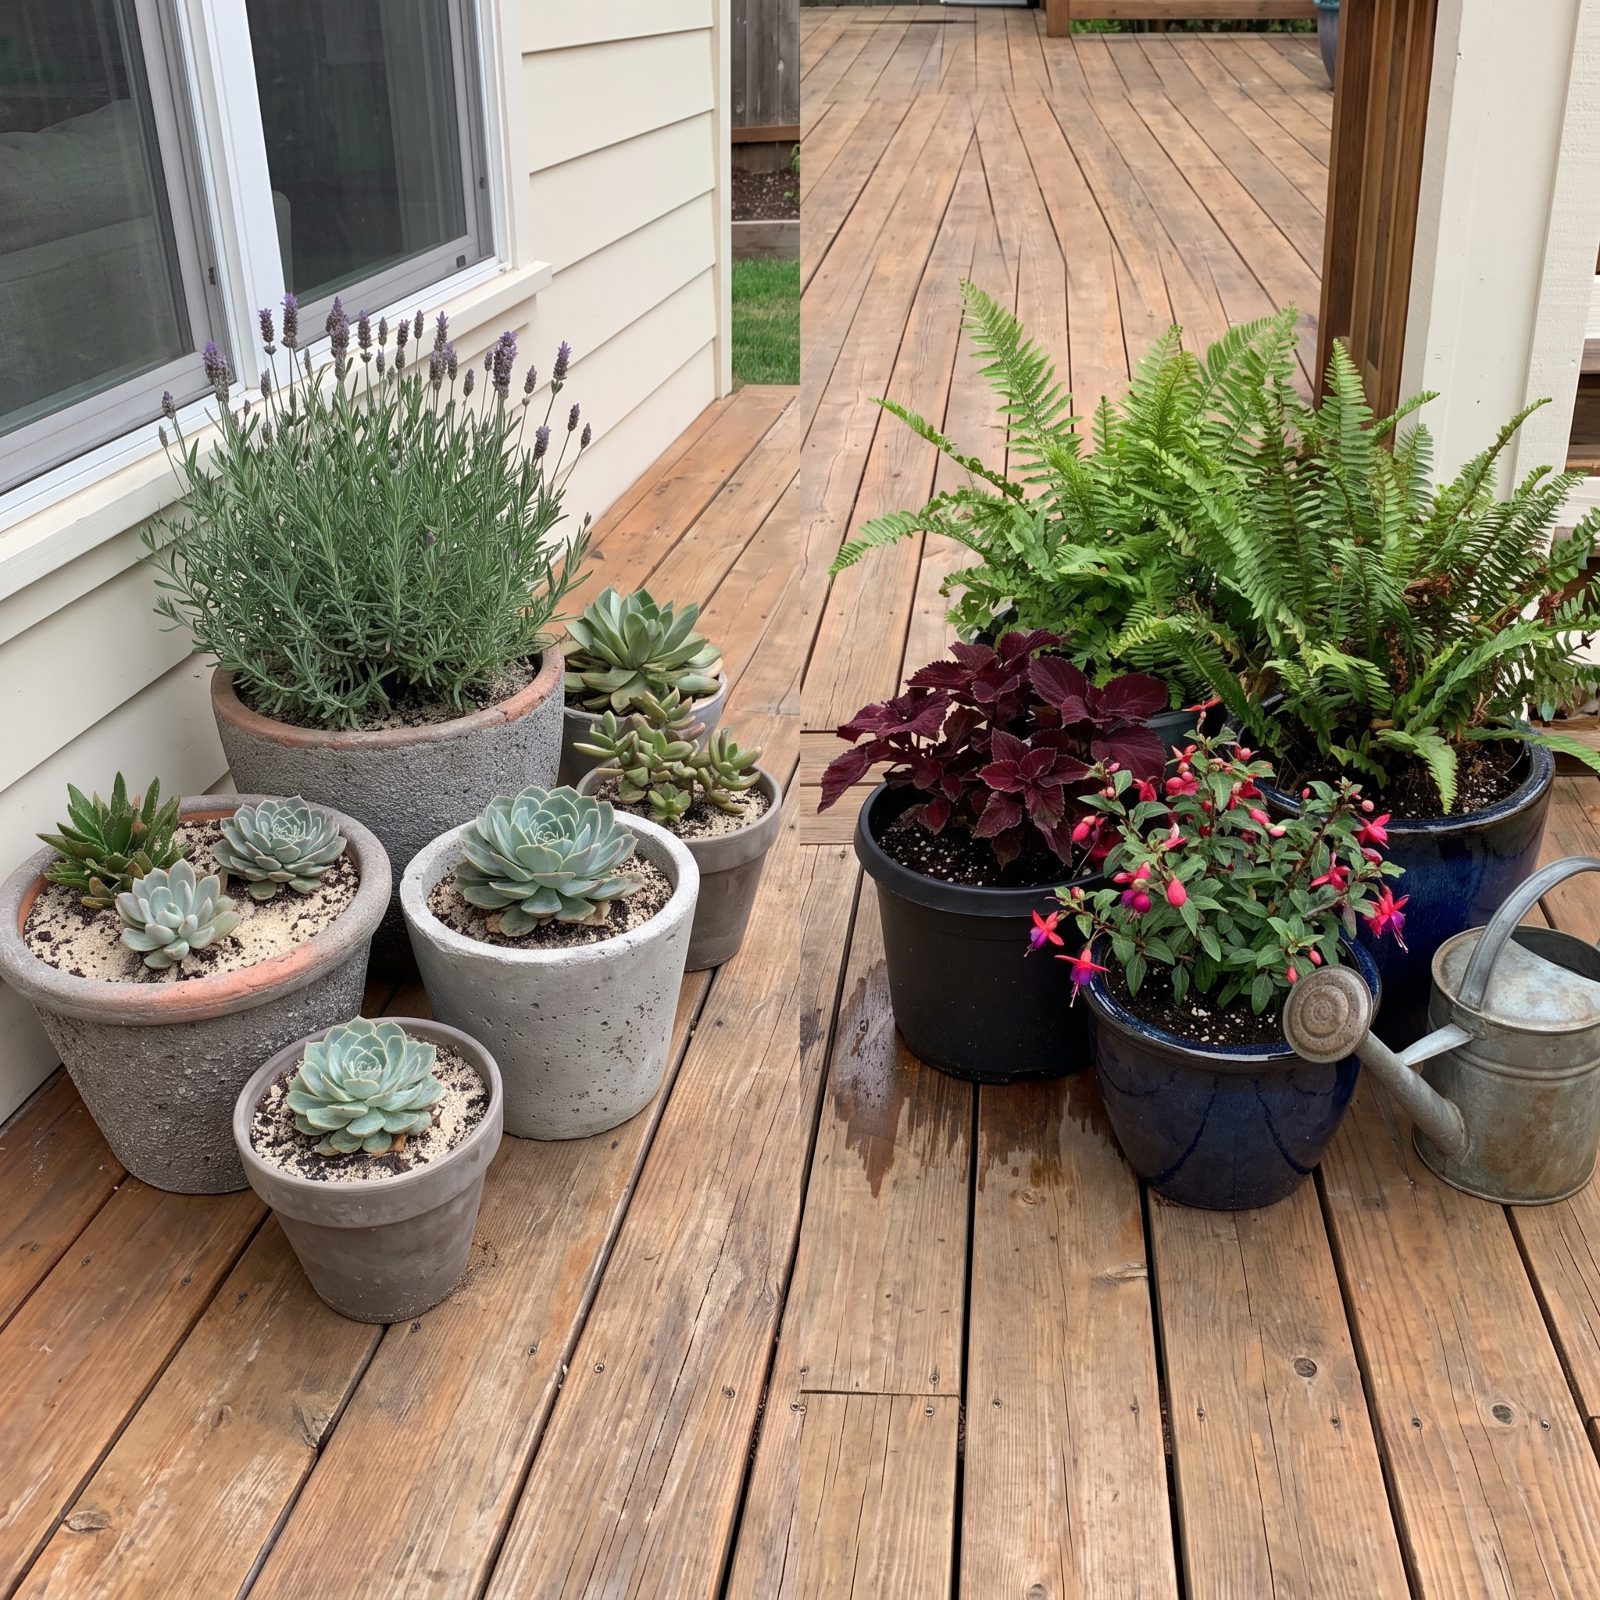
Most people cluster pots by how they look together. Pretty, and a recipe for frustration.
Put a drought-loving lavender next to a thirsty fern and you lose either way. Water for the fern and the lavender rots. Water for the lavender and the fern crisps by Thursday.
Sort by water need instead — thirsty with thirsty, tough with tough. One pass of the hose now serves a whole cluster correctly, and nothing is drowning while its neighbor begs. The grouping can still look good. It just has to make sense underground first.
22. Wipe the Dust Off Broad Evergreen Leaves to Bring the Color Back
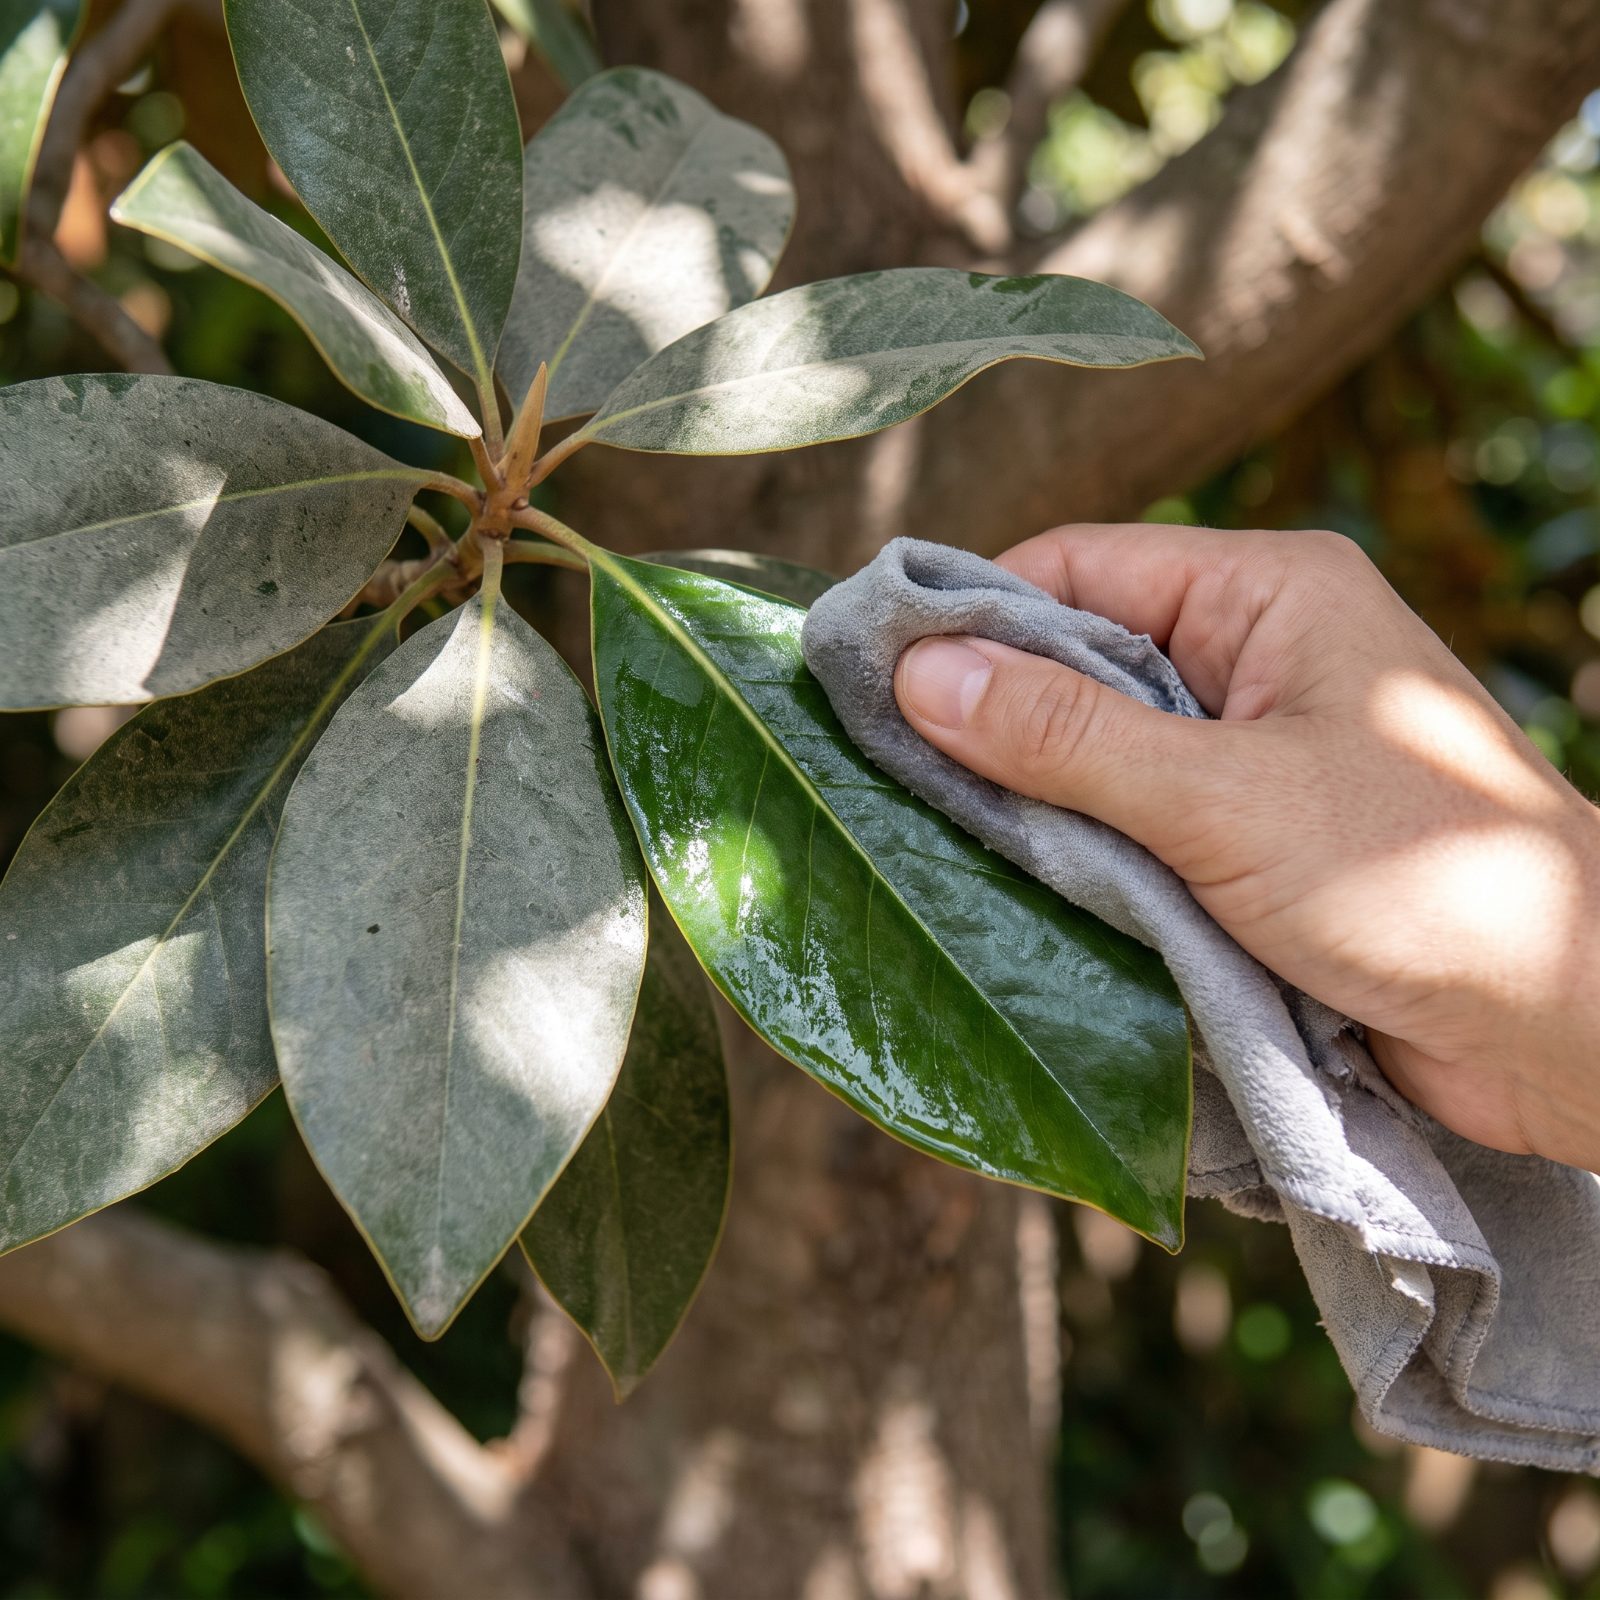
Almost nobody bothers with this one. Broad-leaved evergreens near driveways, paths, or dry beds collect a gray film of dust and pollen over a season. It dulls the color and, worse, partly blocks the pores the leaf breathes through.
Wipe them with a damp soft cloth, or hose the shrub off on a warm morning. The green that comes back is startling. Magnolias, rhododendrons, aucuba — anything with a big flat glossy leaf responds.
Skip the leaf-shine sprays sold for houseplants. Outdoors they attract more grime than they prevent, and plain water does the real work.
21. Shear a Third of Your Summer Perennials to Stagger the Bloom
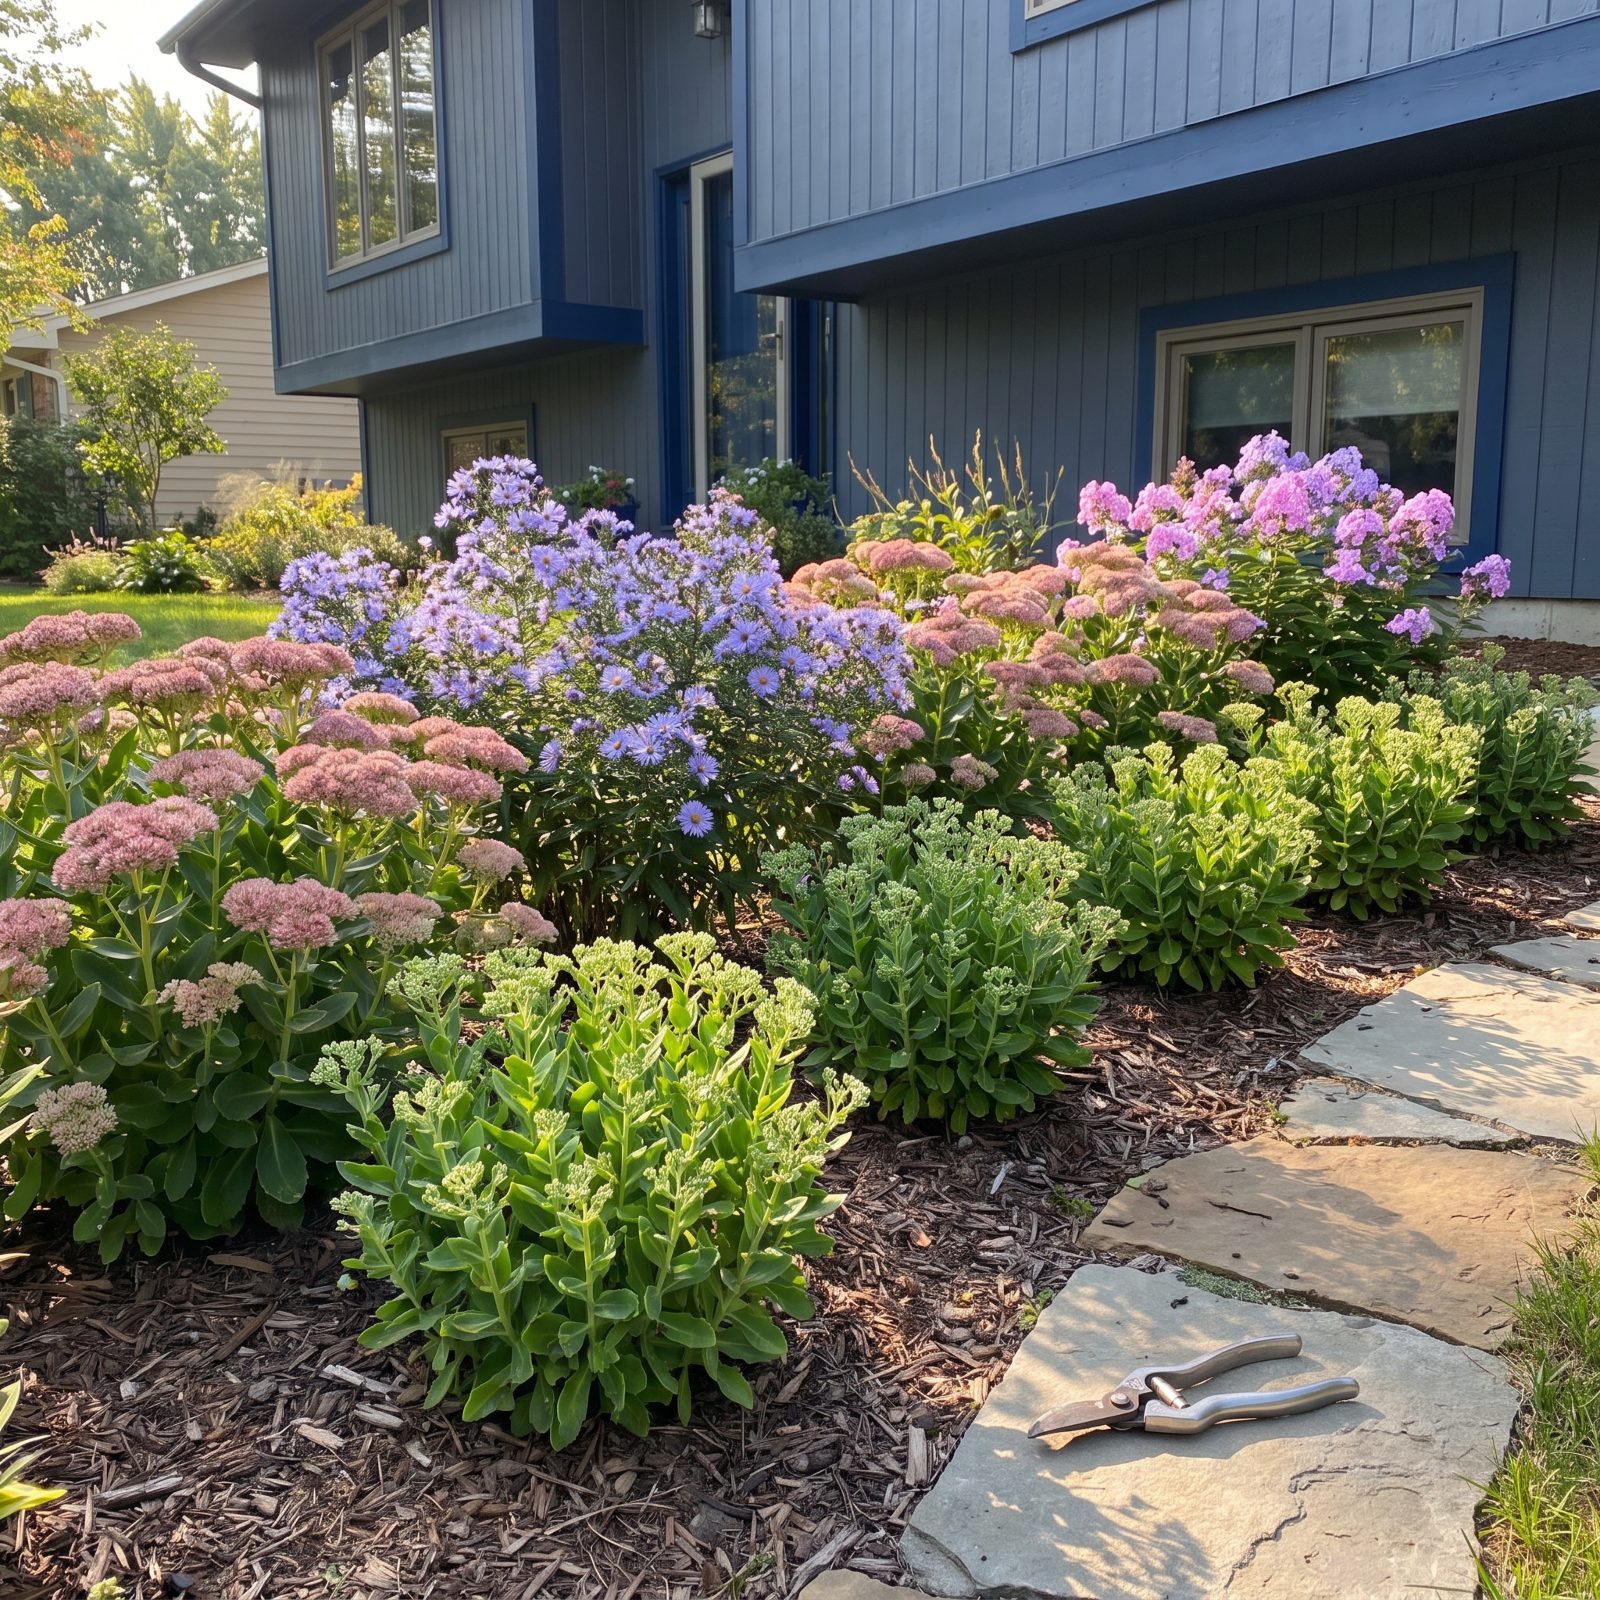
A border that blooms all at once blooms for about ten days, then sulks for a month.
Gardeners who stretch the show cut back roughly a third of their late-summer perennials by early summer, taking off a third of the height. Asters, phlox, sedum, bee balm — all take it well. The trimmed stems bloom later and shorter, so the same plant flowers in two waves and the bed never goes fully bare.
It feels wrong to shear a healthy plant that’s about to flower. Do it anyway. You’ll trade one quick party for weeks of color.
20. Lift the Lower Branches on Dense Shrubs to Show Off Their Shape
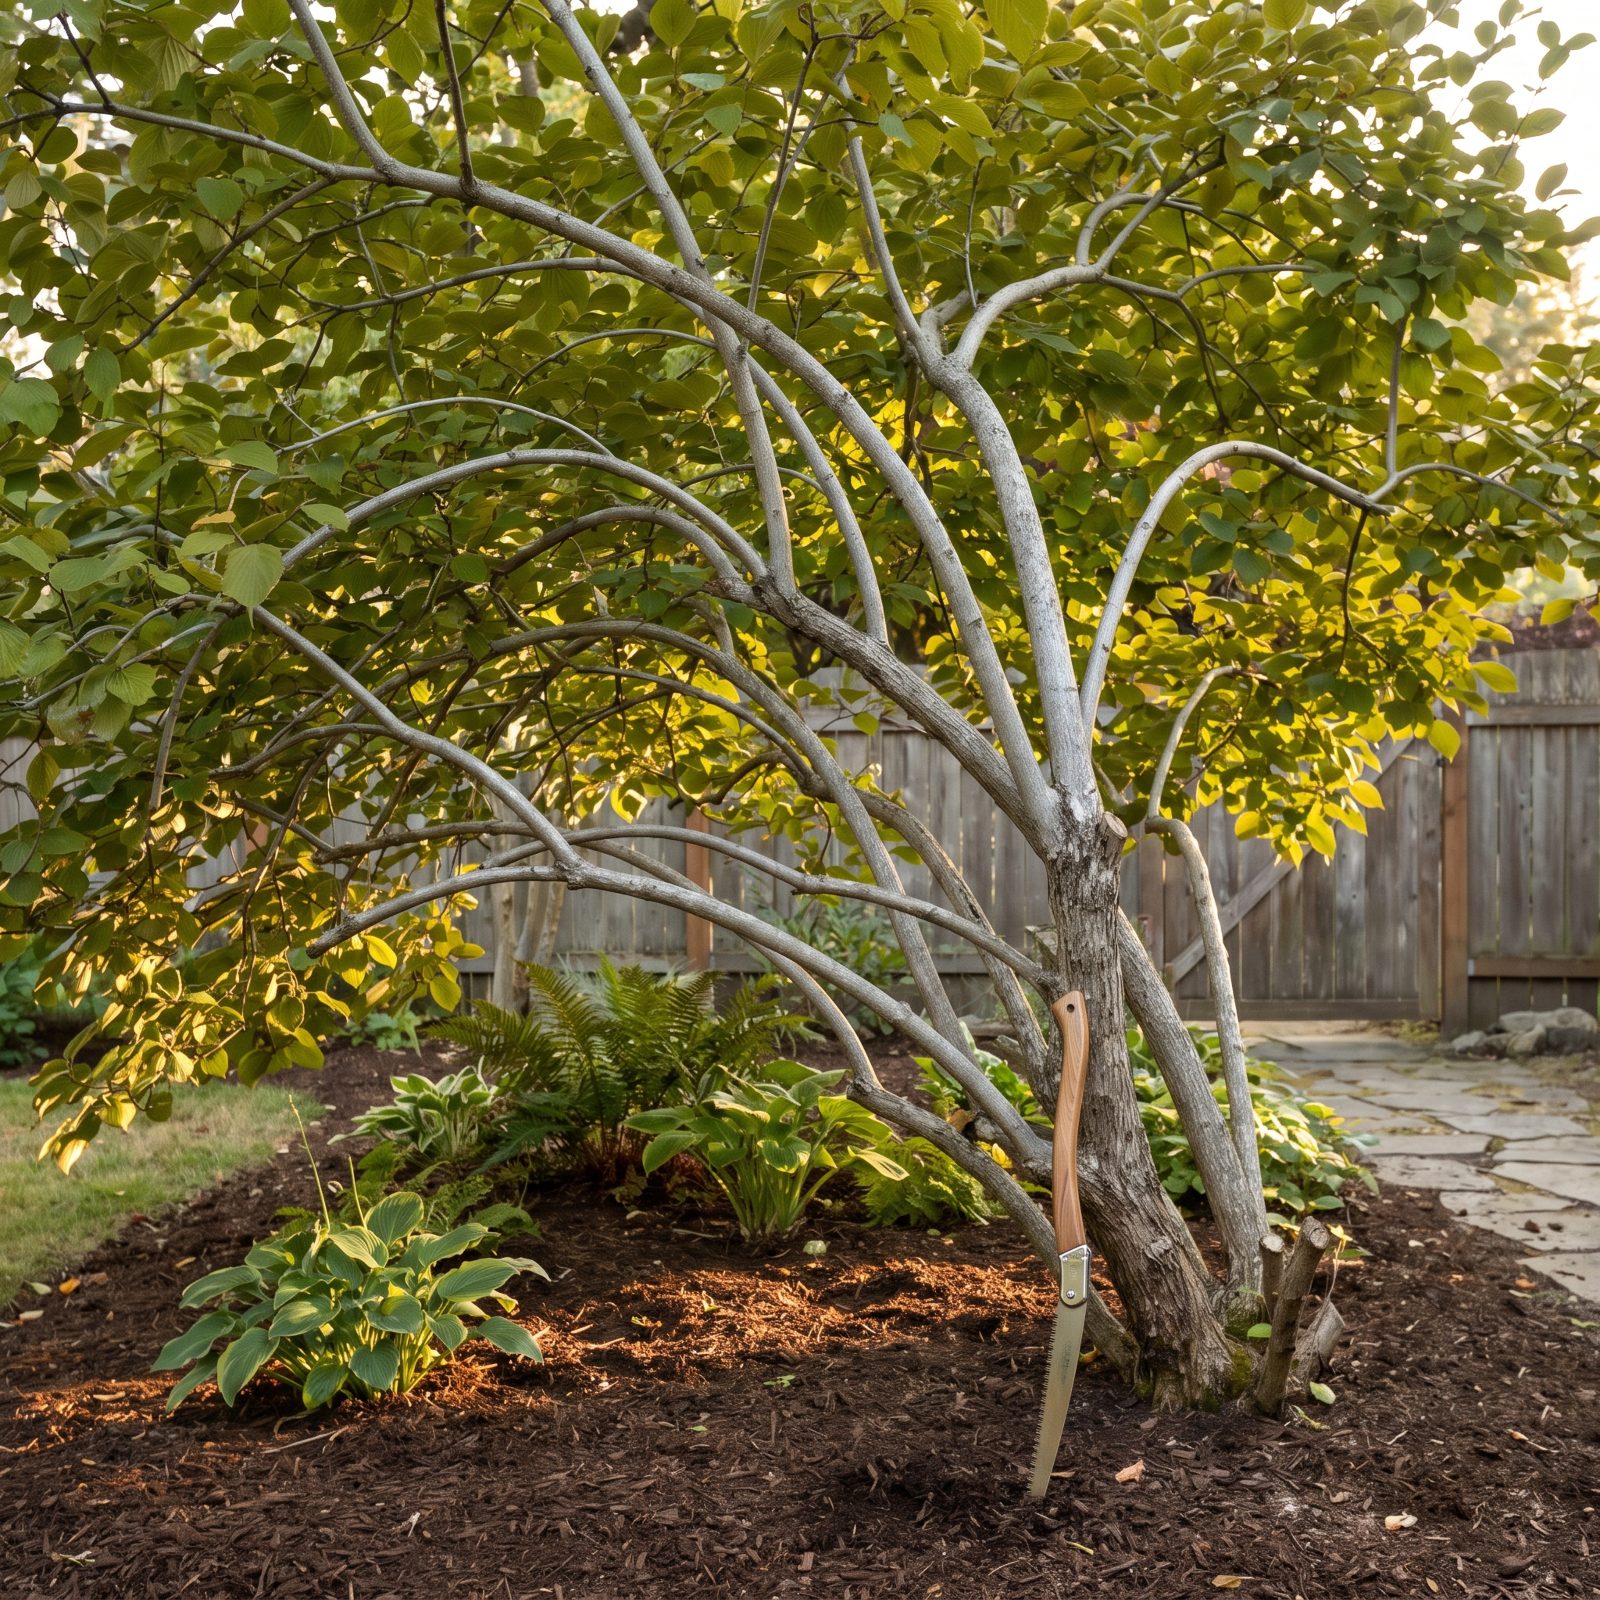
You know the shrub that’s become a solid green blob, swallowing the fence line and hiding its own trunk. Most people just keep shearing the top.
Try the opposite. Remove the lowest branches and expose the main stems underneath. Now you can see the arching structure the plant actually has, light reaches the ground, and there’s room for a few shade plants at the base.
This works beautifully on viburnum, lilac, large hydrangea, even an overgrown camellia. The technical name is limbing up. What it really does is turn a wall of leaves into something with bones.
19. Trim Groundcovers Off the Path Before They Eat It
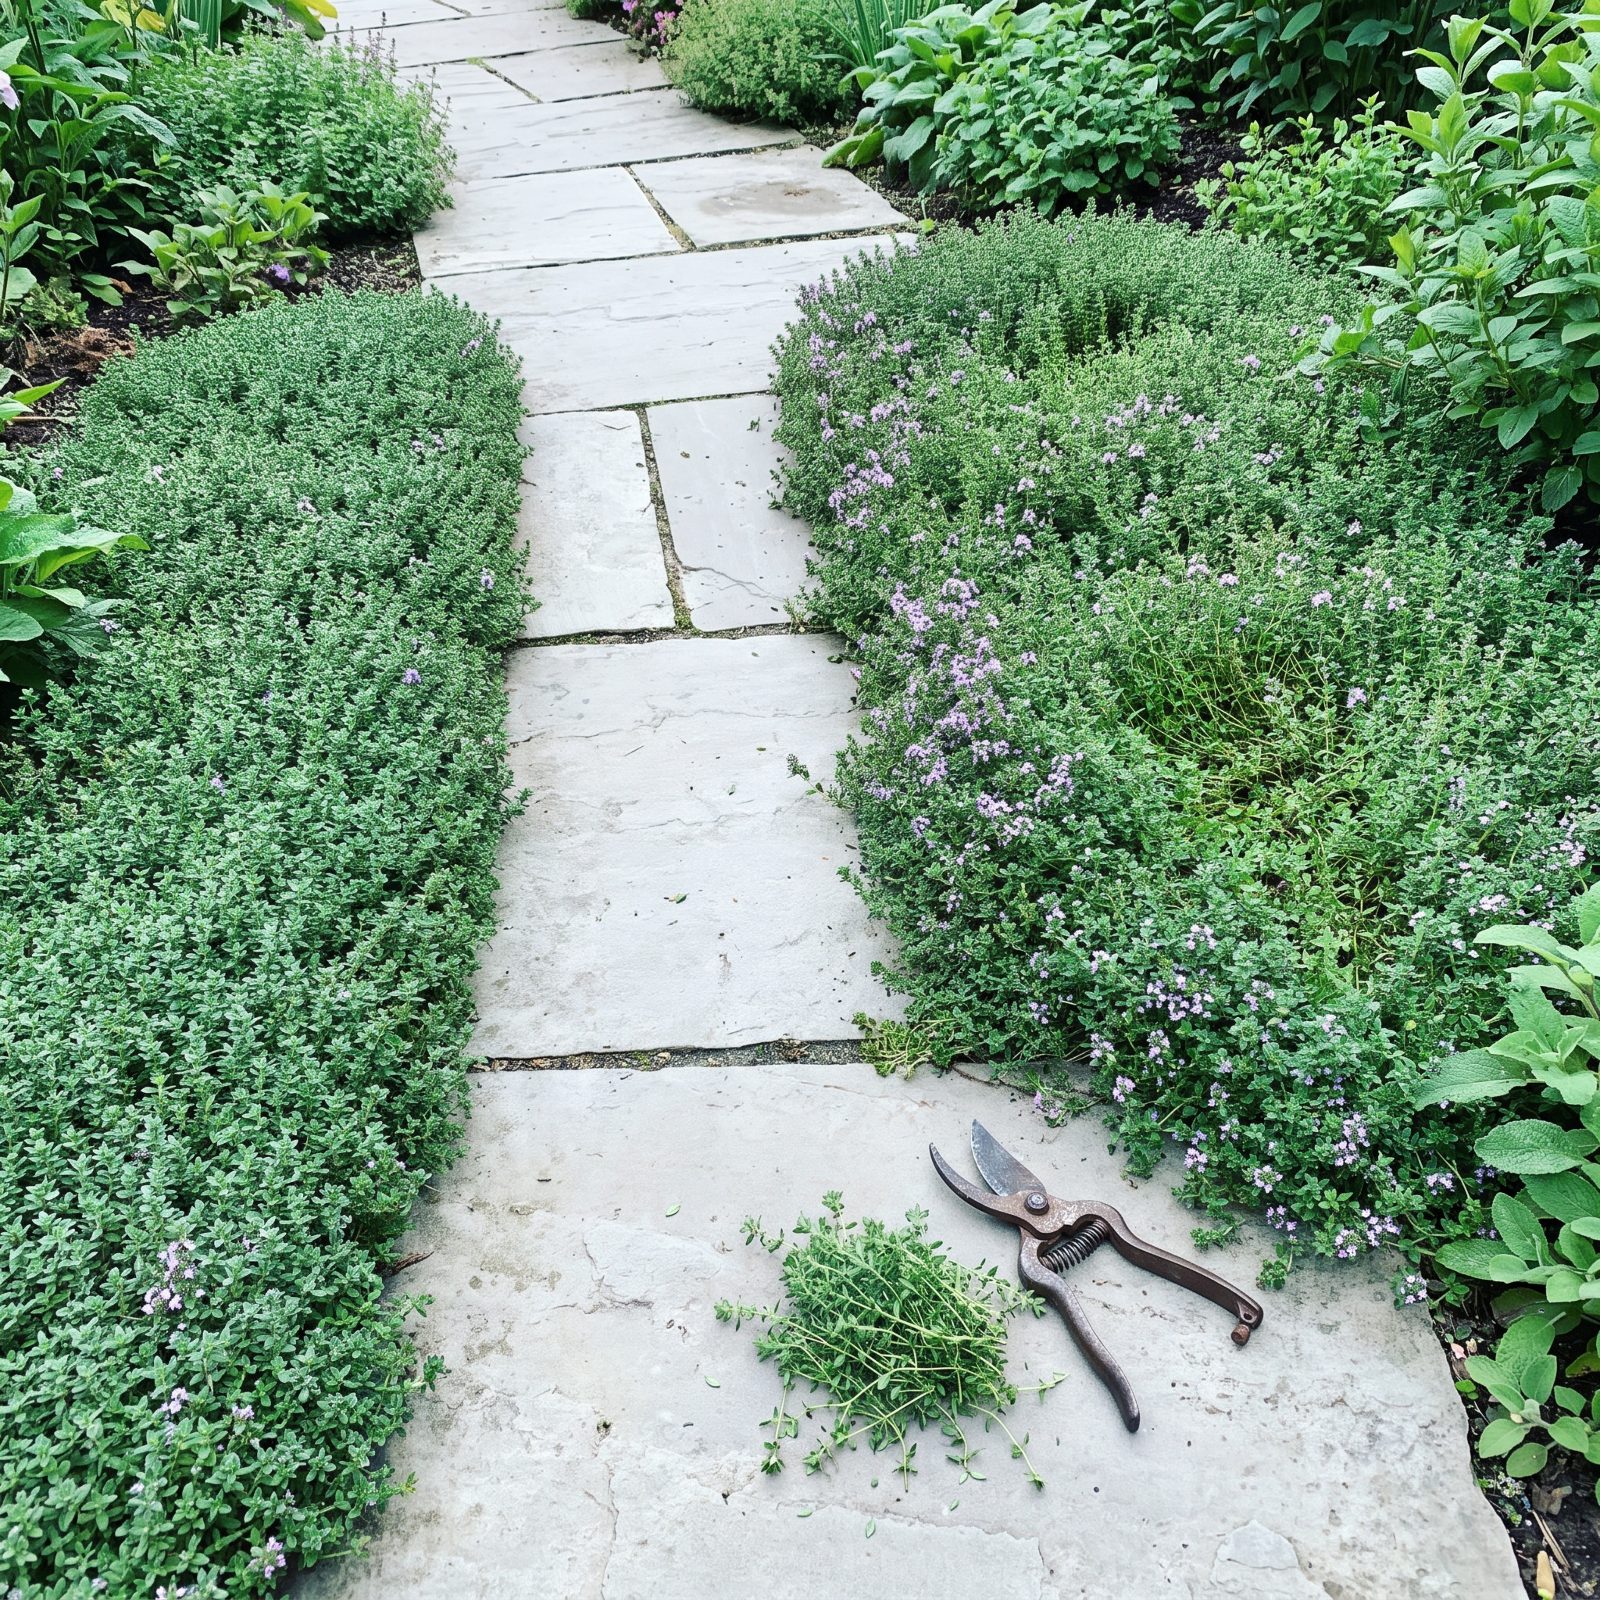
Creeping groundcovers are lovely for exactly one season before they decide the path belongs to them too.
A quick edge trim a few times through the growing season keeps a crisp line between planting and path, and that single clean line does more for a tidy look than almost anything else. The eye reads order from edges. Blur the edge and the whole bed looks neglected even when it isn’t.
Thyme, vinca, ajuga, sedum — all of them march outward fast. Cut them back to the stone before the path narrows to a goat track.
18. Plant One Big Specimen Where a Cluster of Little Ones Would Look Busy
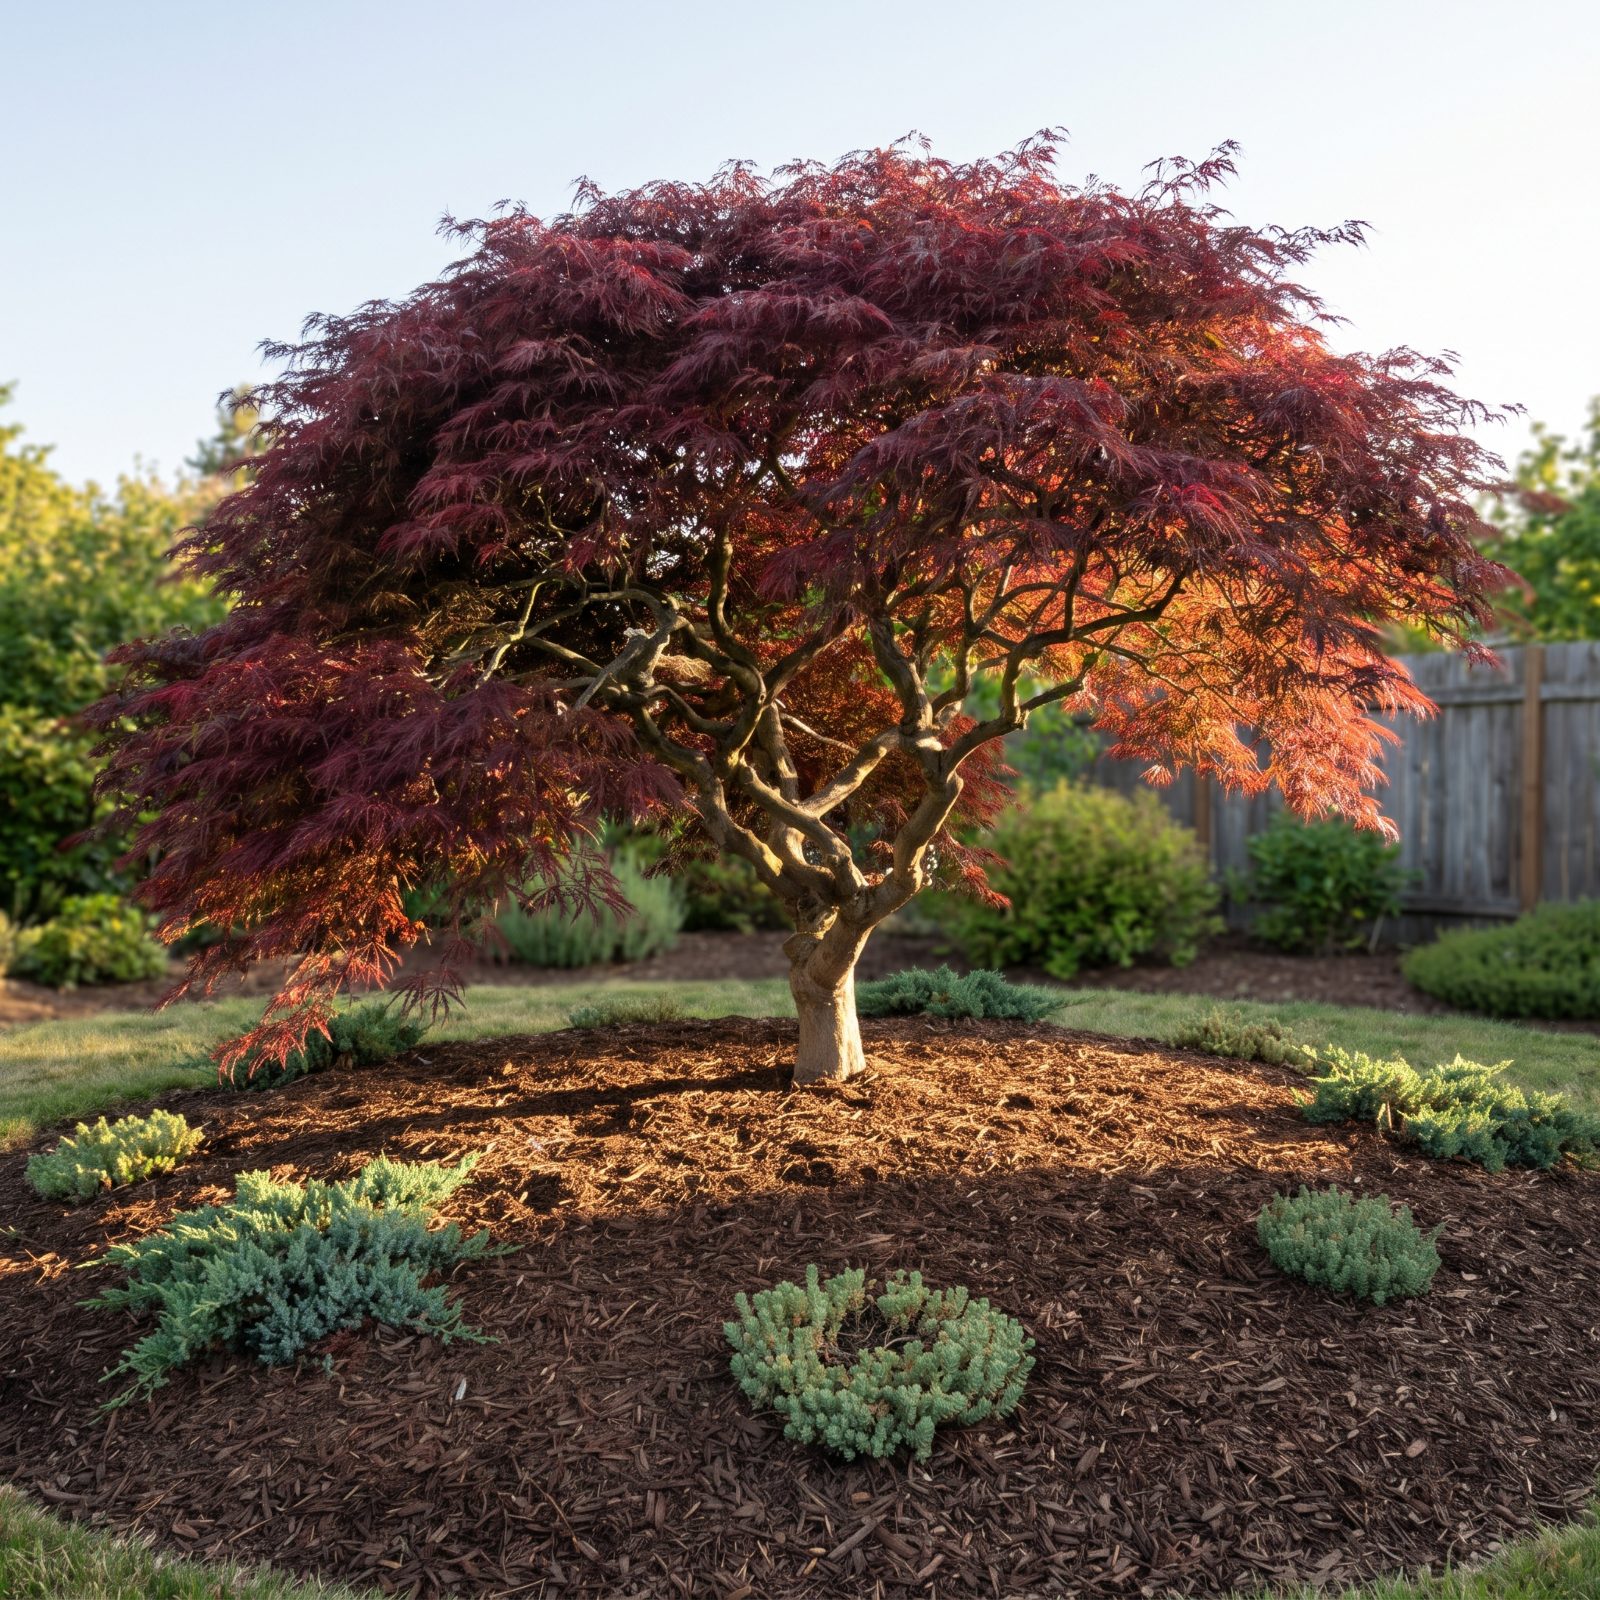
The common instinct is to fill a bare corner with five small plants. Usually it looks fussy and anxious, like a shelf crowded with knickknacks.
One oversized plant does the job better — a mature hosta, a tall grass, a specimen maple, something with real presence. It gives the eye a single confident place to land and makes the space around it feel intentional rather than crammed.
Yes, one big plant often costs more than a flat of small ones. But you buy it once, it reads as a decision, and you spend the next five years not fiddling with the corner.
17. Repeat One Standout Plant in Three Spots to Tie the Yard Together
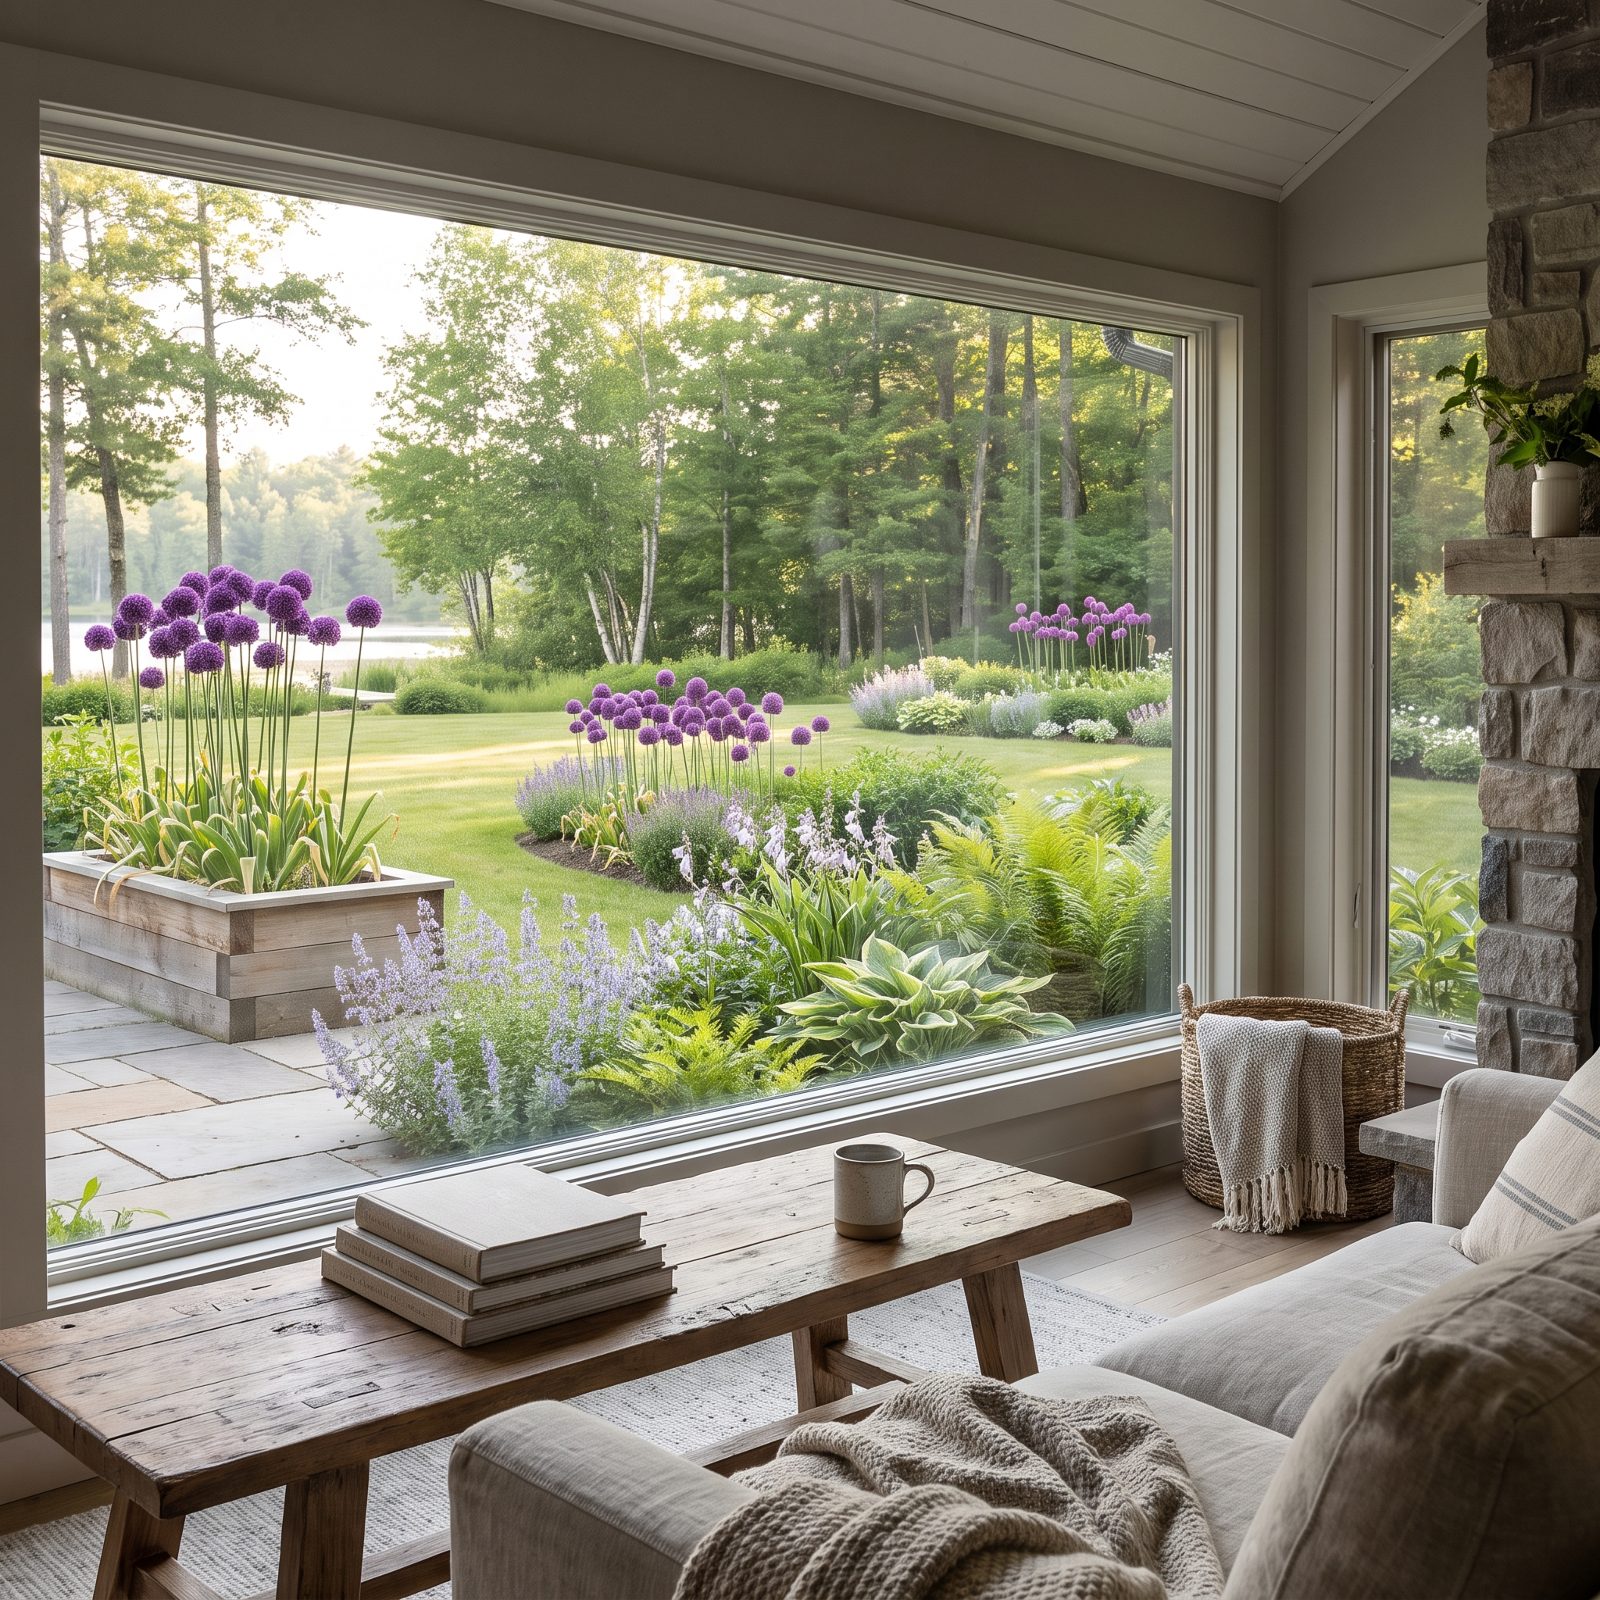
Here’s the designer trick that makes a jumbled yard feel composed, and it costs almost nothing: pick one distinctive plant and repeat it in three separated spots.
Three purple alliums. Three clumps of the same silver grass. Three identical pots of boxwood. Scattered across the space, that repeated note pulls your eye from one side of the yard to the other and makes everything between feel connected.
One plant said once is an accident. Said three times, it becomes the thread holding the whole garden together.
Odd numbers matter. Three and five rest easy on the eye; pairs look staged. For most yards, three is plenty.
16. Drop in Dark Foliage So Your Pastels Stop Looking Faded
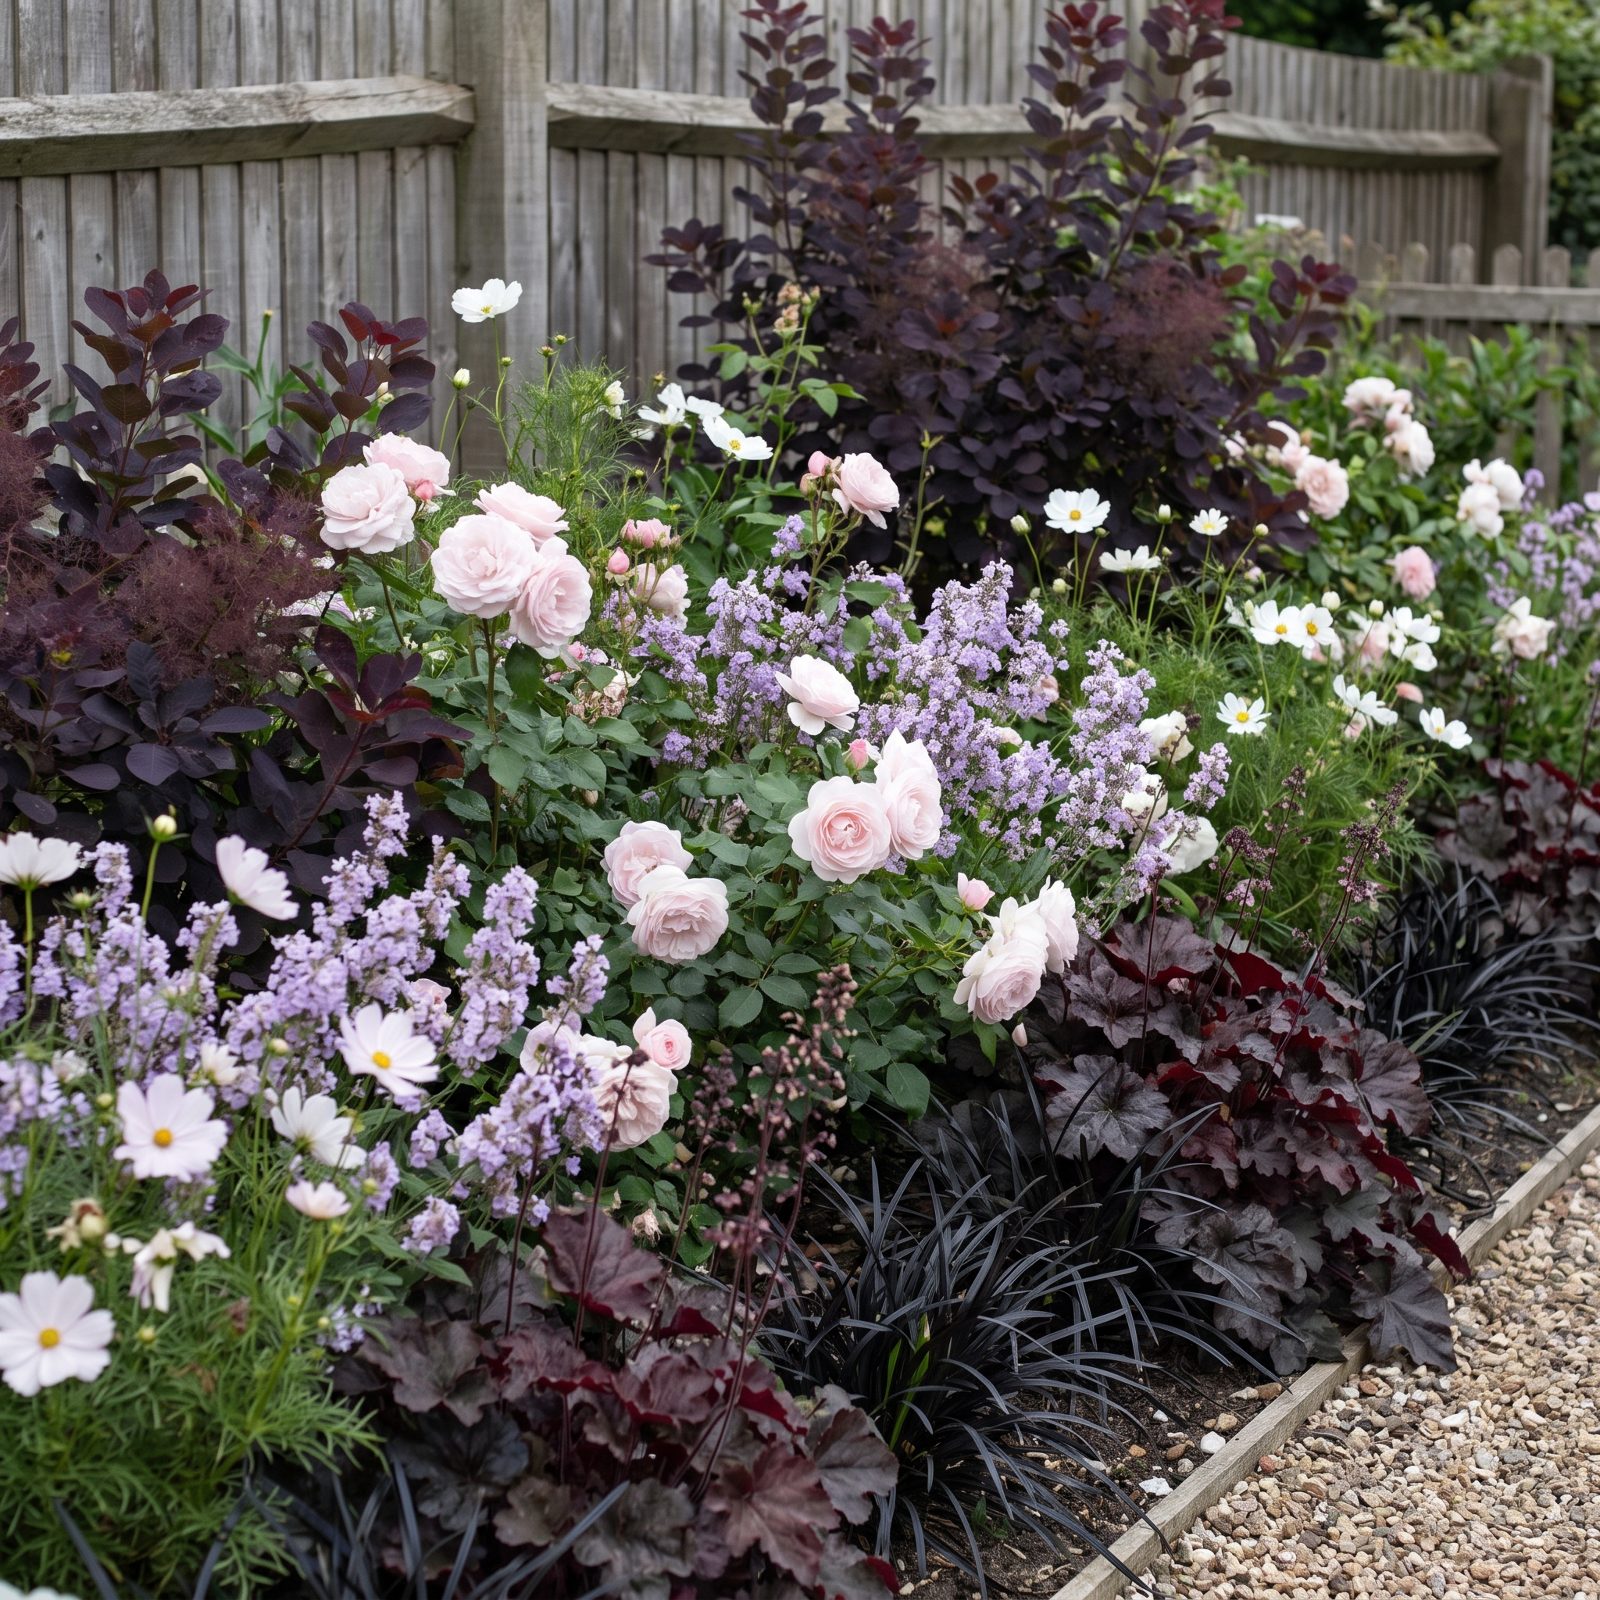
Pastel plantings have a weakness. Put pale pink, soft lavender, and cream together and from a distance the whole bed goes hazy and washed-out, like a photo left too long in the sun.
The fix isn’t more color. It’s less. Tuck in dark foliage — deep burgundy heuchera, black mondo grass, a purple-leaved smoke bush — and the pastels snap back into focus. The dark leaves give the eye a floor to measure against, and suddenly the pale flowers read as pale on purpose.
15. Put the White Flowers at the Far End to Pull the Eye Through the Yard
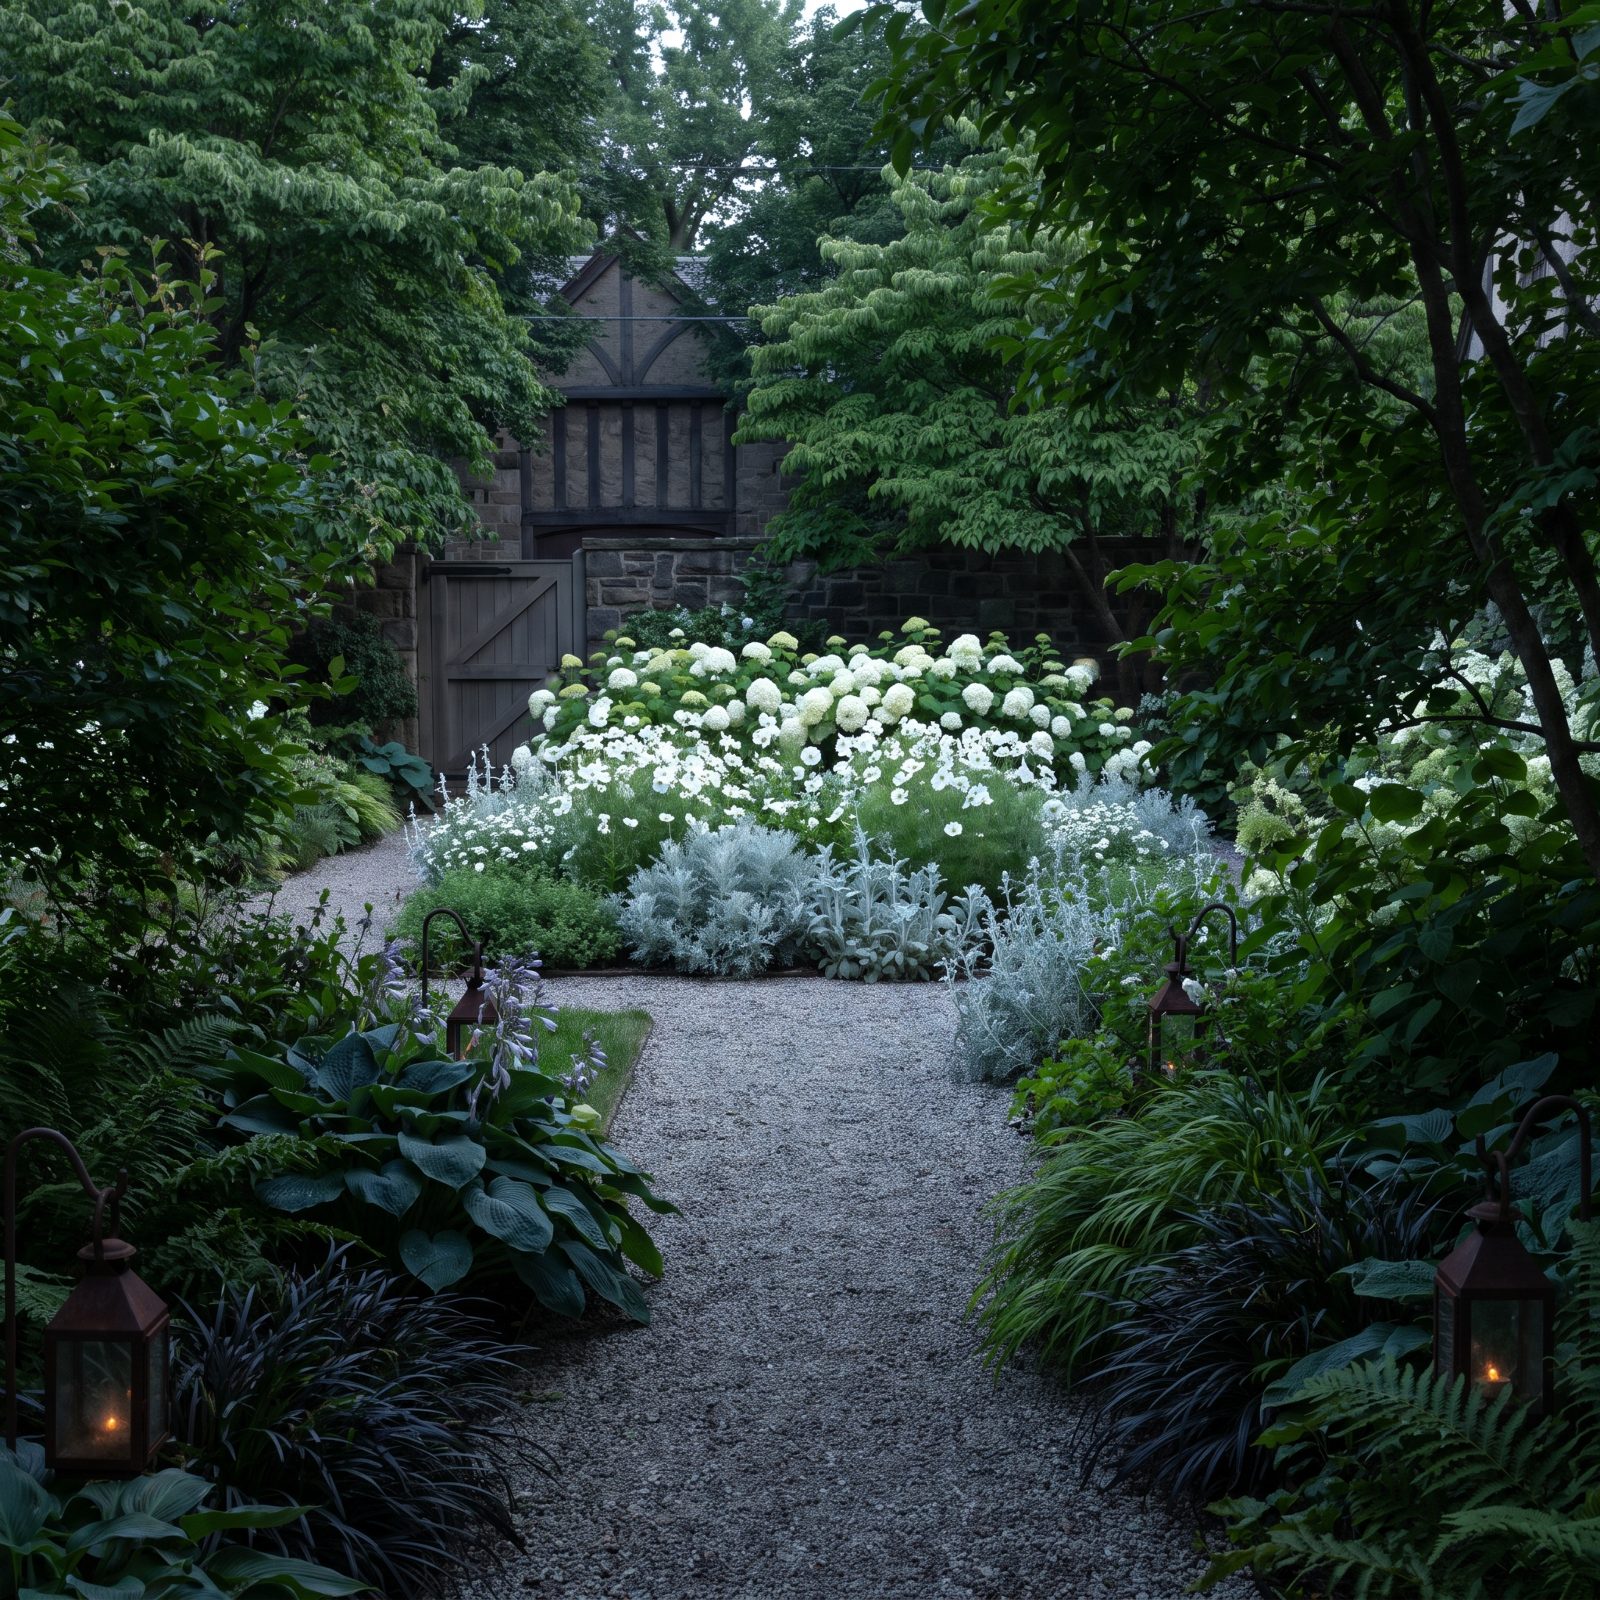
White flowers do something no other color manages. They hold light after everything else has gone flat, especially at dusk — which, let’s be honest, is when most of us are finally out in the garden at all.
Plant them at the far end and they pull your gaze all the way down, making a small space feel deeper and a long one feel like it has a destination. White hydrangea, cosmos, nicotiana, anything pale set against dark distant green.
Reverse it and white up close just blares at you while the far end disappears. Send the brightness to the back. Let the eye travel to reach it.
14. Plant Chartreuse Foliage Where Dark Corners Need Definition
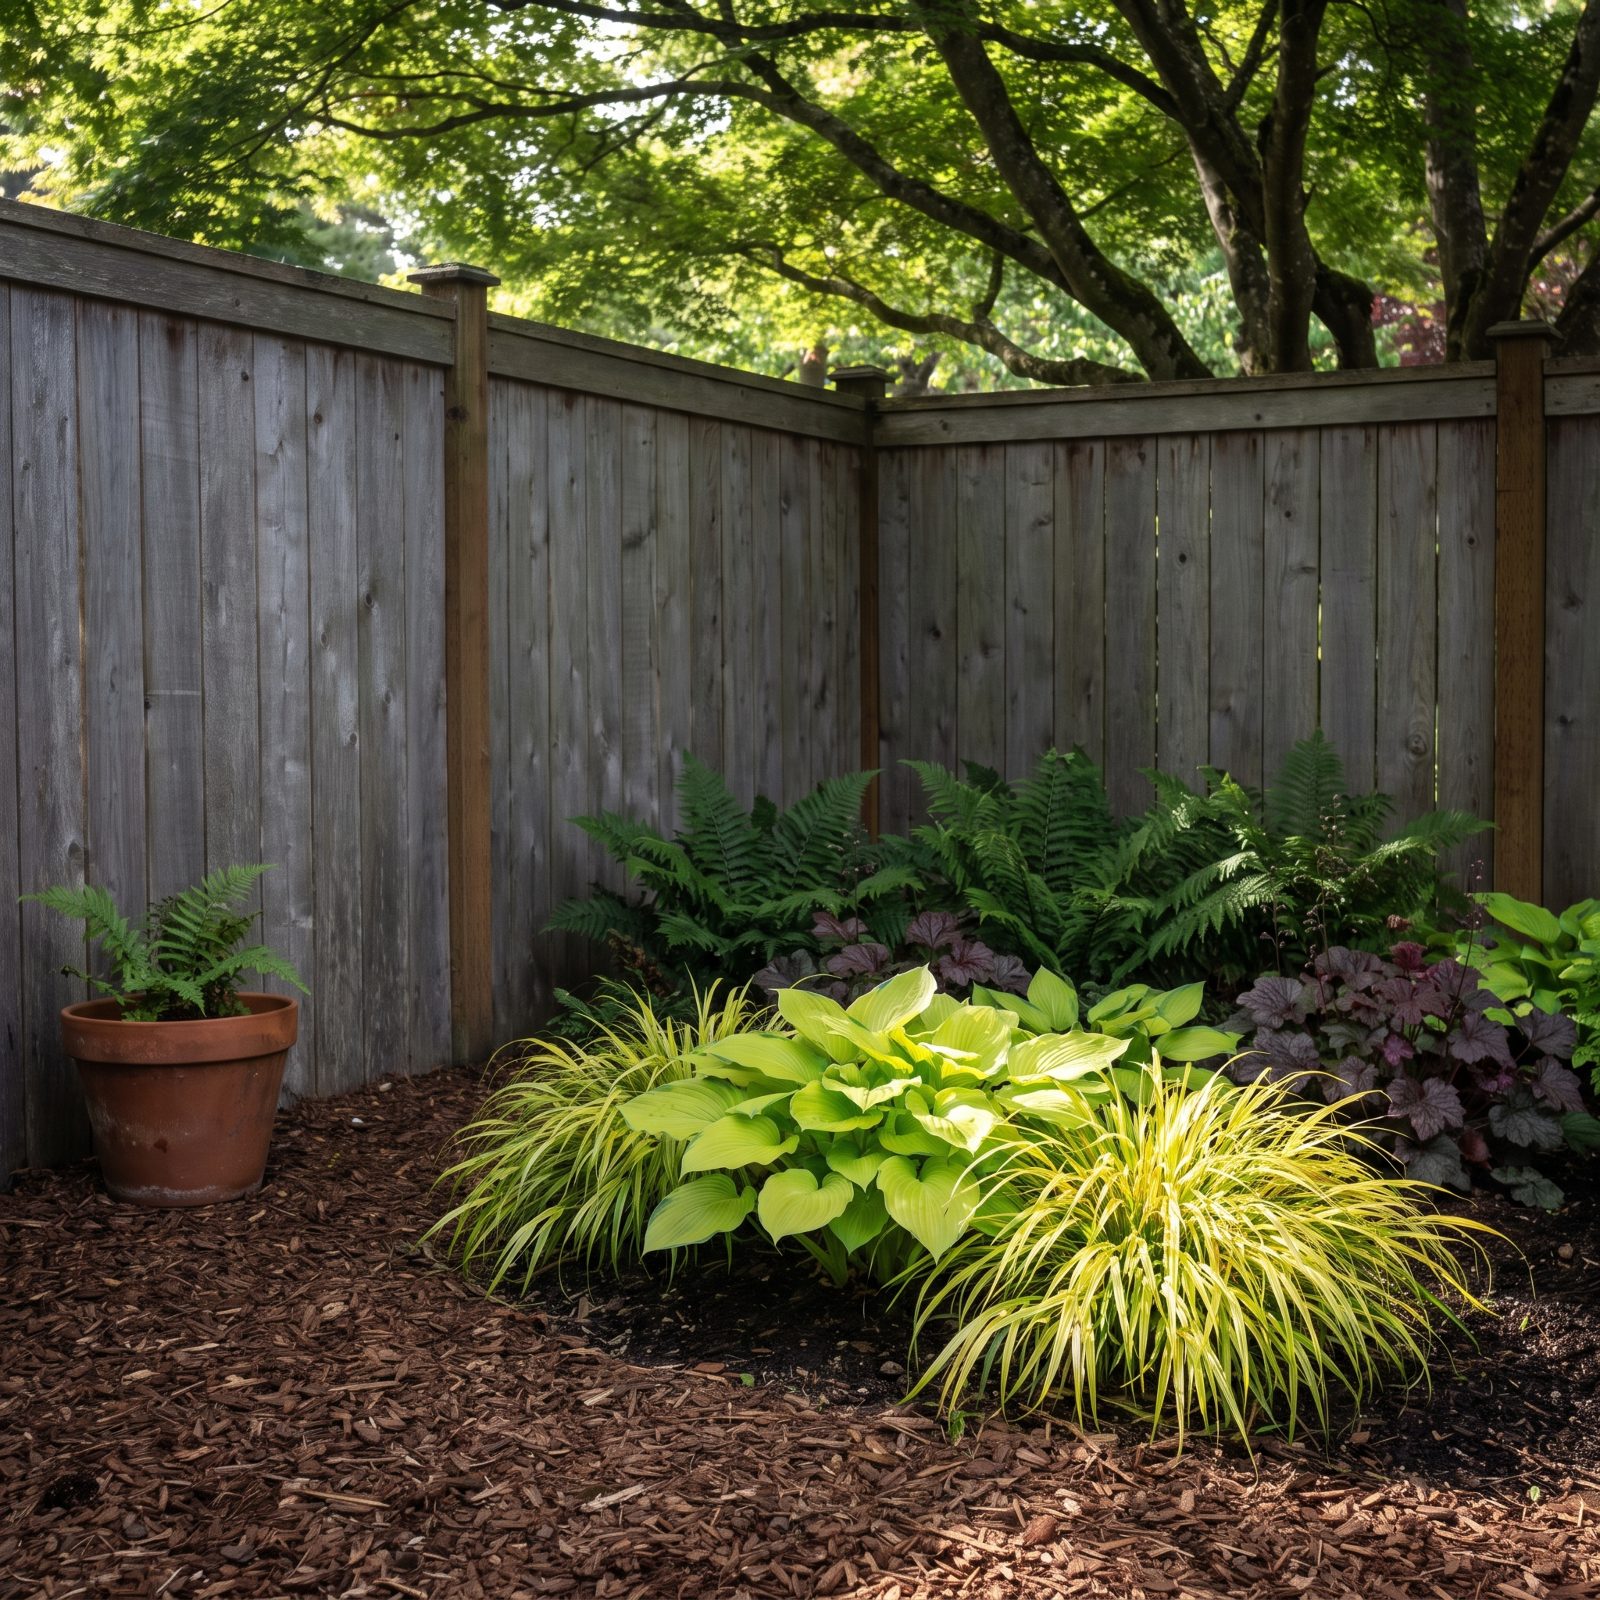
Dark corners swallow light, but a chartreuse plant throws it back. Those acid-green and gold leaves read almost luminous against deep shade, so a spot that used to disappear suddenly has a center of gravity.
Gold Japanese forest grass, ‘Sun Power’ hosta, golden creeping Jenny — they work because the color does what no amount of flowers can manage in shade. Flowers come and go. The foliage glows all season.
13. Leave Open Mulched Space Around Specimen Plants to Show Their Shape
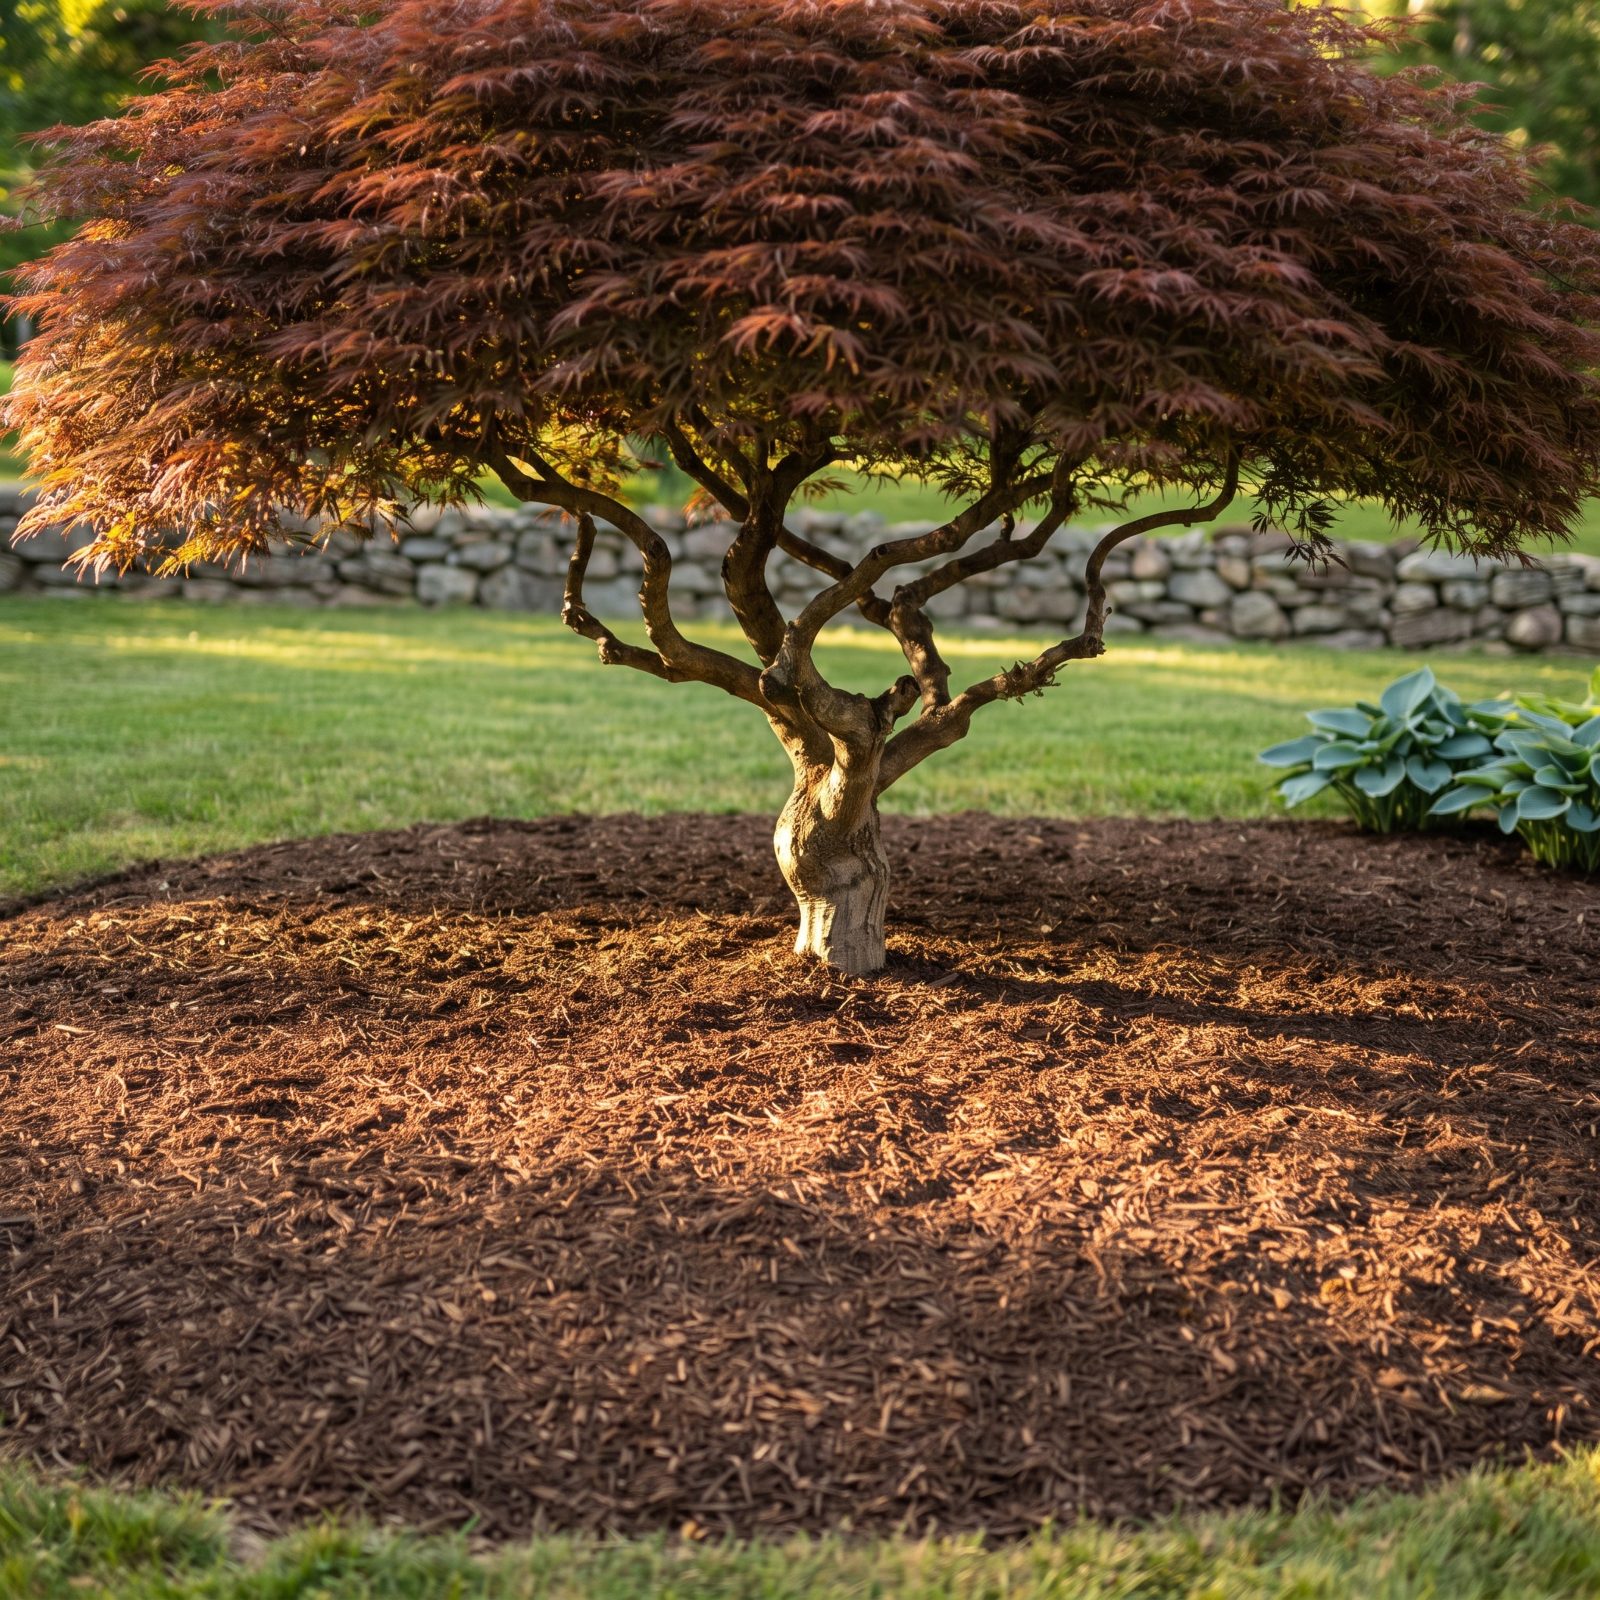
The instinct is to fill every gap. Fight it. A specimen plant — a sculptural Japanese maple, a weeping conifer, a mature peony — needs breathing room to be seen as a form rather than one green thing in a wall of green things.
Give it a clean apron of mulch and the shape does the talking. Crowd it and you’ve spent money on a plant nobody can actually see.
12. Align a Focal Plant With the Main Gate or Front Walk
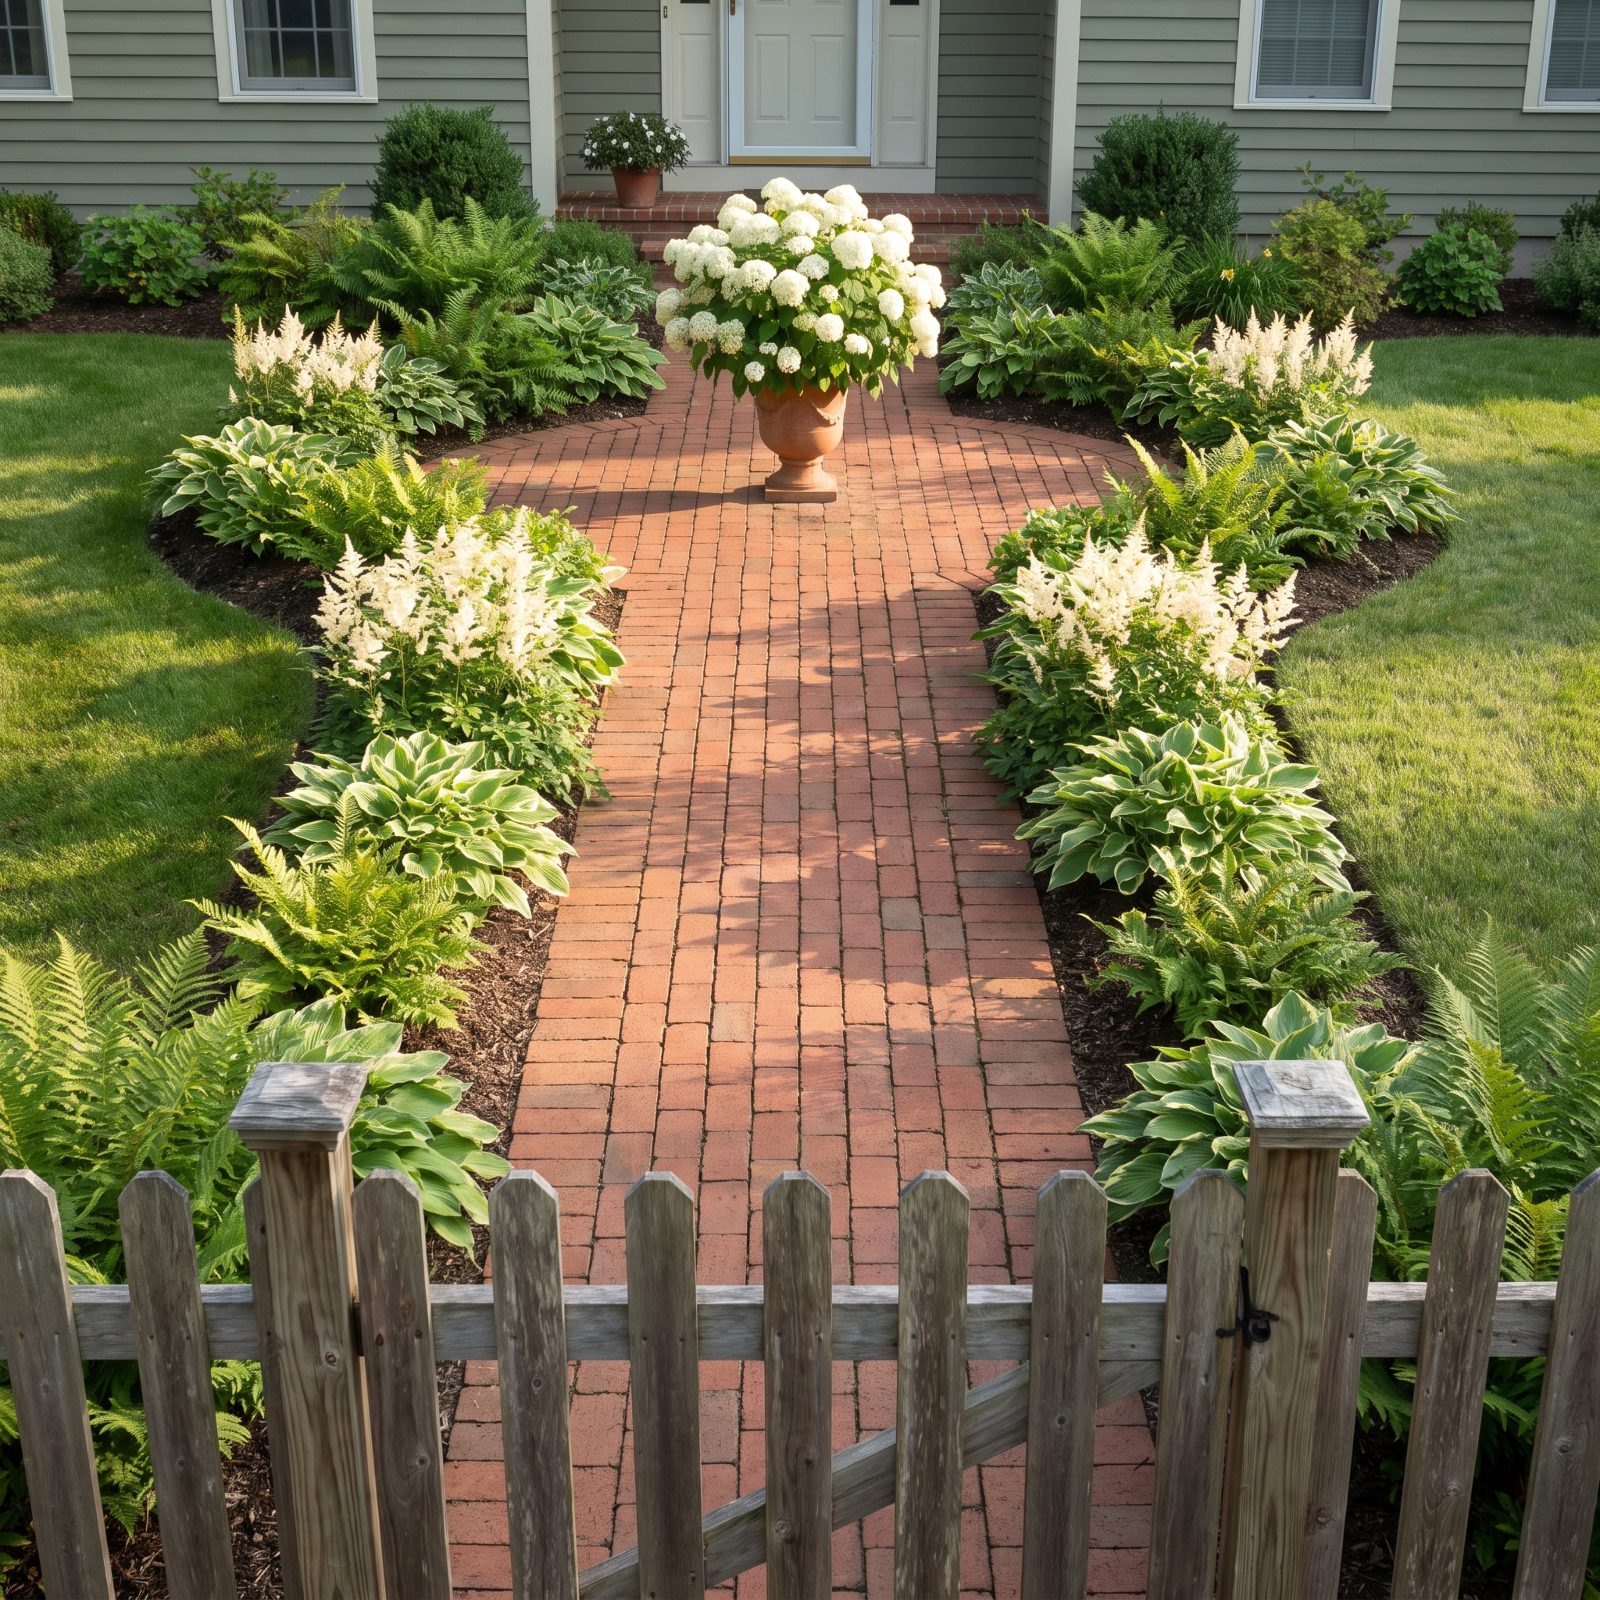
Walk out your front gate and follow your own eyes. Wherever they land is a decision point most people never make on purpose.
Experienced gardeners put something deliberate at the end of that sightline — a clipped boxwood, an urn, a hydrangea at its summer peak. The alignment gives the whole front garden a sense of intent, as if the space was planned rather than accumulated over a dozen impulse buys from the garden center. And it costs nothing but a tape measure and the willingness to shift one plant two feet to the left.
11. Taper Mulch Thinner Near Paths for a Cleaner Finished Edge
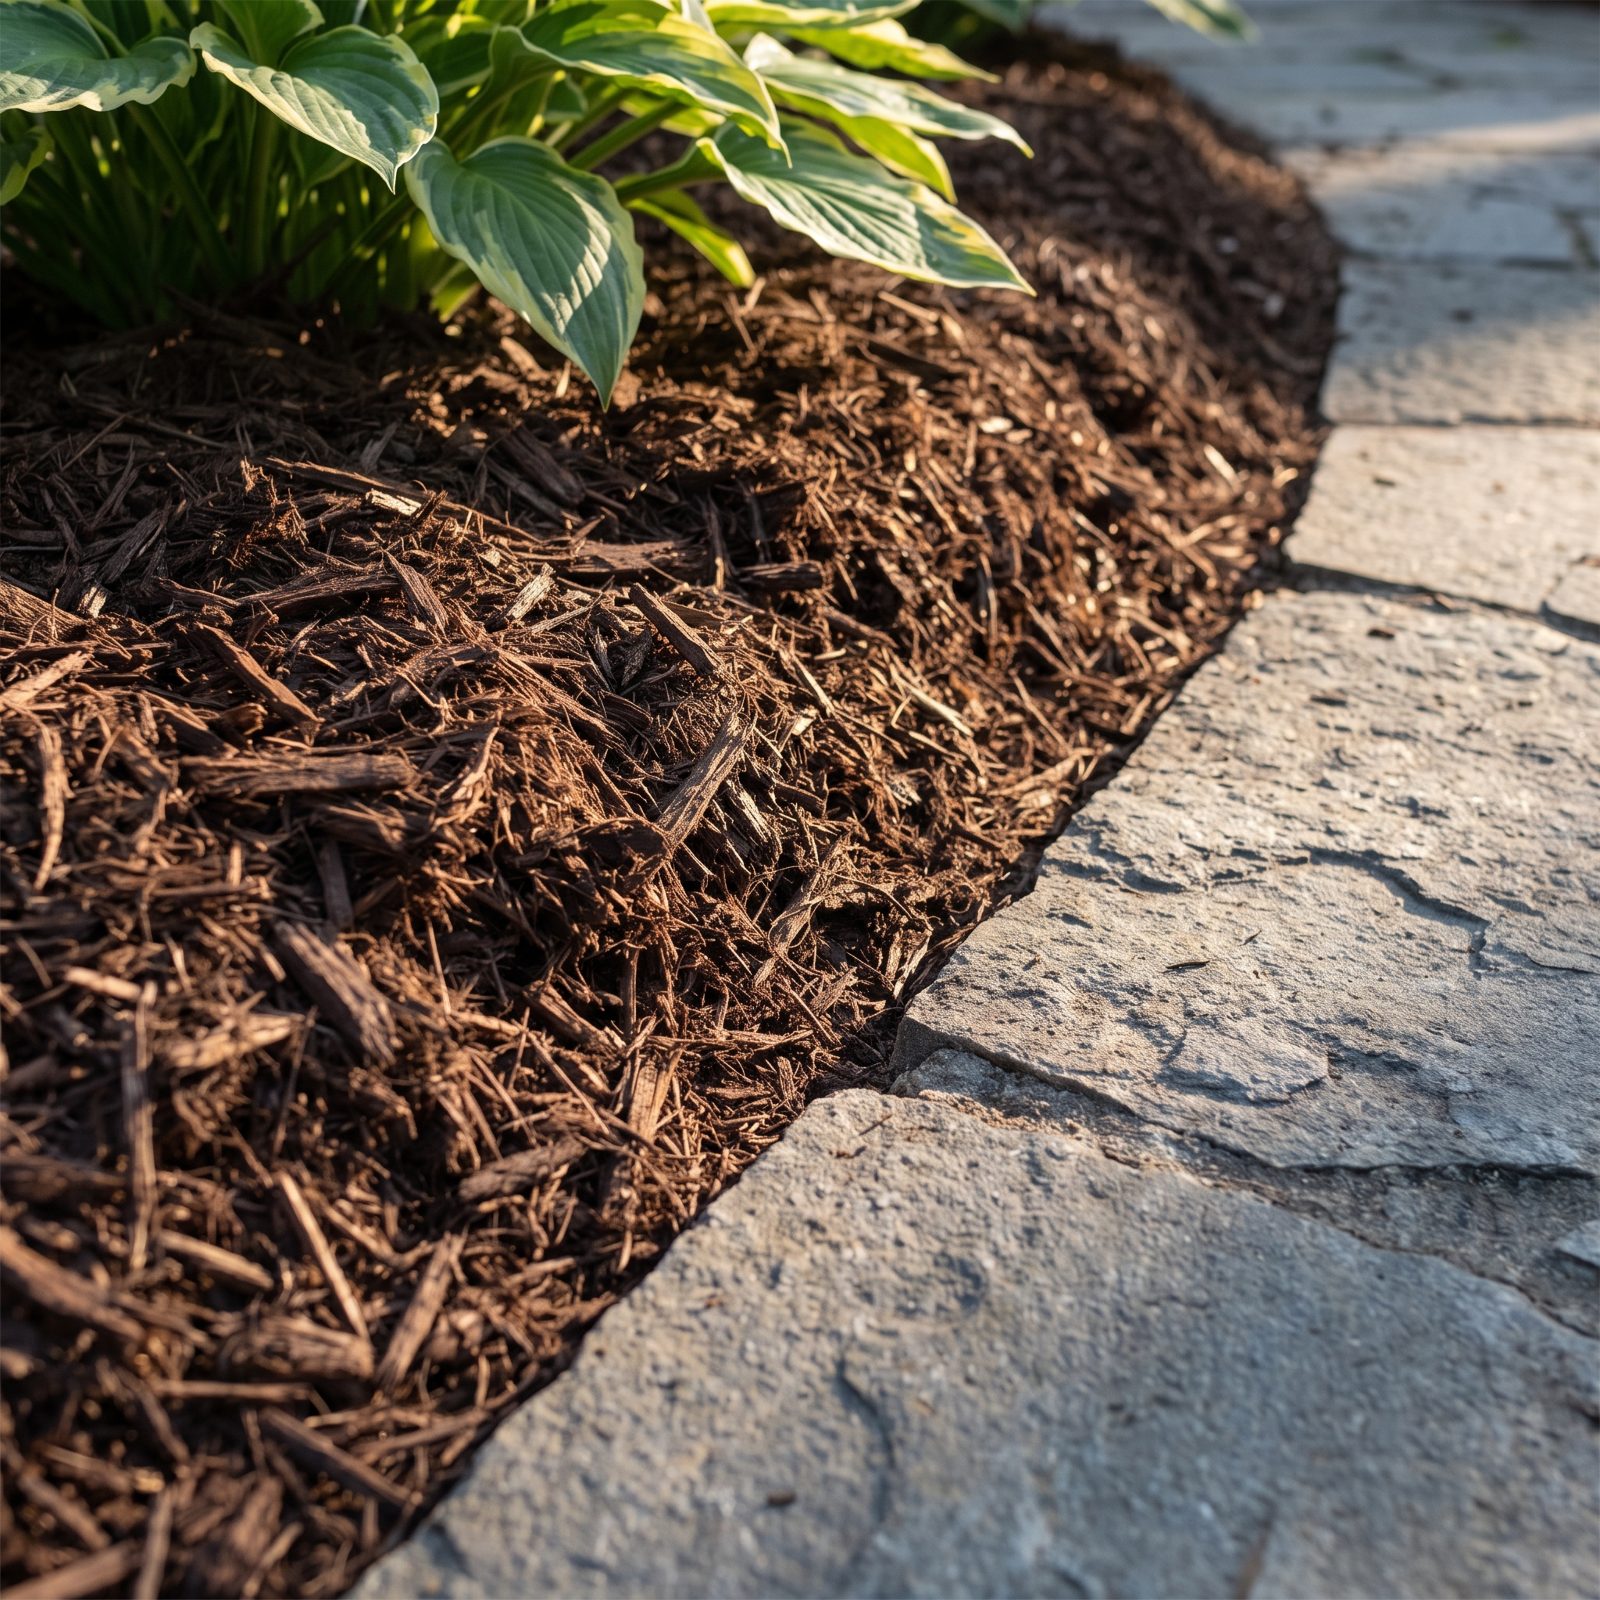
Mulch piled thick right up to a path with nothing holding it back looks like a landslide waiting to happen. Every rain washes some onto the stone and you’re sweeping it back forever.
So taper it instead — keep it deep around the plants, then let it slope down gradually until it meets the path nearly flush, with just a thin seam at the stone. The edge reads clean instead of shaggy, and far less migrates onto the walkway.
10. Use Shredded Leaves as a Fine-Textured Mulch in Informal Beds
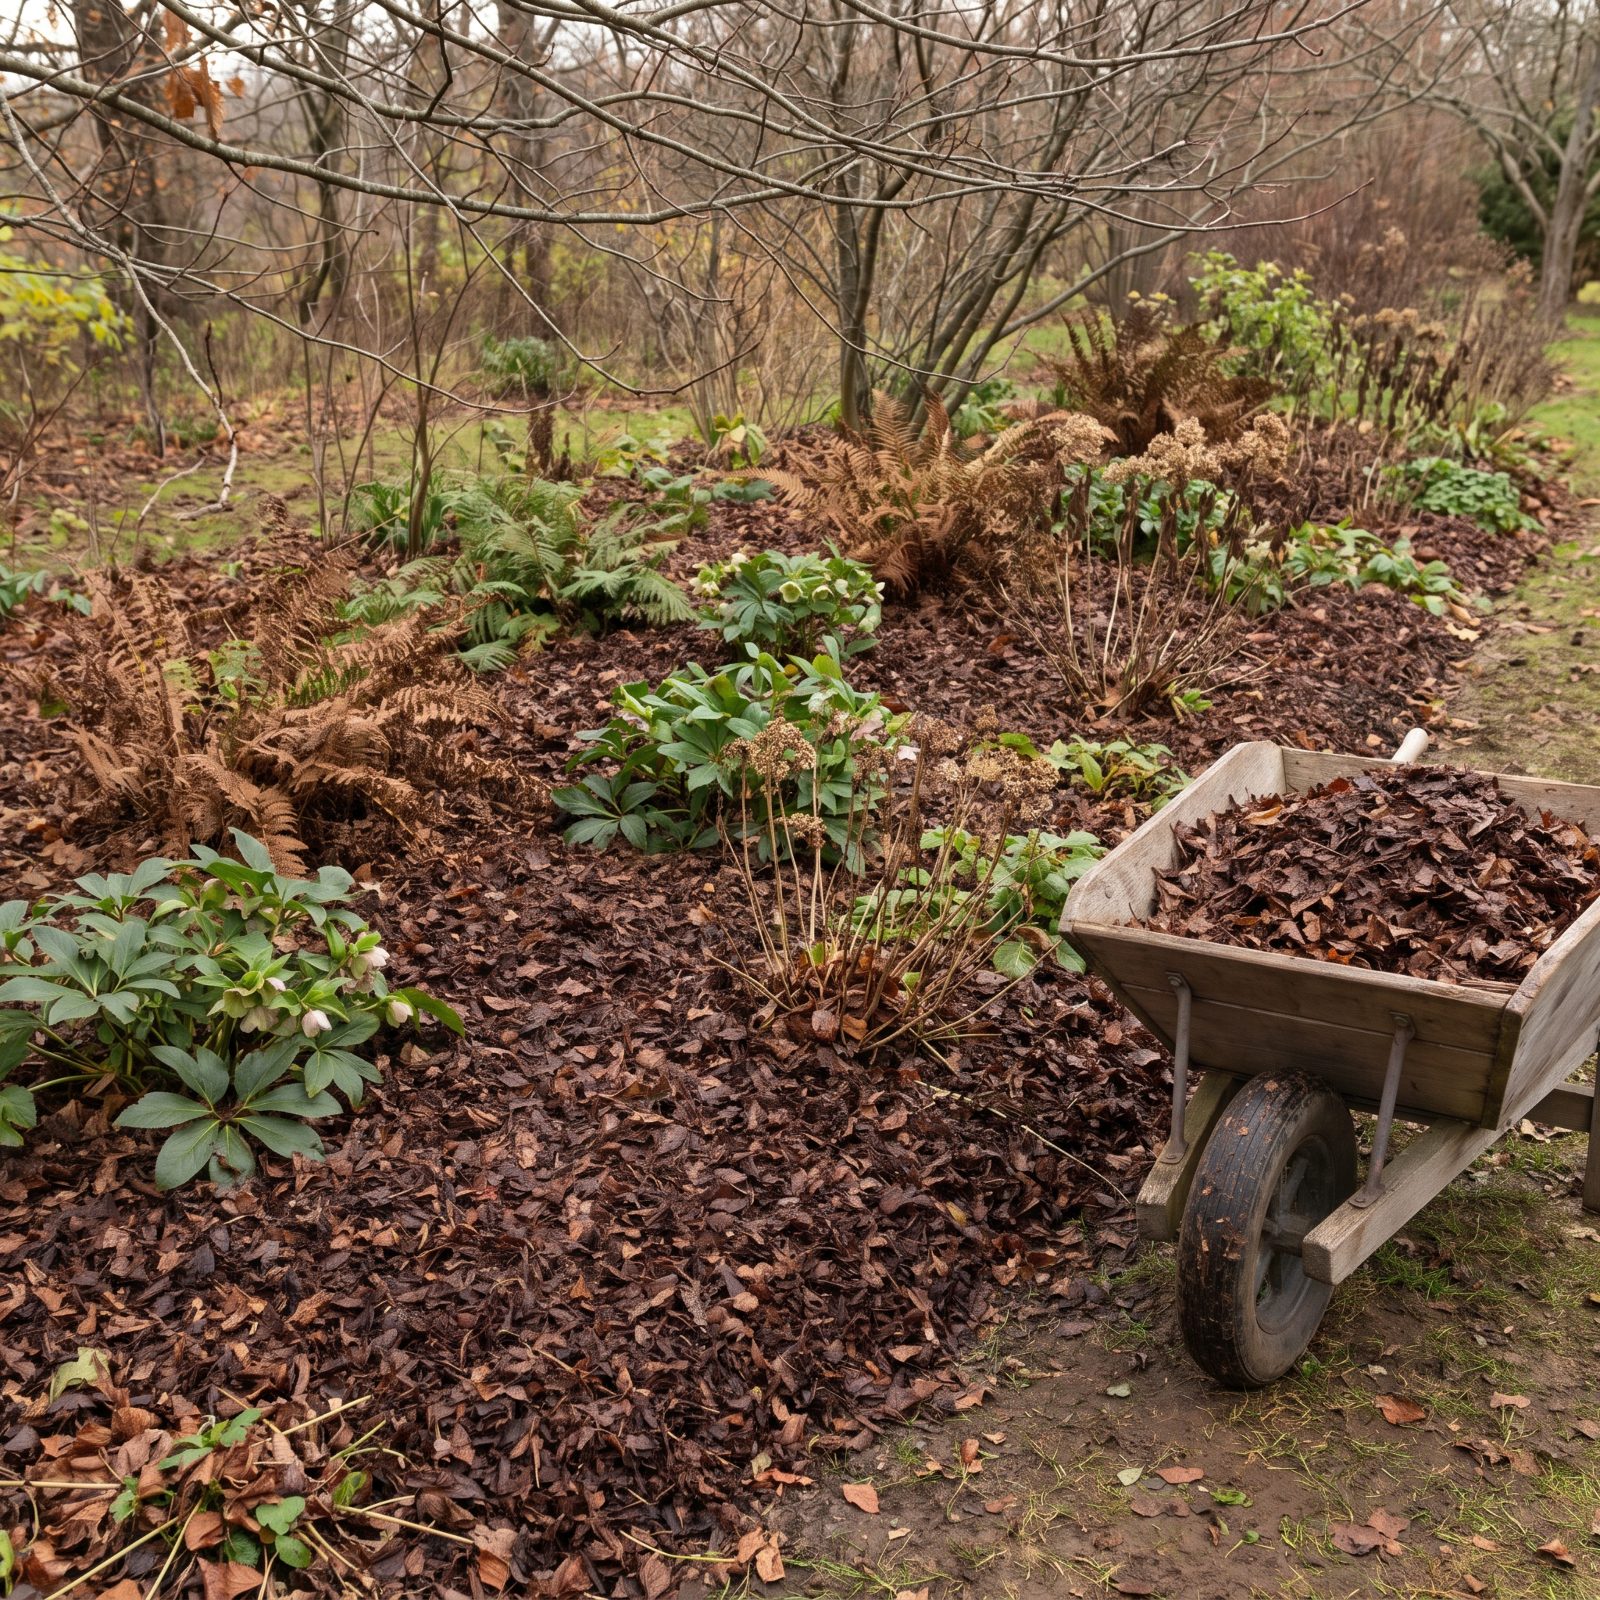
Bagged bark mulch is fine. But in a relaxed, naturalistic bed it can look weirdly manufactured — too uniform, too orange. Shredded leaves look like the forest floor because that’s exactly what they are.
Run the mower over a pile of fall leaves until they’re confetti, then spread them. Fine texture, soft color, and they feed the soil as they break down. The worms will do work you’d otherwise pay for.
One catch: don’t lay whole leaves. They mat into a wet shingle that sheds water and smothers crowns. Shred first.
9. Mow Fallen Leaves Into the Lawn Instead of Raking Every One Away
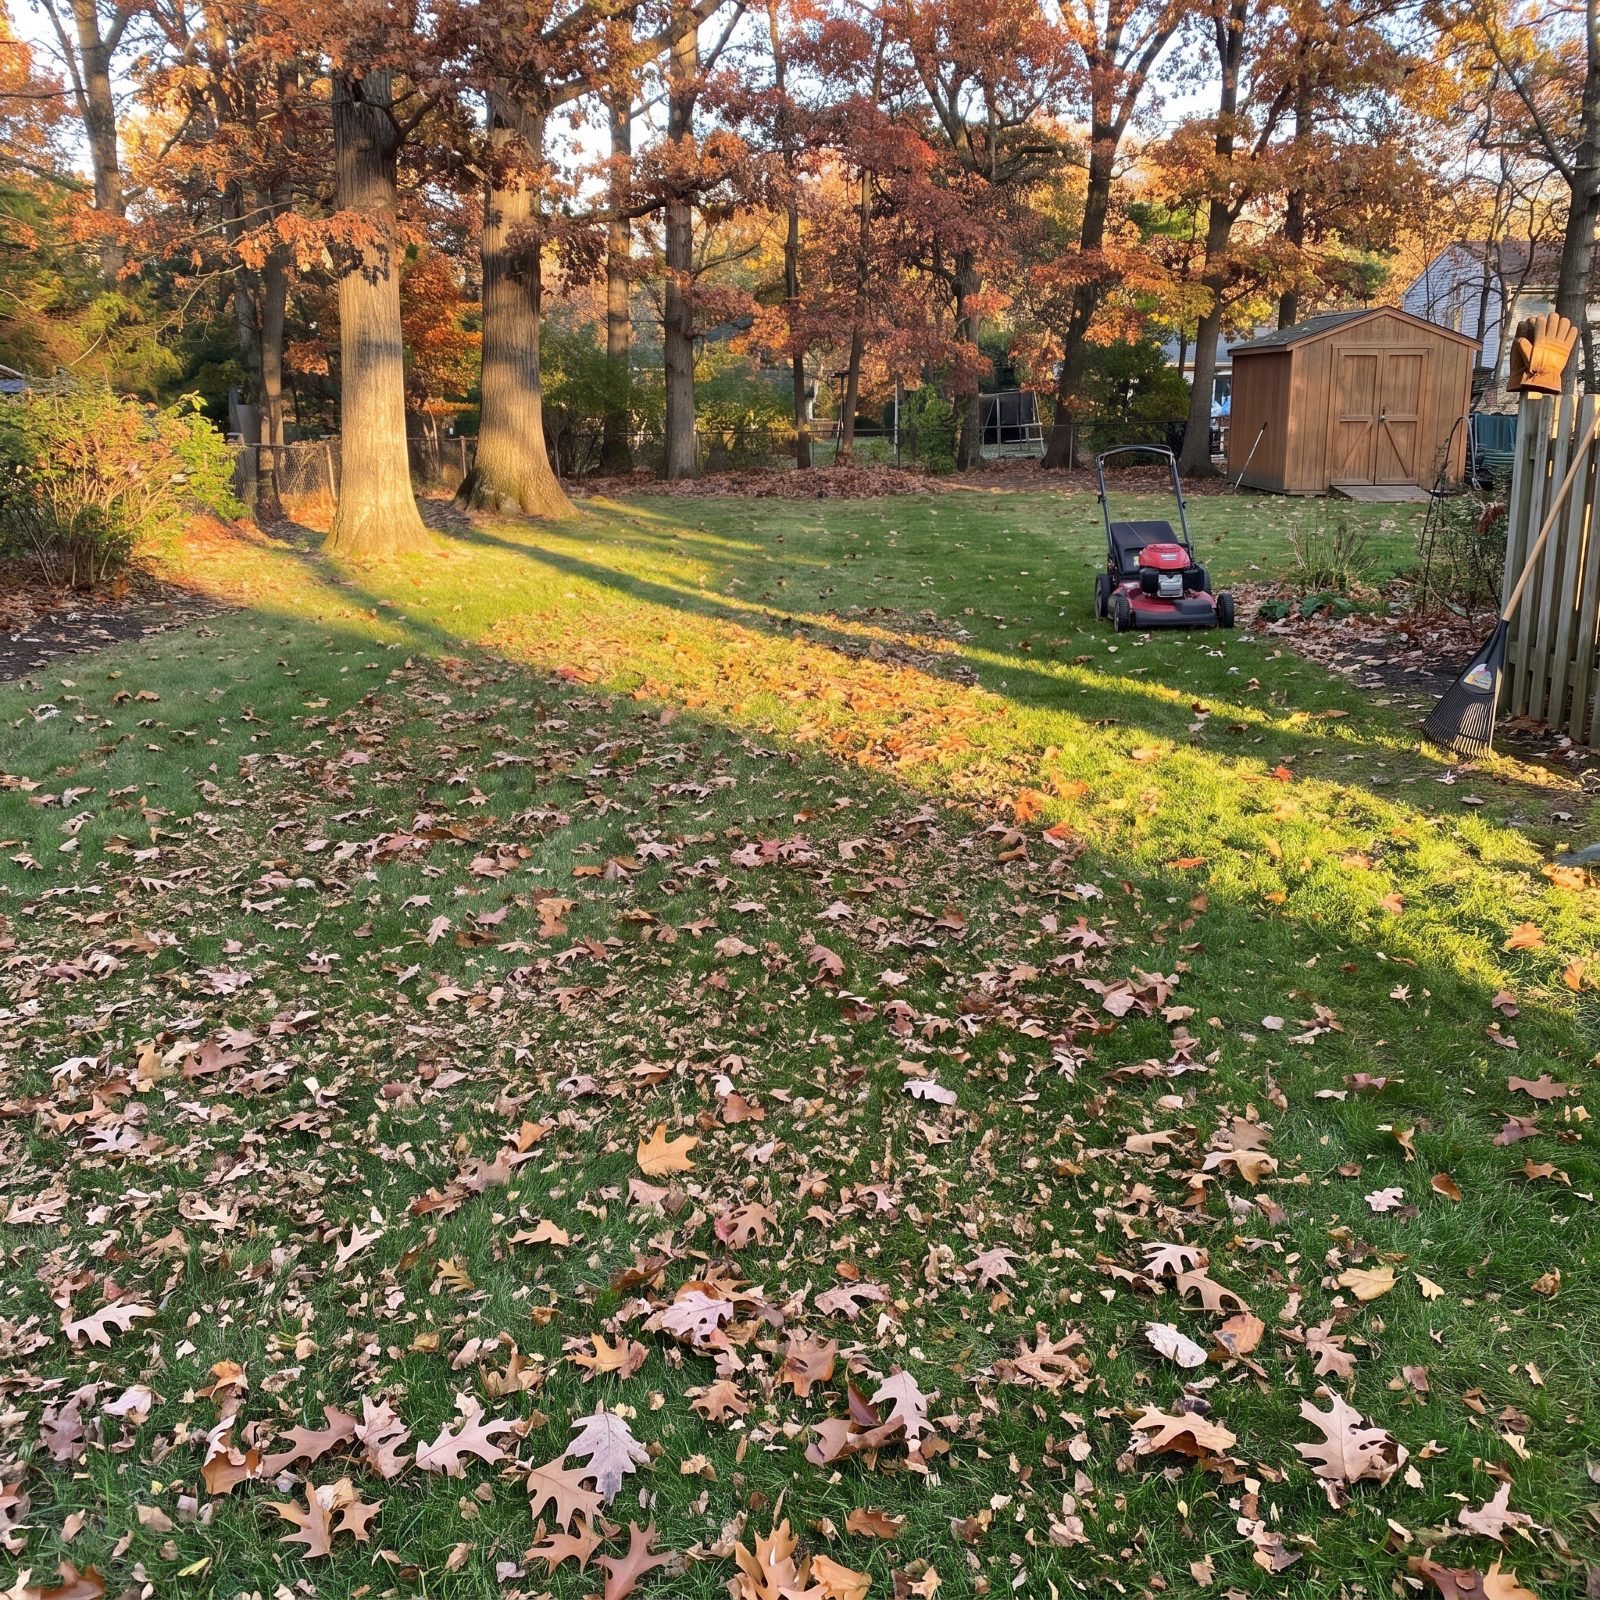
Raking every leaf into bags and dragging them to the curb is a lot of labor to throw away free fertilizer. A mulching mower chops leaves fine enough that they drop between the grass blades and disappear.
Turf programs at Michigan State and elsewhere have backed this up for years: mulched leaves break down over winter and feed the lawn, and in some trials they even cut down weed emergence the following spring.
8. Lay Plain Cardboard Beneath New Mulch to Suppress Existing Weeds
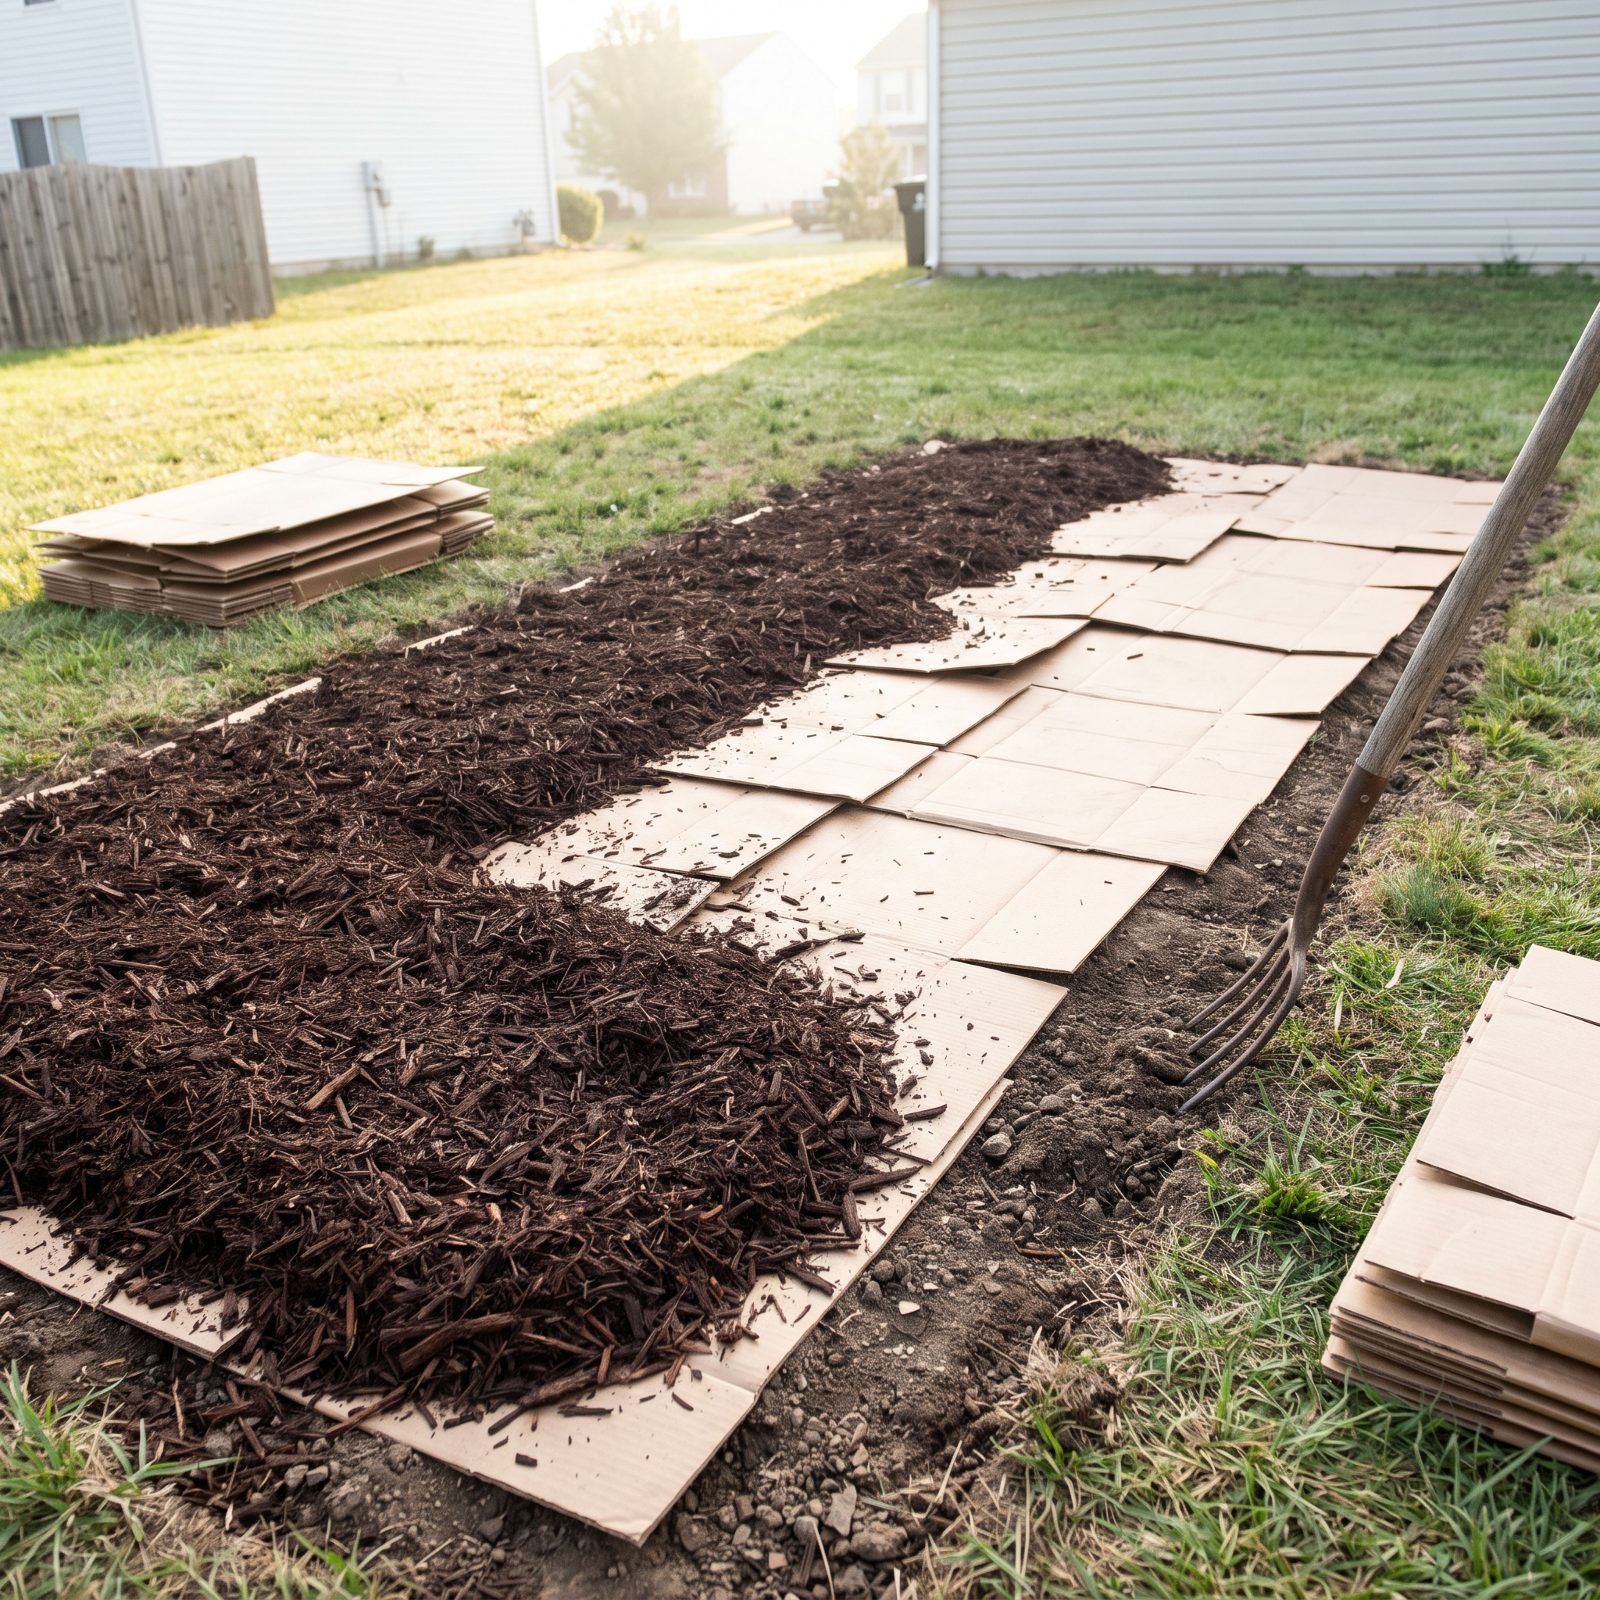
Landscape fabric promises weed control and delivers a plastic mat that clogs, slides, and surfaces in ugly black ribbons two summers later. Plain cardboard does the job better and then politely disappears.
Flatten the boxes, peel off tape and shiny labels, overlap the seams, wet them down, and cover with mulch. The cardboard blocks light long enough to smother what’s below, then rots into the soil and feeds the worms.
Skip anything glossy or heavily printed. Plain corrugated brown, nothing with a plastic coating.
7. Pull Weeds Just After Rain When Roots Release More Completely
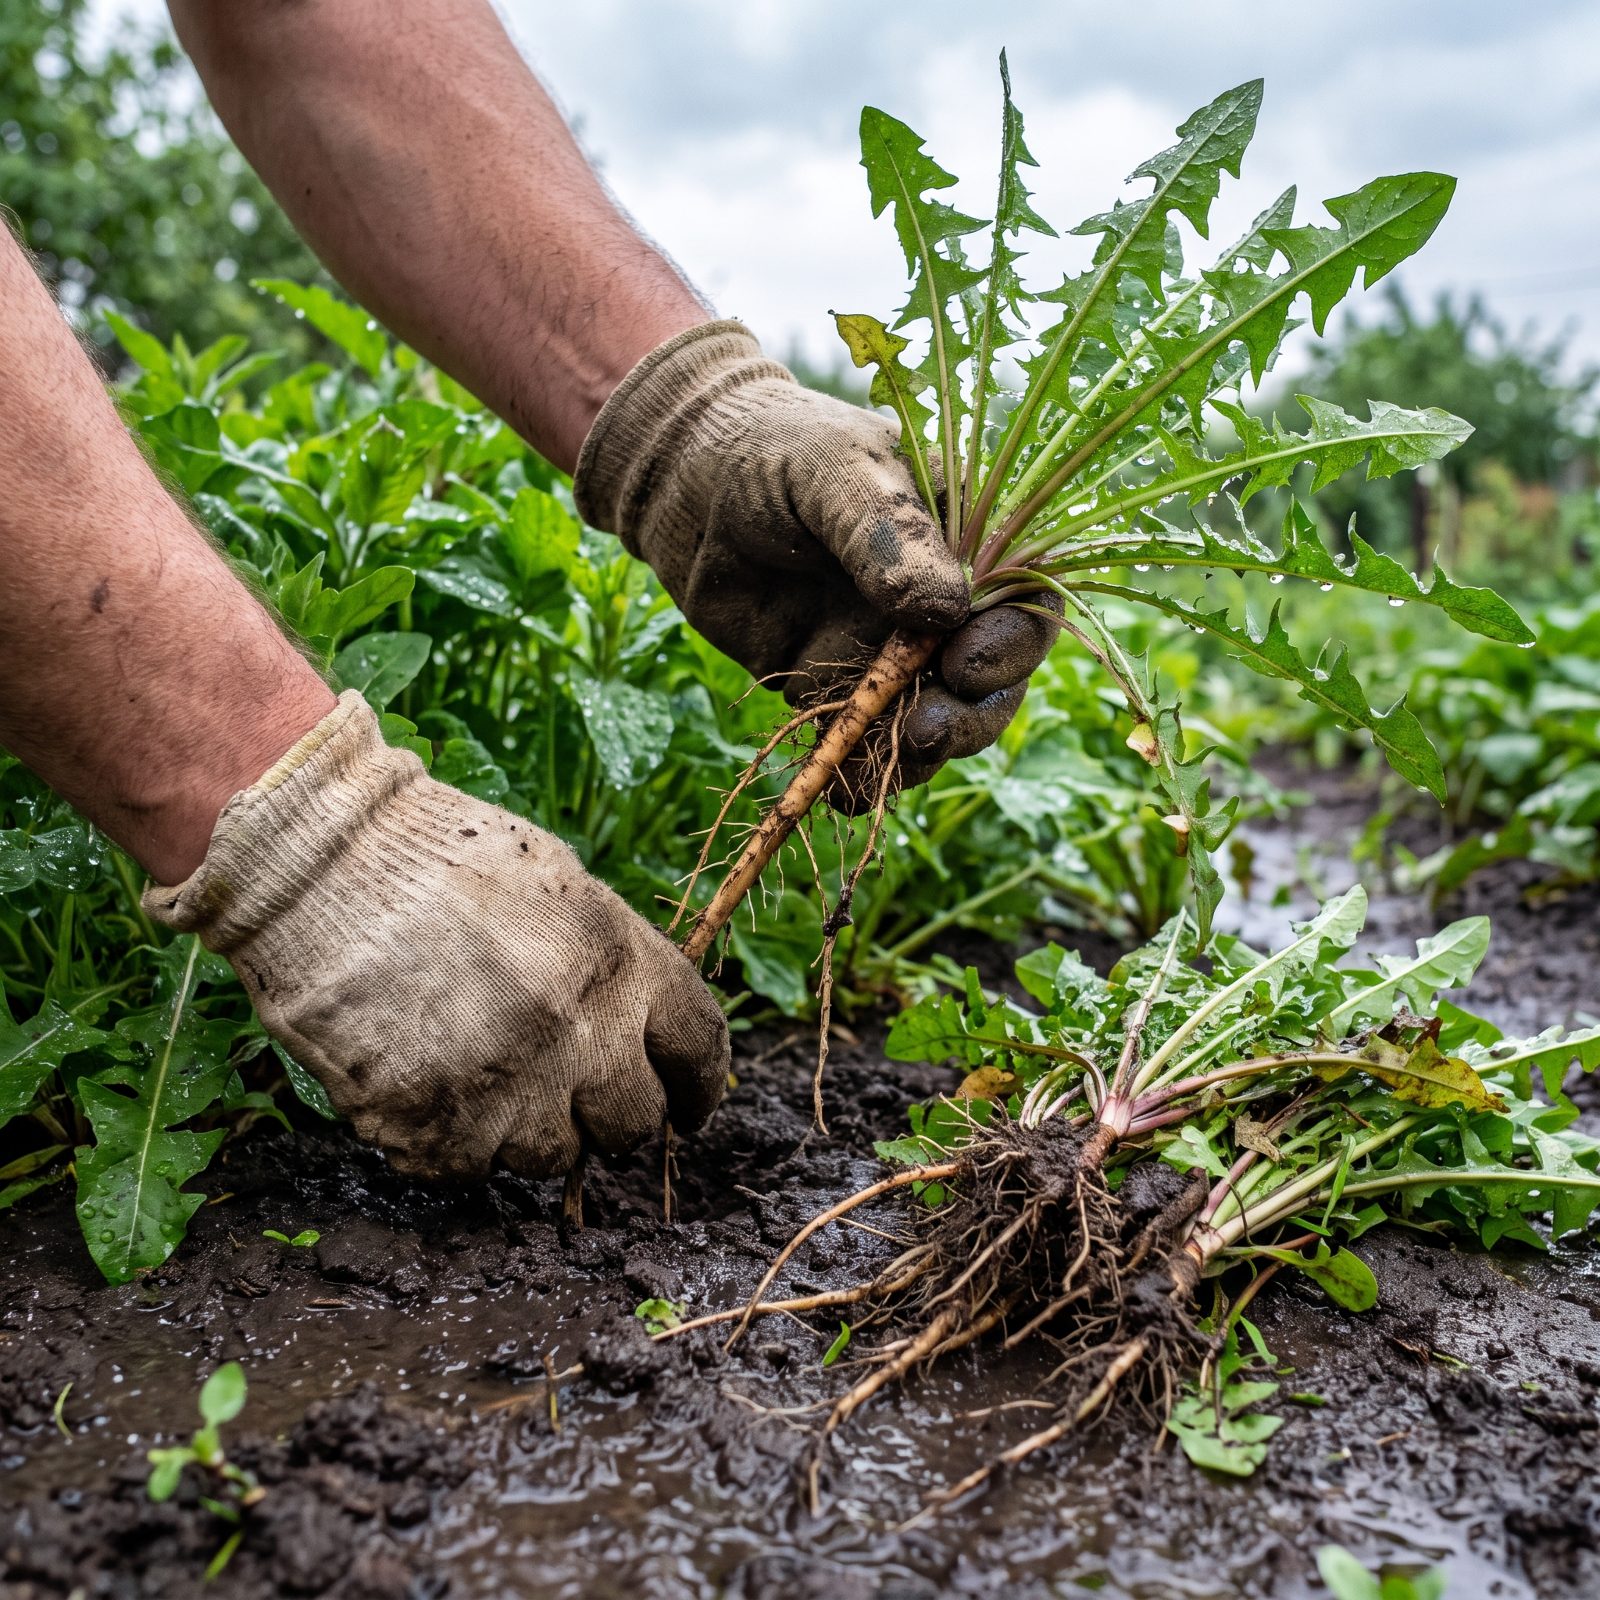
Timing beats effort here. Yank a weed from baked dry soil and the top snaps off while the root stays put, ready to regrow in a week. Pull the same weed from ground softened by rain and the whole thing slides out, taproot and all.
Walk the beds the morning after a good soak. Dandelions, thistle, bindweed — the stubborn deep-rooted ones all give up with a steady, even pull.
6. Carry a Deadheading Pouch to Prevent Spent Blooms From Littering Beds
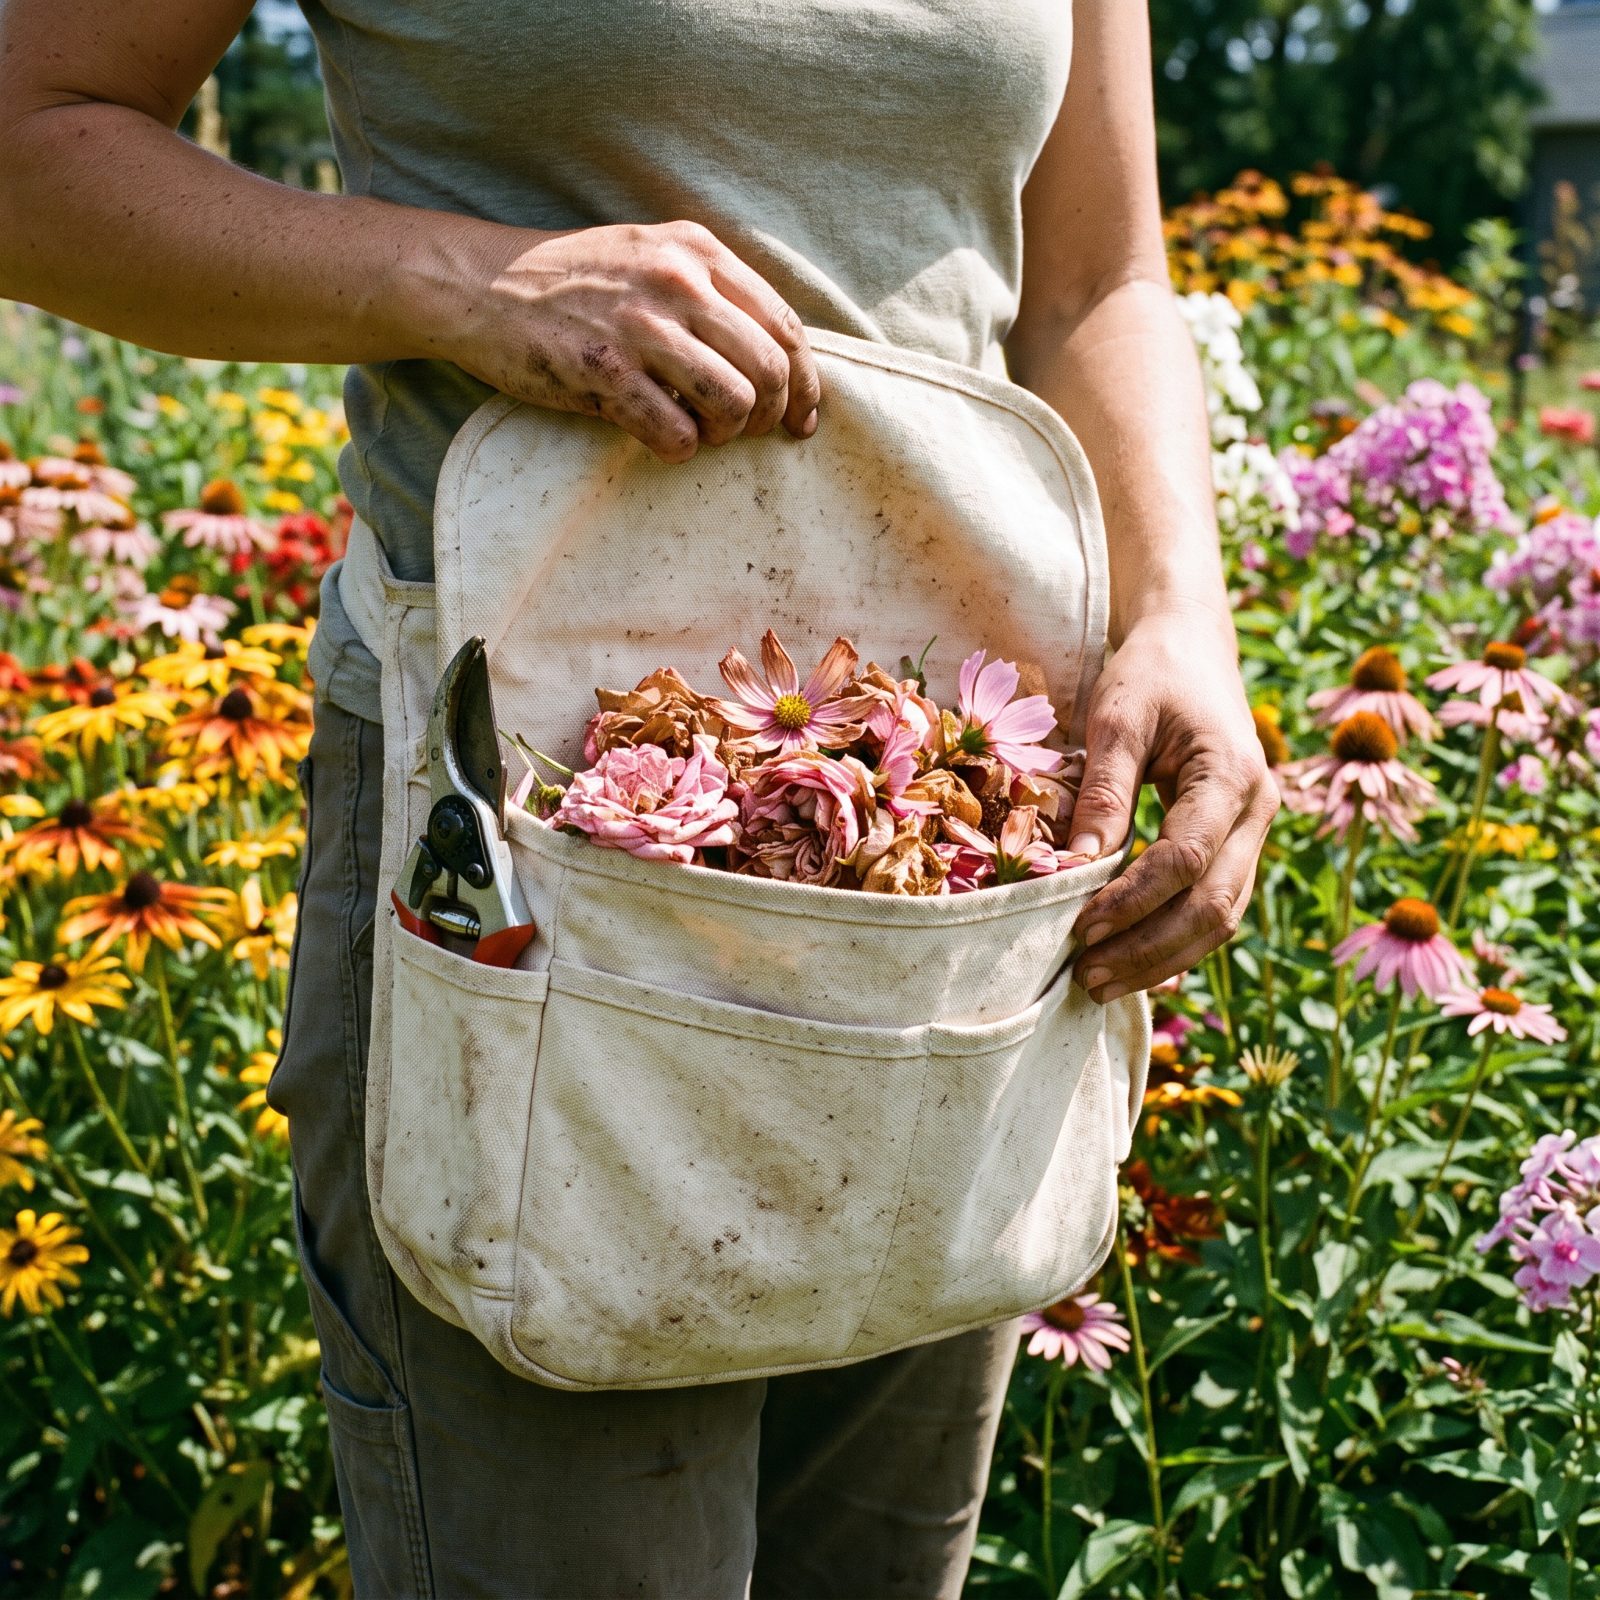
Snip a spent bloom, drop it on the ground, and you’ve just made two chores out of one. Later you’re hunting through the bed picking up slimy brown petals.
A pouch at your waist — an old apron, a bucket clipped to your belt — catches everything as you go. One pass, no cleanup, nothing left to rot into the crown of the plant below.
5. Deadhead Only Repeat Bloomers and Leave Decorative Seed Heads Standing
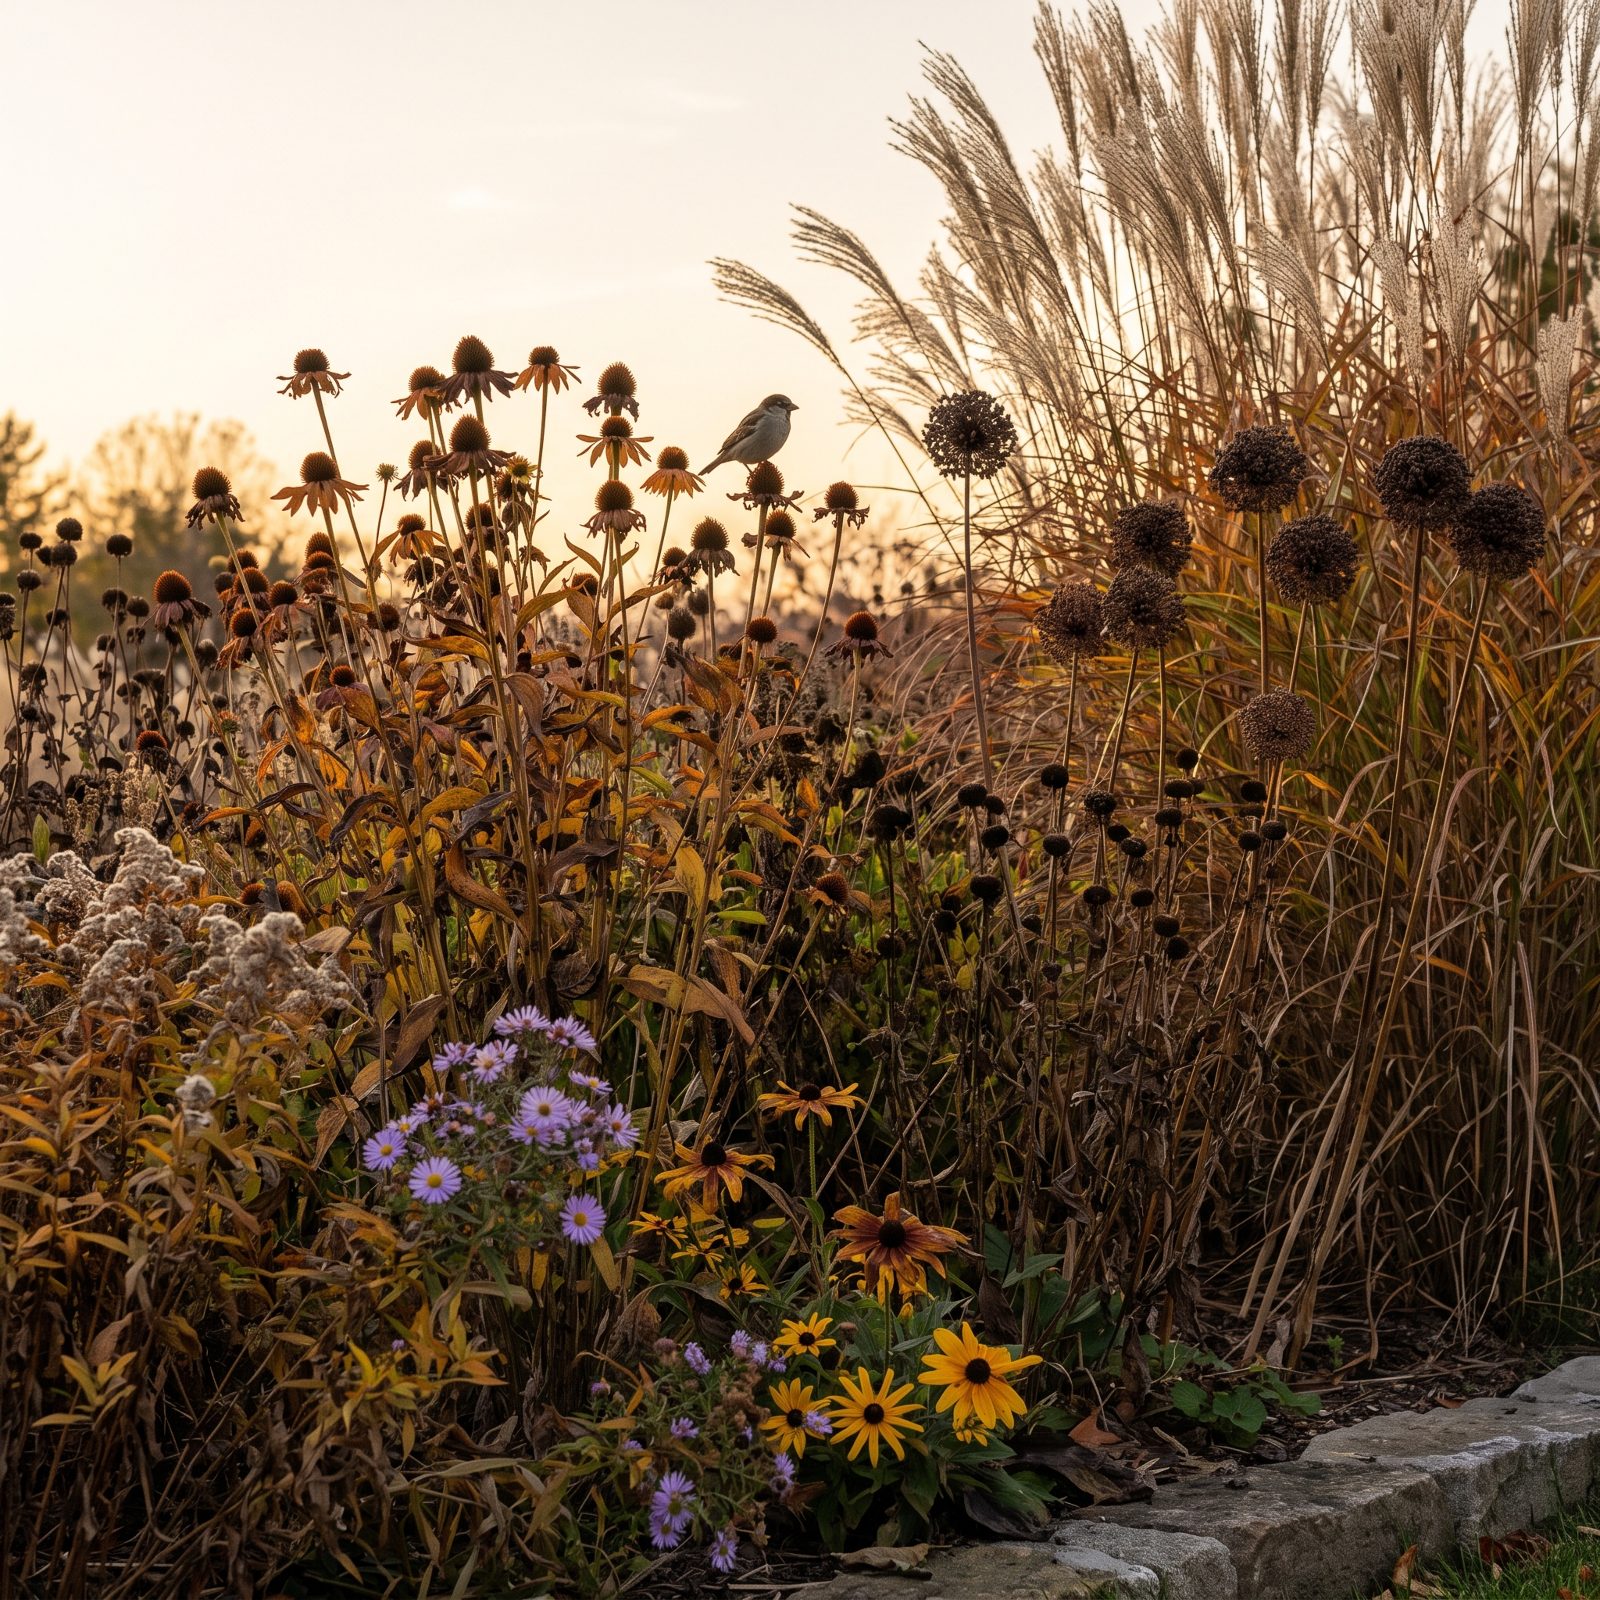
Deadheading gets sold as a universal rule. It isn’t. It earns its keep on repeat bloomers like roses, cosmos, and dahlias, where removing spent flowers pushes a fresh flush.
But cutting everything on reflex robs you twice. Coneflowers, sedum, ornamental grasses, alliums — their seed heads hold form through fall, catch frost, and feed goldfinches straight into winter. A border of bare stems in October is a garden that gave up early.
So learn which plants rebloom and which just make one magnificent set of seed heads. Serve each accordingly, and leave the scissors in the shed for the rest.
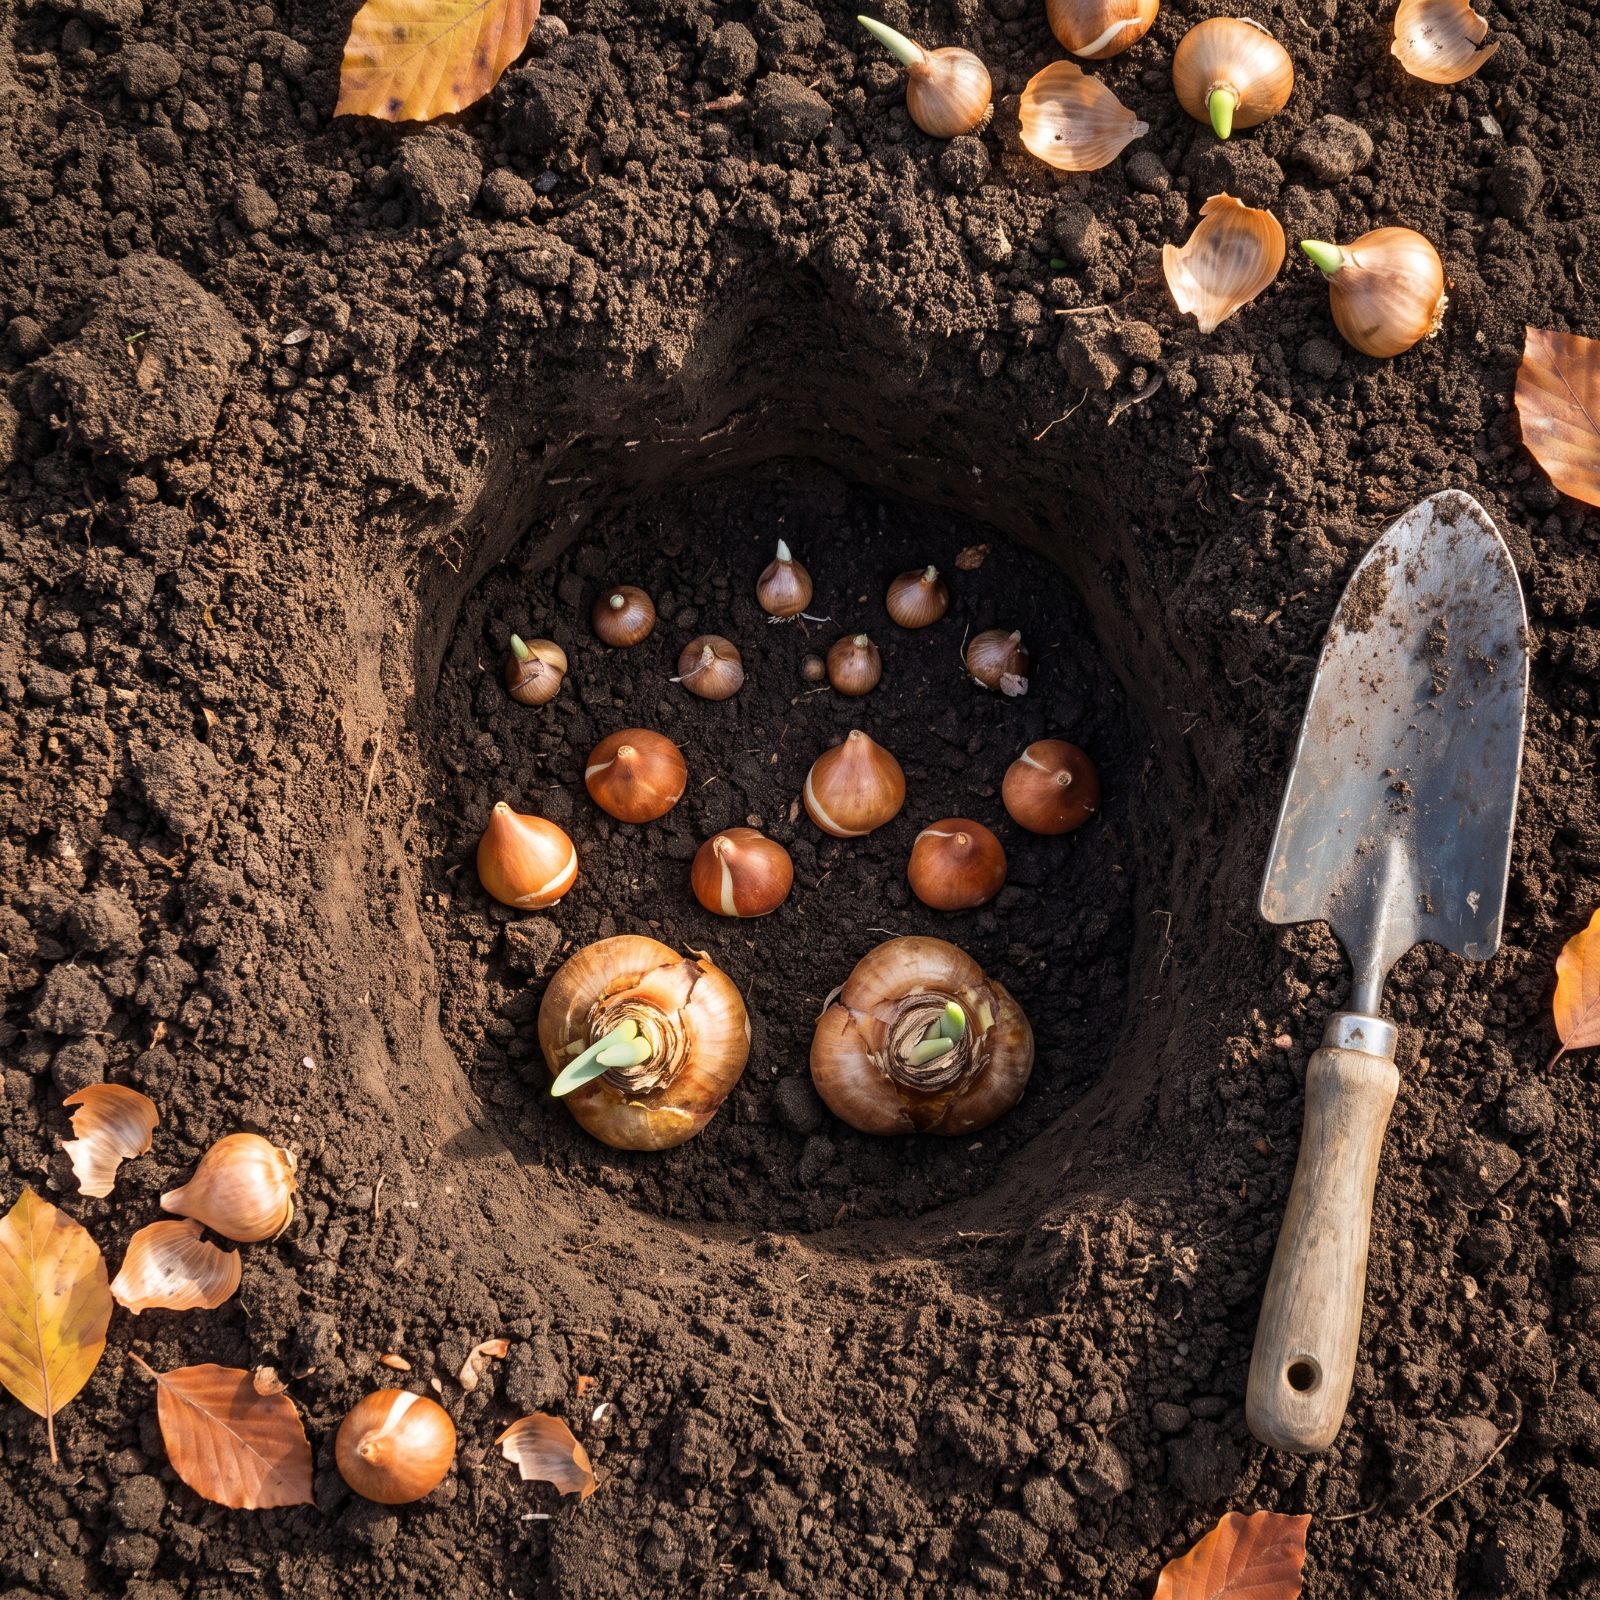
4. Plant Spring Bulbs in Layers for a Longer Run of Flowers
3. Let Later Perennials Swallow Up the Mess of Dying Bulb Leaves
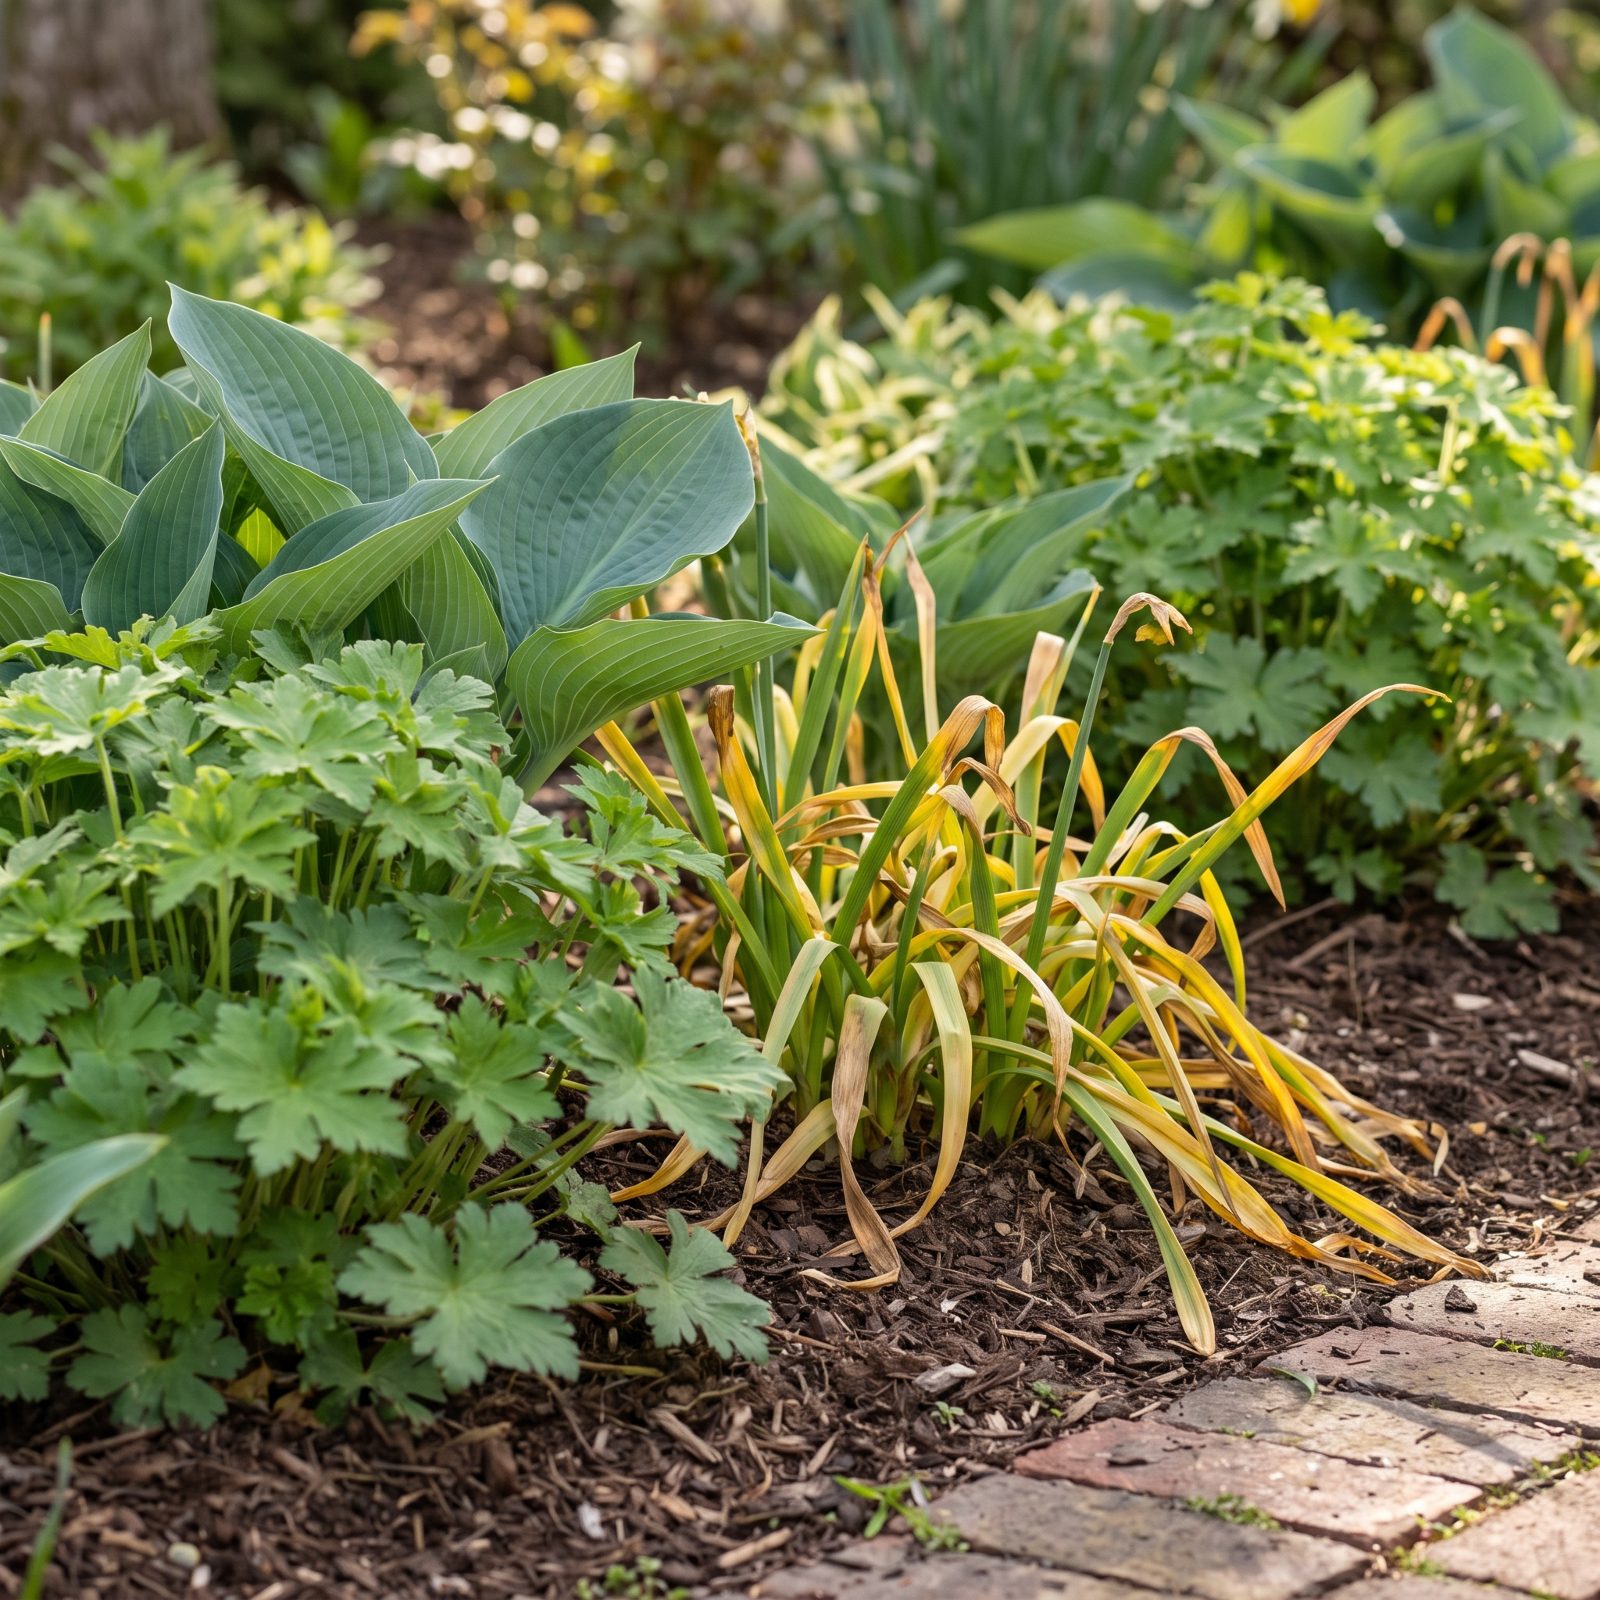
Daffodils give you a week of joy and six weeks of looking like wet shoelaces. And you can’t cut the leaves off, because the bulb is busy feeding itself for next year through those ugly fading blades. So the leaves have to stay. Your move is simply to stop looking at them.
Plant your bulbs right between, or woven among, perennials that wake up late — hostas, daylilies, hardy geraniums, peonies. By the time the bulb foliage goes sad and yellow, the new growth is filling in on either side to crowd the crime scene. Early color, none of the long ugly hangover.
2. Cut a Crisp Bed Edge With a Soil Knife and Skip the Plastic Border
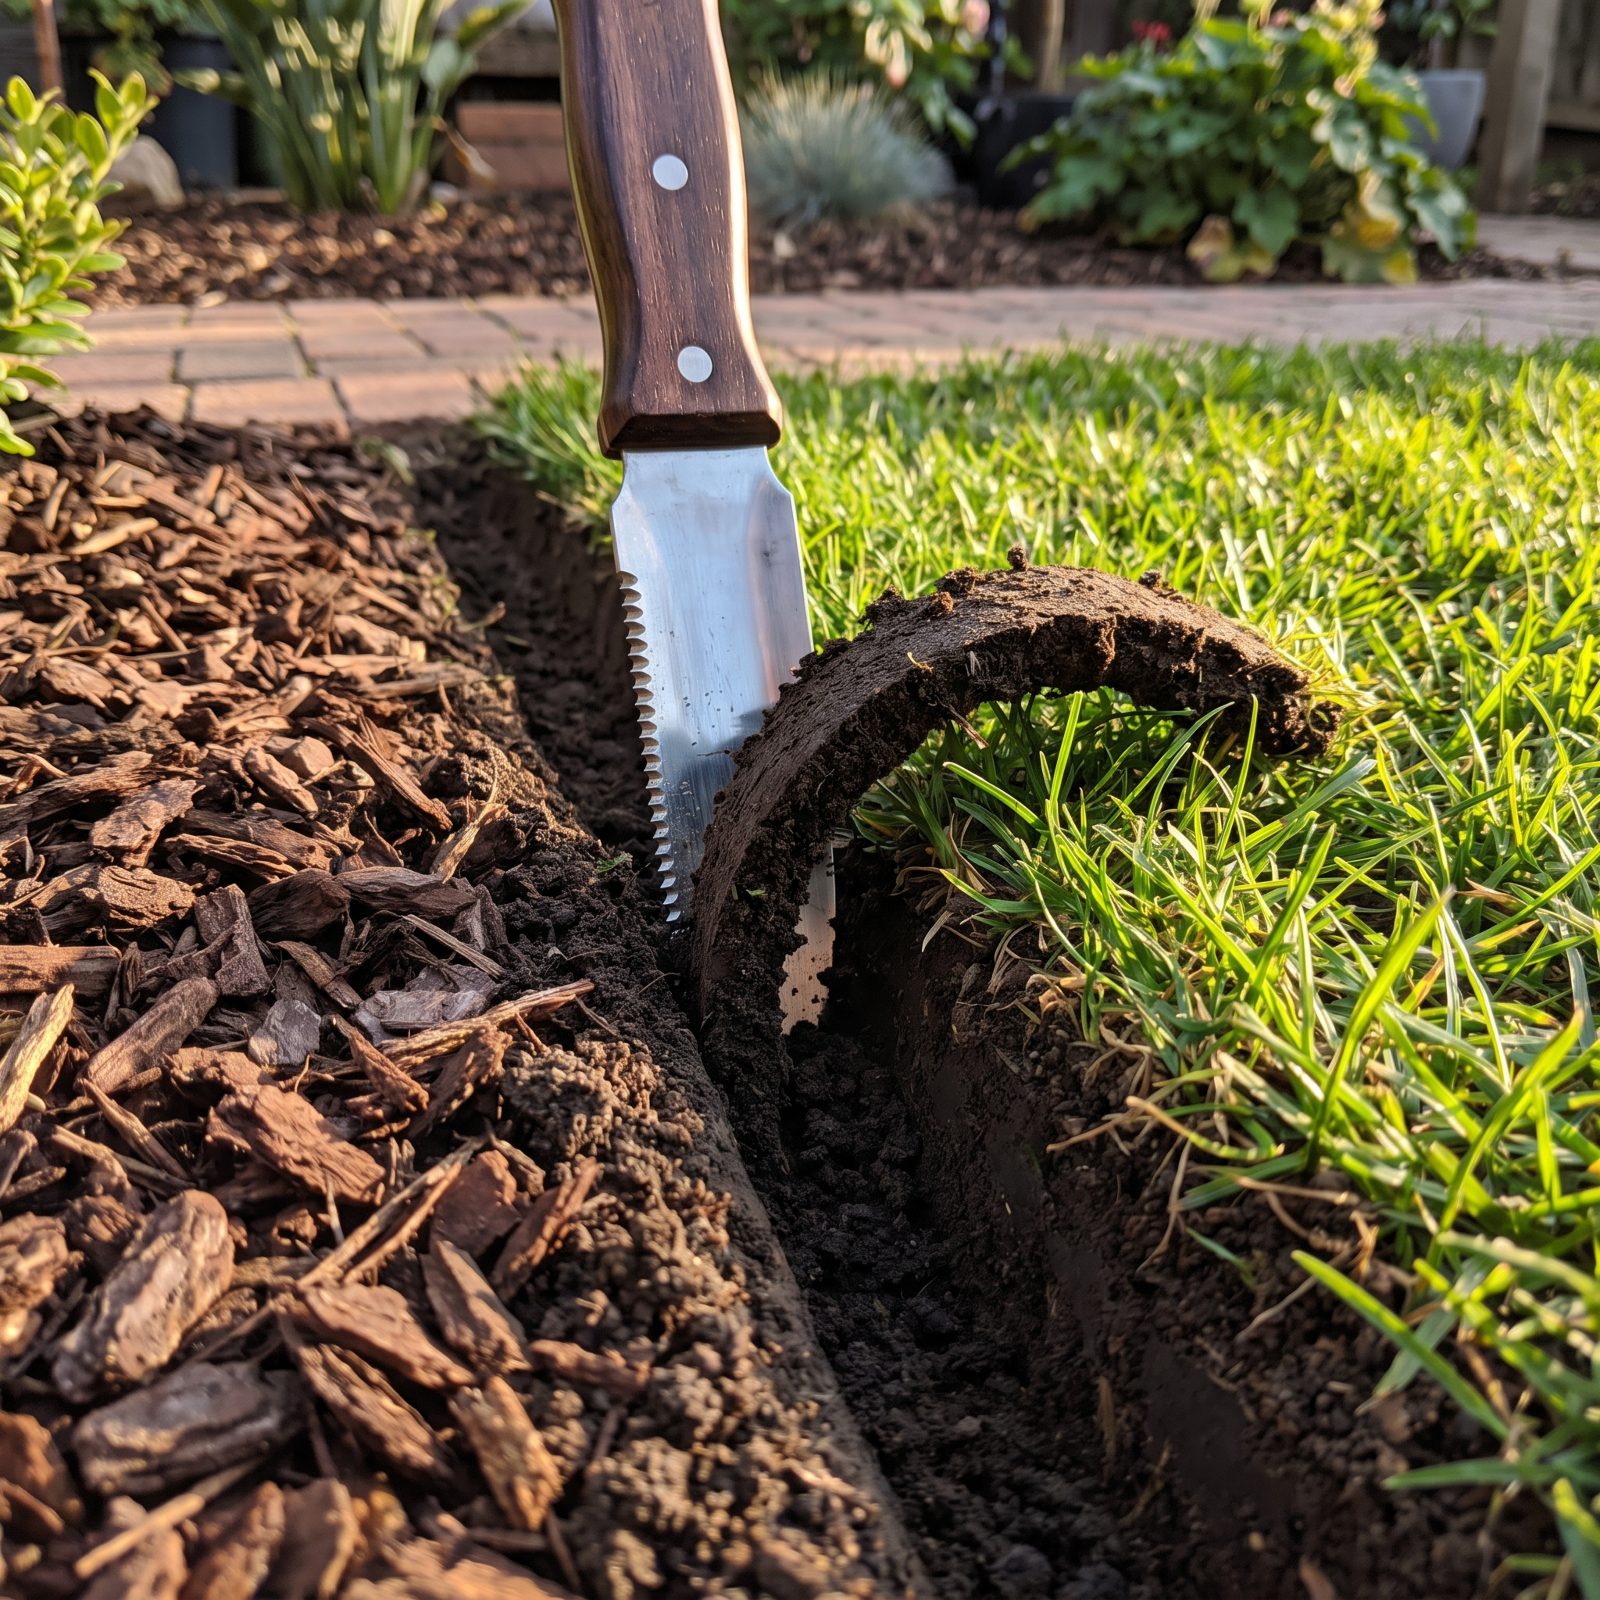
A sharp edge does more for a scruffy yard than another plant ever will. That clean line where bed meets lawn is what your eye reads as “someone tends this place,” even when the beds themselves are a bit of a jungle.
Plastic edging promises to do this for you, and it fails. It heaves up in winter, cracks in the sun, and after a year you’ve got a wavy black lip poking out of the mulch looking cheap. A soil knife — a hori-hori — cuts a deep, U-shaped trench straight down through the turf, a few inches out from the mulch (lift out the leftover grass strip afterward for a clean bed edge). No product, no lip, nothing to buy twice.
Say you edge a bed in April. Come June the mulch has stayed put, the grass hasn’t crept in, and the whole bed looks intentional for the cost of ten minutes and a sharp blade. Honestly, a good hori-hori is the one tool worth splurging on.
1. Paint Your Plant Stakes a Dark Dull Color So They Vanish
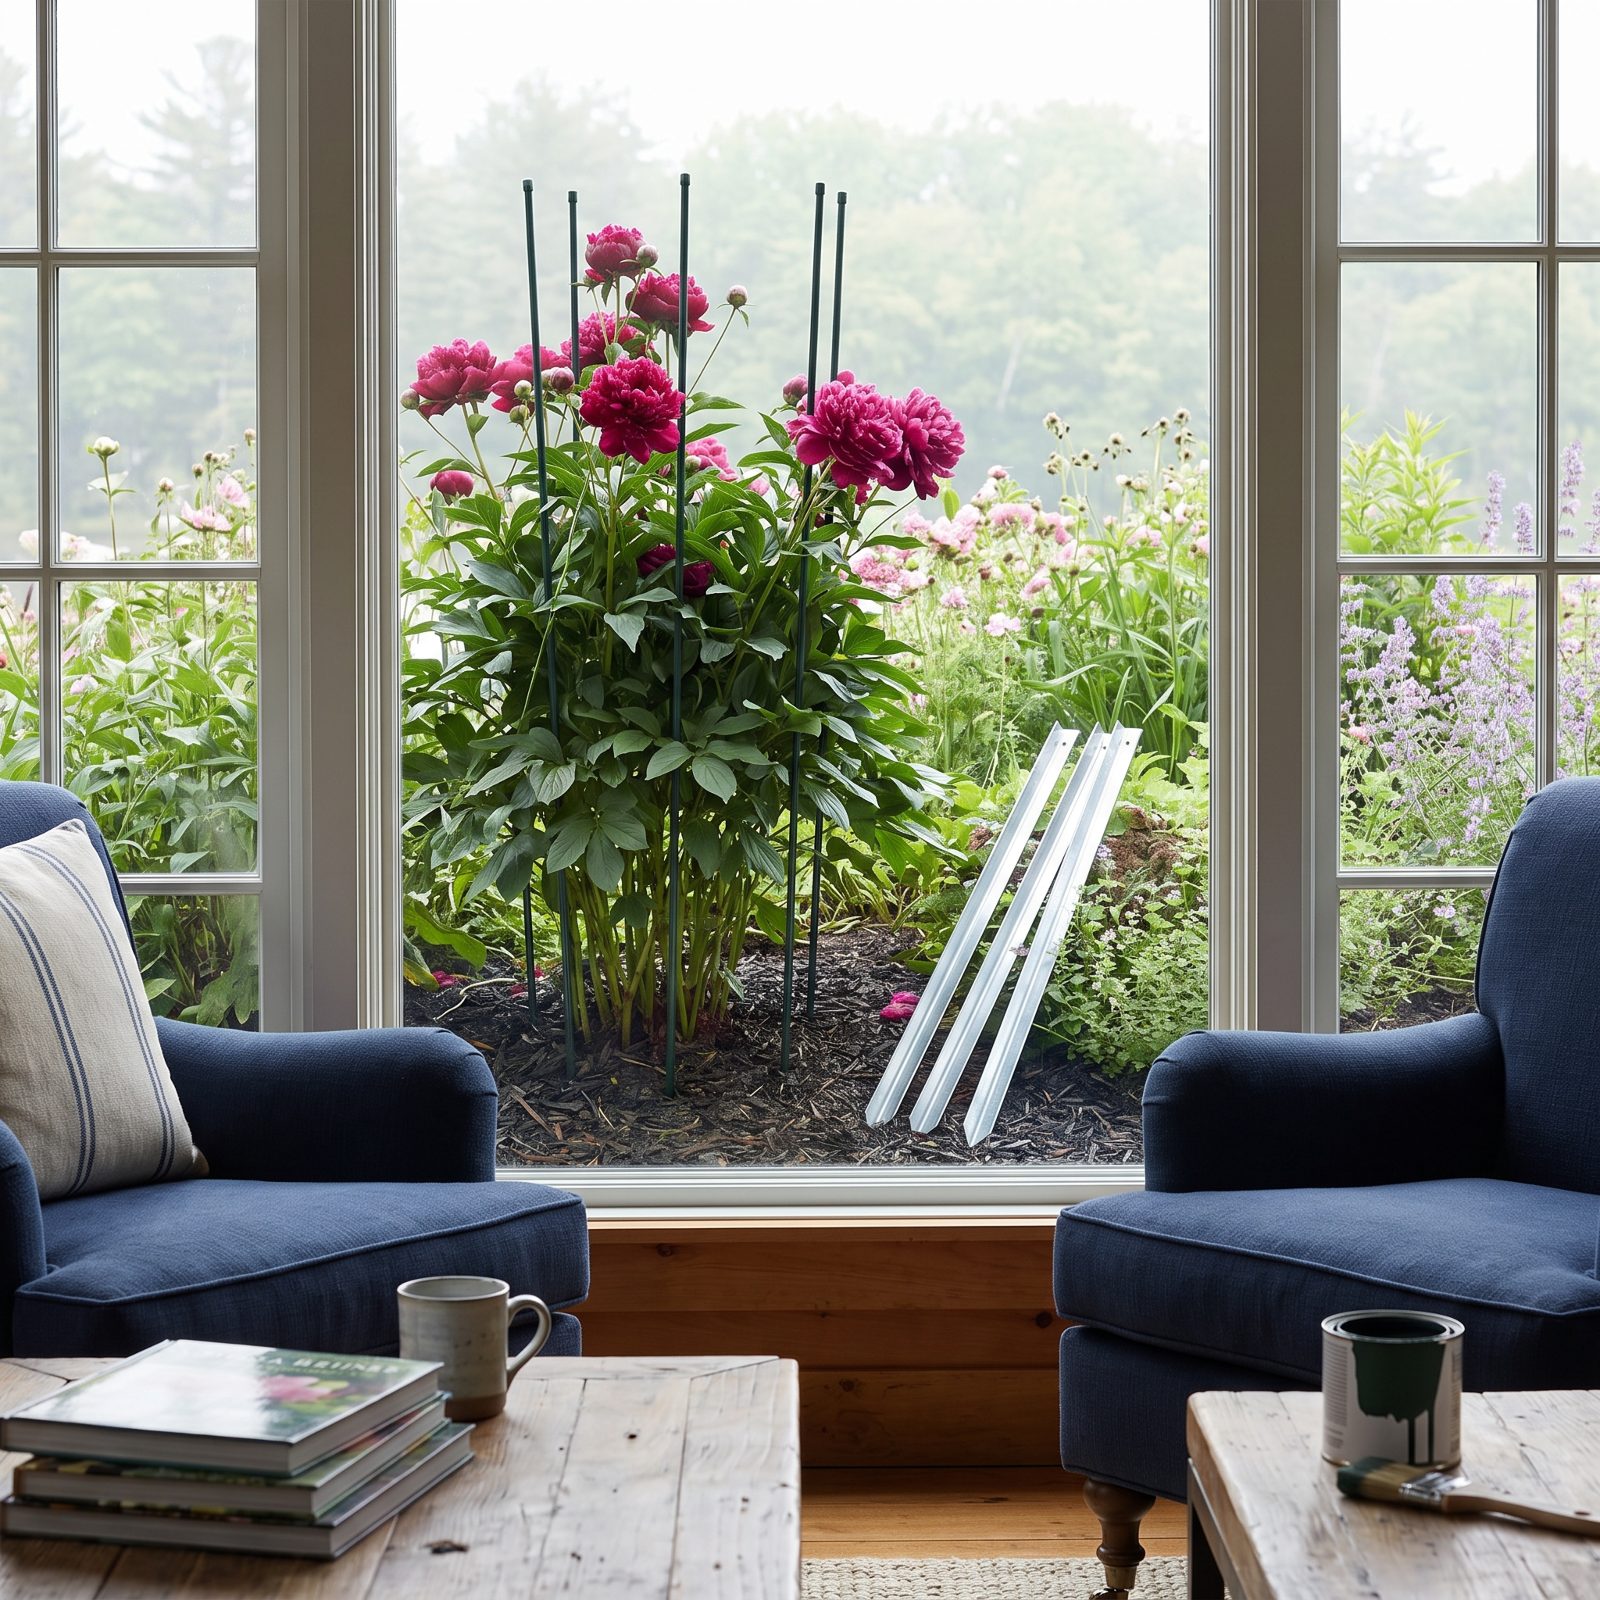
Shiny new stakes are a magnet for the eye. Bright green bamboo, raw galvanized steel, that fresh pale wood tone — all of it jumps out and announces that the plant can’t stand on its own, so the support becomes the thing you notice instead of the flower it’s holding up.
Paint them a dull dark green or near-black and they drop out of sight. Foliage and shadow are dark, so a dark stake reads as not-there. Matte, never gloss. Gloss throws light and gives the whole game away.
Same logic for twine — green or brown, never bright white. A staked dahlia should look like a dahlia that happens to be upright, not a dahlia laid up in a hospital bed.